
Lunaea Manual
Choose your sources, name your domains, review placement proposals and build your workspace. A guide to Lunaea’s screens, controls and workflows.
Lunaea is available for Windows and Mac. Screenshots and keyboard shortcuts in this manual show the Mac version unless noted.
First launch
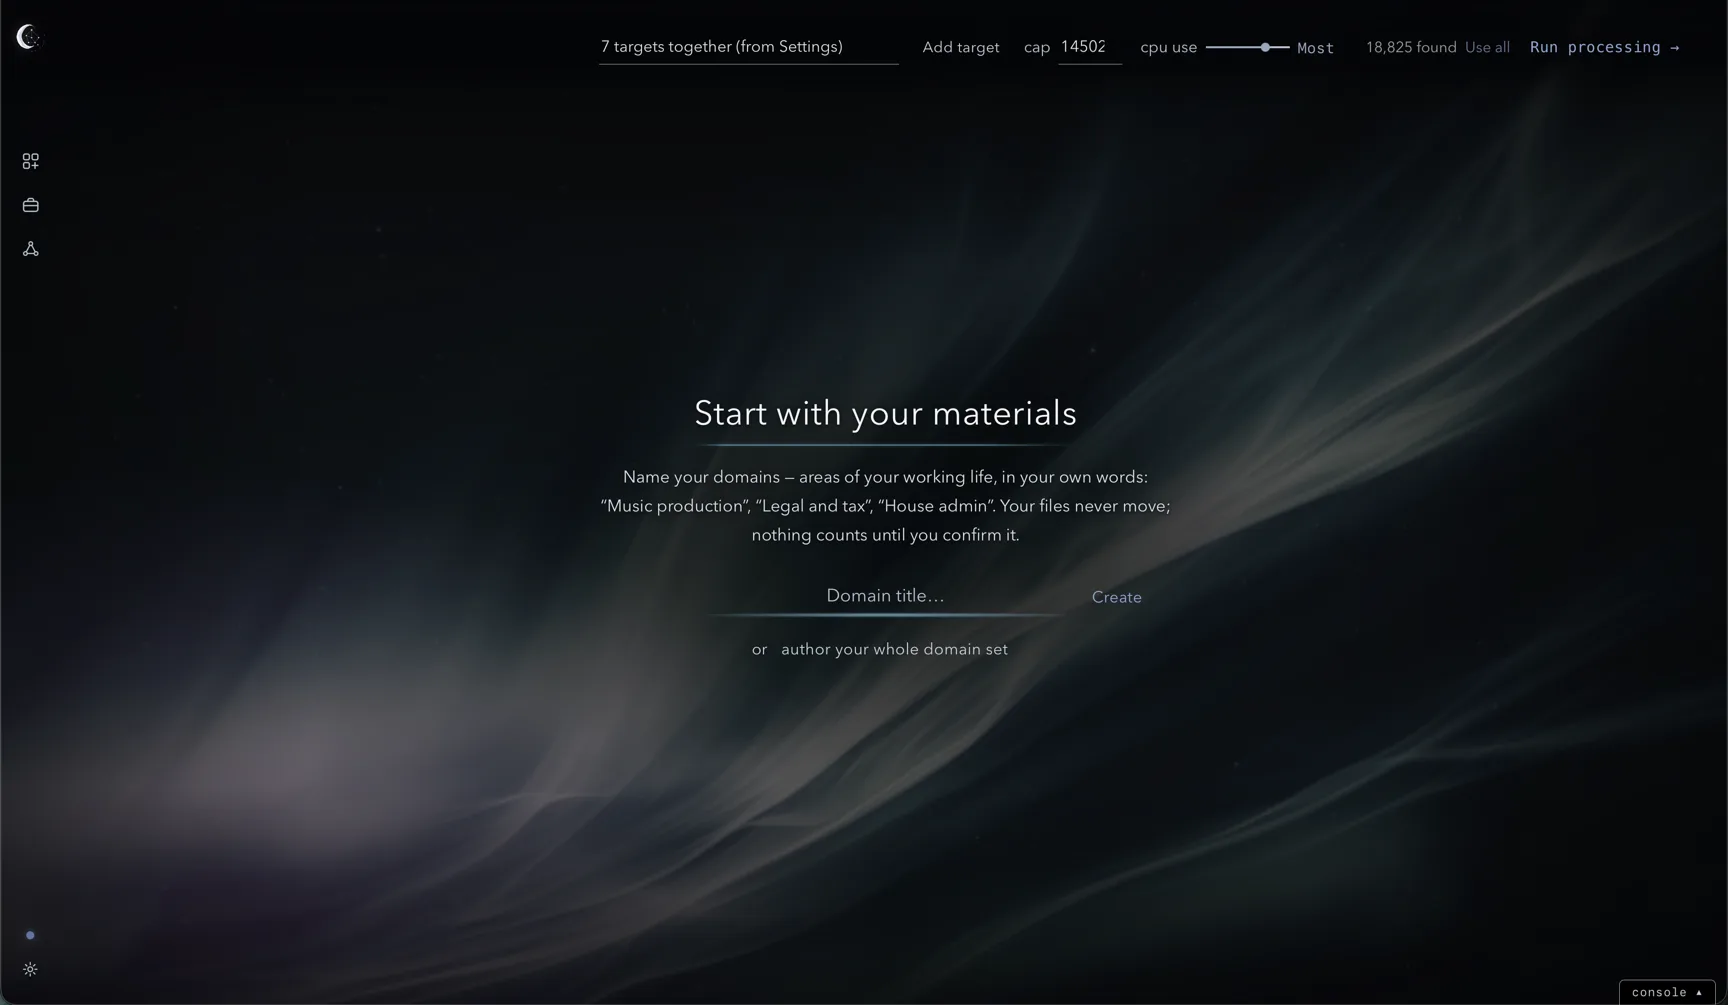
Start on Home by naming your domains and choosing the folders or volumes to process.
The Home page
On first launch, connect to the internet and activate your license key. Chapter 8 explains activation, license details and recovery. Once activated, Lunaea opens Home and works offline.
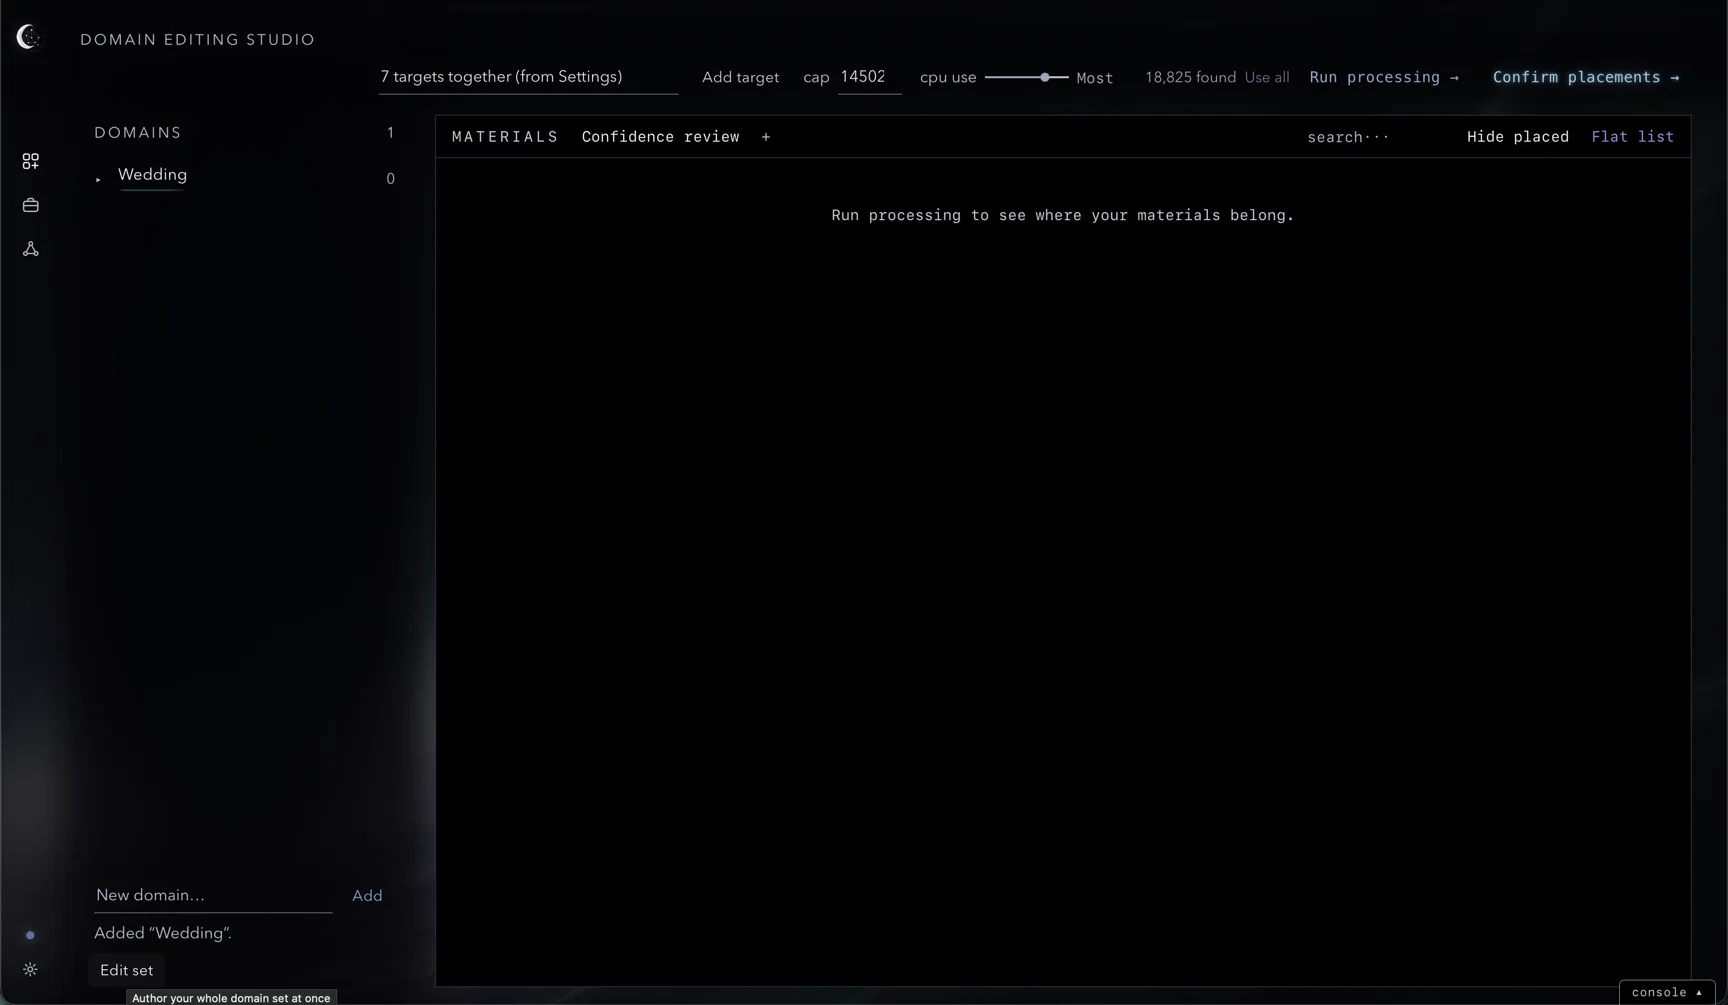
A domain groups materials under a title you choose, such as Weddings, Client deliverables or Taxes. Enter a title and press Create, or open author your whole domain set to name several at once.
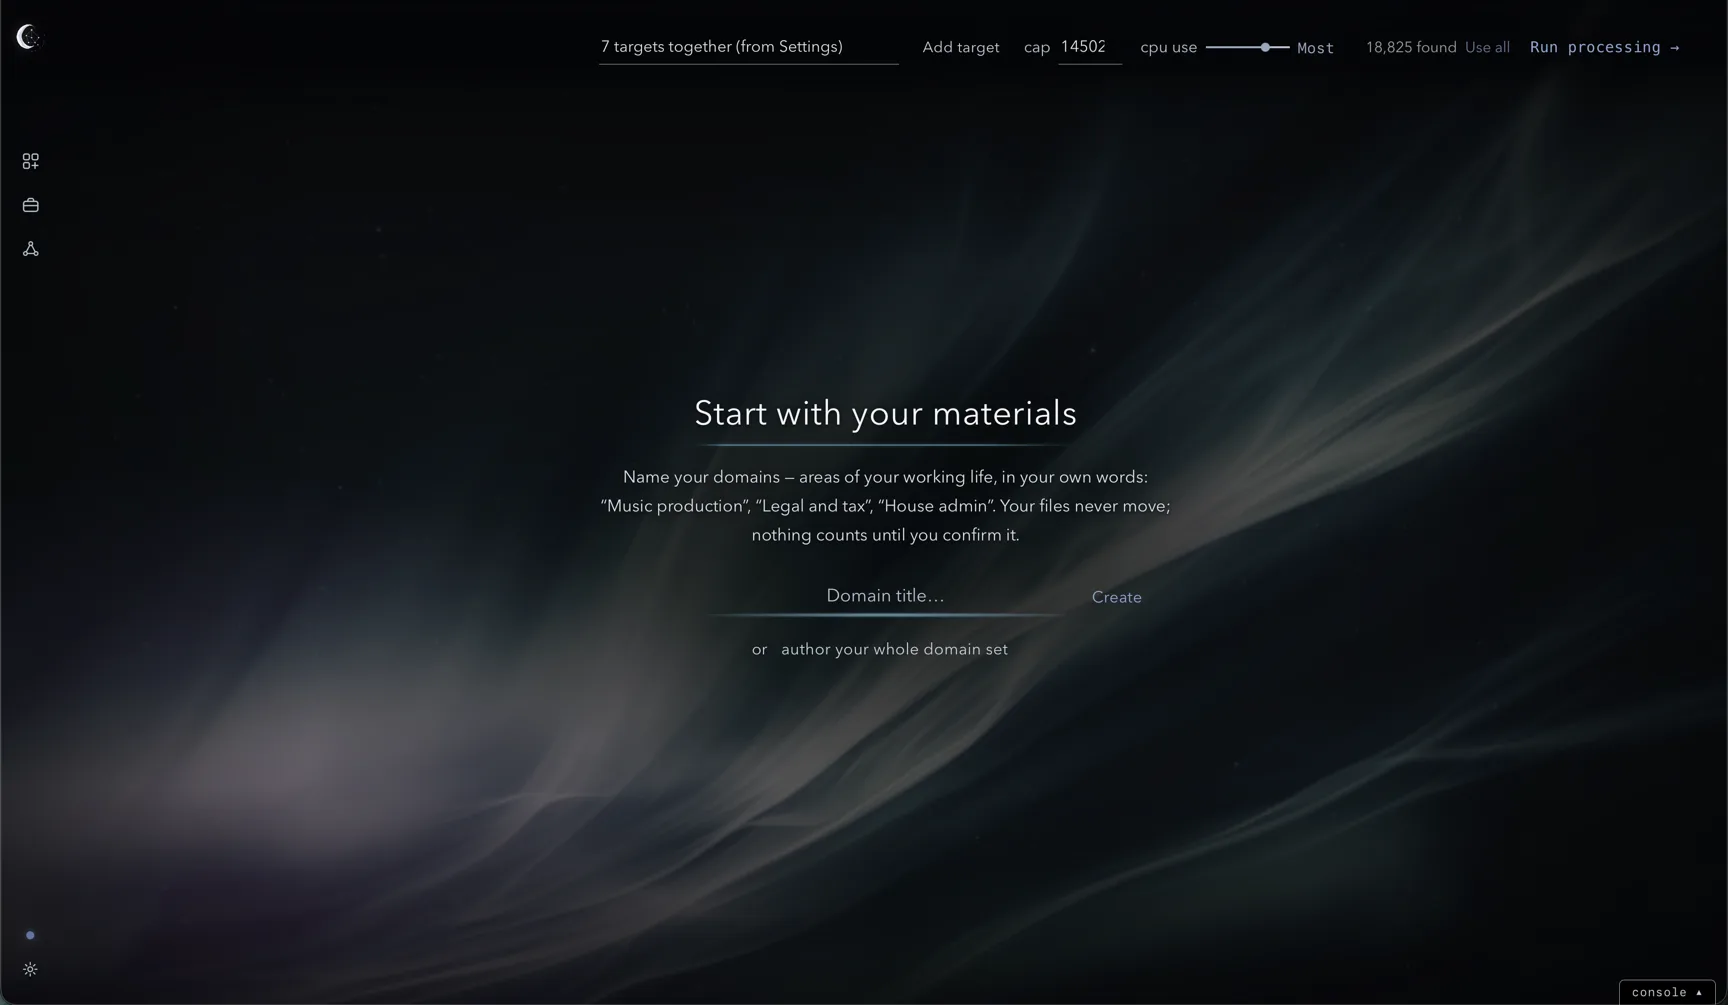
The header contains the editable source path, Add target for browsing, cap, cpu use and Run processing →. The left rail opens Home, Domain Editing Studio, Environment Workspace, Node Graph and Settings. Use ⌘1 through ⌘5 to switch pages.
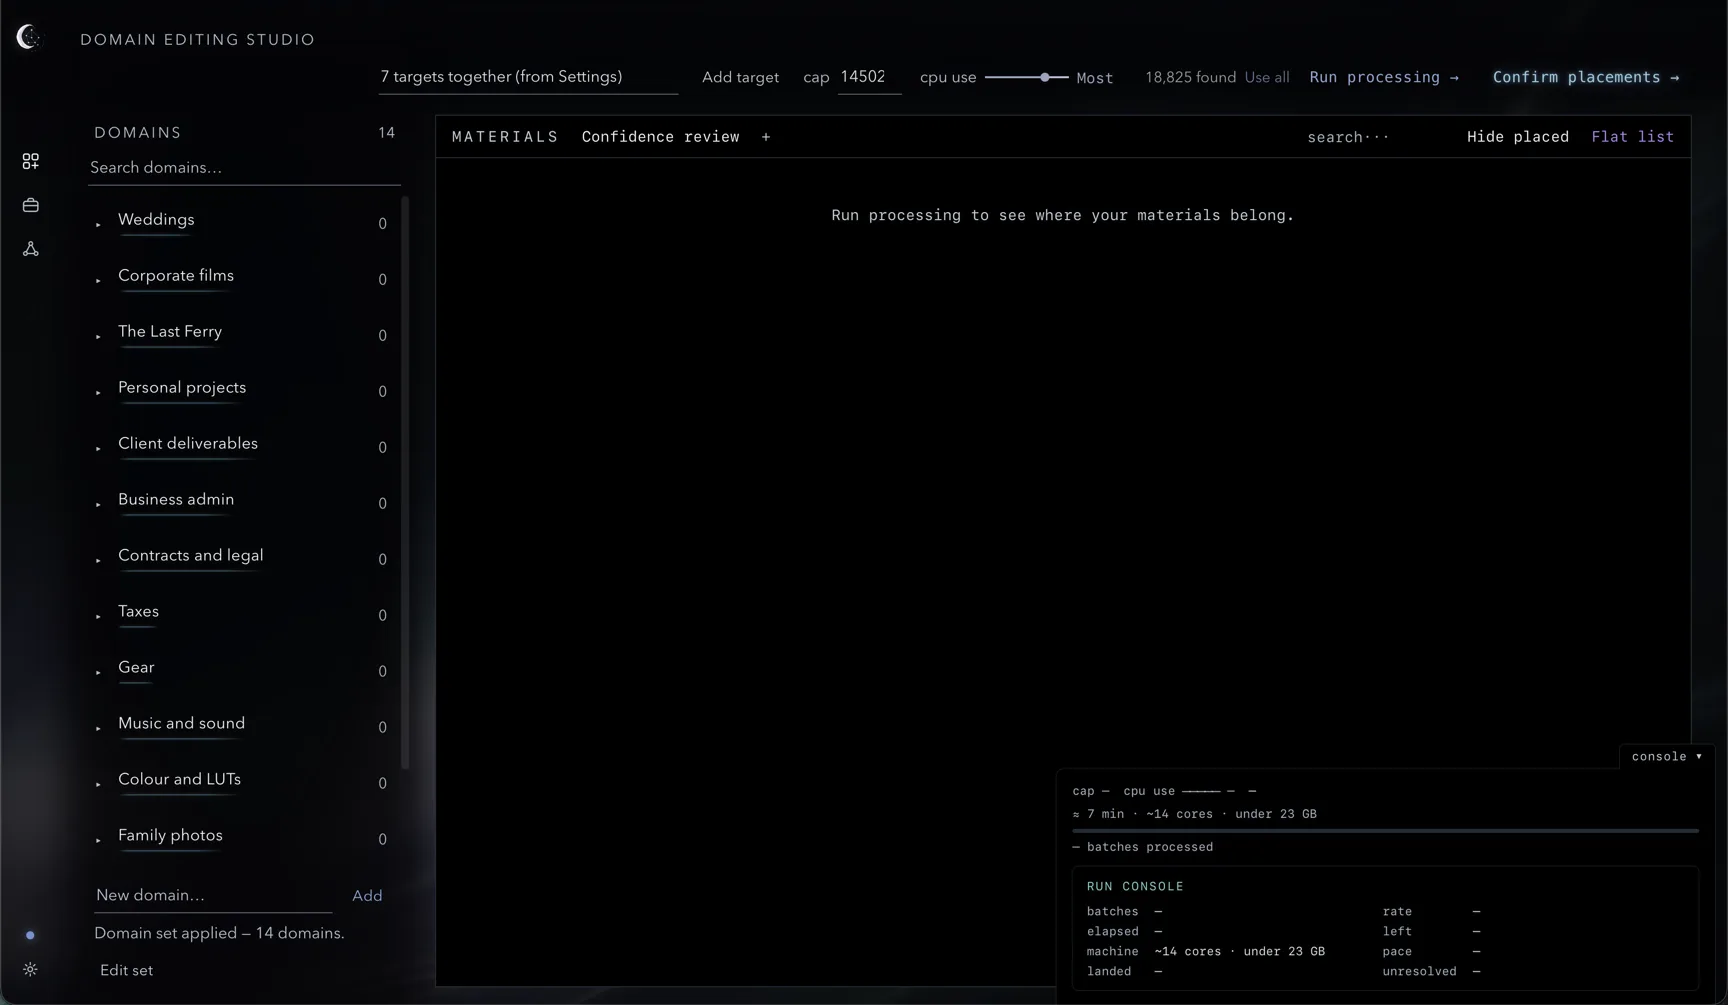
The small console tab in the bottom-right corner opens the run console from any page. The first few times Lunaea opens, a small hint points to it. Chapter 3 is about it.
Name a domain
Type a title into Domain title… and press Create or Return.
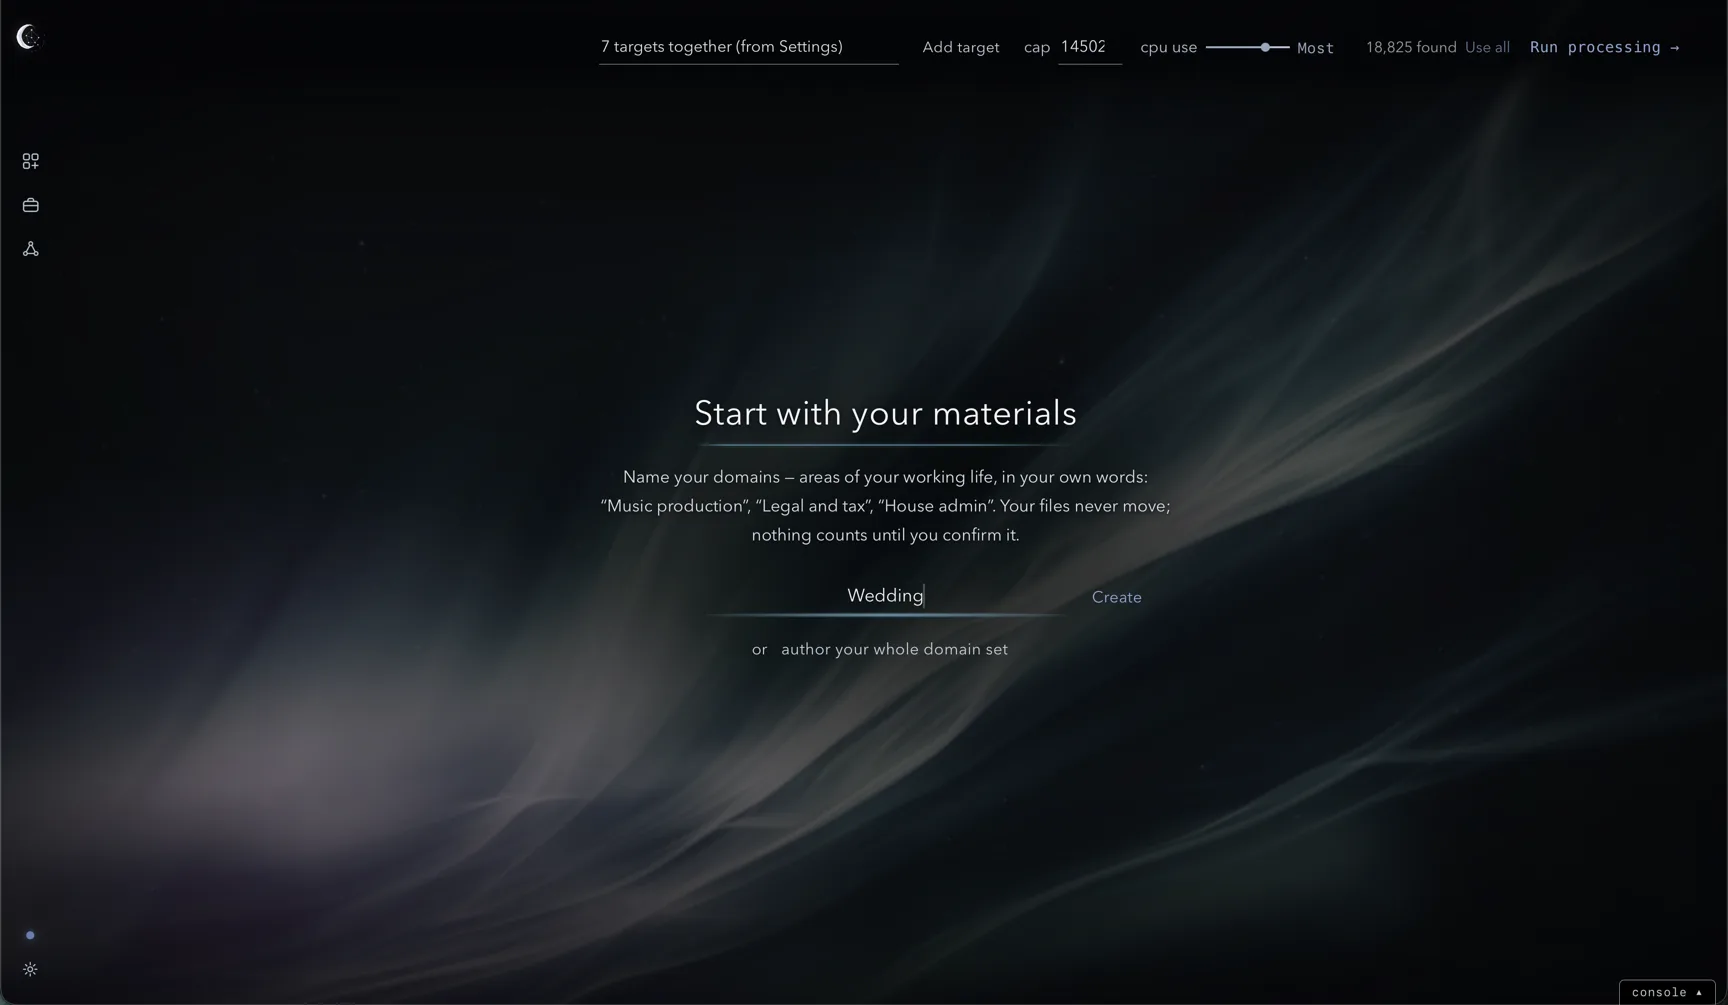
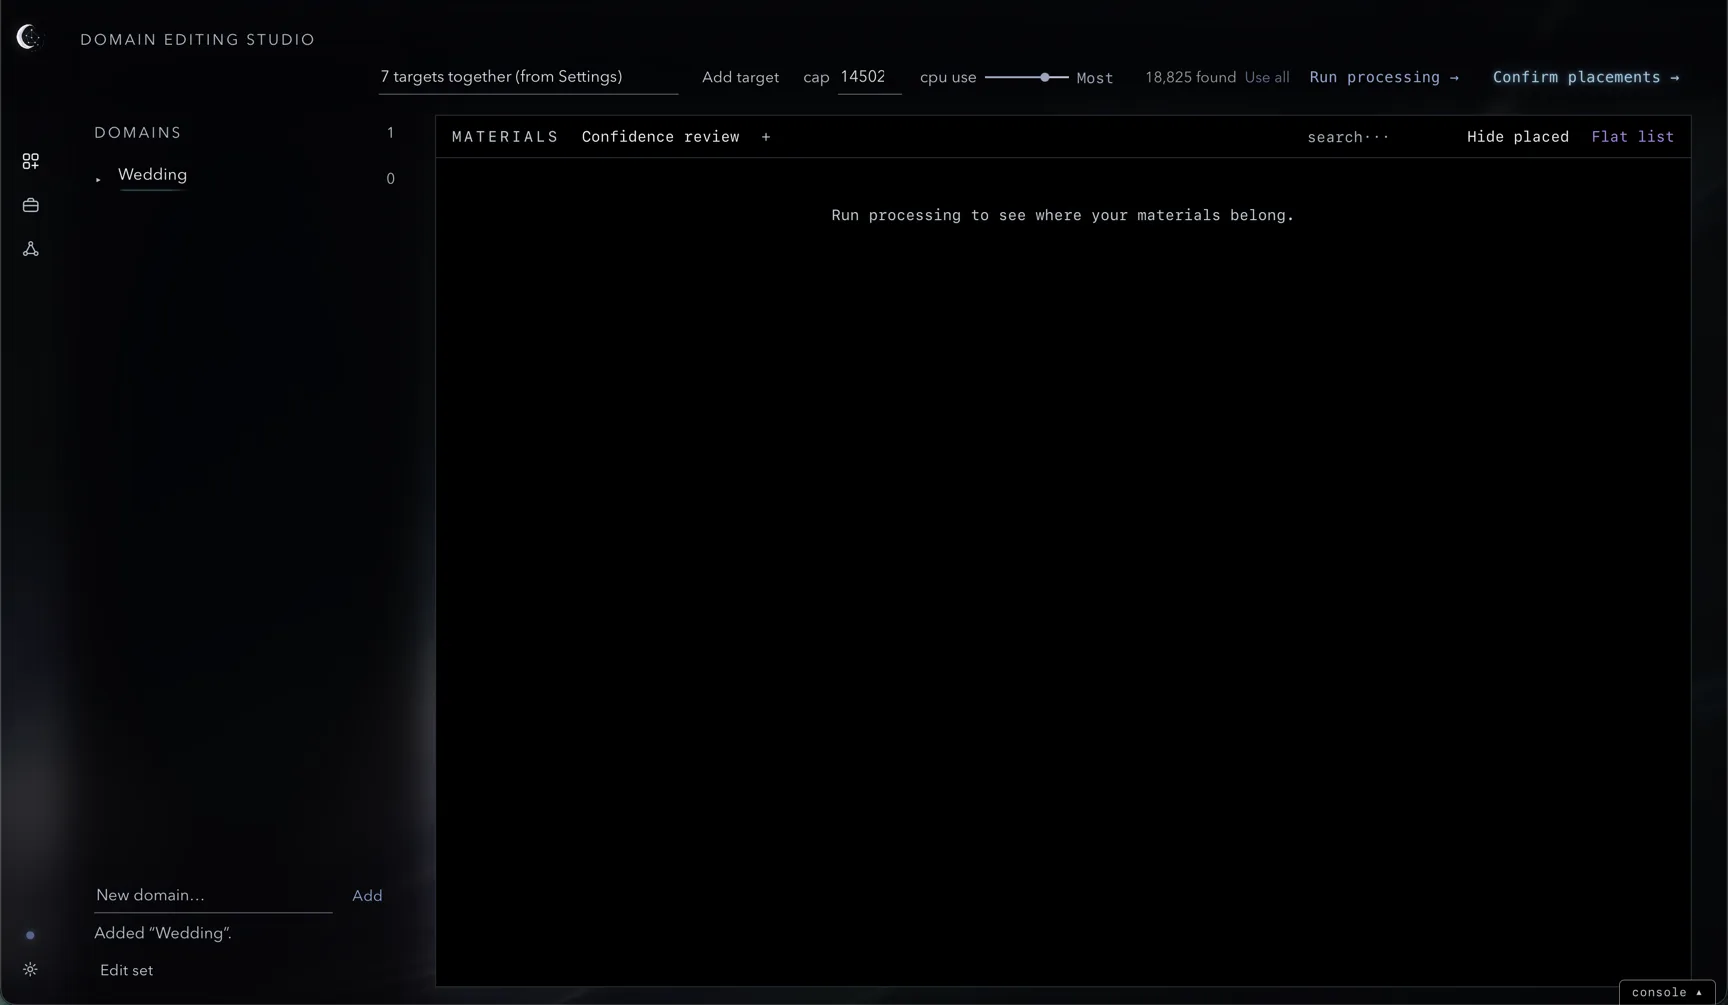
The Domain Editing Studio opens with the new domain in its sidebar. Its count shows placed materials, so it remains at zero until you confirm or manually place materials into it.
Author your whole domain set
or author your whole domain set opens a sheet with one line per domain. The count under the field updates as you type. Apply set creates them all at once.
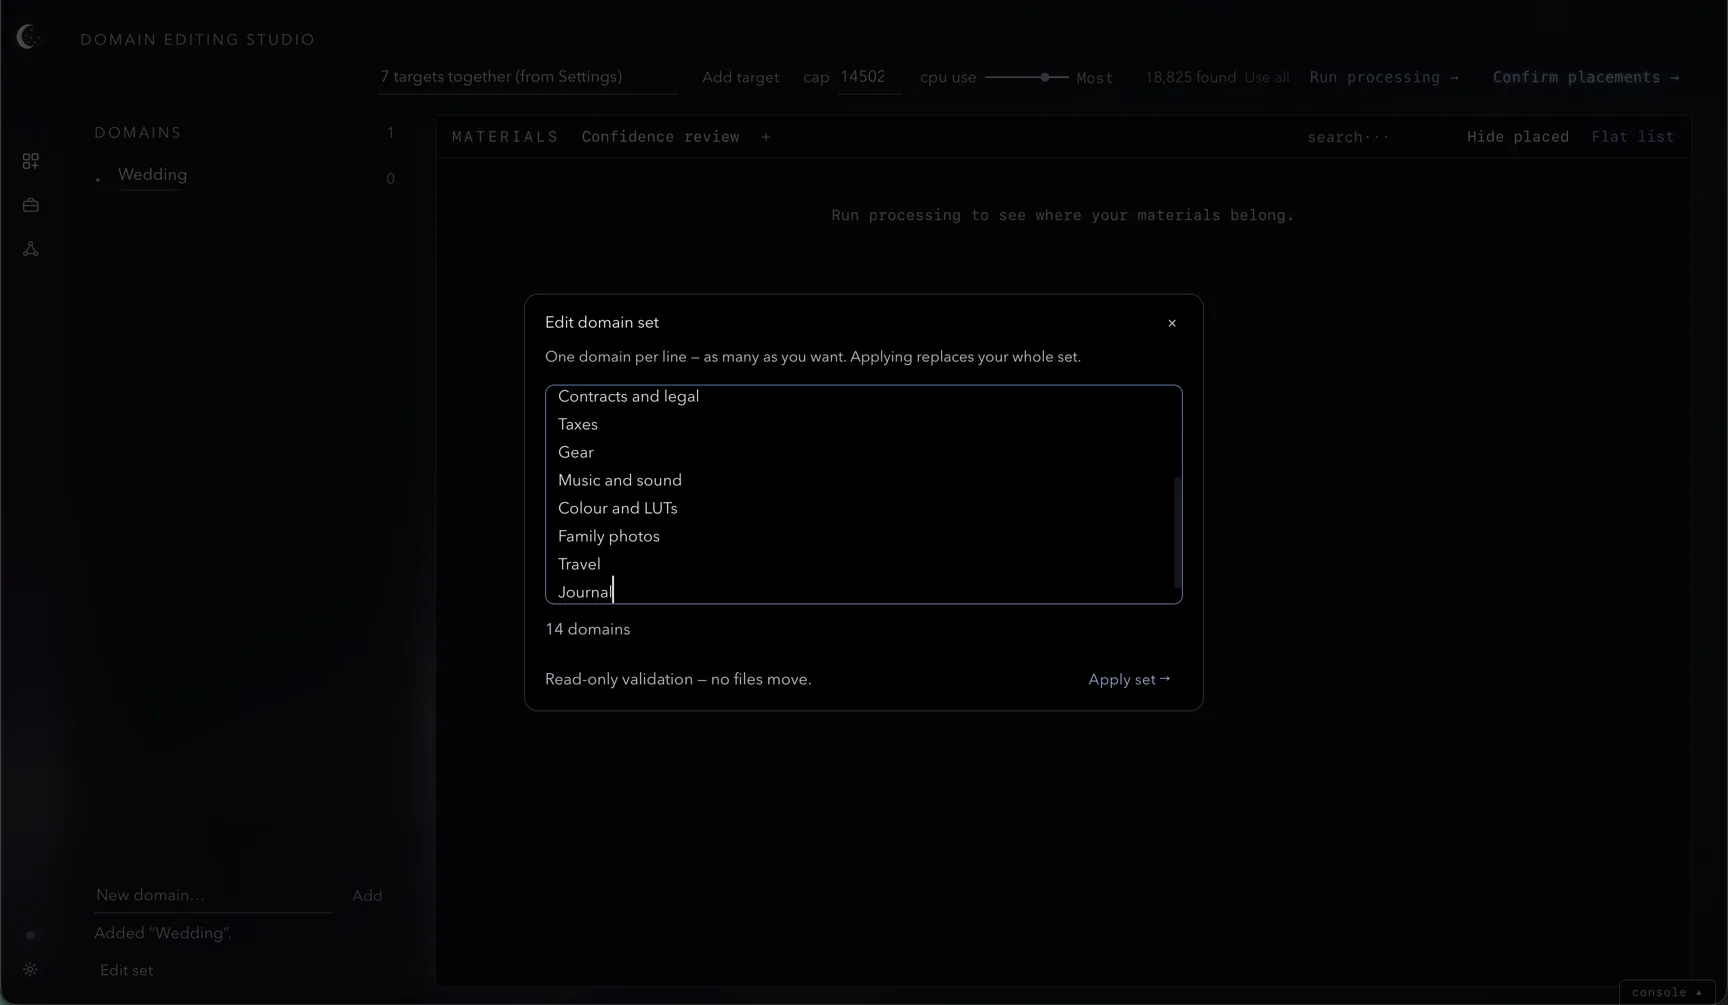
Open this editor later through Edit set at the foot of the Studio sidebar to add or remove domain titles.
The console corner
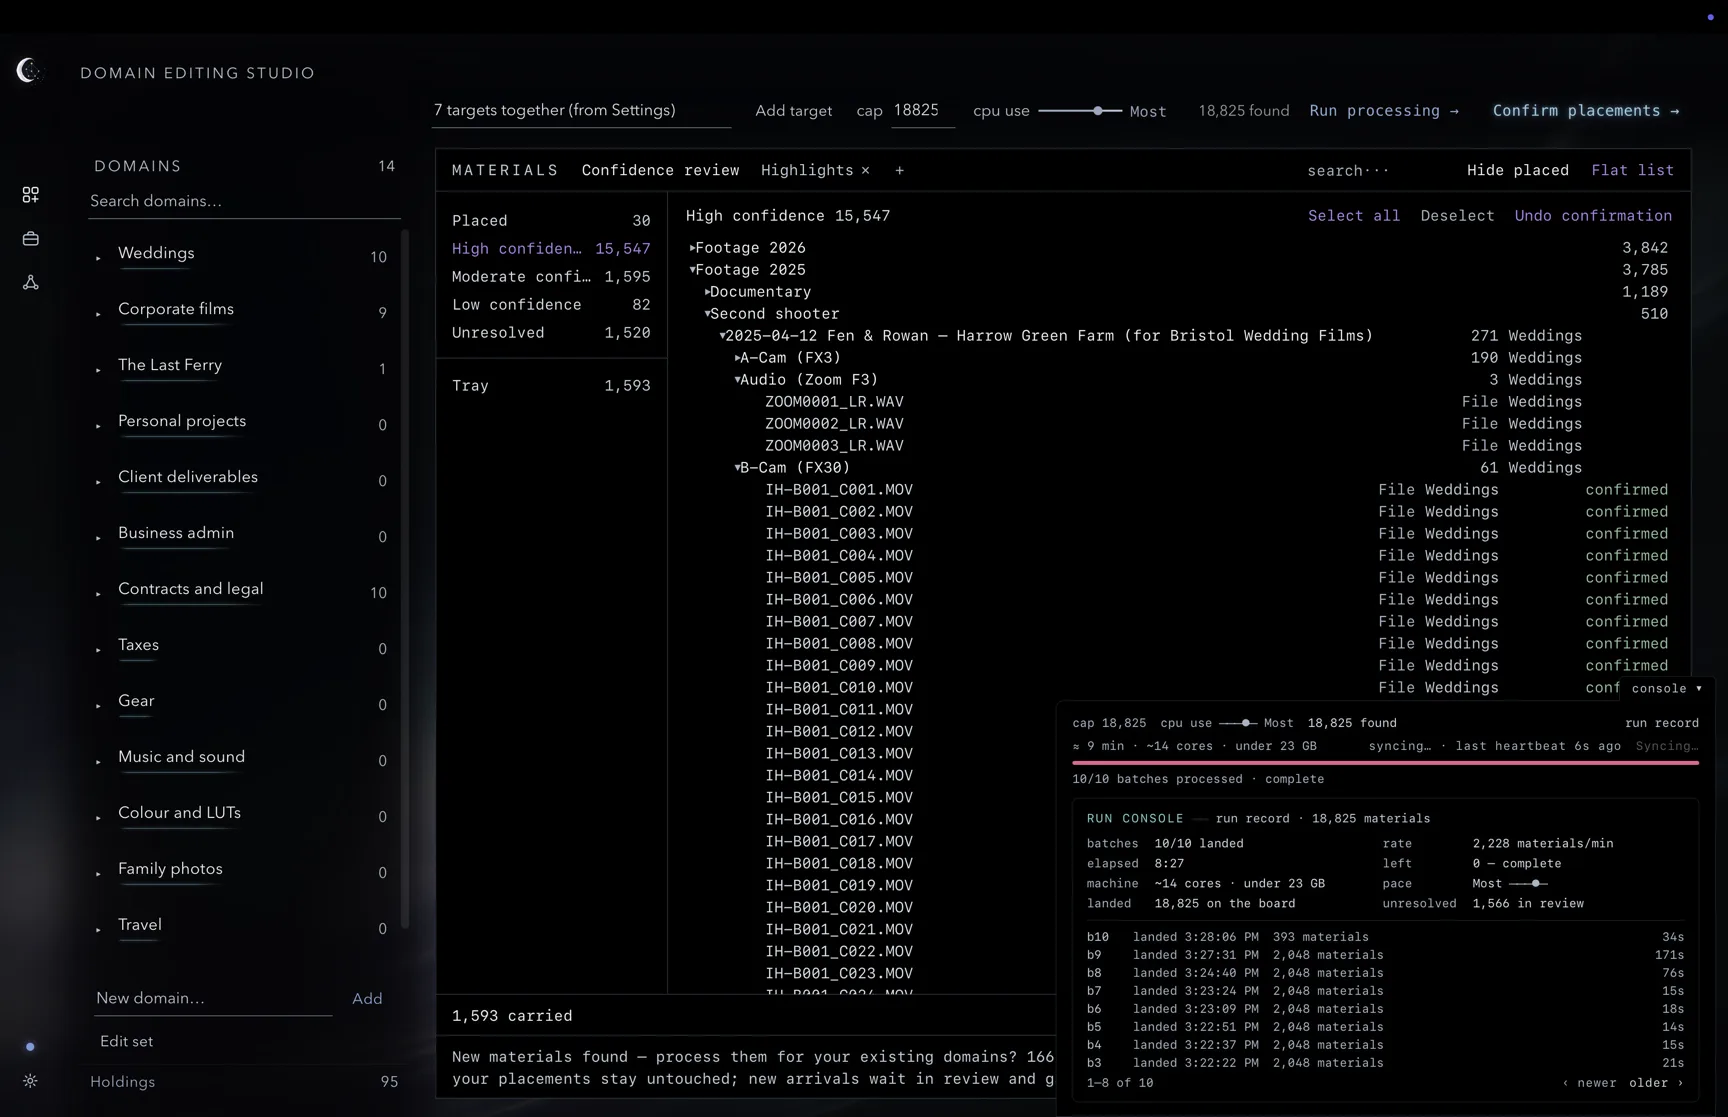
Open console ▴ from any page to see processing controls, the machine estimate, progress and the completed run record. The tab is part of the console: open, it sits at the top of the card as console ▾, and the card rests on the bottom edge of the window. Press the tab again to fold the card away.
The Help menu
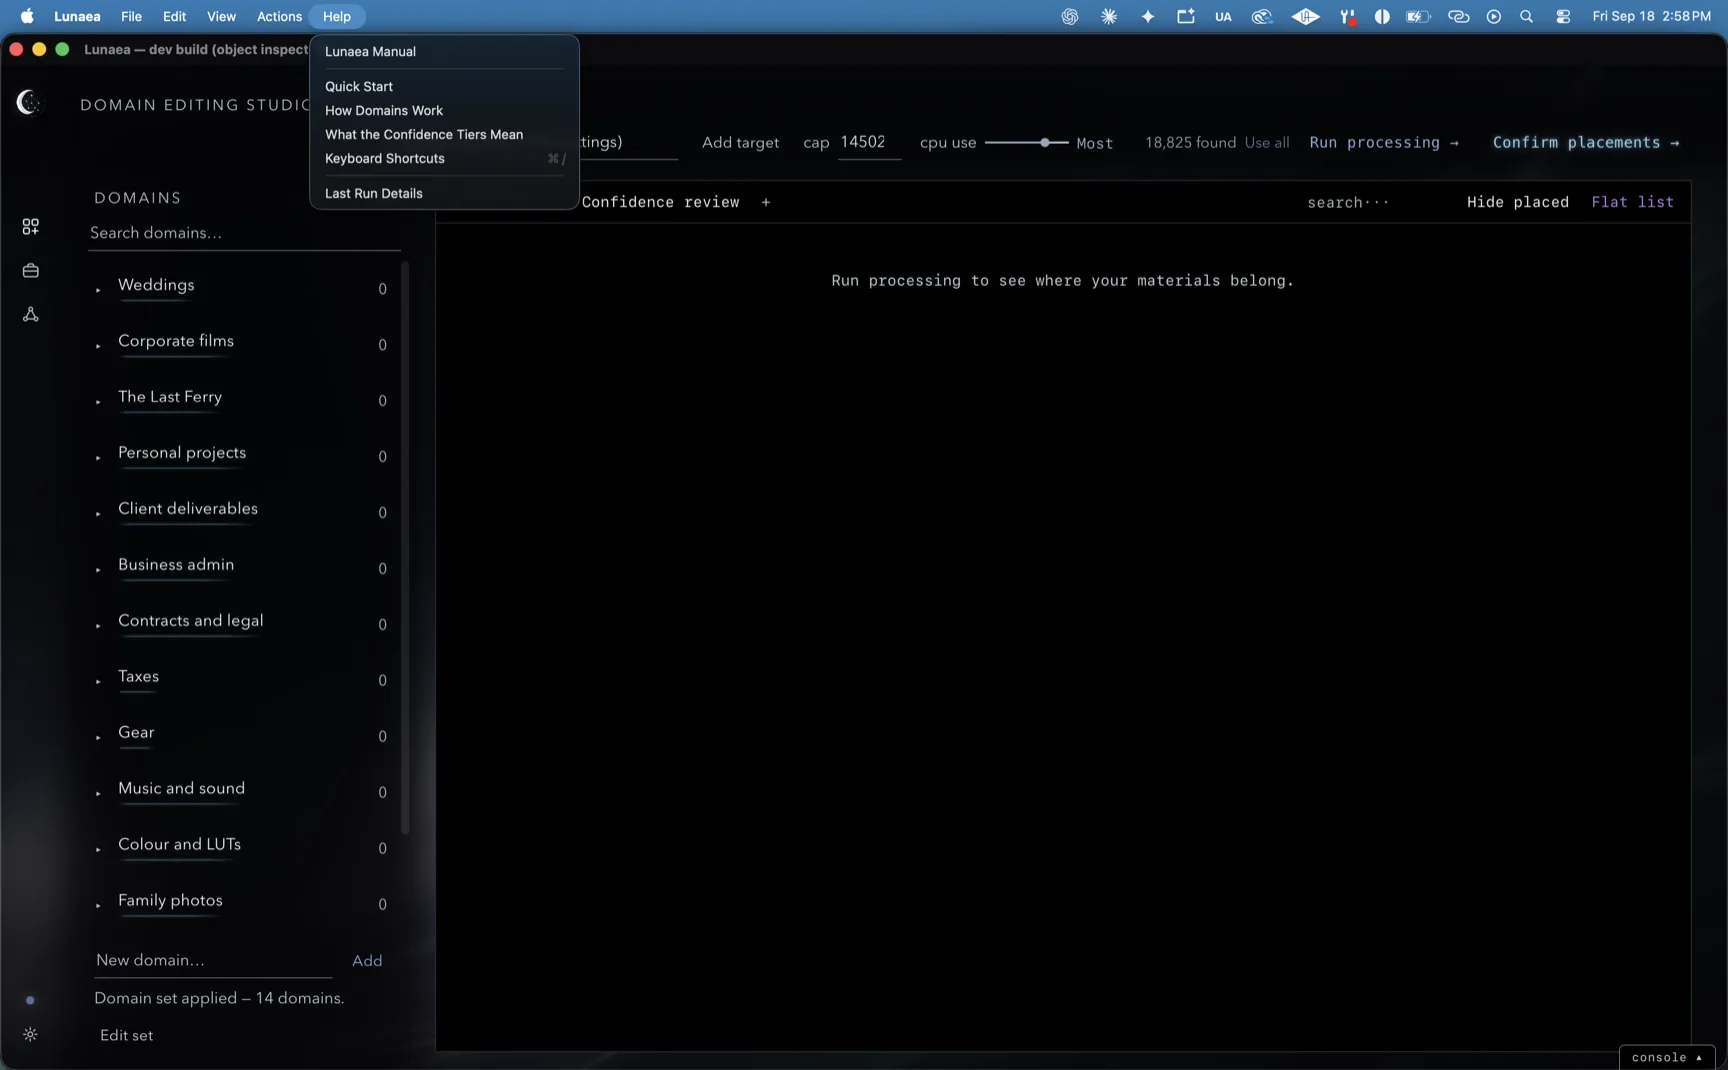
Choose Help ▸ Lunaea Manual to open the web manual in your browser. The Help menu also contains Quick Start, How Domains Work, What the Confidence Tiers Mean, Keyboard Shortcuts and Last Run Details.
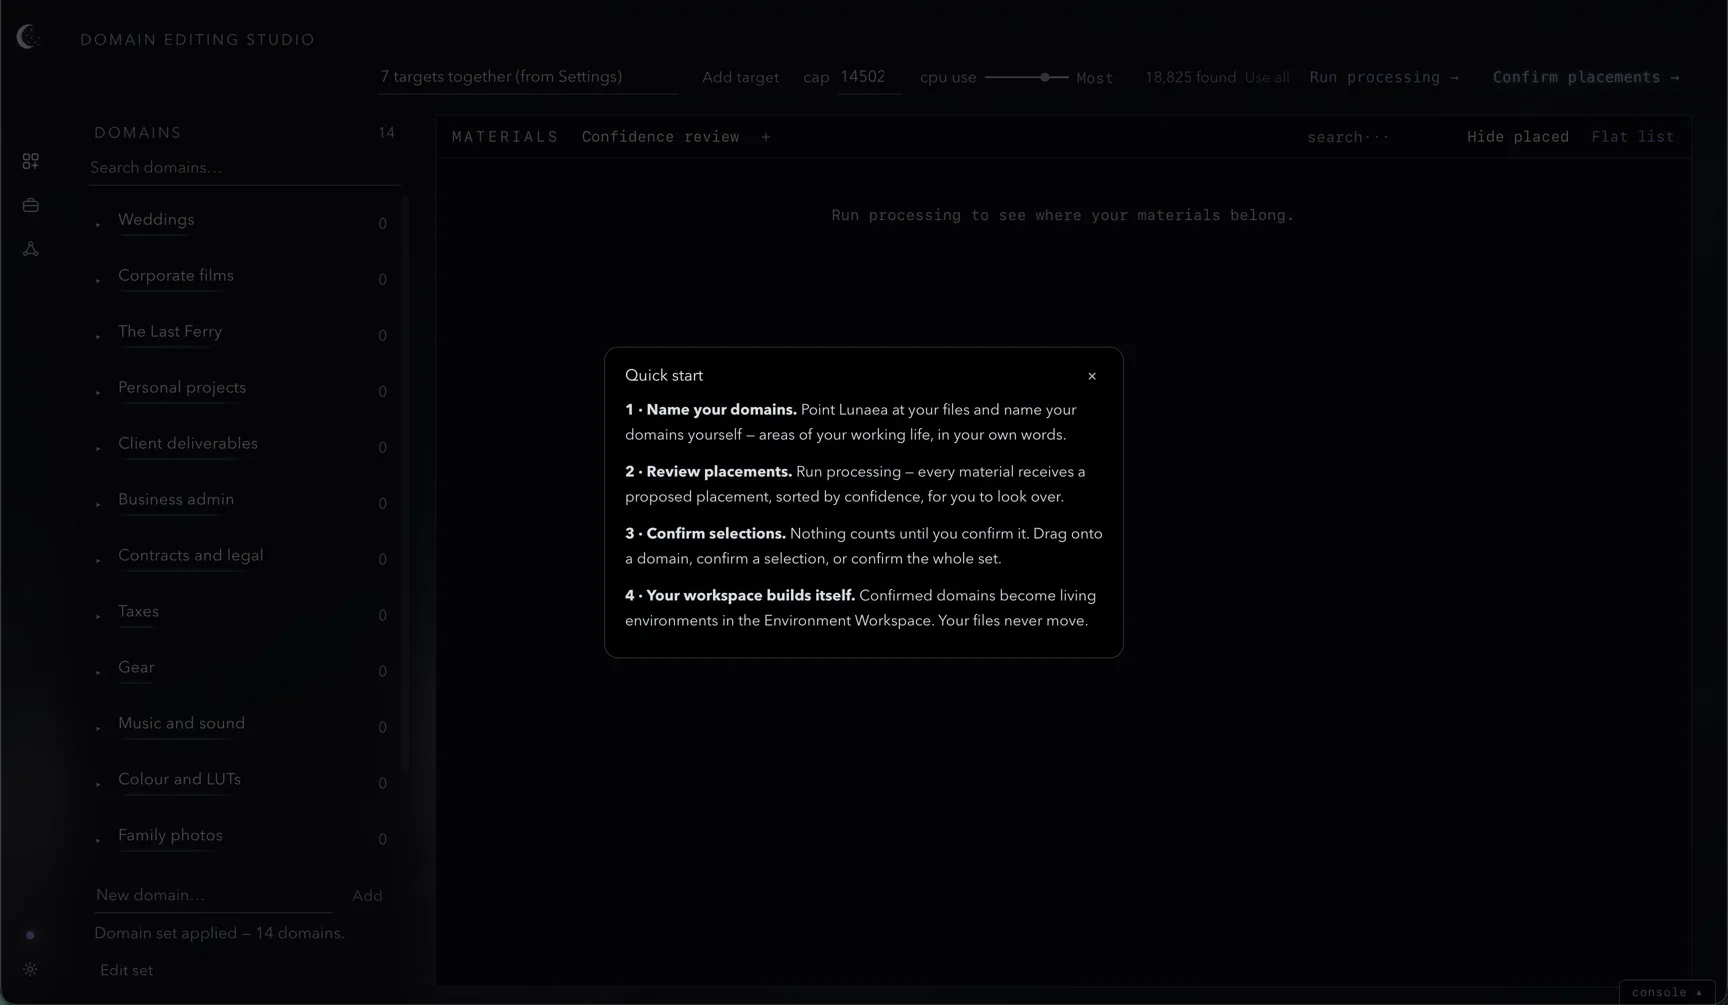
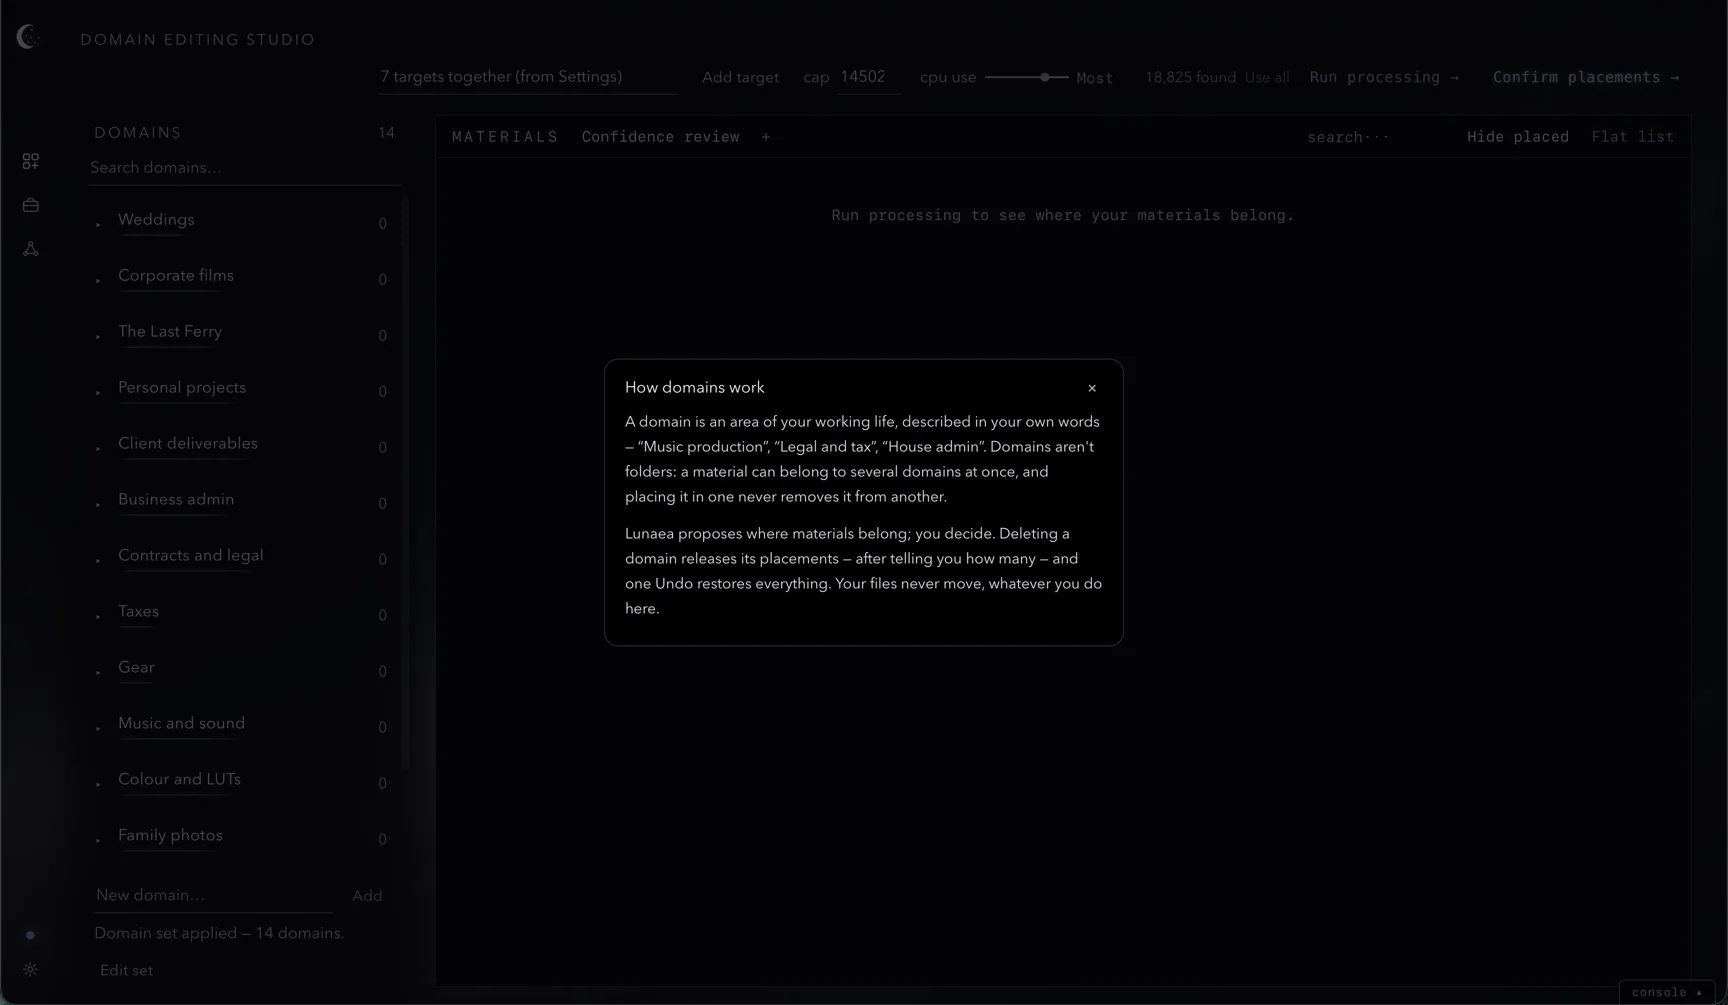
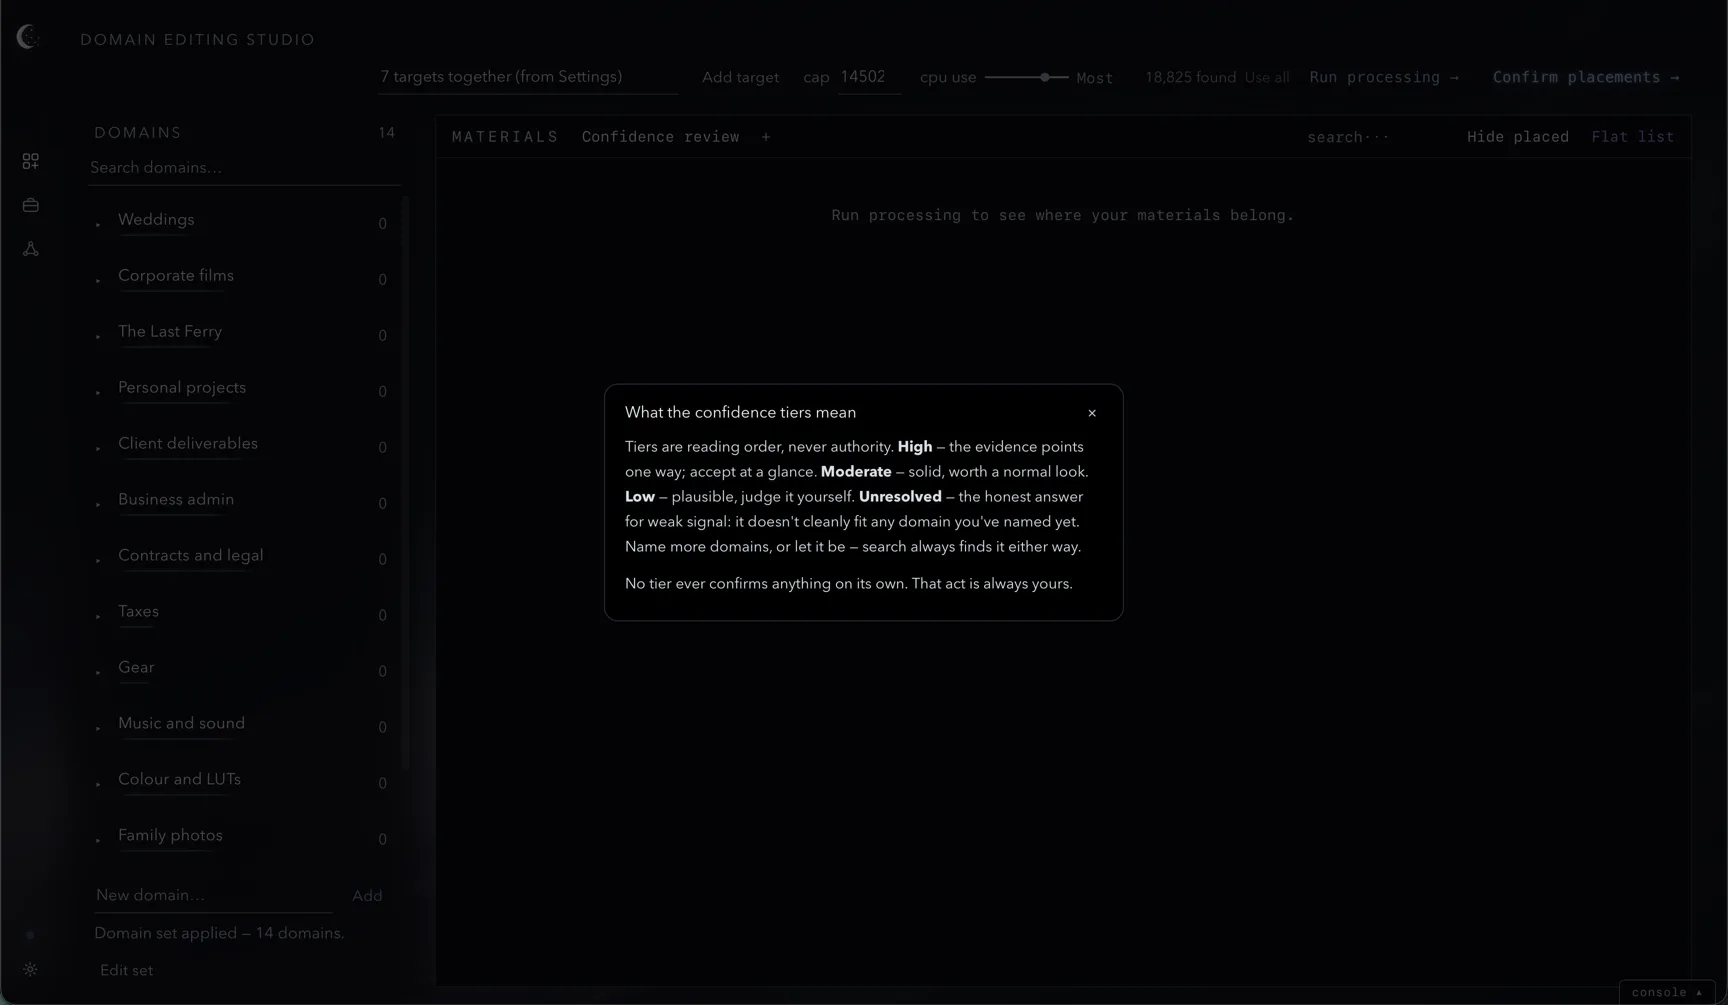
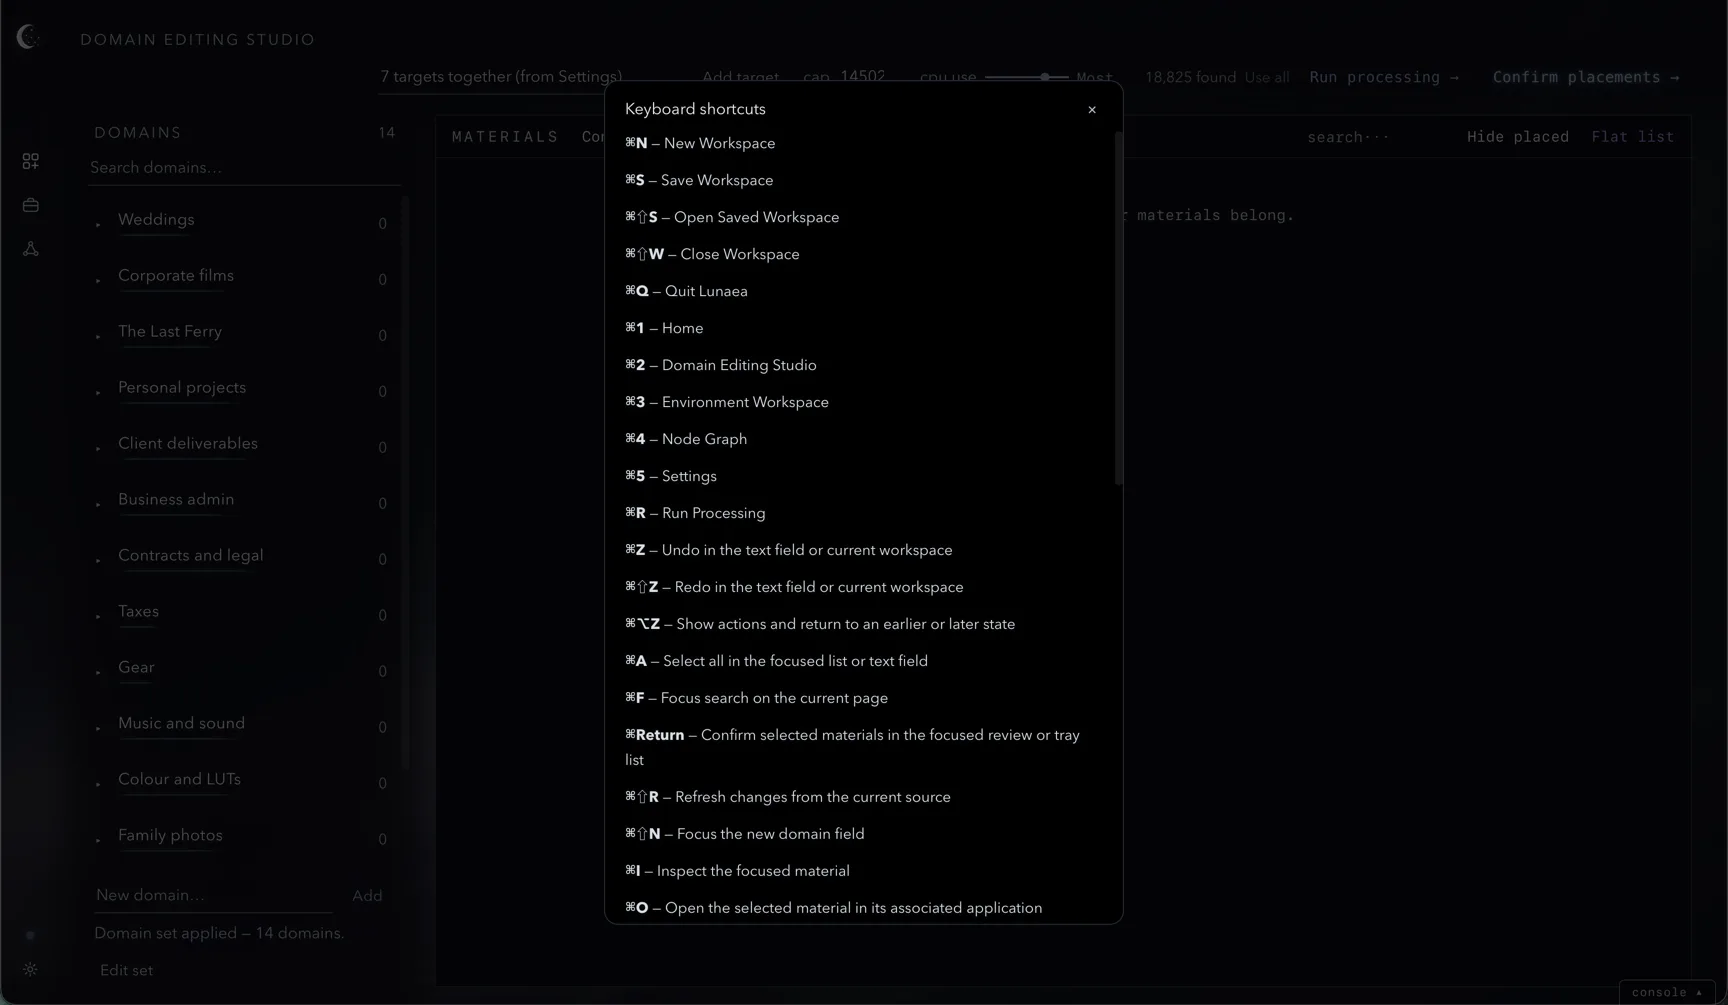
Keyboard Shortcuts (⌘/) opens the full reference; chapter 9 reproduces it.
Choosing your materials
Choose folders, drives or network locations as sources. Lunaea remembers your registered sources and can process several together.
Type a path or browse
On Home and in the Domain Editing Studio, click the underlined source field to type or paste a folder path. To browse instead, click Add target beside it. Choose a folder or a whole volume in the standard folder picker and press Open. The field shows the selected path, and the header reports how many materials were found there.
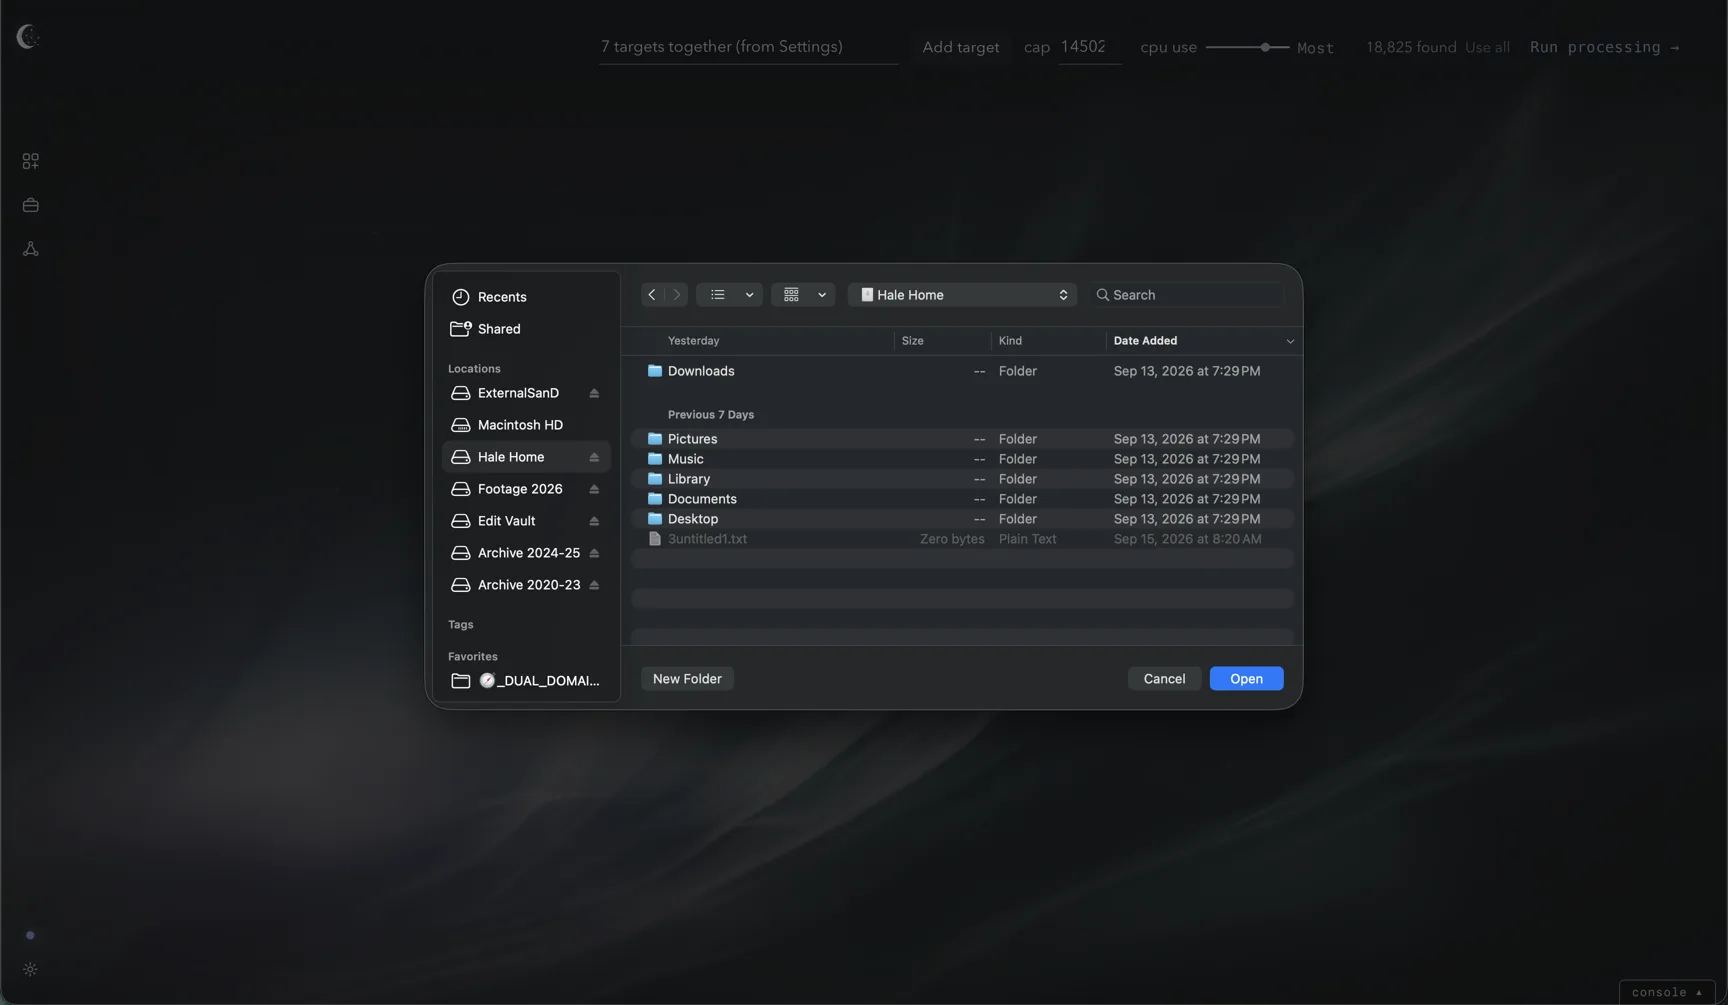
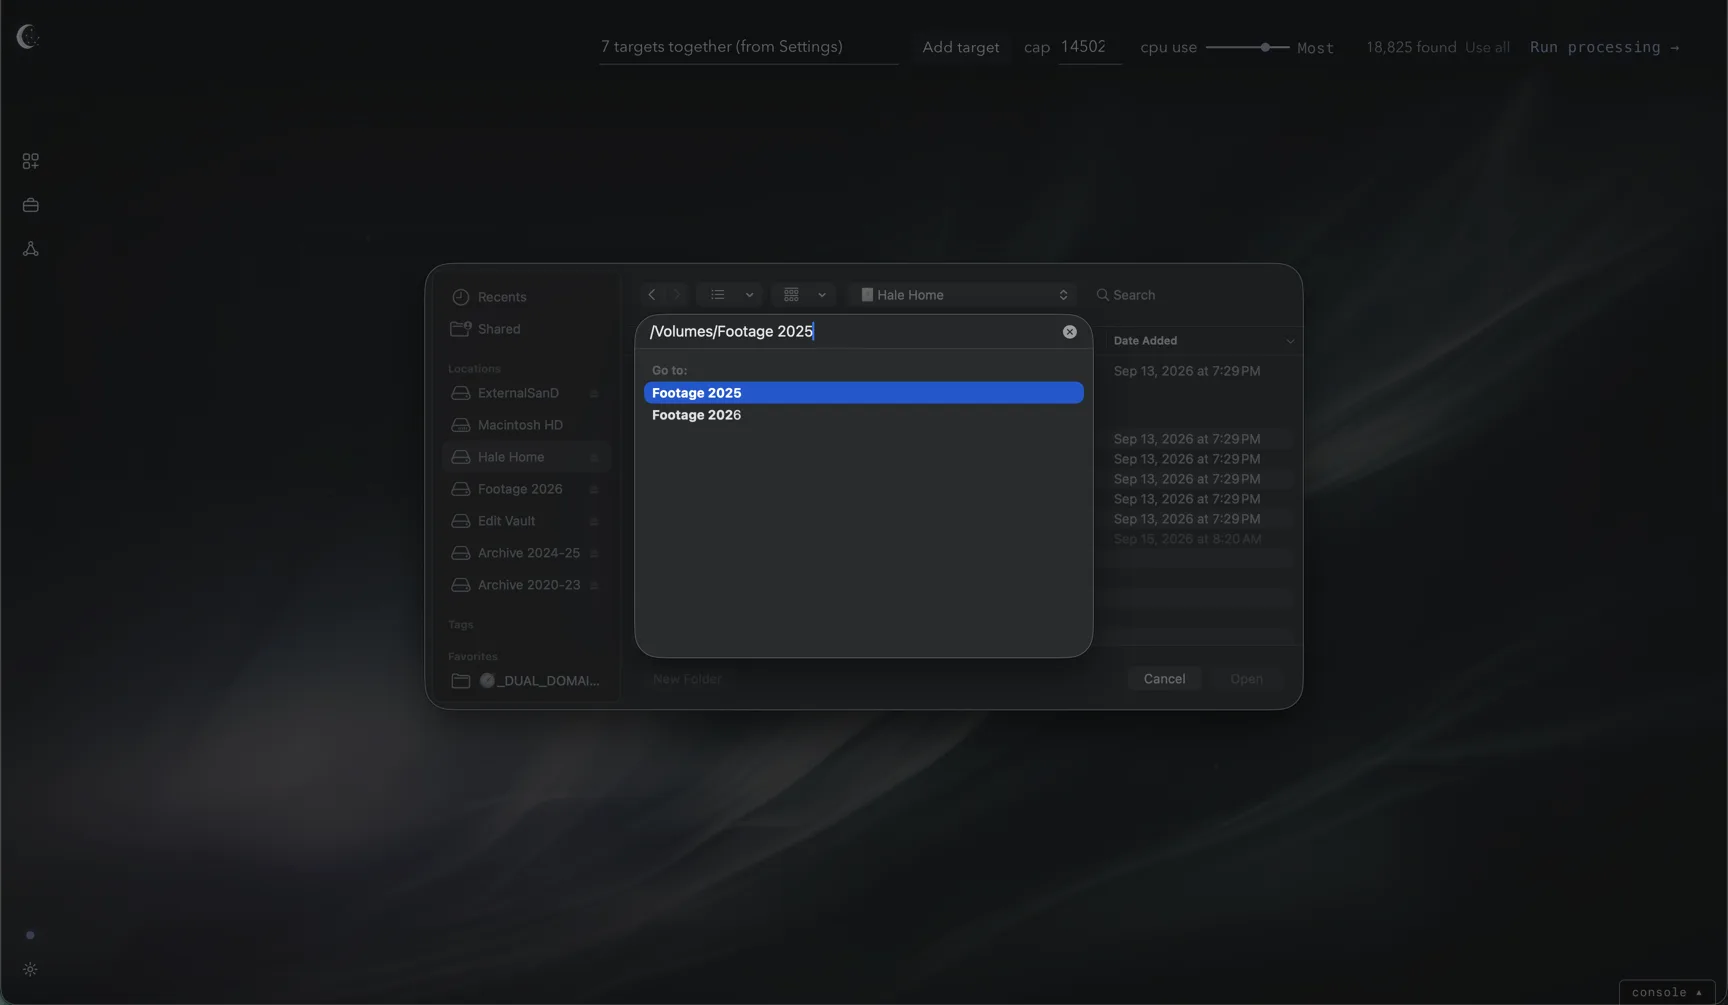
Inside the picker, ⇧⌘G also lets you enter a path and press Return to navigate directly to that folder.
Sources in Settings
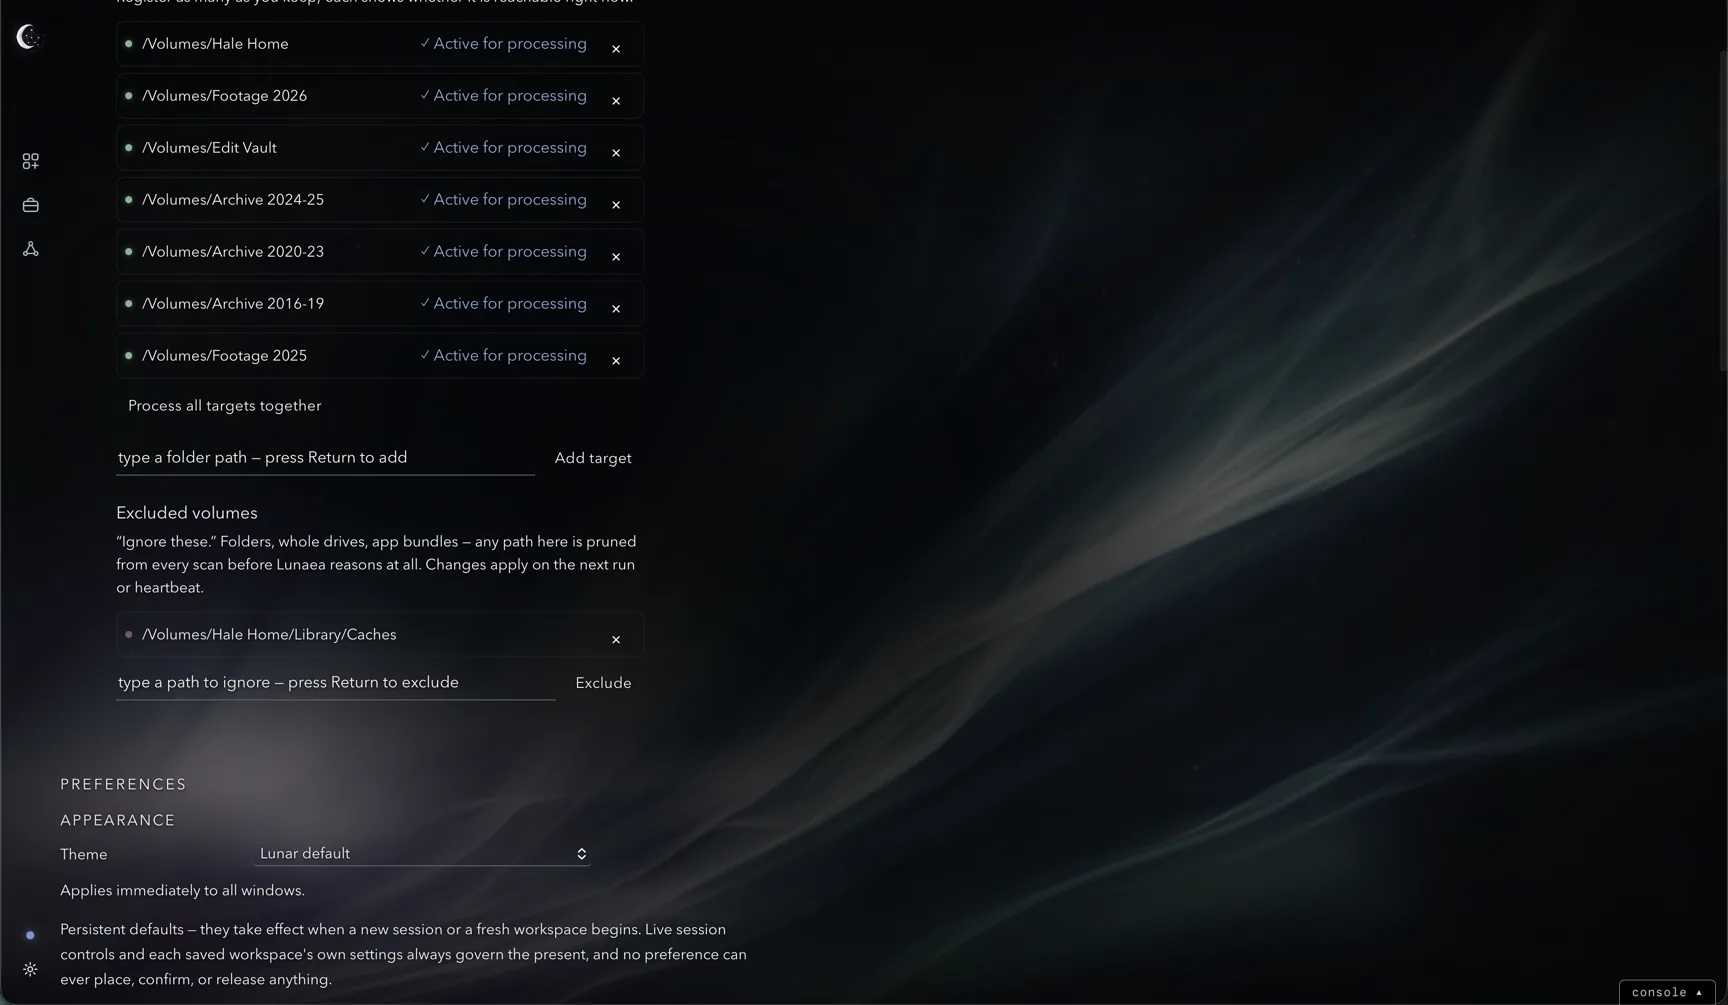
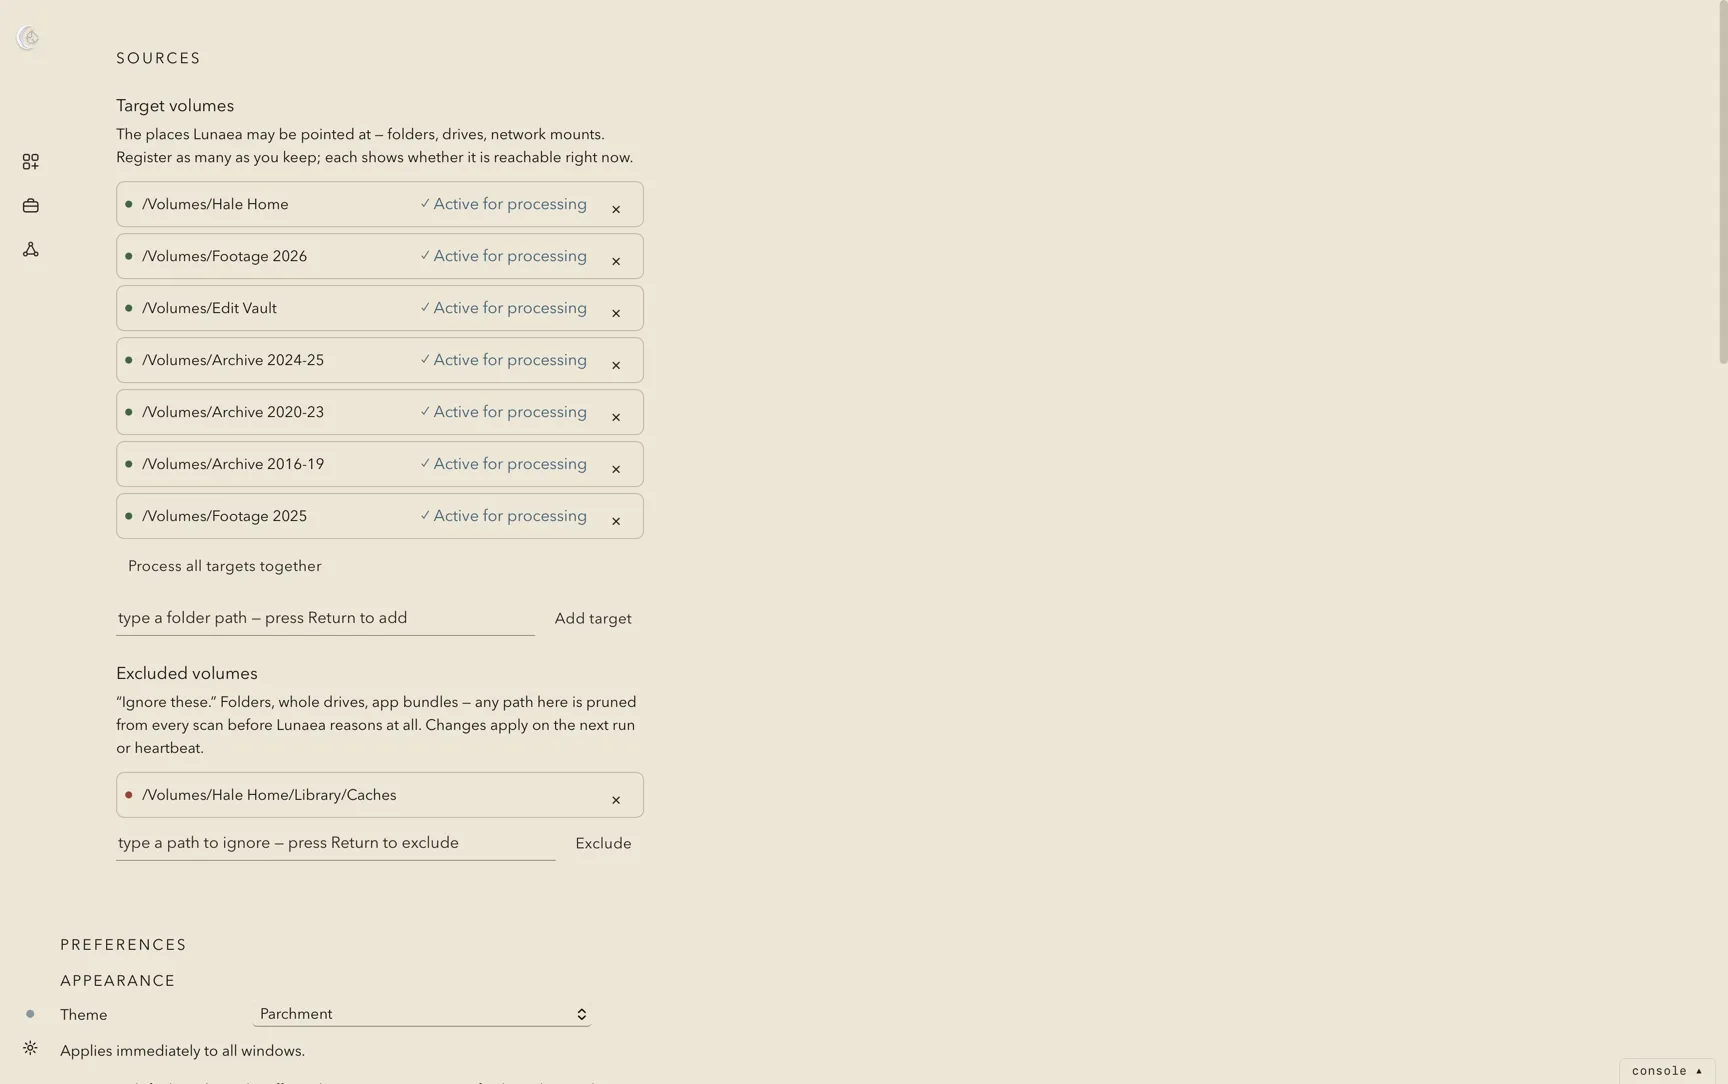
Settings ▸ Sources lists registered targets, their paths and their availability. Toggle Use for processing to include a target in the next run; enabled targets read Active for processing. The row’s × removes the target from the list and leaves its files in place.
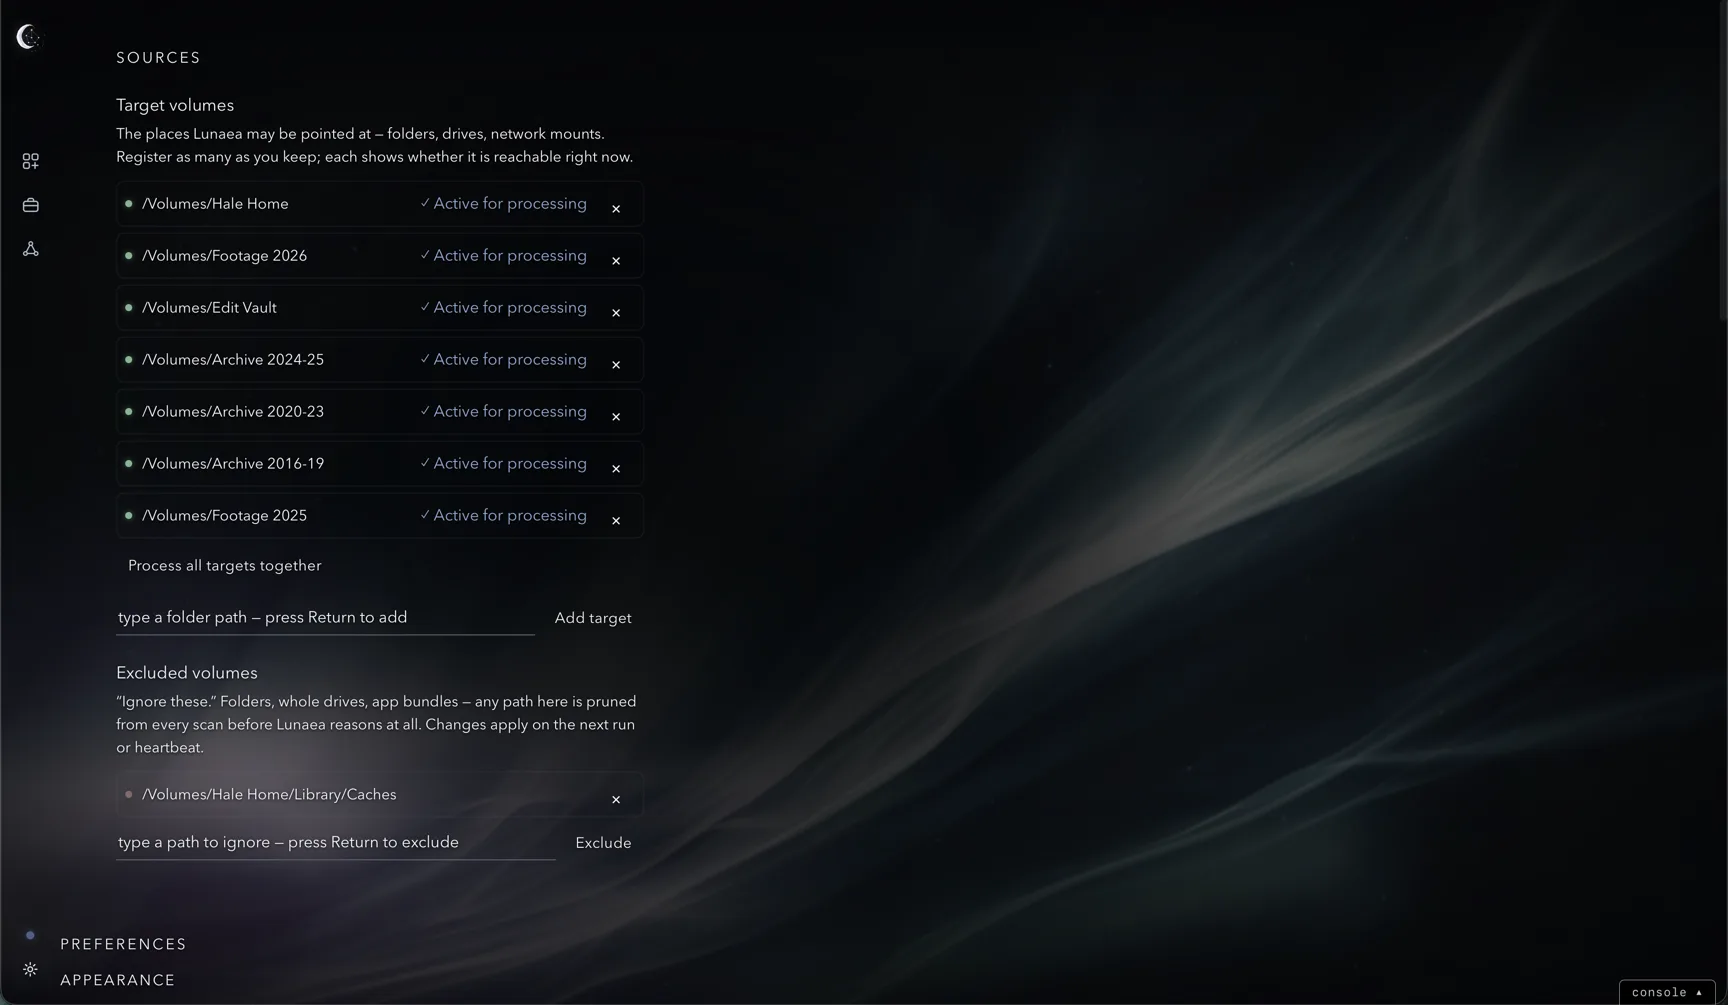
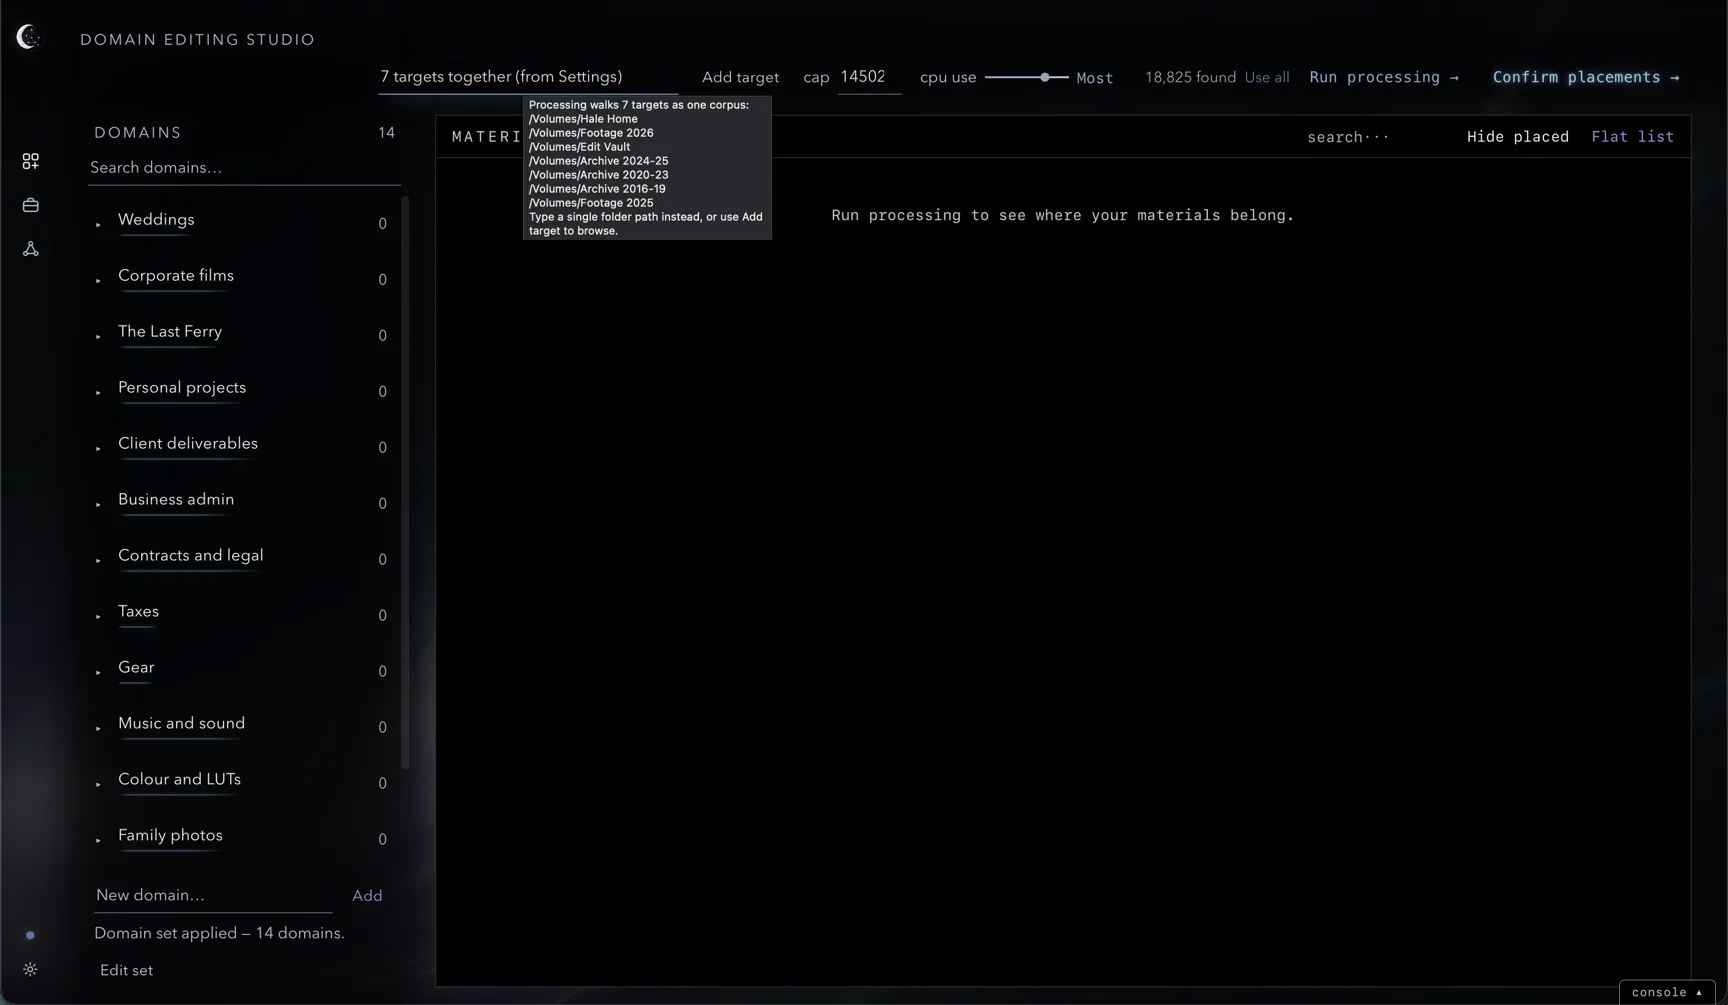
Type or paste a path into the target field and press Return to register it. Add target opens the folder picker. Cancelling the picker keeps your typed path. Press Process all targets together to activate every registered target, including disabled ones. Use the individual target controls to choose a smaller set.
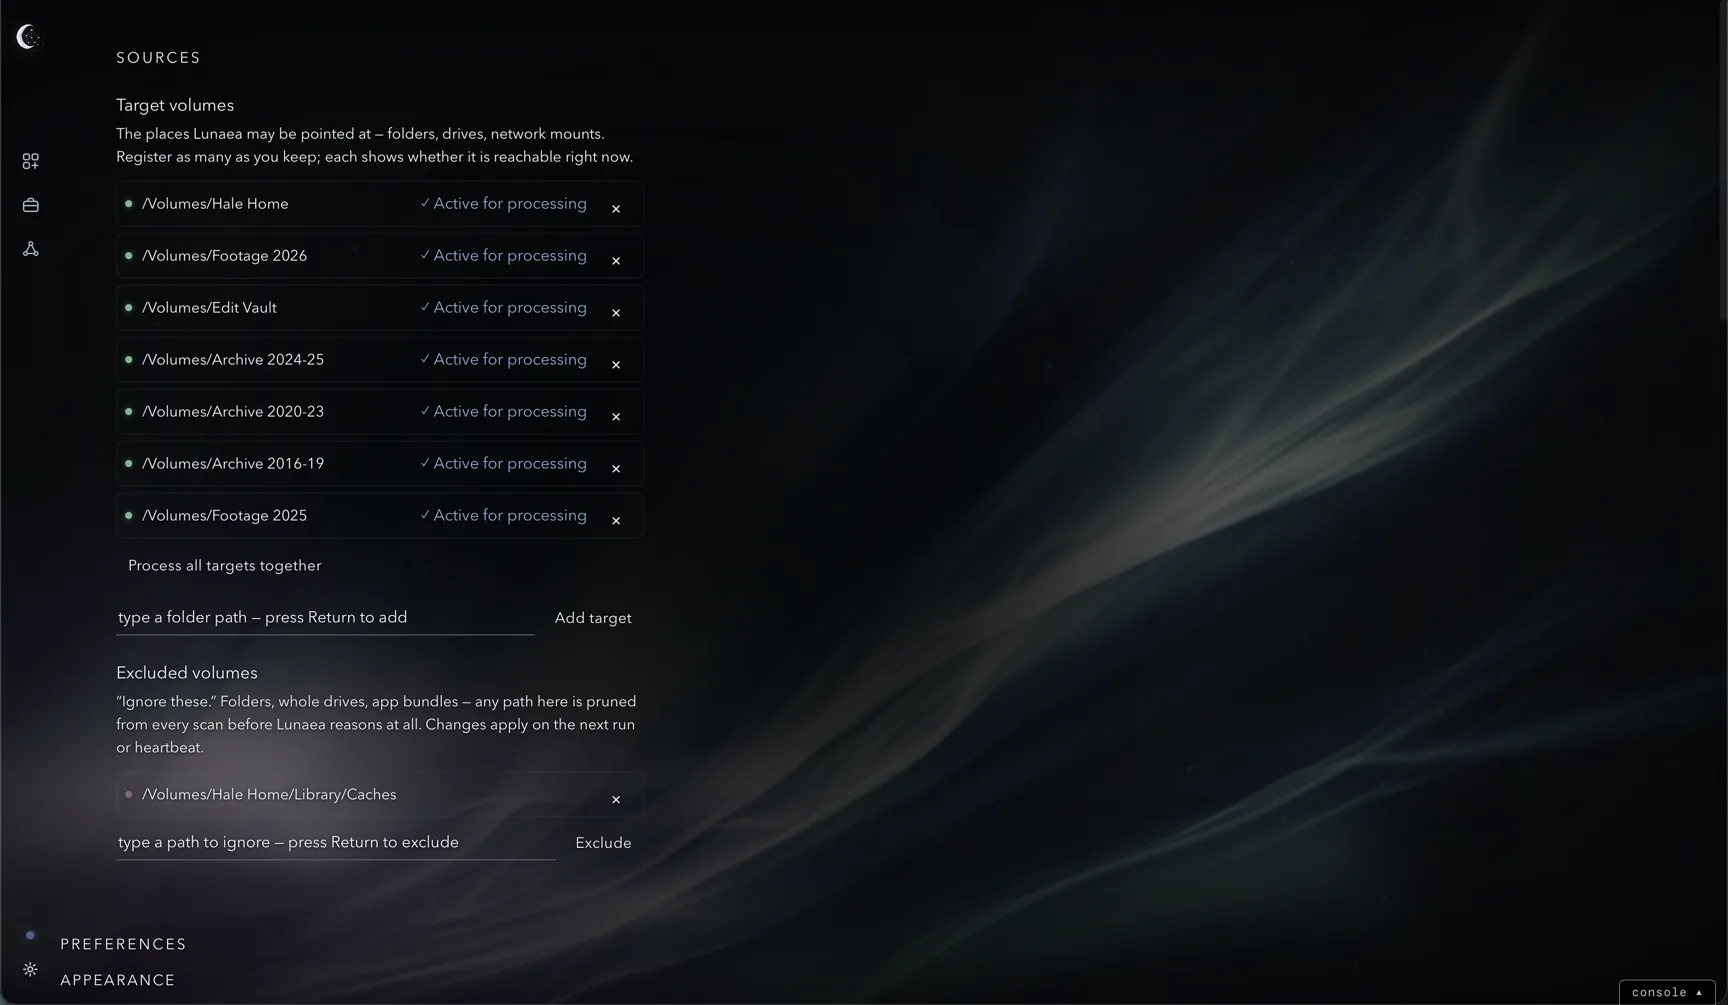
Excluded paths
Excluded volumes lists paths to omit from scans. Type or paste a path into the exclusion field and press Return, or click Exclude to choose it in the folder picker. Use its × to remove the exclusion. Changes apply on the next run and heartbeat check.
A typical entry is a caches folder. Anything under an excluded path is neither read nor counted.
The cap, and what was found
The cap limits how many materials a run processes. The found count shows the materials available in the selected sources. Press Use all to set the cap to that count.
If the cap limits a run, the Studio reports how many materials it covered and the total found. Raise the cap to include more materials.
cpu use
The cpu use dial offers Least, Some, Most and All. Lower settings leave more capacity for other work. The console shows the estimated duration, core use and memory for the selected pace. You can adjust the dial during a run.
Processing
Processing examines materials from your selected sources against your domains and produces placement proposals with confidence levels. The run proceeds in batches and can be paused or stopped.
Run processing
Press Run processing → in the header, ⌘R, or Actions ▸ Run Processing. Before a full rerun of an existing landscape, Lunaea saves a restore point named Before this run. First runs and runs that process only added domains skip this save.
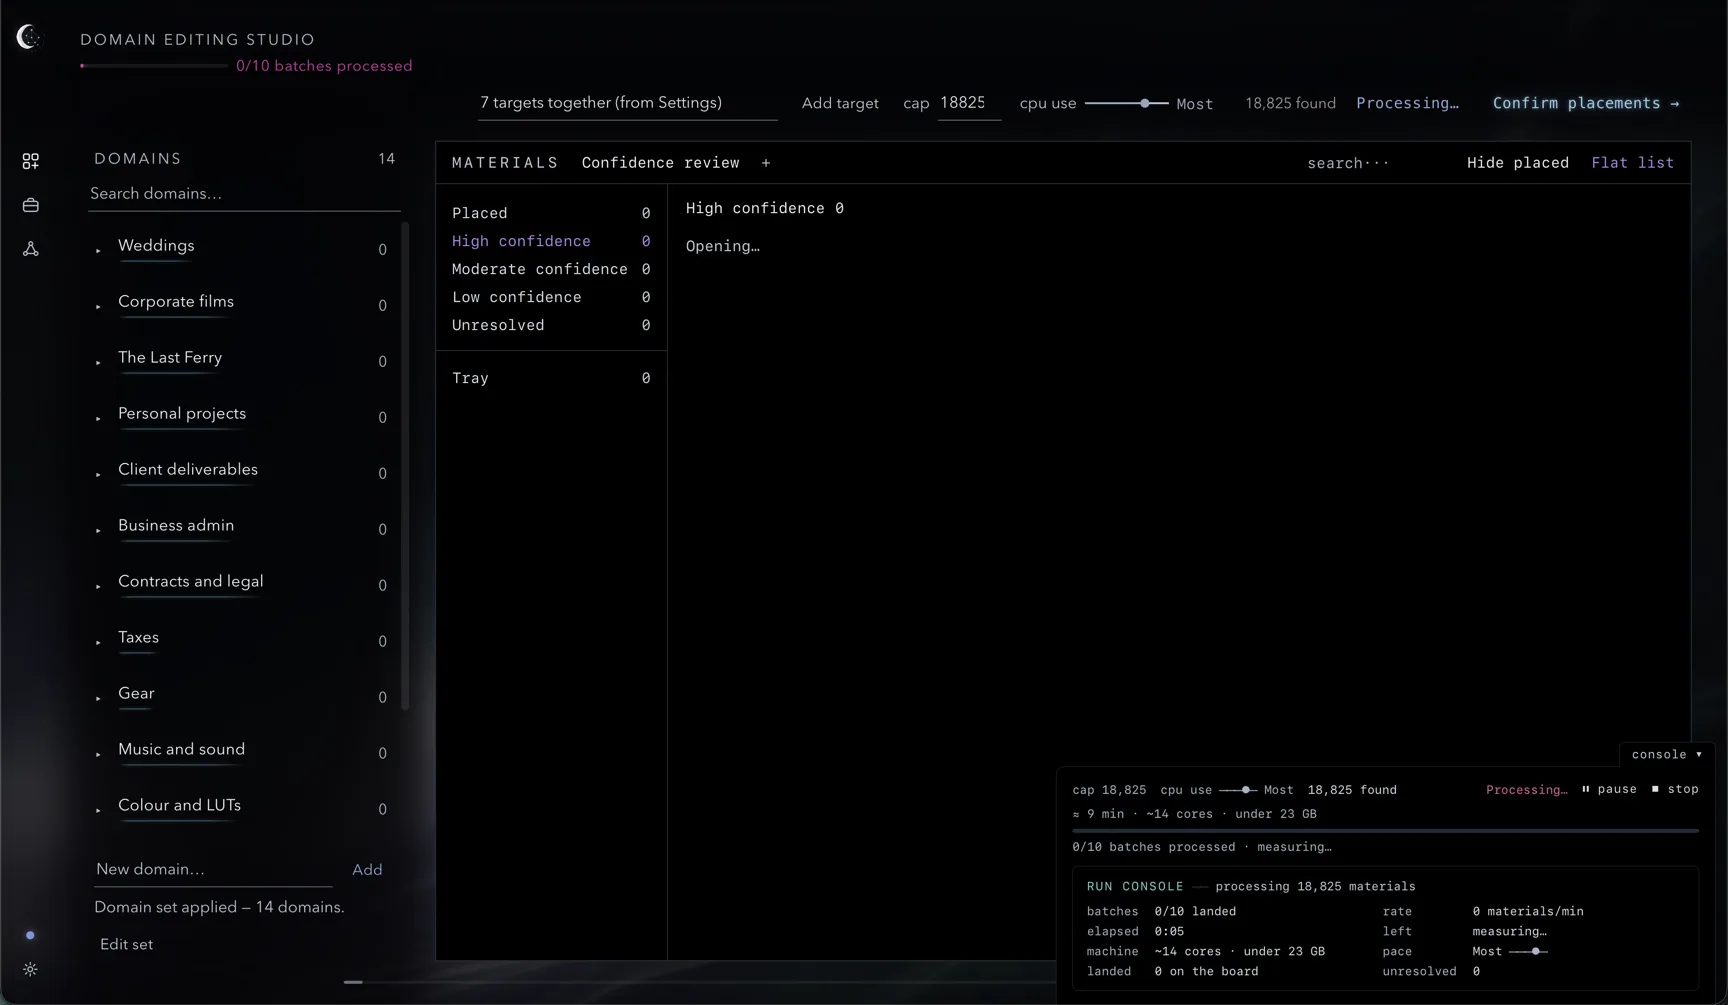
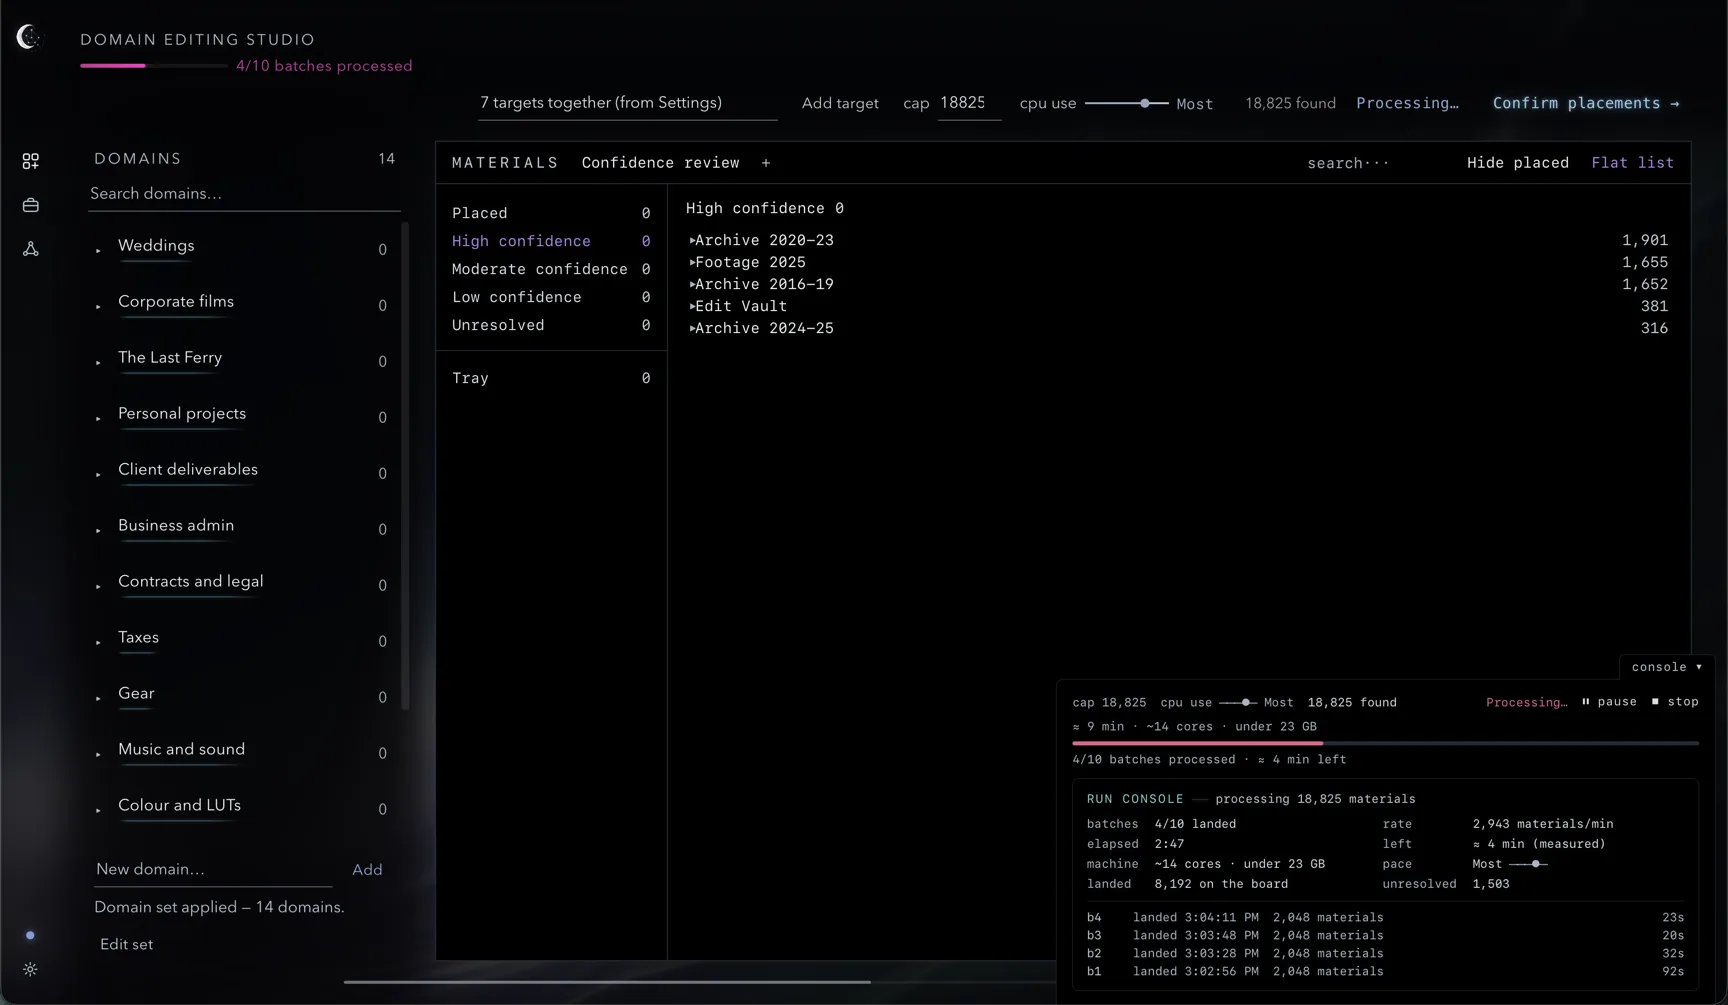
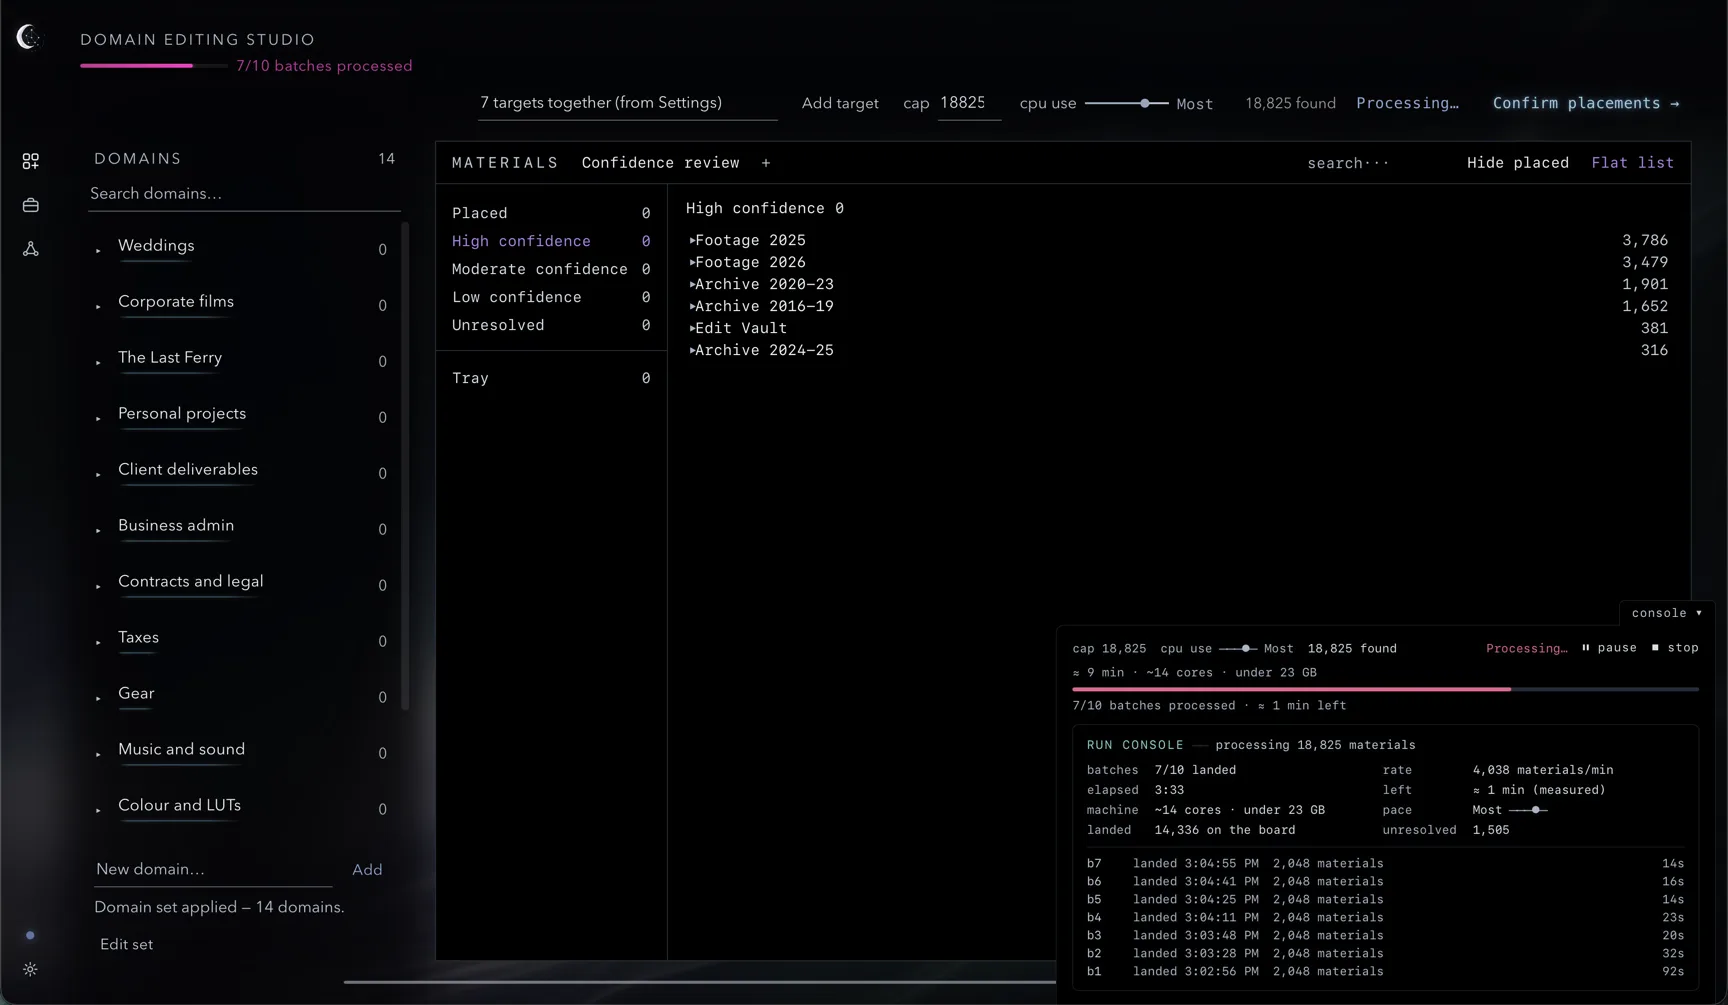
The run walks the sources, admits up to the cap, and works the admitted materials in batches of 2,048. Each batch lands on the board as it finishes, so review can begin while the run continues. The header reads Processing… with pause and stop beside it.
The console
The console contains the processing controls, machine estimate and batch progress. Between runs it also shows the sync status and Re-sync.
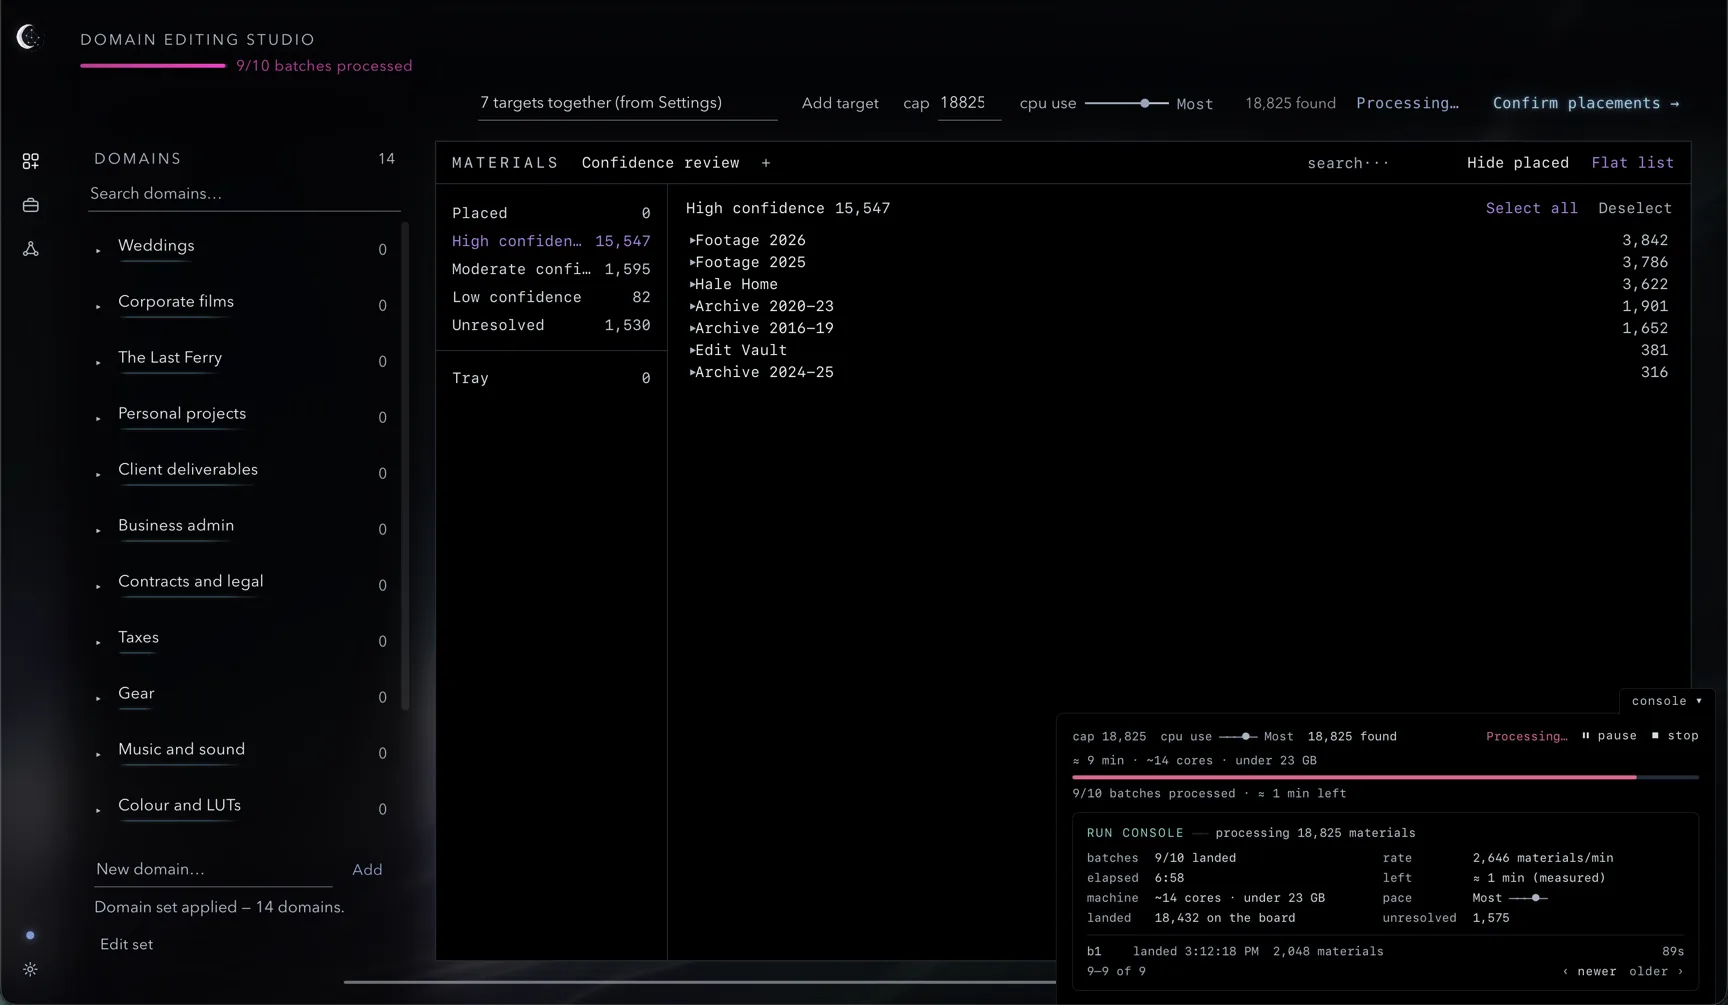
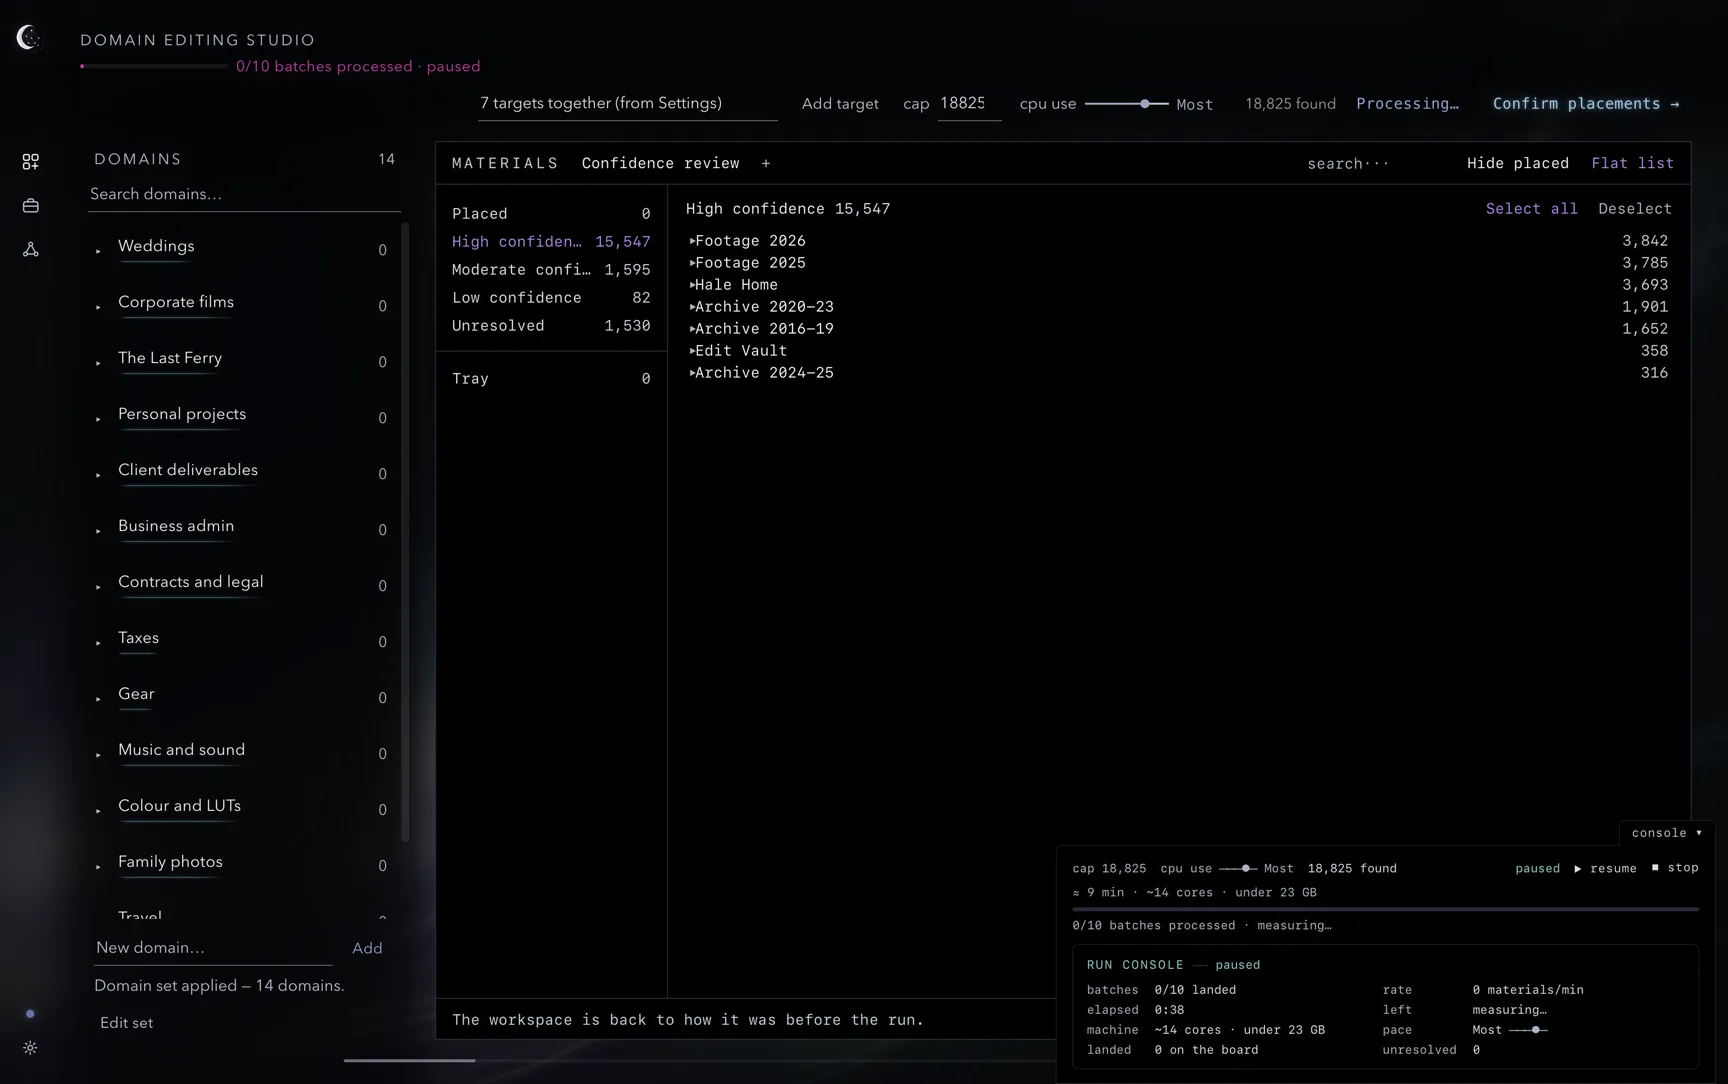
The panel reads batches landed, elapsed, machine, landed on the board, rate in materials per minute, left as measured from the run's own rate, pace, and unresolved. Under the figures, one row per landed batch: its number, when it landed, how many materials, and how long it took.
More than eight batches page eight at a time, newest first; ‹ newer and older › move between pages and the count reads "1–8 of 10".
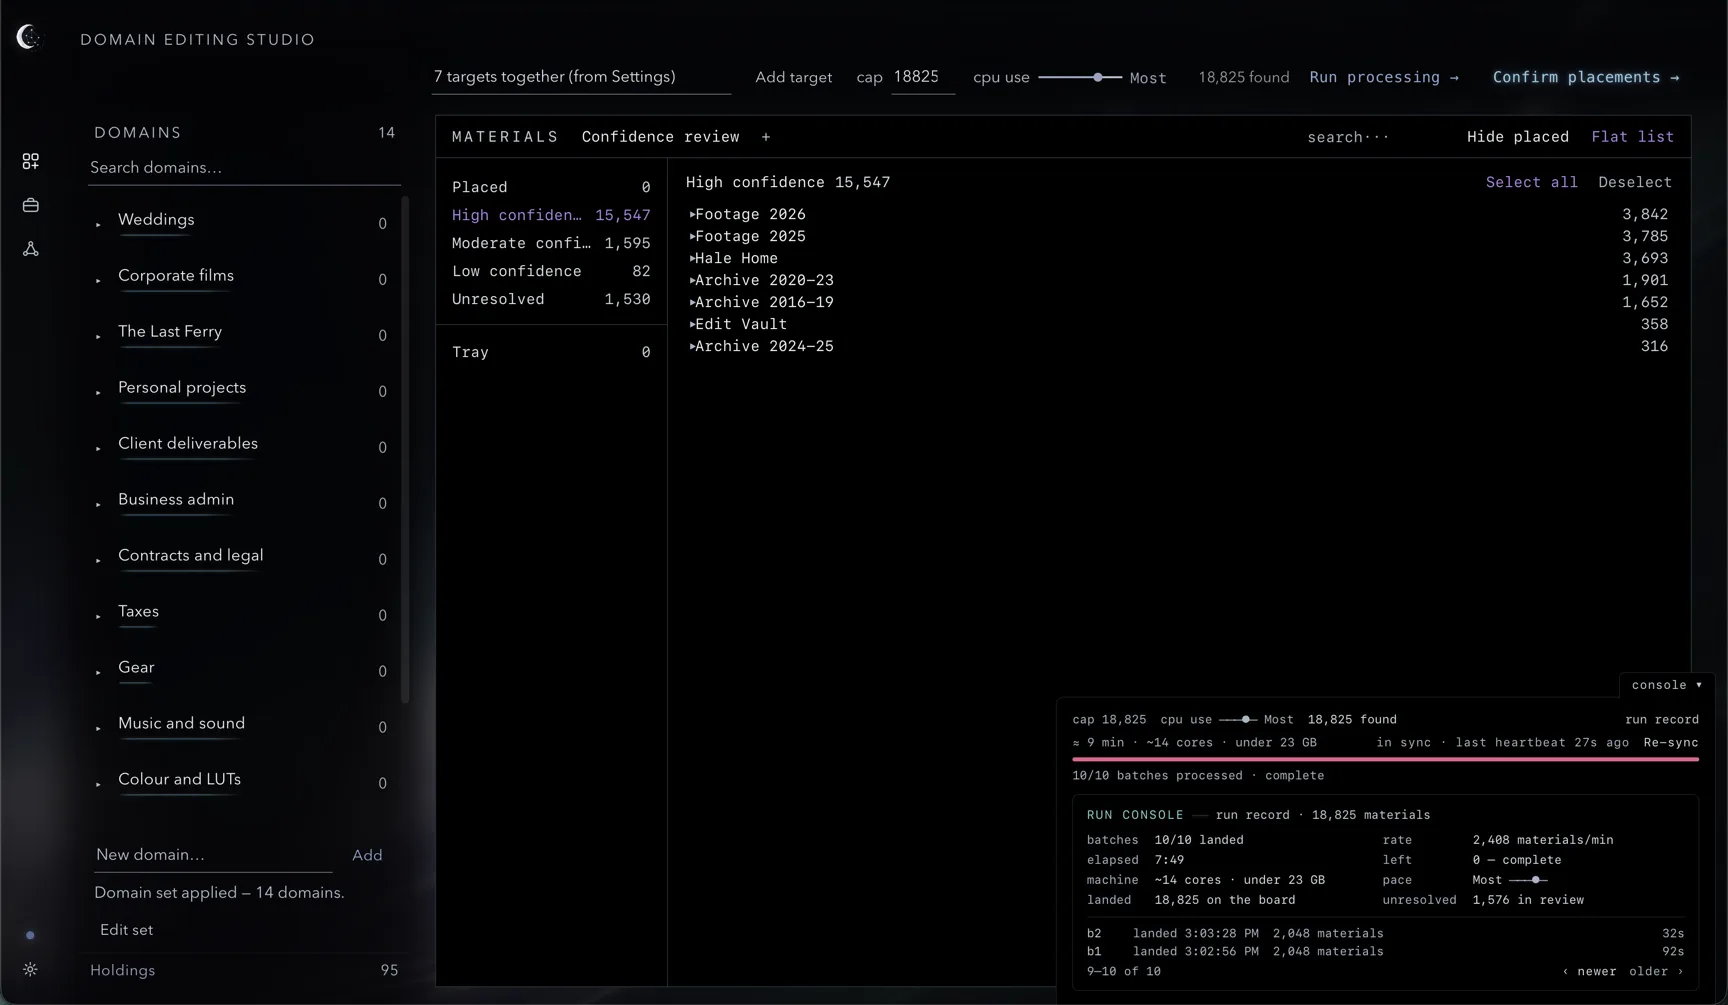
Completed figures and batch rows are saved with the workspace. During processing, the console displays live values.
Pause and stop
Press pause to suspend processing and resume to continue. The console retains the current progress while paused.
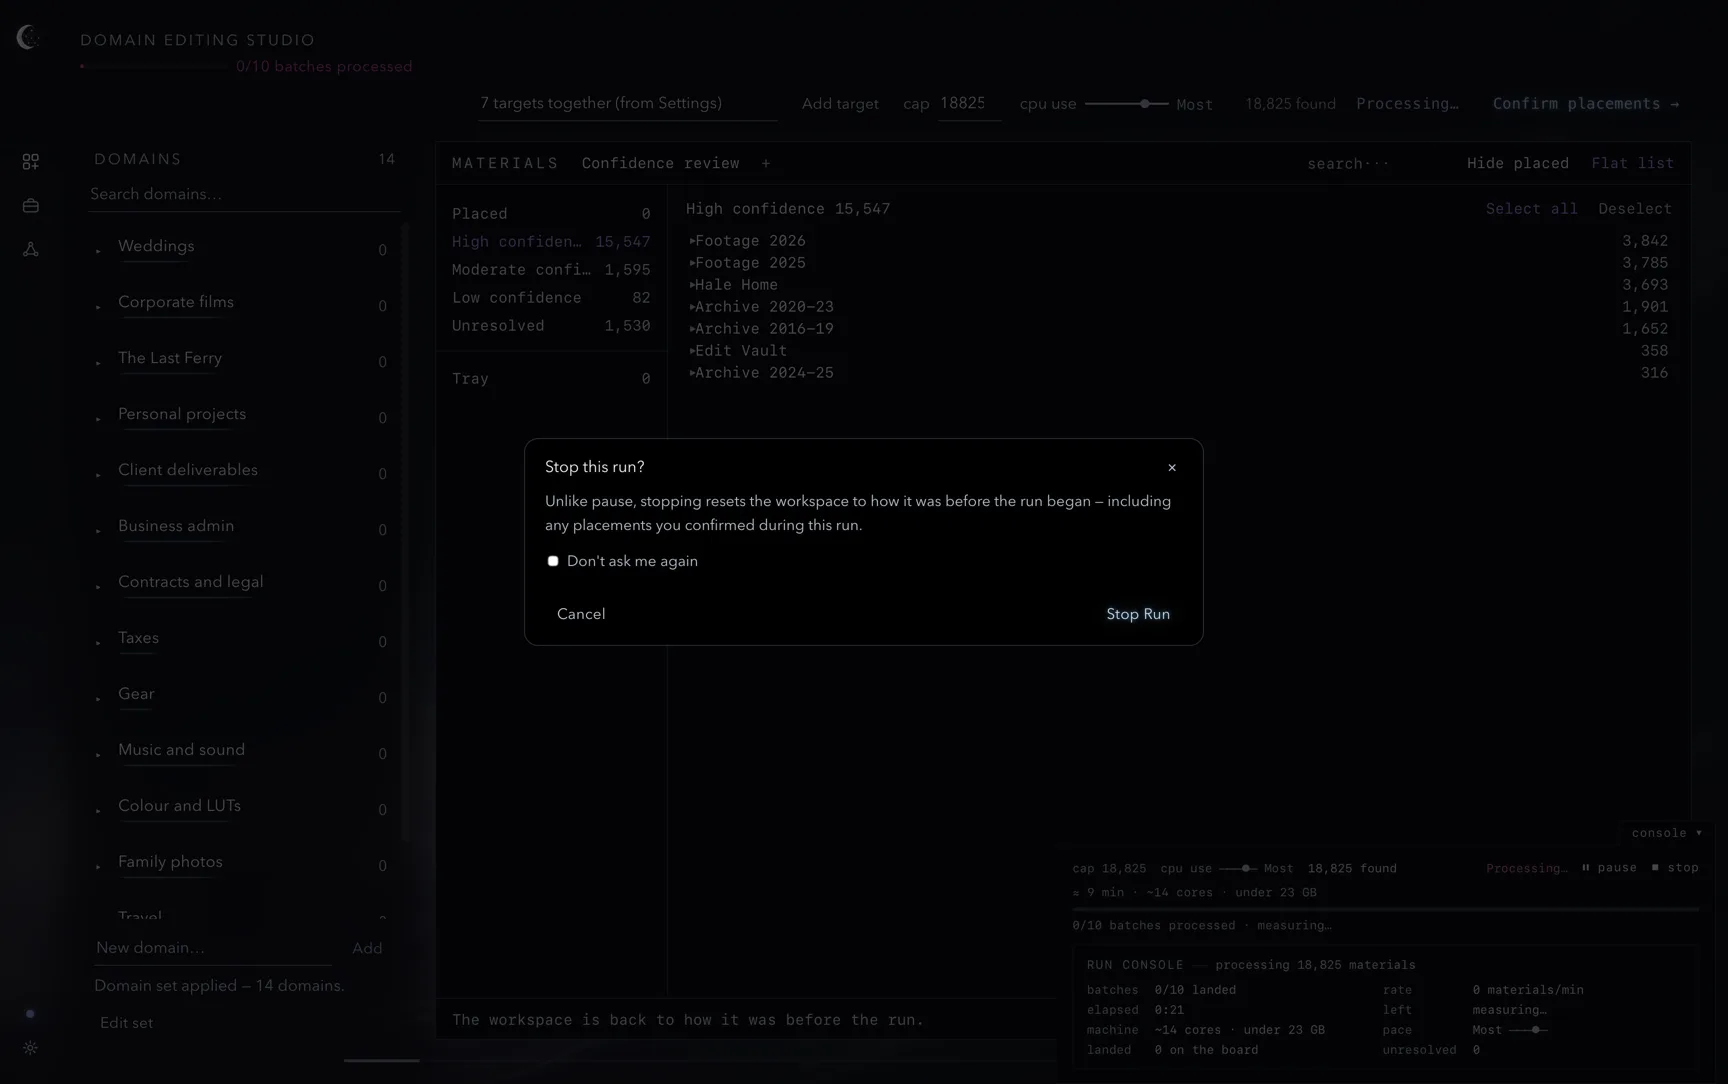
Press stop to end the run. A confirmation sheet appears unless you previously chose Don’t ask me again. When the run has a Before this run restore point, stopping restores that workspace and its saved placements.
The record after a run
When processing finishes, the header returns to Run processing → and the console shows the run record. Review the proposals in the Studio’s confidence tiers, then confirm the placements you want. If the cap limited the run, a banner reports its coverage.
Re-sync and the heartbeat
Between runs, the heartbeat checks your sources for changes. The console shows in sync or the number of changes found, followed by the time since the last completed check, such as last heartbeat 12s ago. Hover for the exact date and time. Click the status to inspect the changes, or press Re-sync to process added and modified materials and record missing paths. Existing placements are preserved.
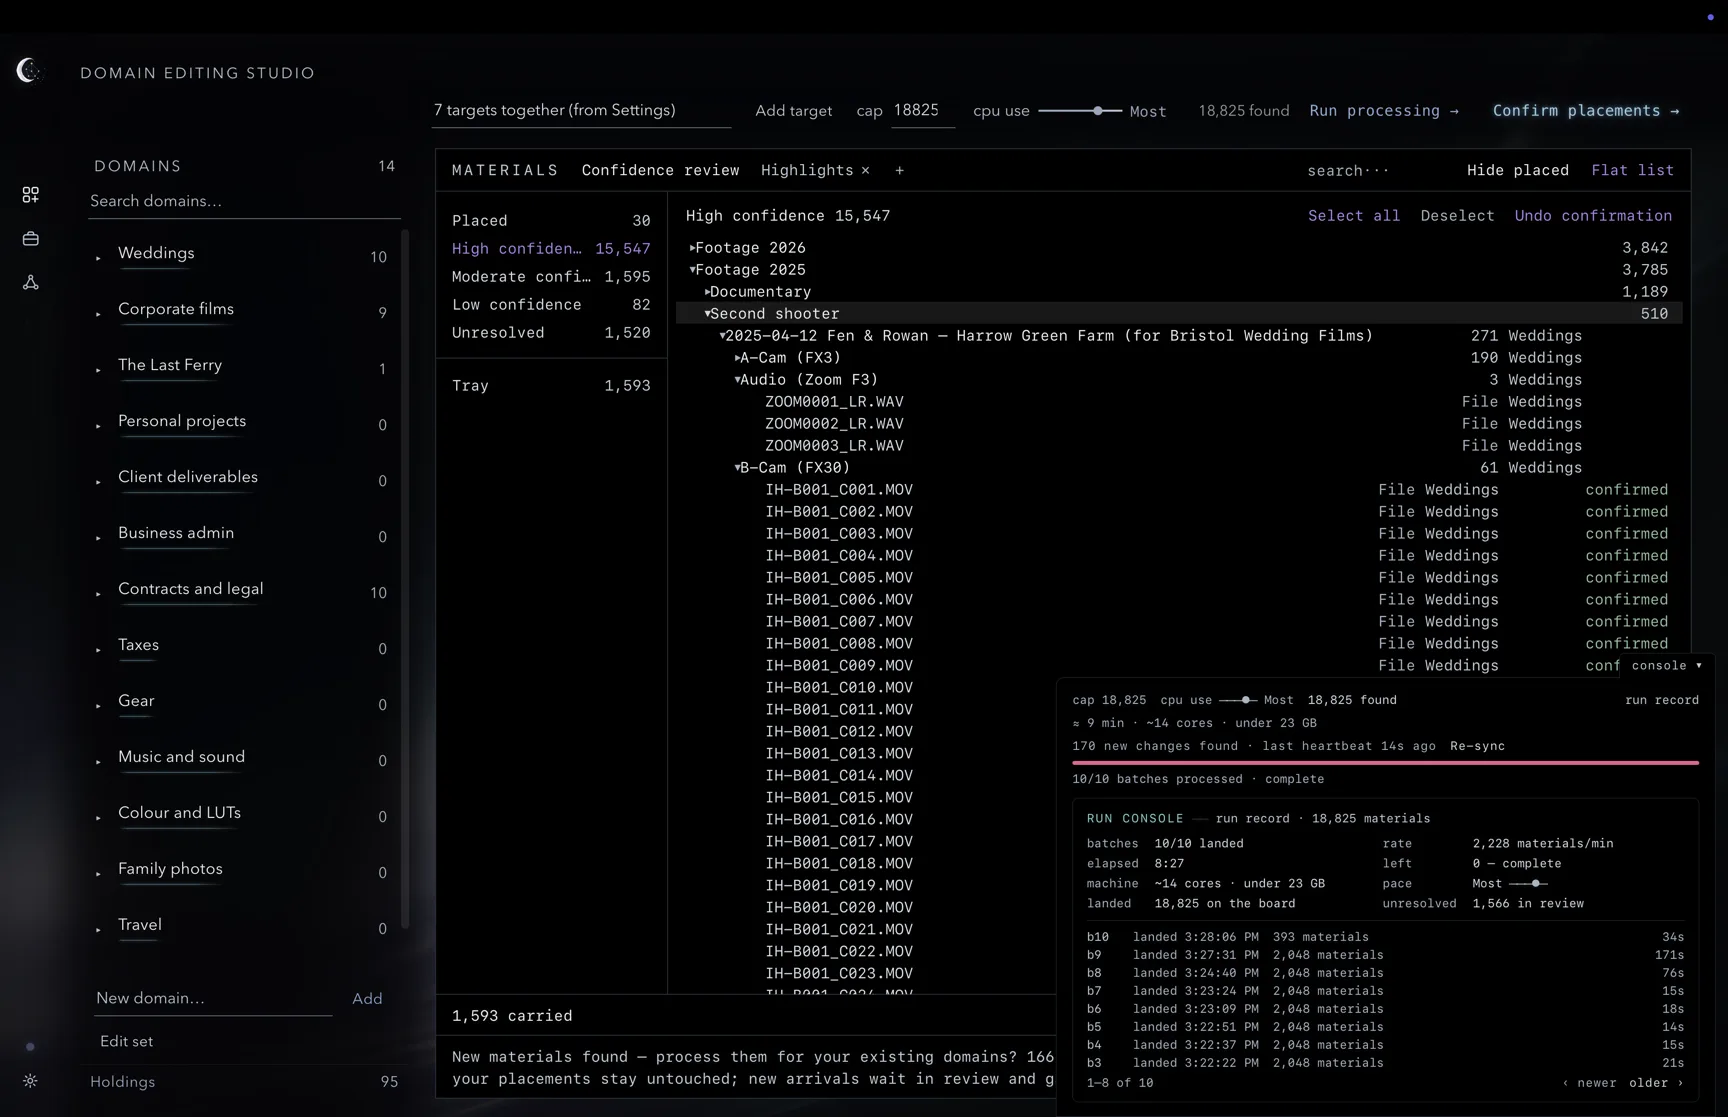
The Studio also offers Process them when changes are found. Not now dismisses that offer until a different set of changes is detected.
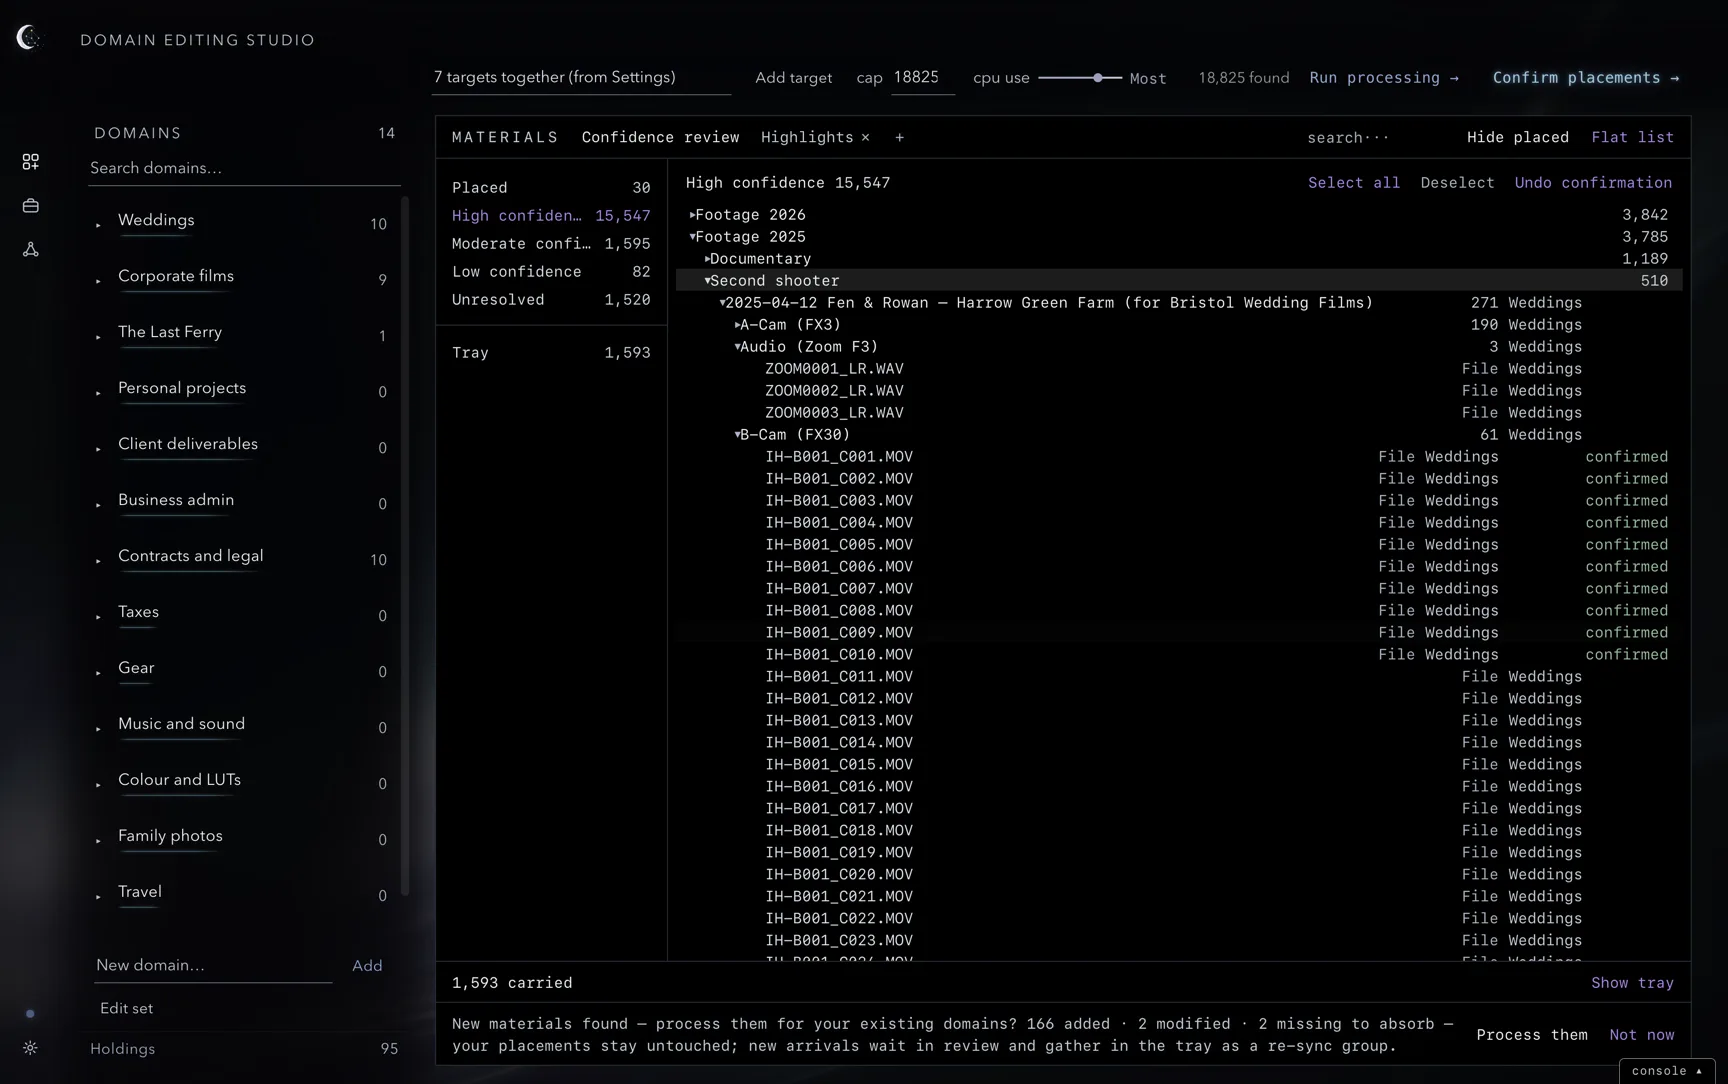
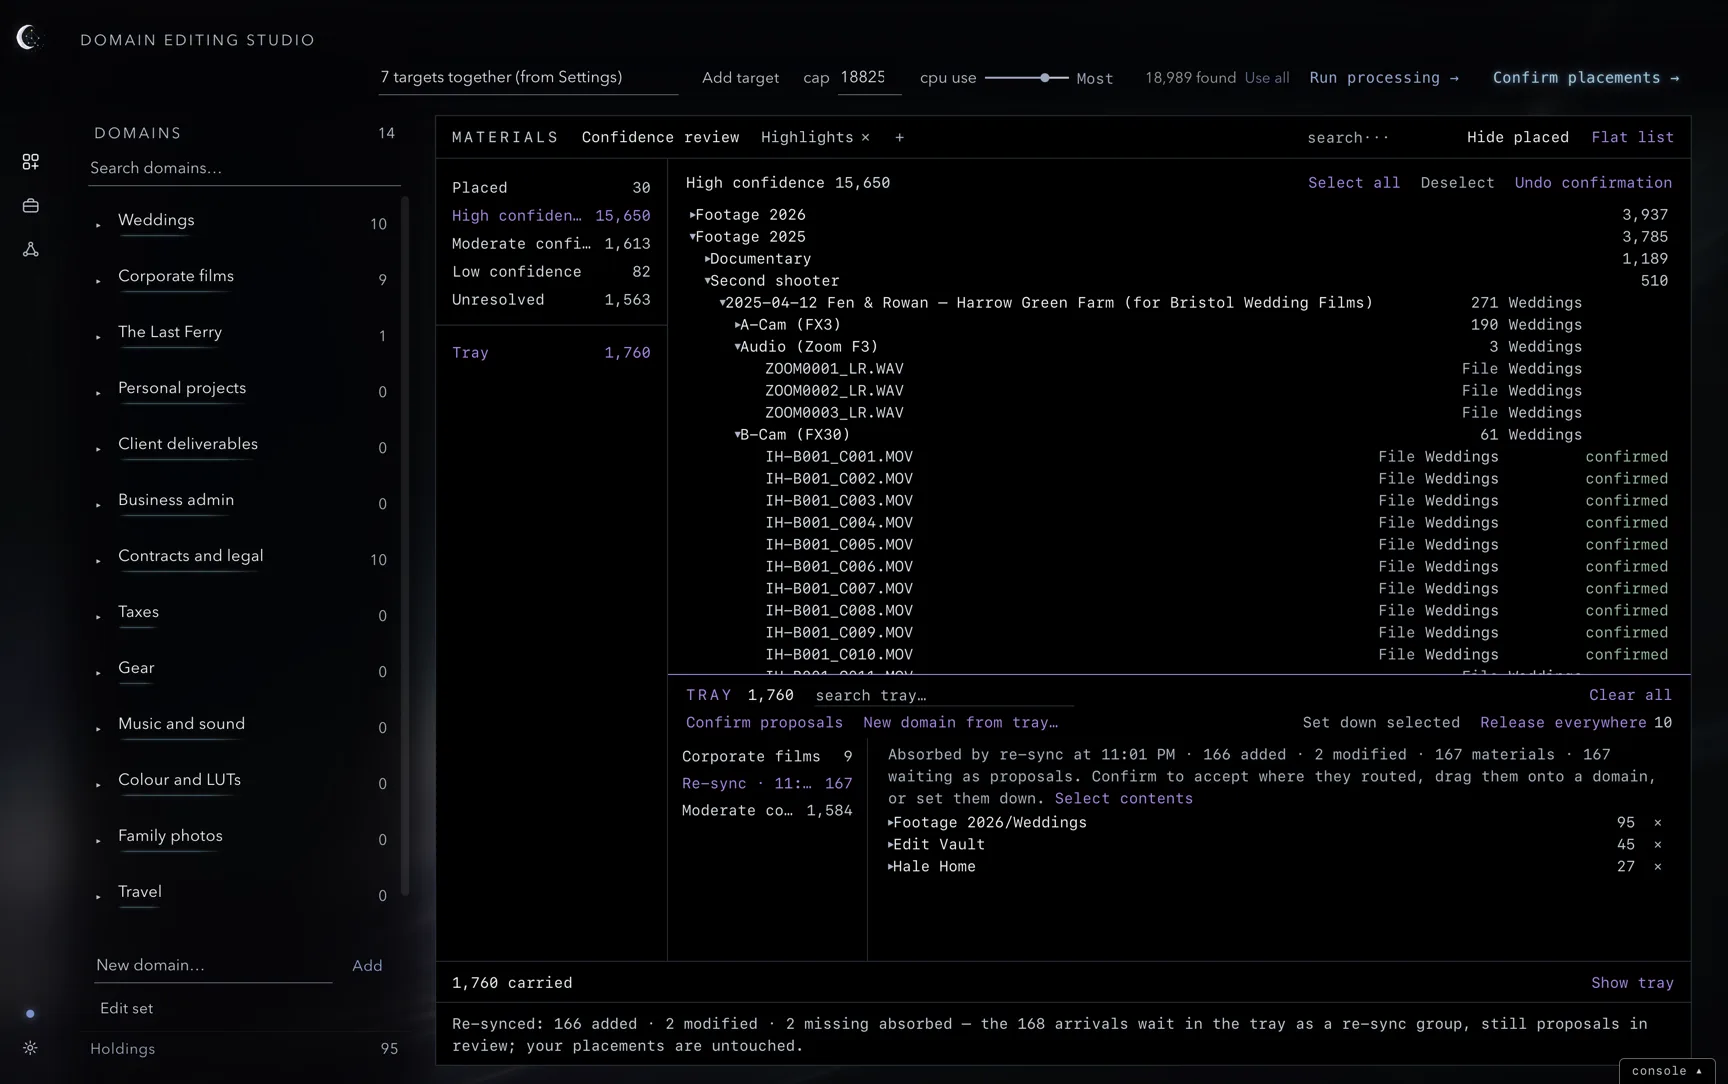
Absorbed changes arrive as proposals in the confidence windows, and every added or modified material is also carried into the tray as one group named Re-sync with the time of the absorb. The group opens the tray so the arrivals can be dealt with together: Confirm proposals accepts where they routed, dragging the group onto a domain places them there, and Set down selected or Clear all leaves them in review as proposals. Missing materials leave the windows and do not join the group.
The re-sync log
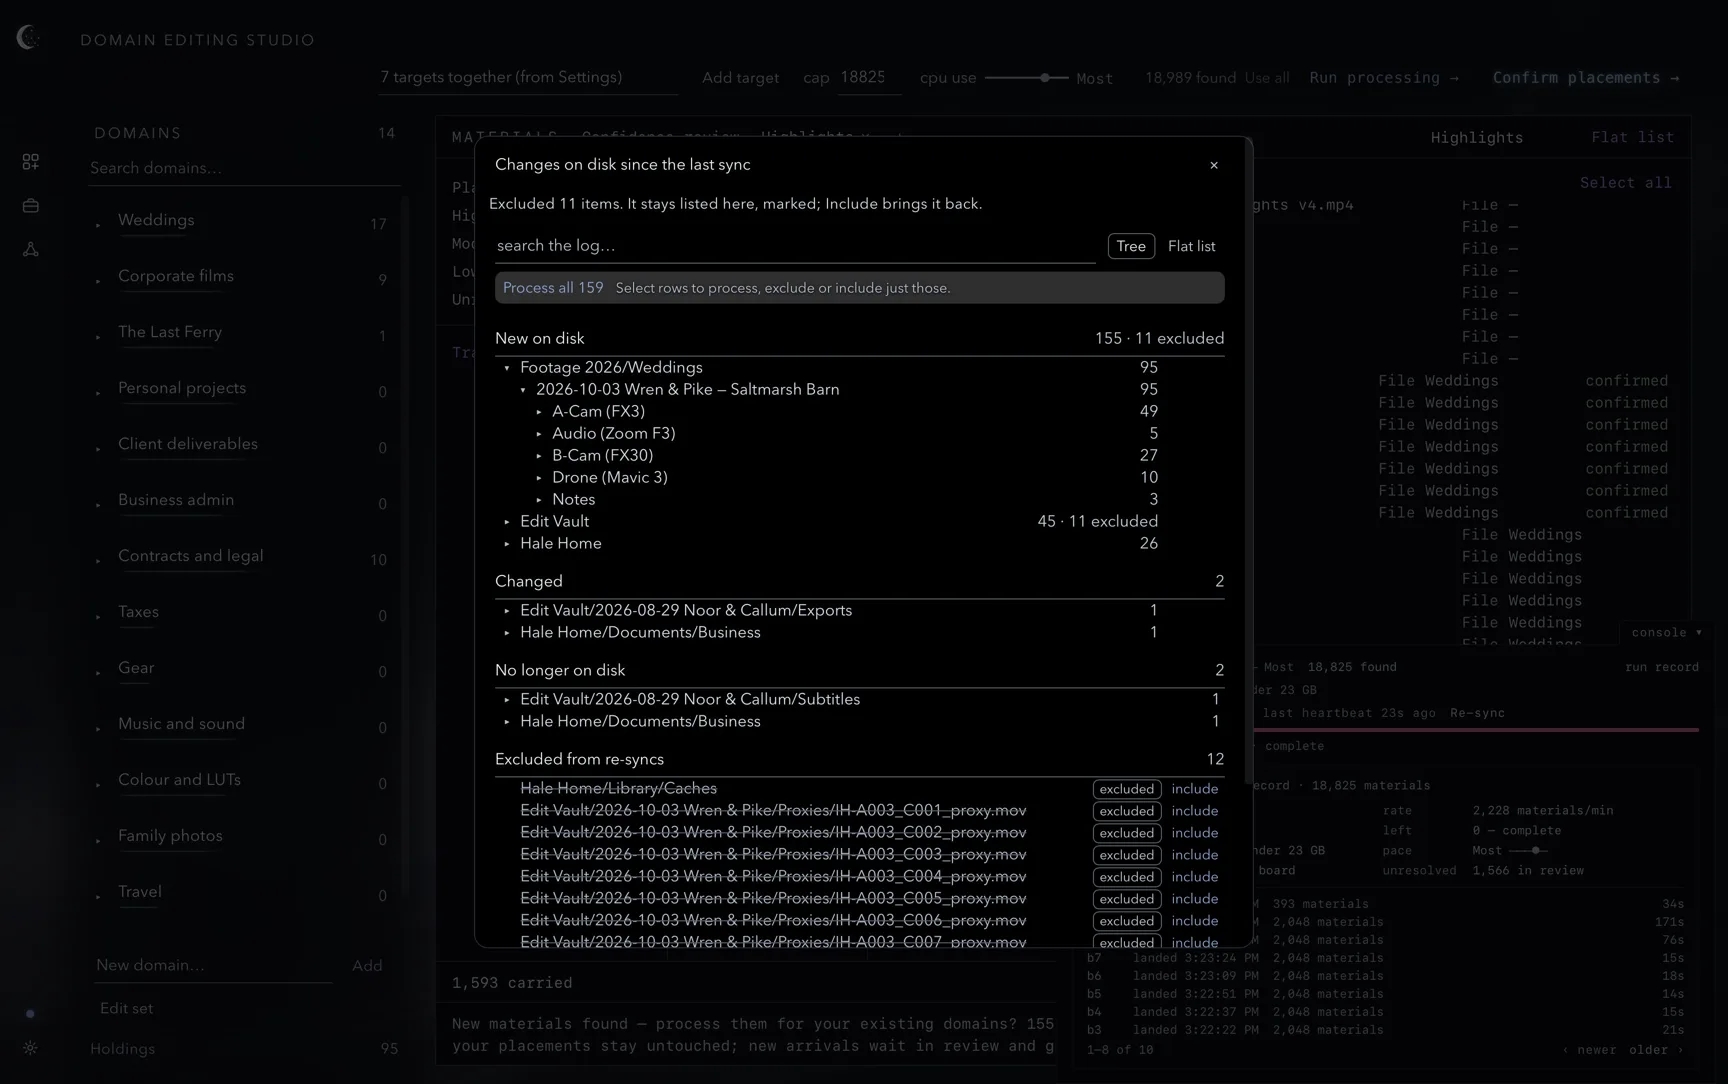
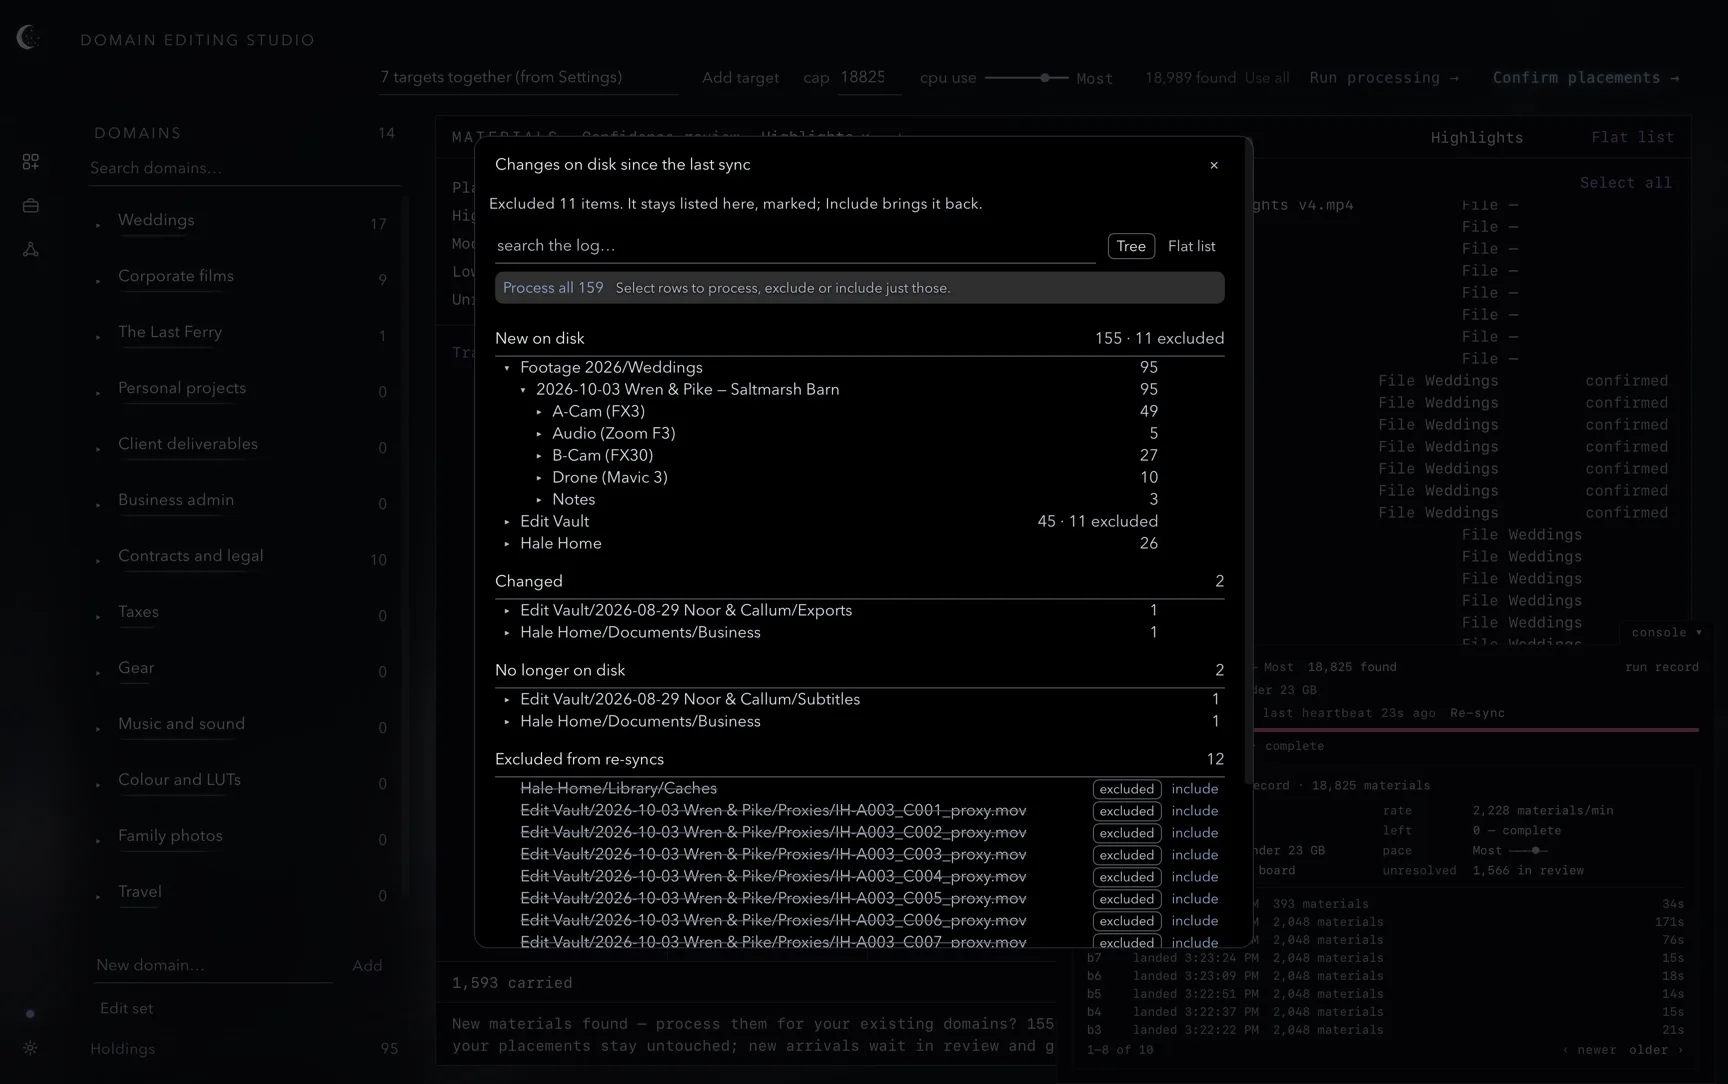
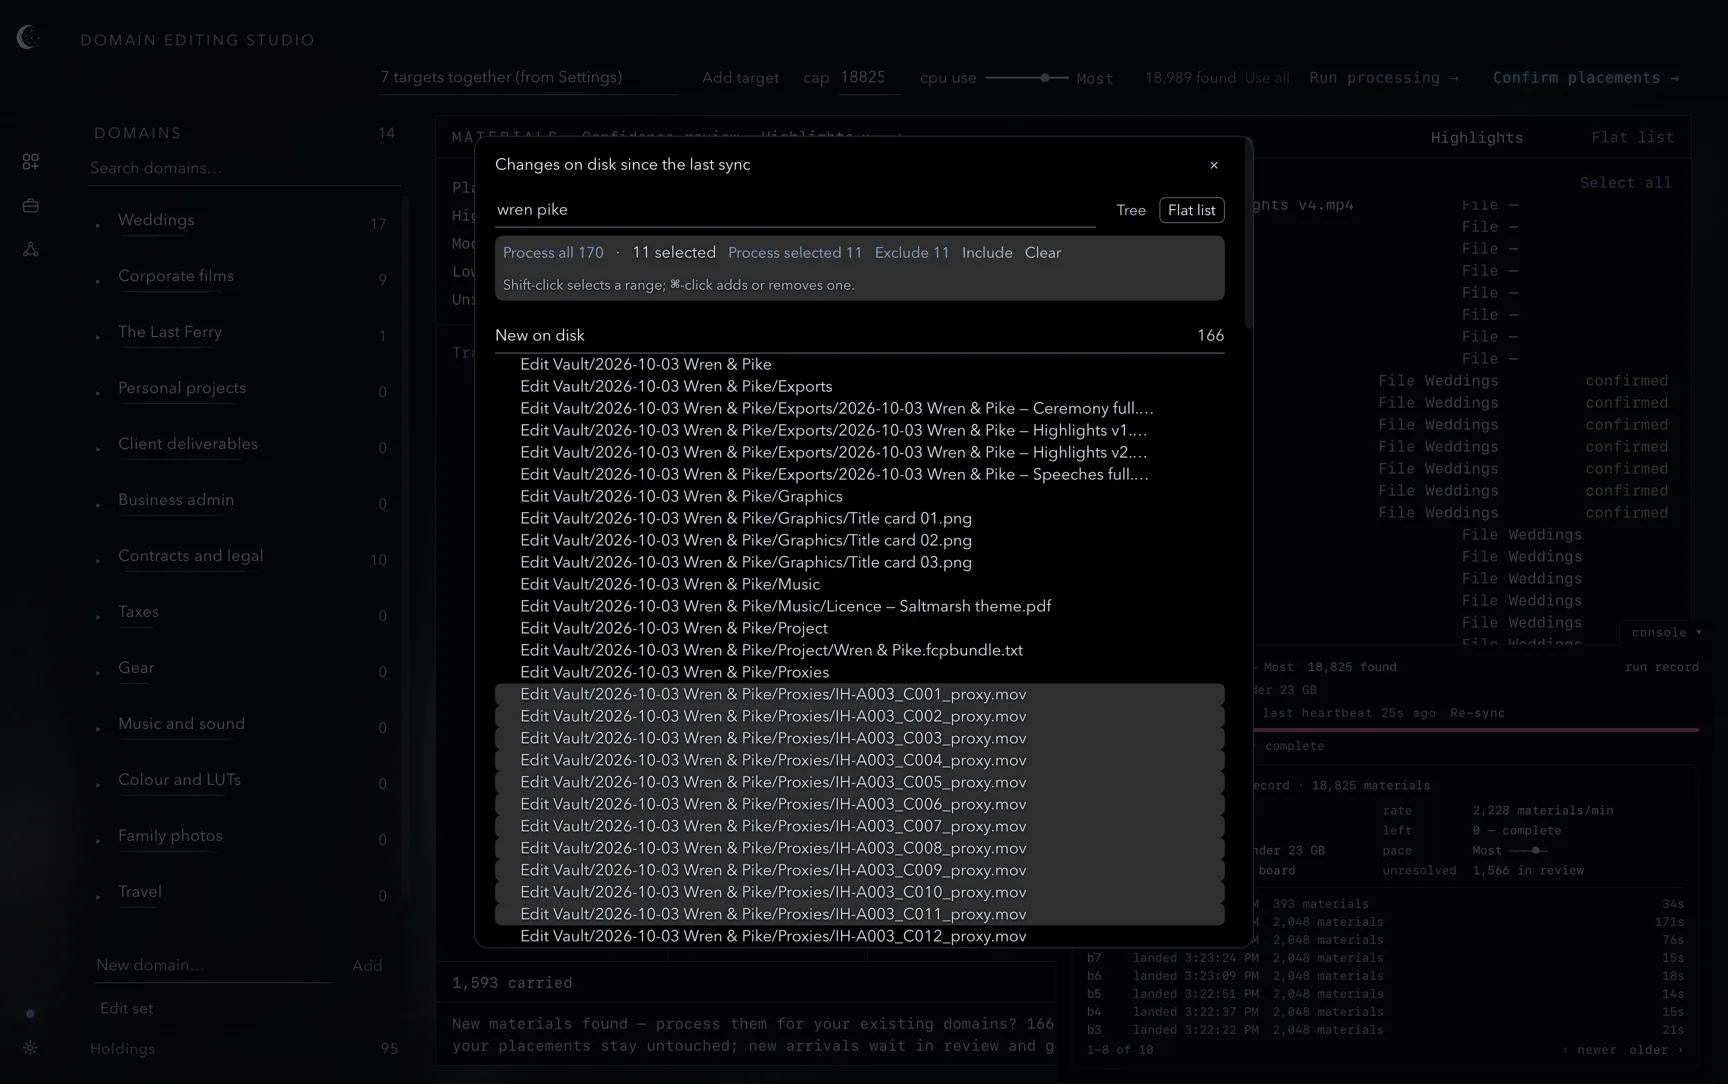
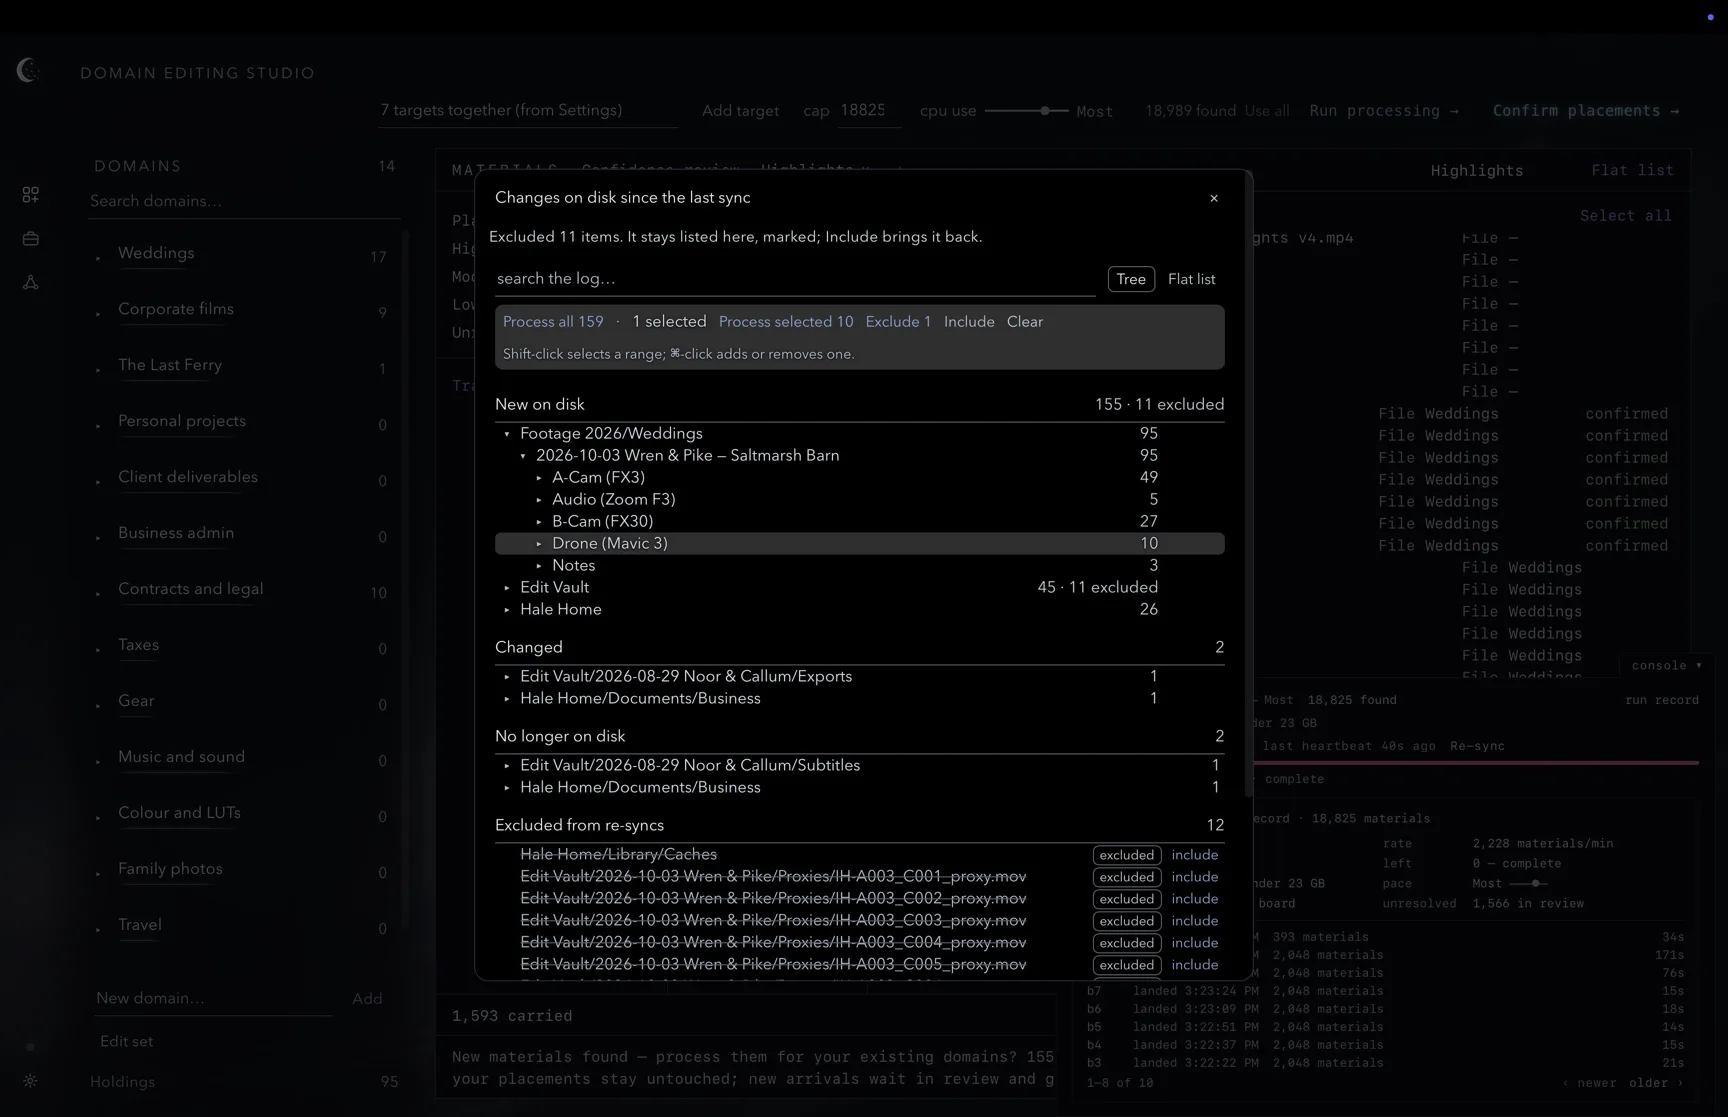
Click the change count in the console, such as 170 new changes found, to open Changes on disk since the last sync. Every path the heartbeat found is listed under New on disk, Changed and No longer on disk, each with its count.
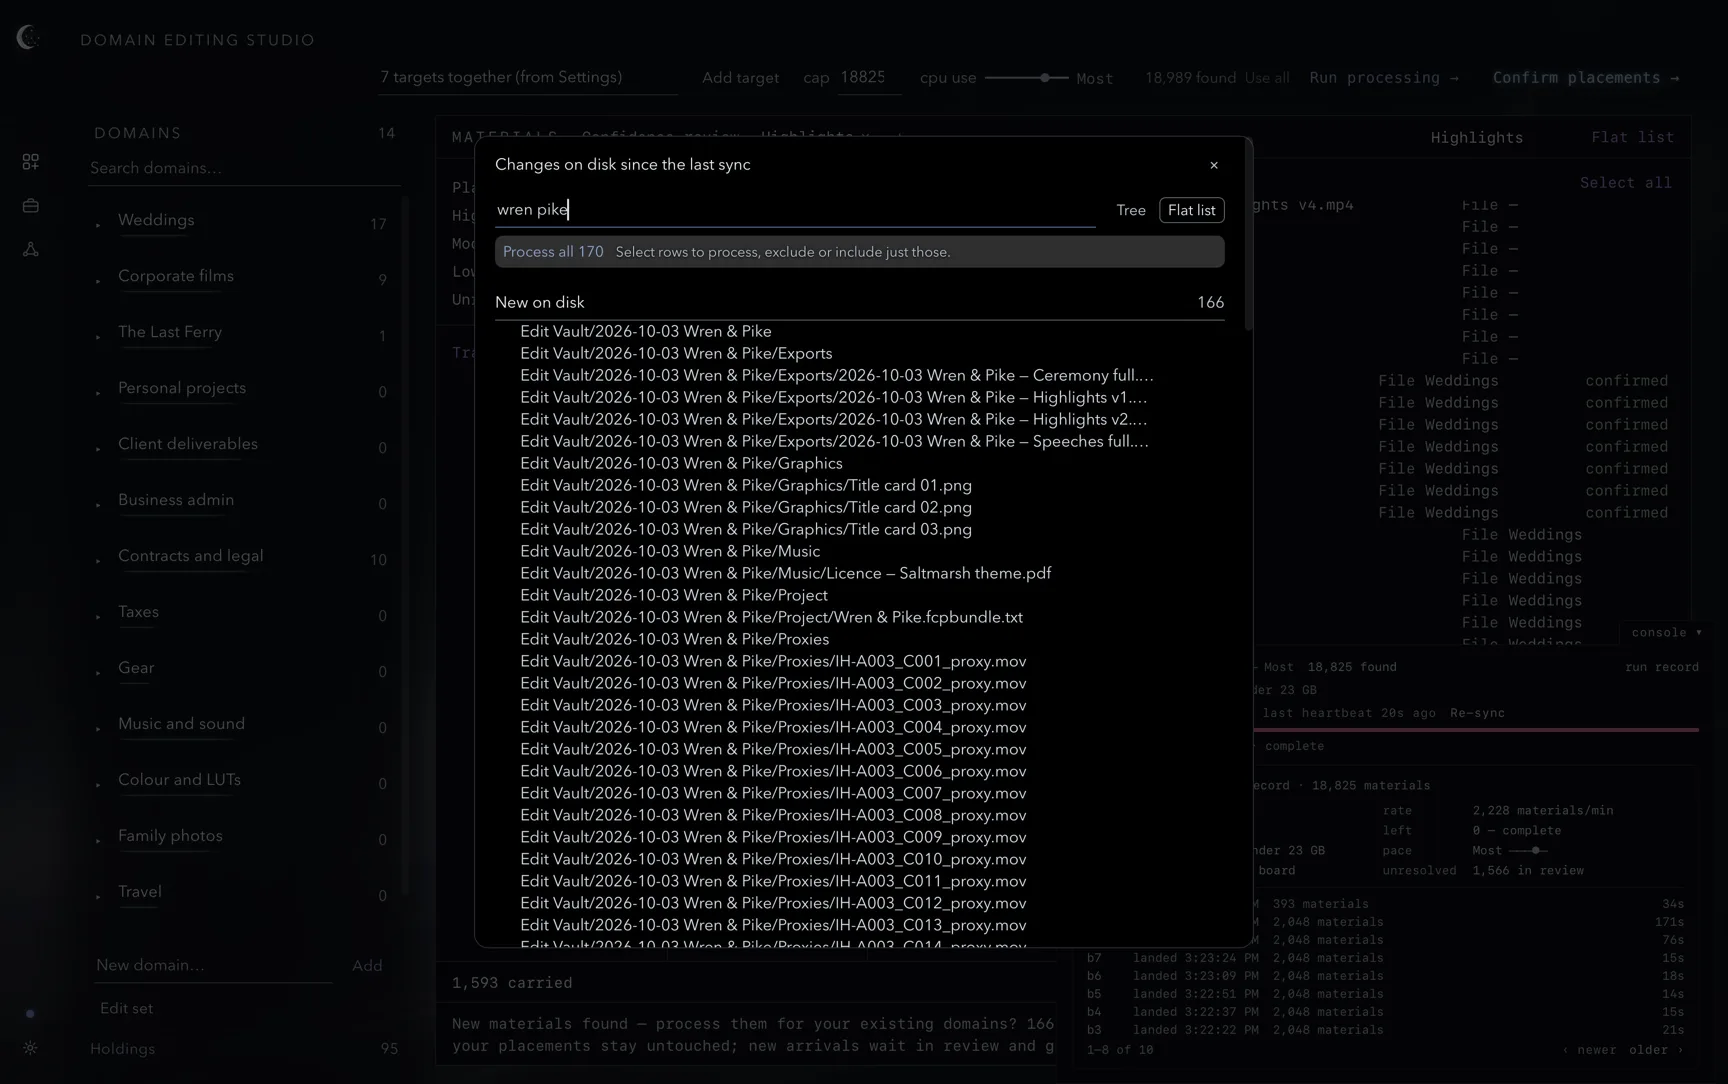
Tree shows the paths folded into their folders, each folder with the number of files inside; Flat list shows every path on its own line. Lunaea remembers the view you last chose. Type in search the log… to narrow either view to matching paths; searching… appears while a long log is being filtered.
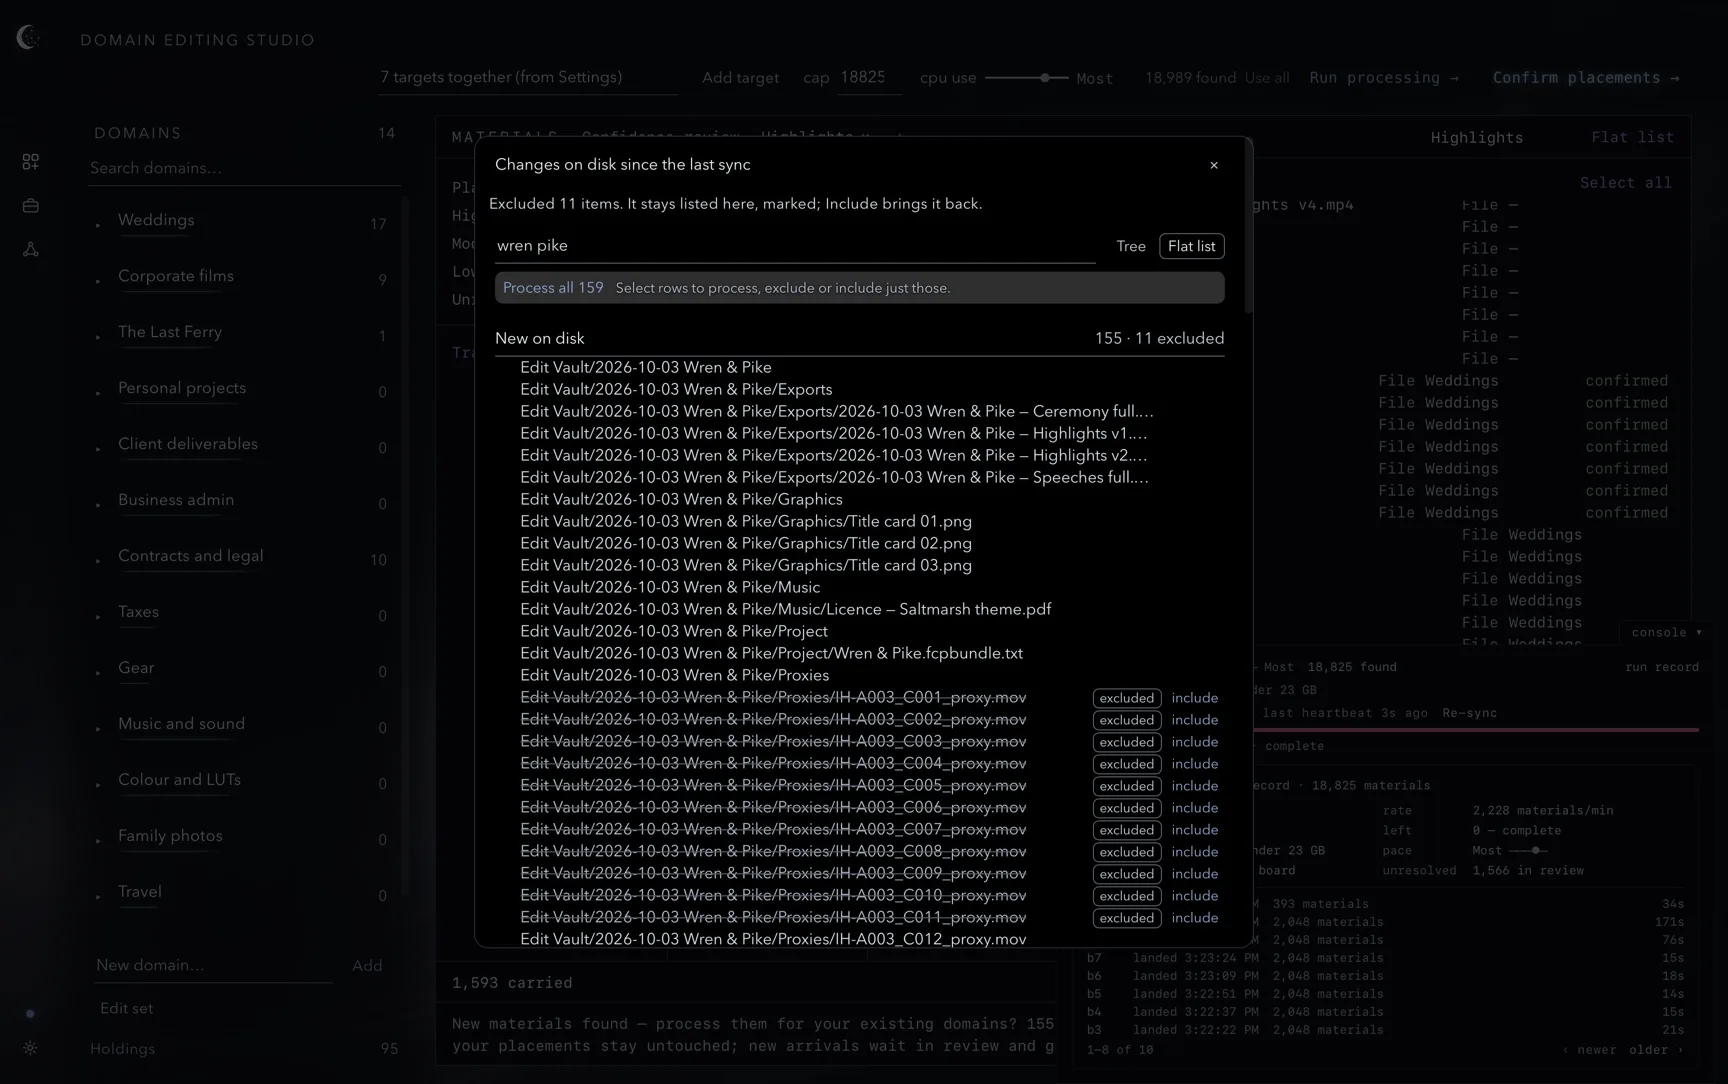
Hover over a new or changed row and choose exclude to keep that file or folder out of re-syncs and runs. The row stays in the log, struck through and marked excluded, with include beside it to bring it back. Excluding a folder covers everything inside it; a folder with only some of its contents excluded shows how many. Paths under No longer on disk are already gone and cannot be excluded.
To act on many rows at once, click one row, then Shift-click another to select everything between them; ⌘-click adds or removes a single row. The header shows how many are selected, with Process selected, Exclude and Include and their counts, and Clear. It stays in view while the list scrolls.
Everything excluded is gathered under Excluded from re-syncs at the end of the log, each entry with include. These are the same excluded paths listed in Settings ▸ Sources: an exclusion made in either place appears in both, and can be undone in either.
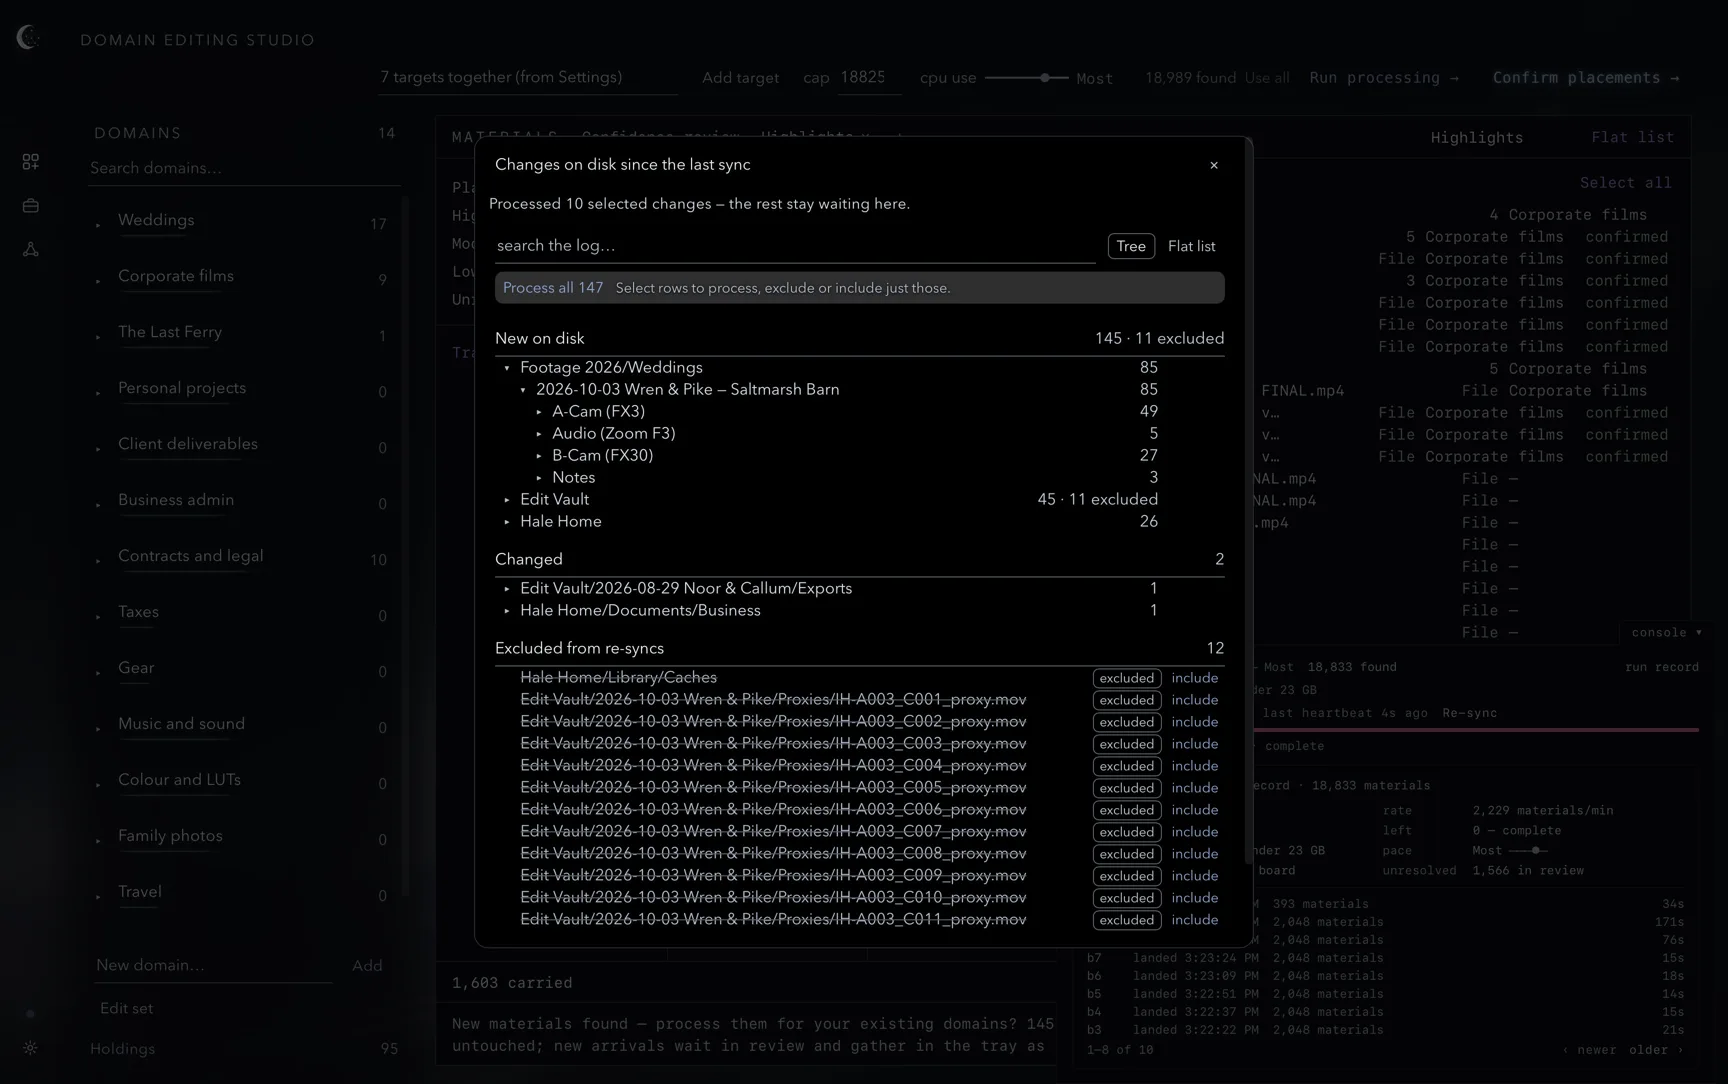
Process selected processes only the rows you have selected, a folder row covering everything inside it; the rest stay listed and waiting. Process all, always in the header beside it, processes everything that is not excluded. Either way your placements are untouched, and what arrives gathers in the tray as a Re-sync group. The Heartbeat checkbox at the foot of the log turns the background check on or off.
Growing the set and processing again
Add a domain through New domain… and Add, or through Edit set. To add a subdomain, expand its parent in the sidebar, type a name into New subdomain… and press Add. Then press Run processing to assess your existing materials against what you added. Earlier proposals and confirmed placements are preserved, and the new domain stays at zero until materials are placed into it.
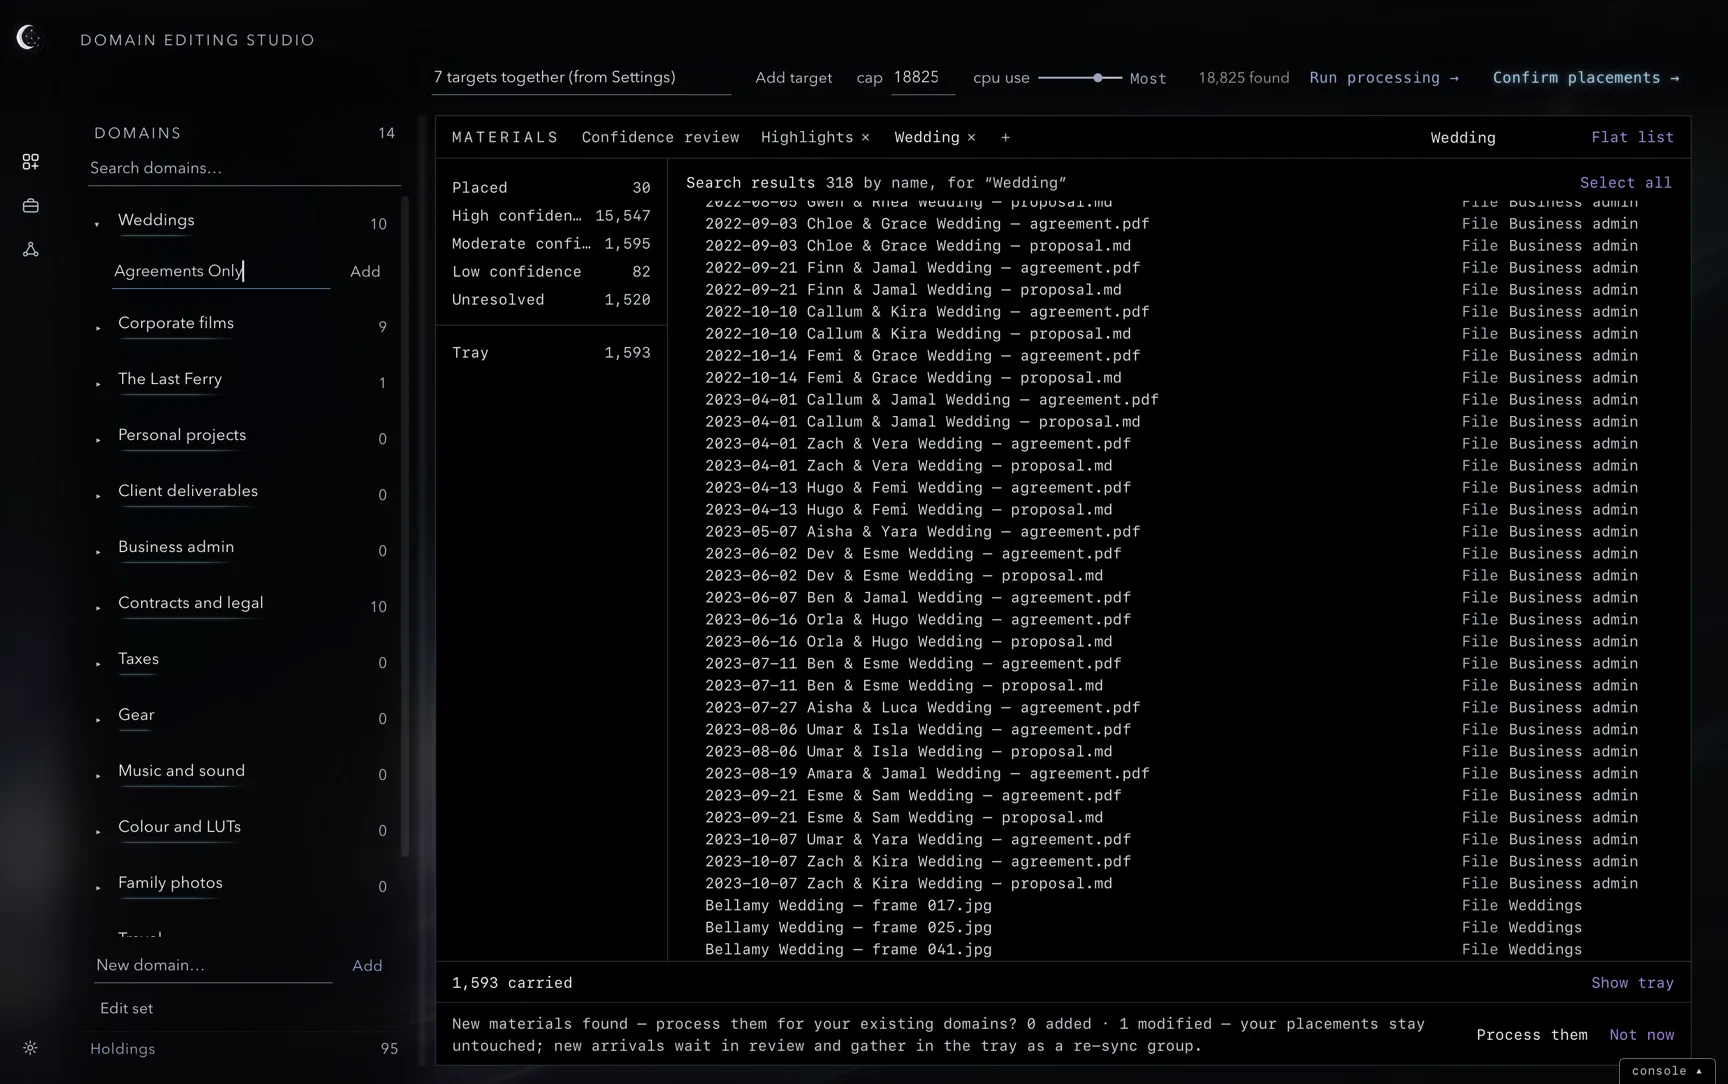
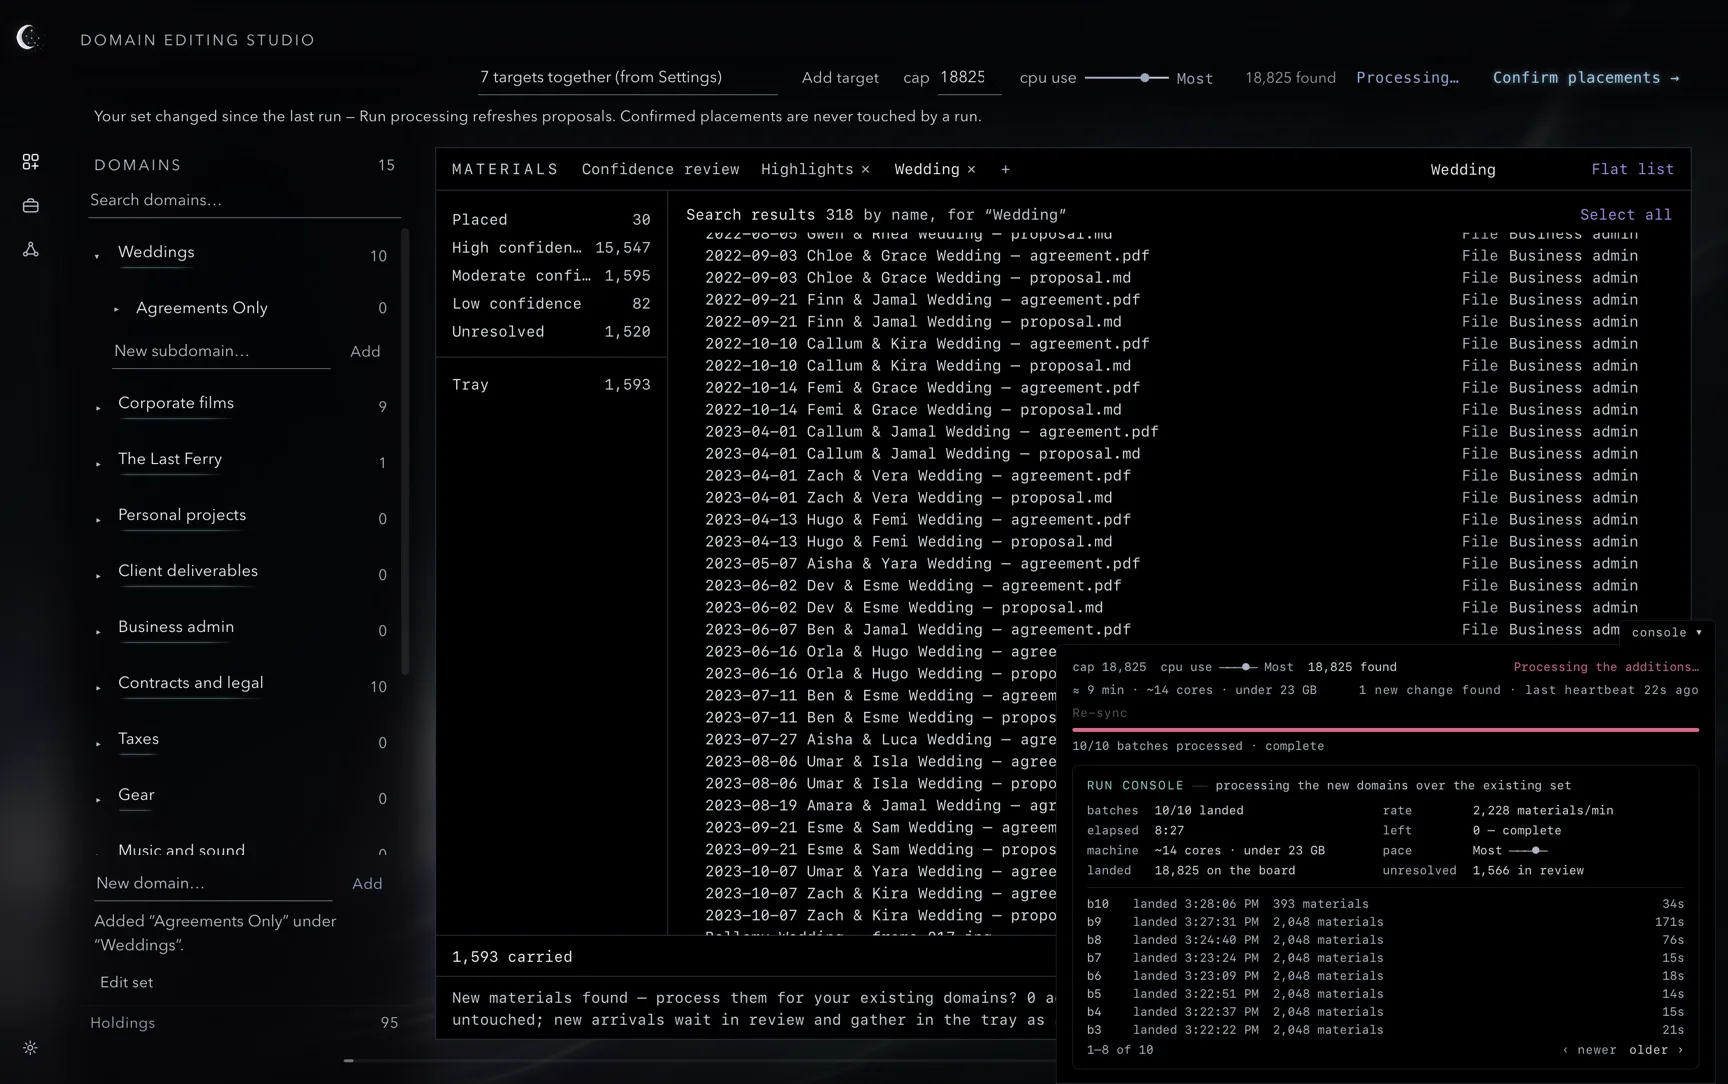
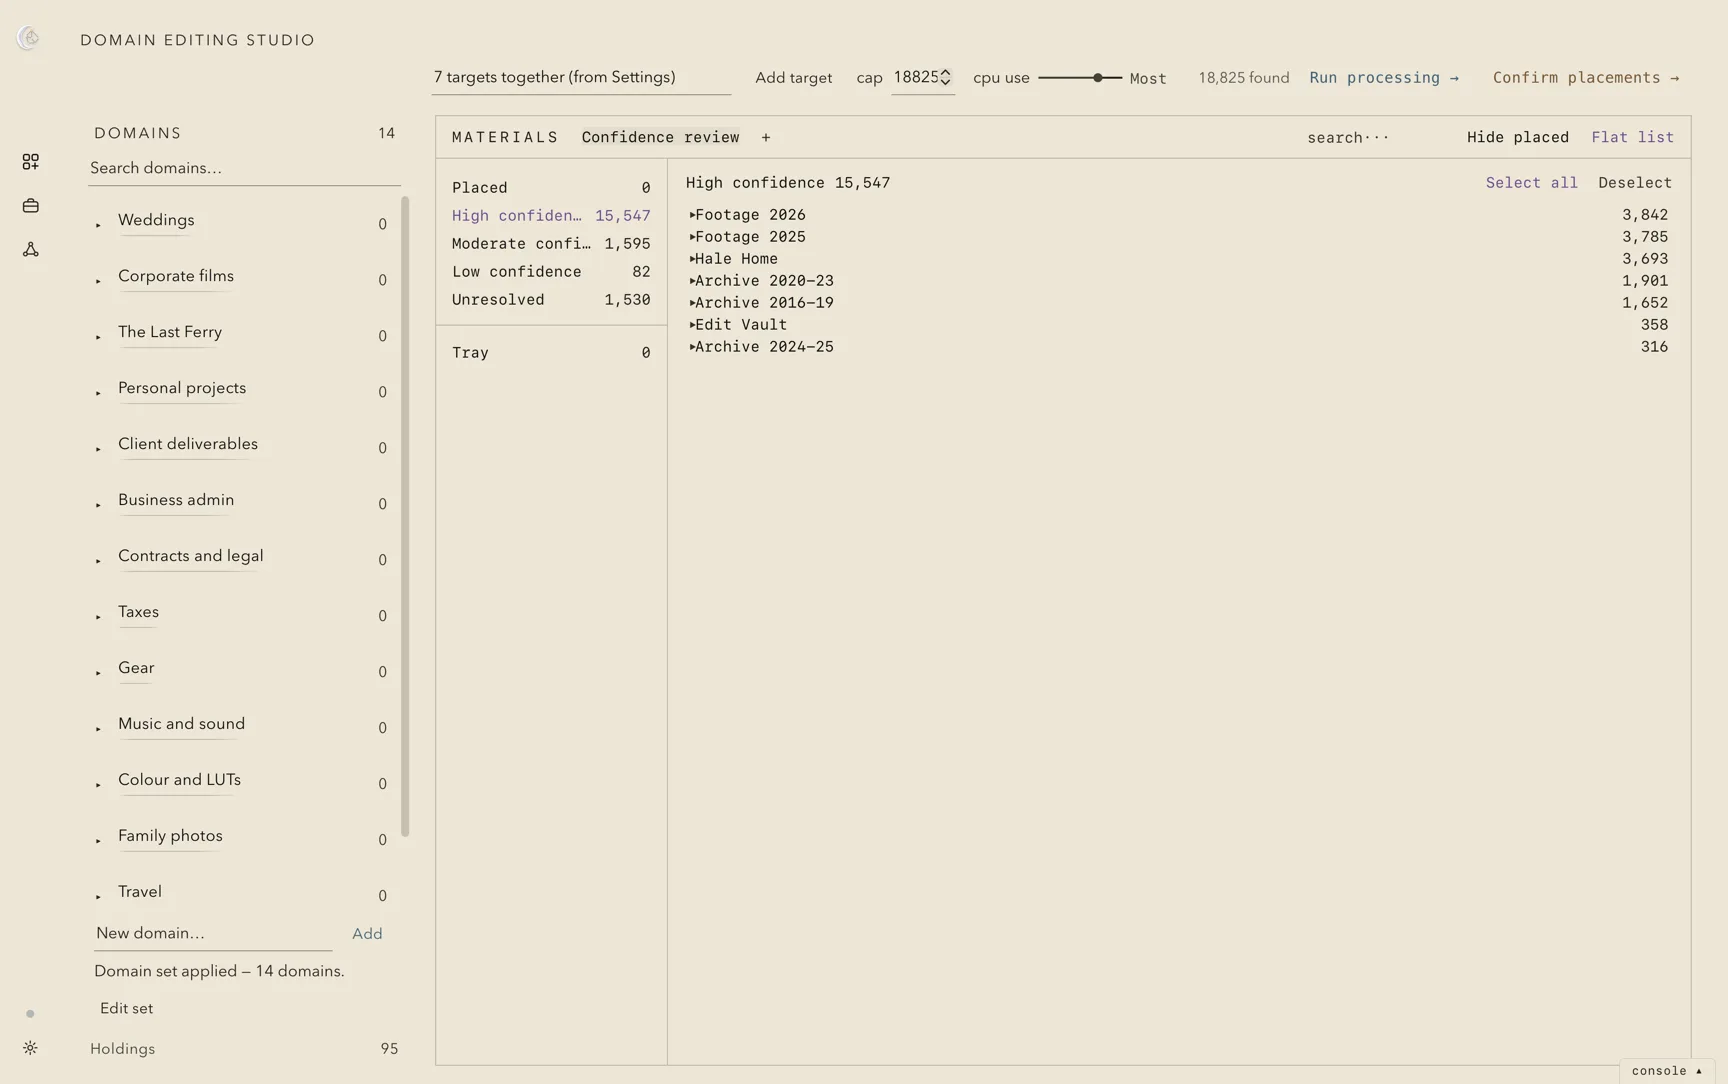
A run for additions reads only what it needs, so it is short: here, 37 seconds over 18,825 materials. Afterwards, open the new domain to see what Lunaea proposes for it. The name is what it works from: Agreements Only gathers the signed agreements from wedding jobs, corporate jobs and an interview series alike, whichever domain each was first proposed for.
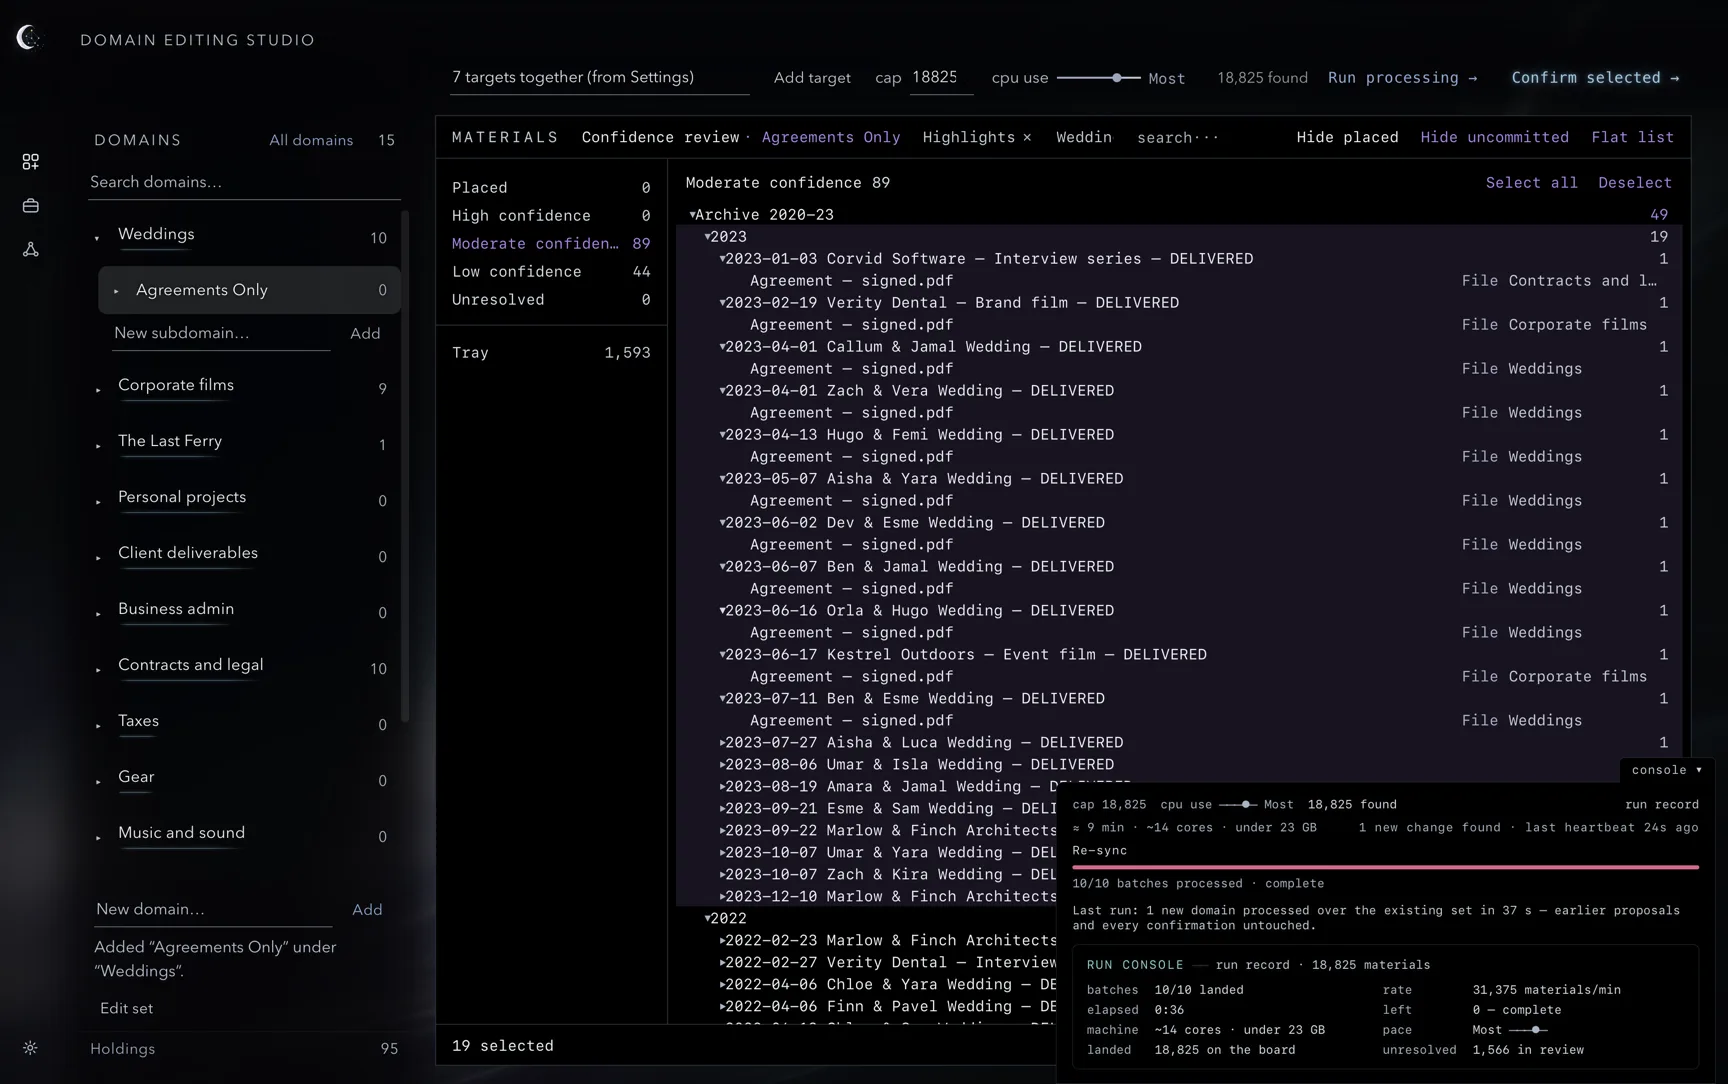
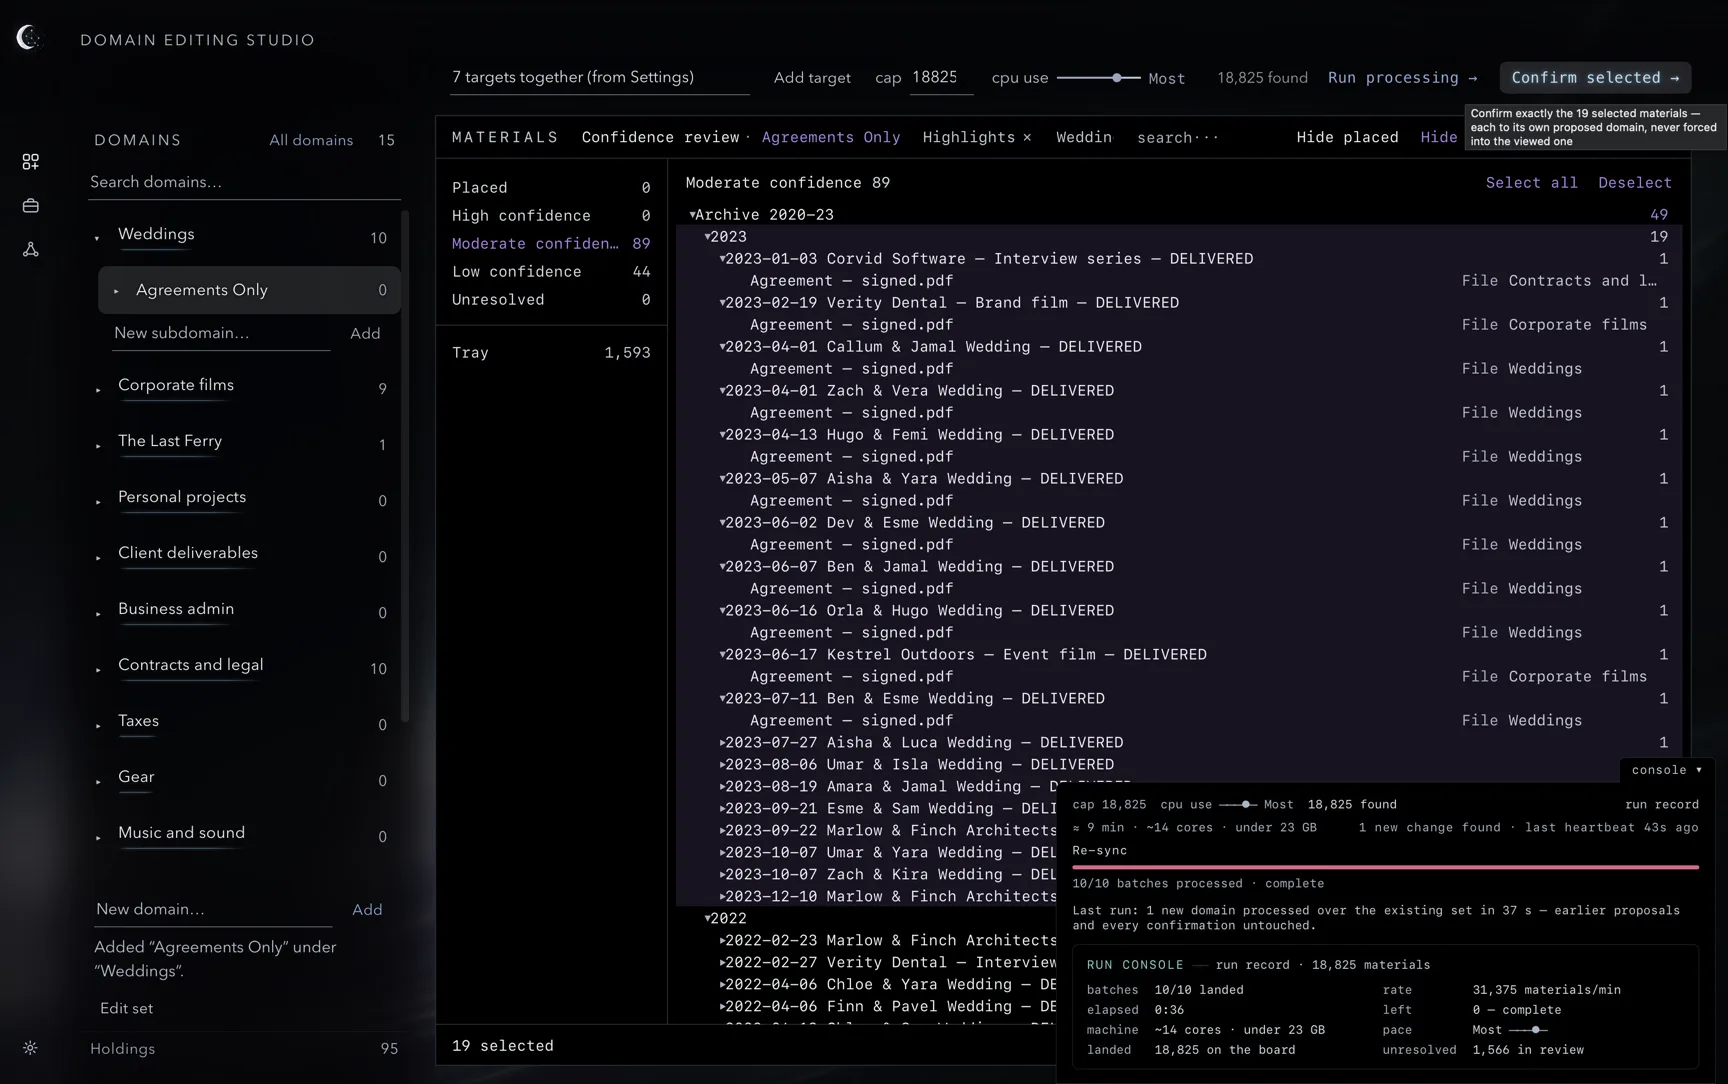
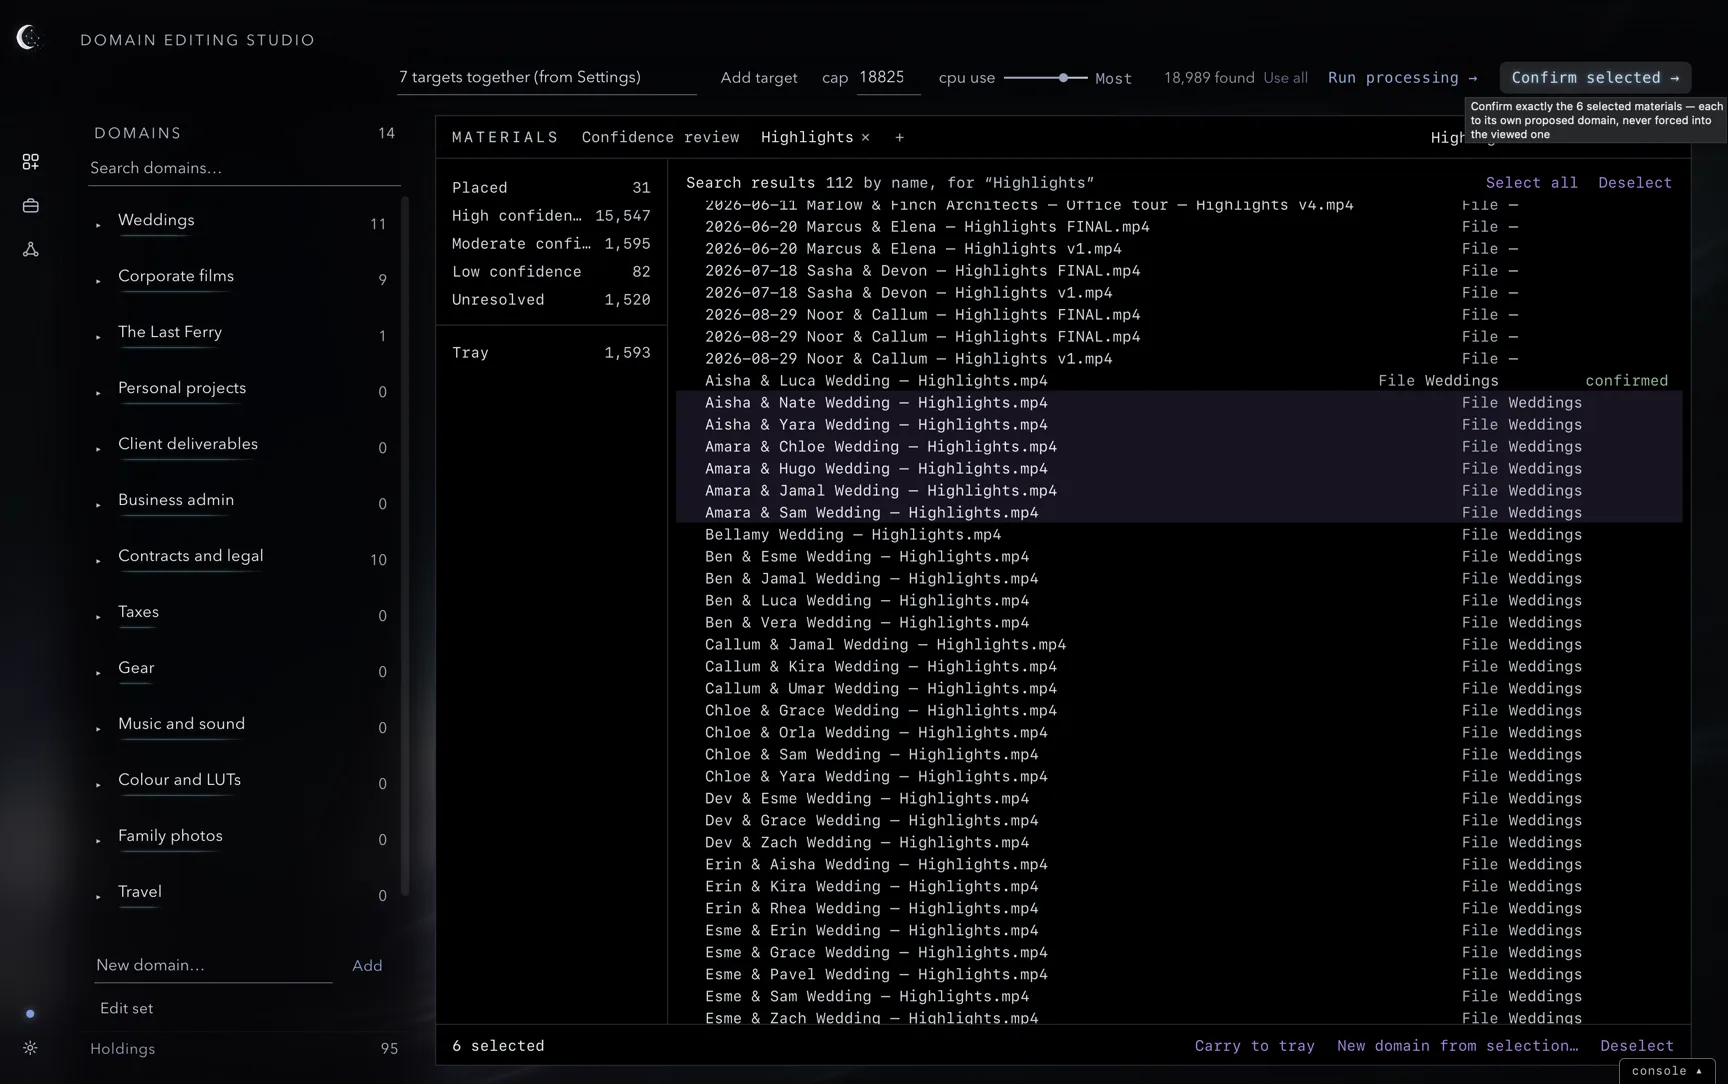
Select the proposals you agree with and press Confirm selected: they are placed into the domain you are viewing. A material already placed in another domain stays there too; it now belongs to both.
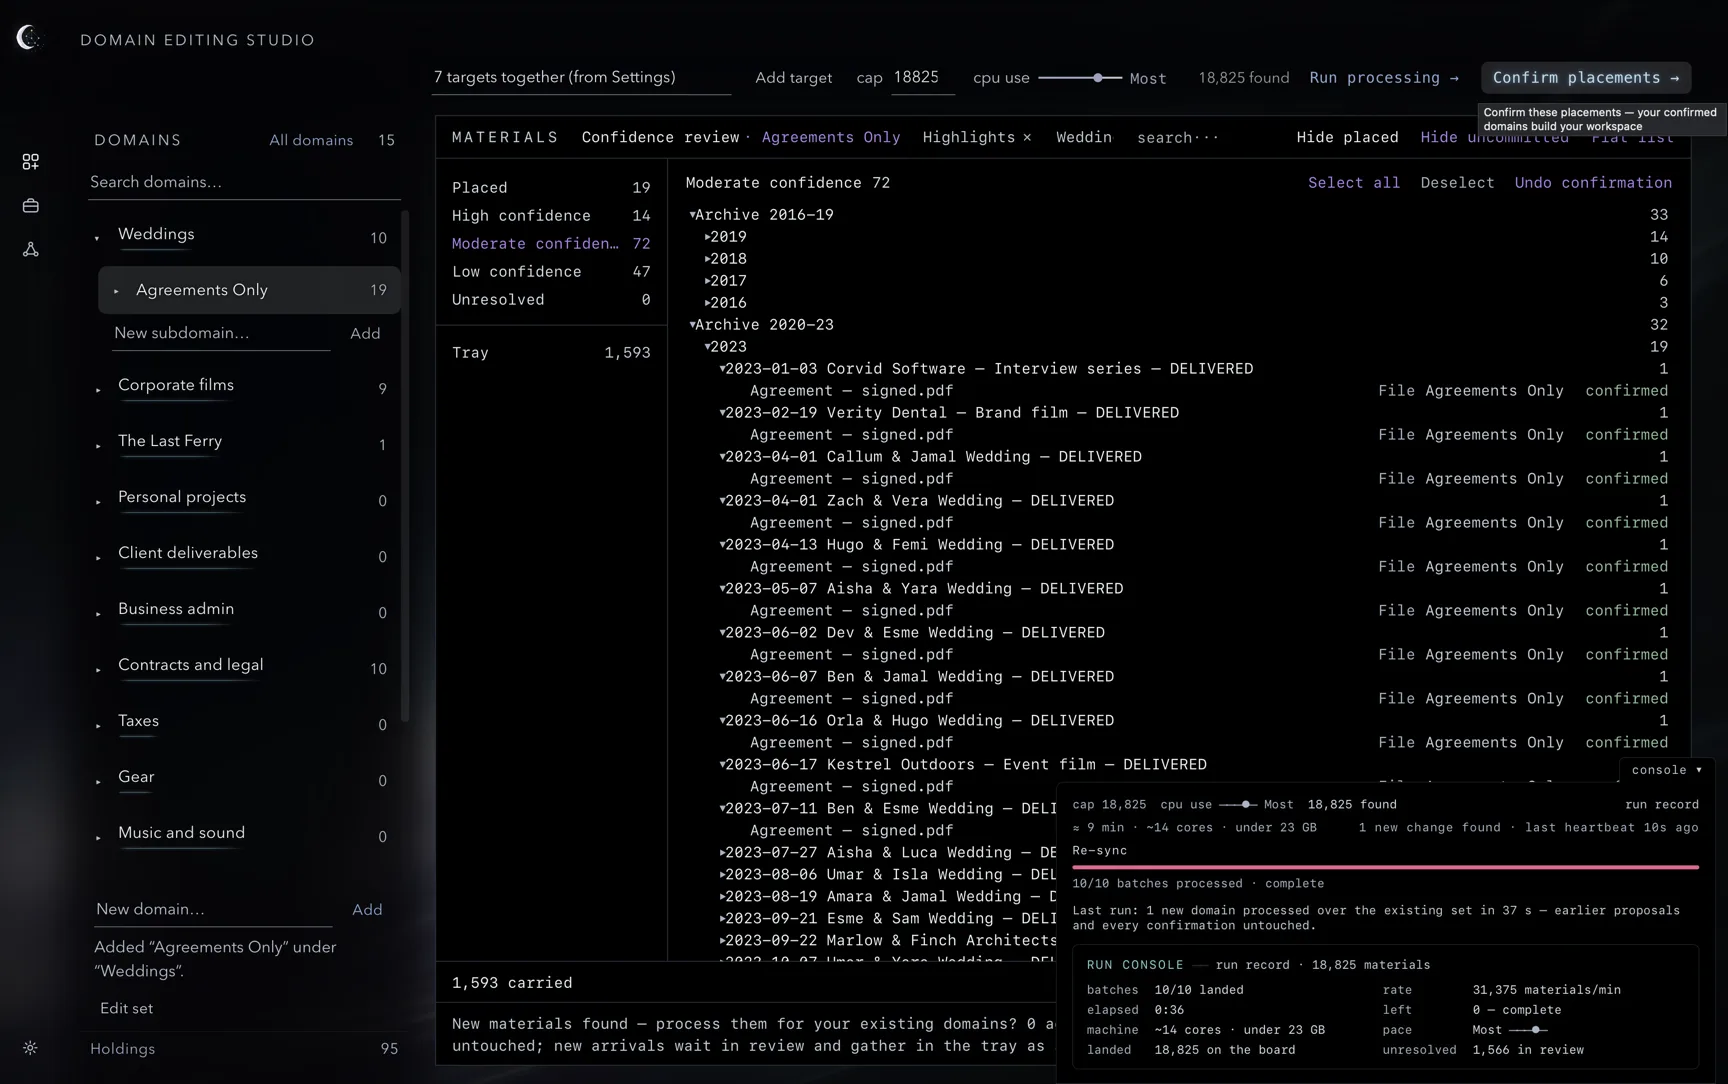
There are two ways to fill a new domain: run processing again, or place materials into it by hand. Chapter 4 covers both.
The Domain Editing Studio
The Studio presents processing results for review. Browse domains and confidence tiers, inspect materials, and confirm or place them into your domains.
The page
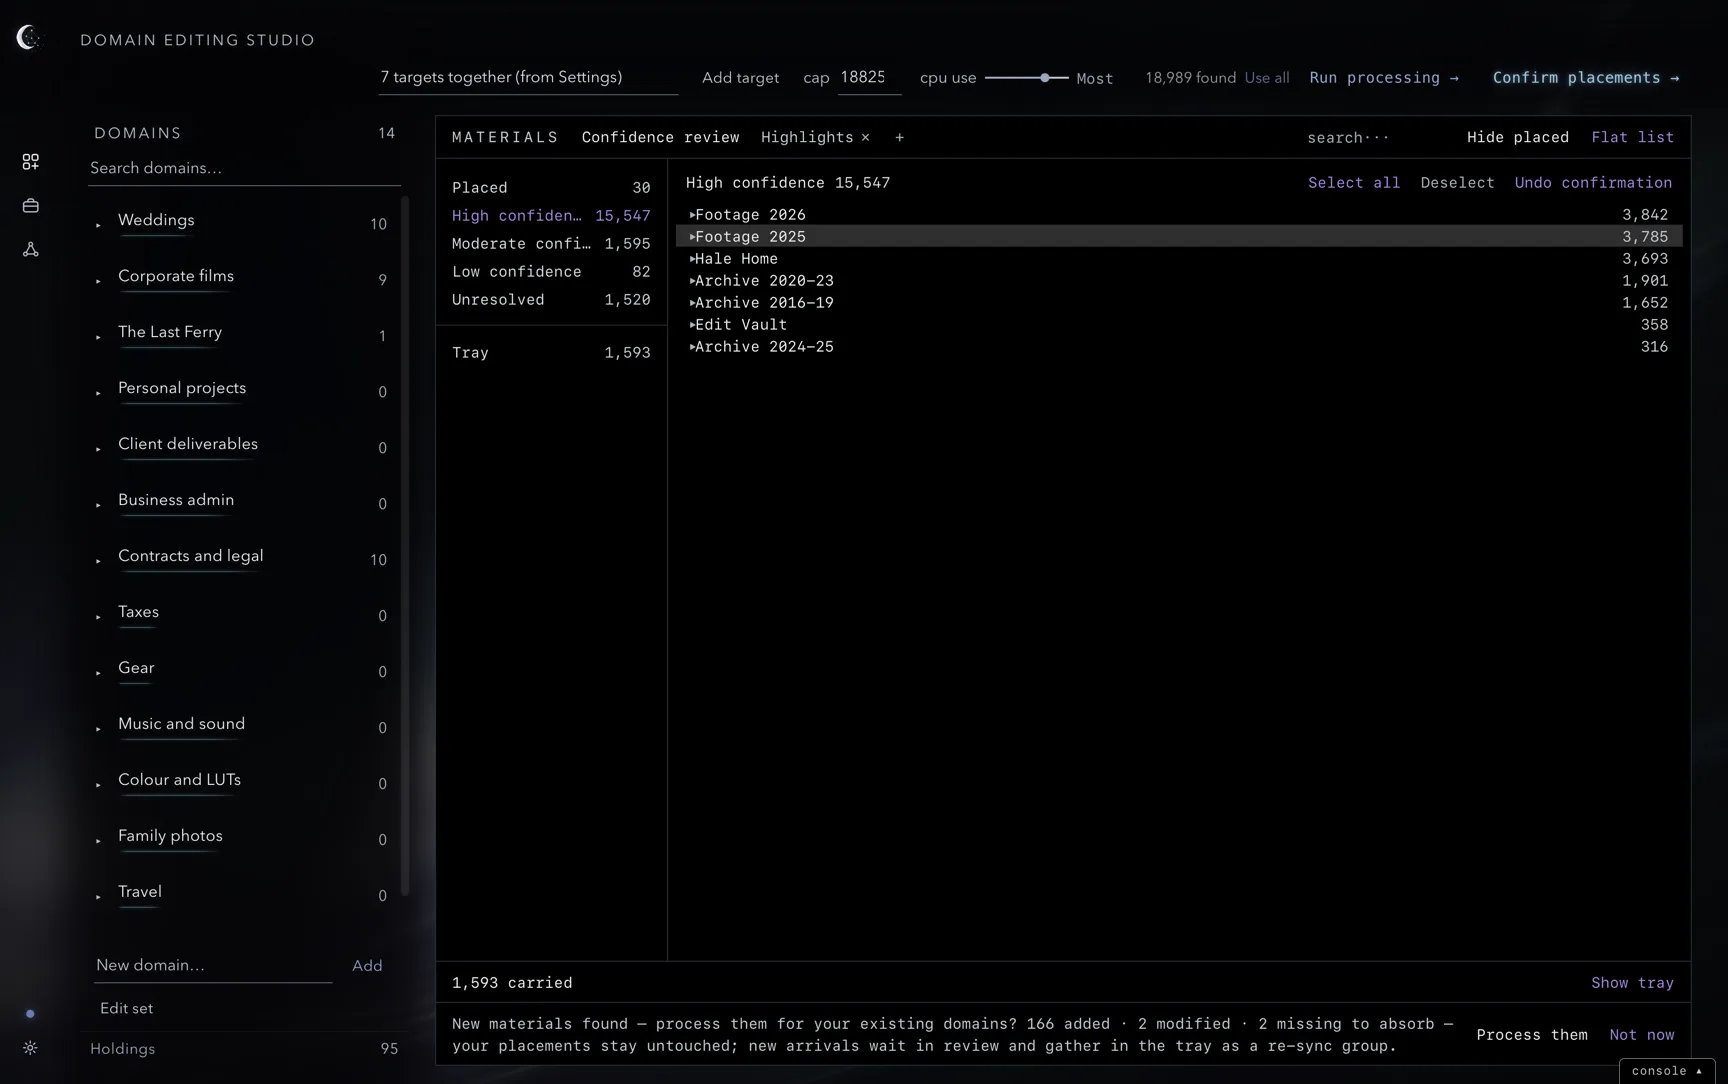
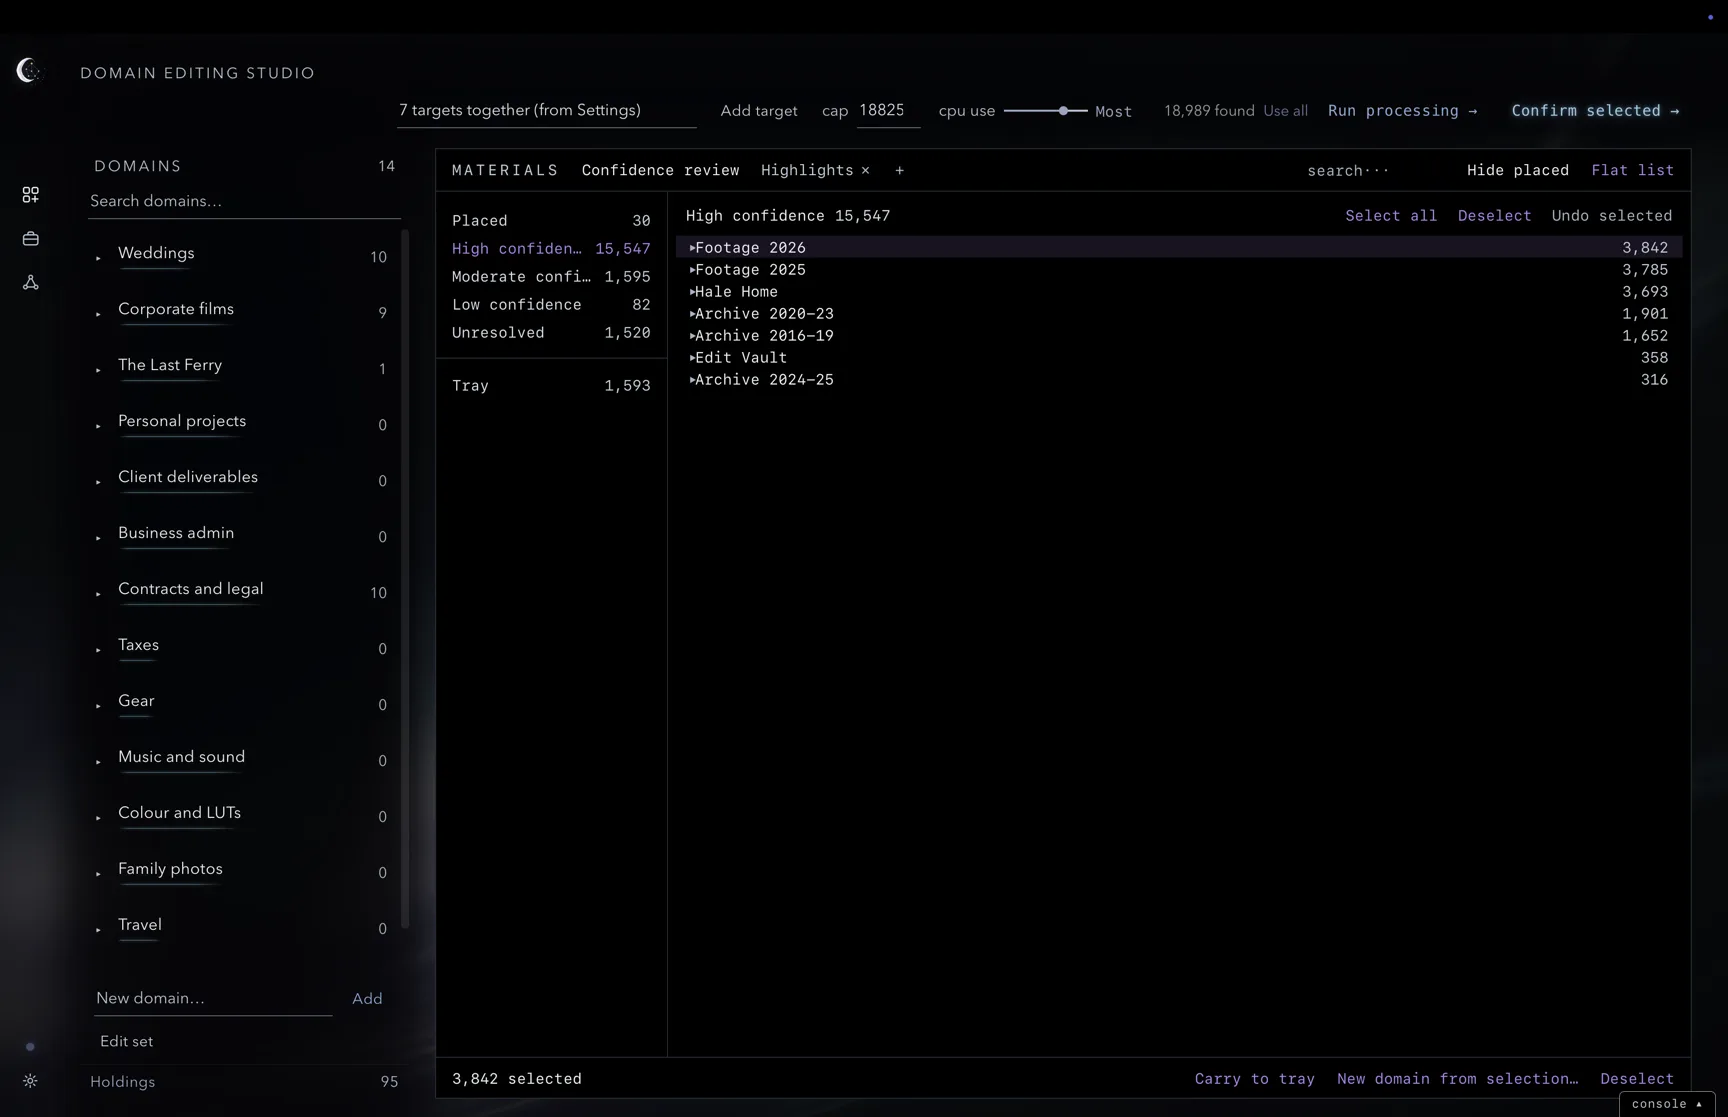
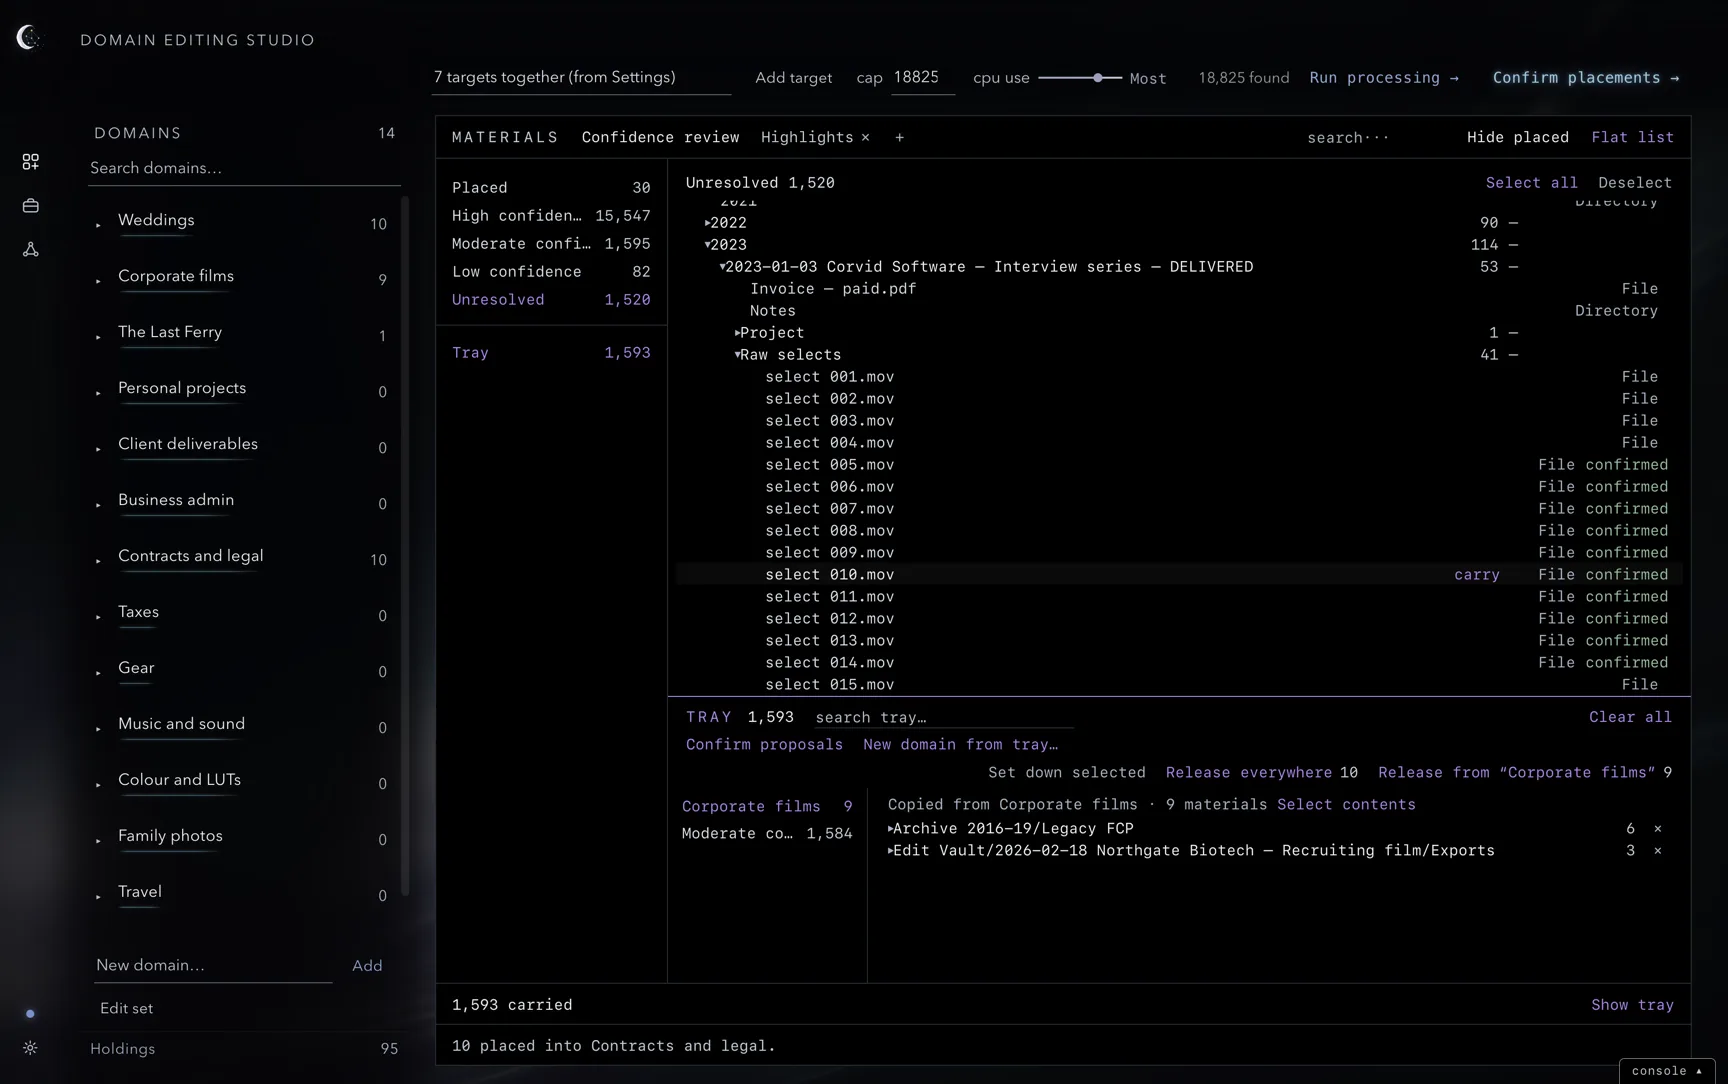
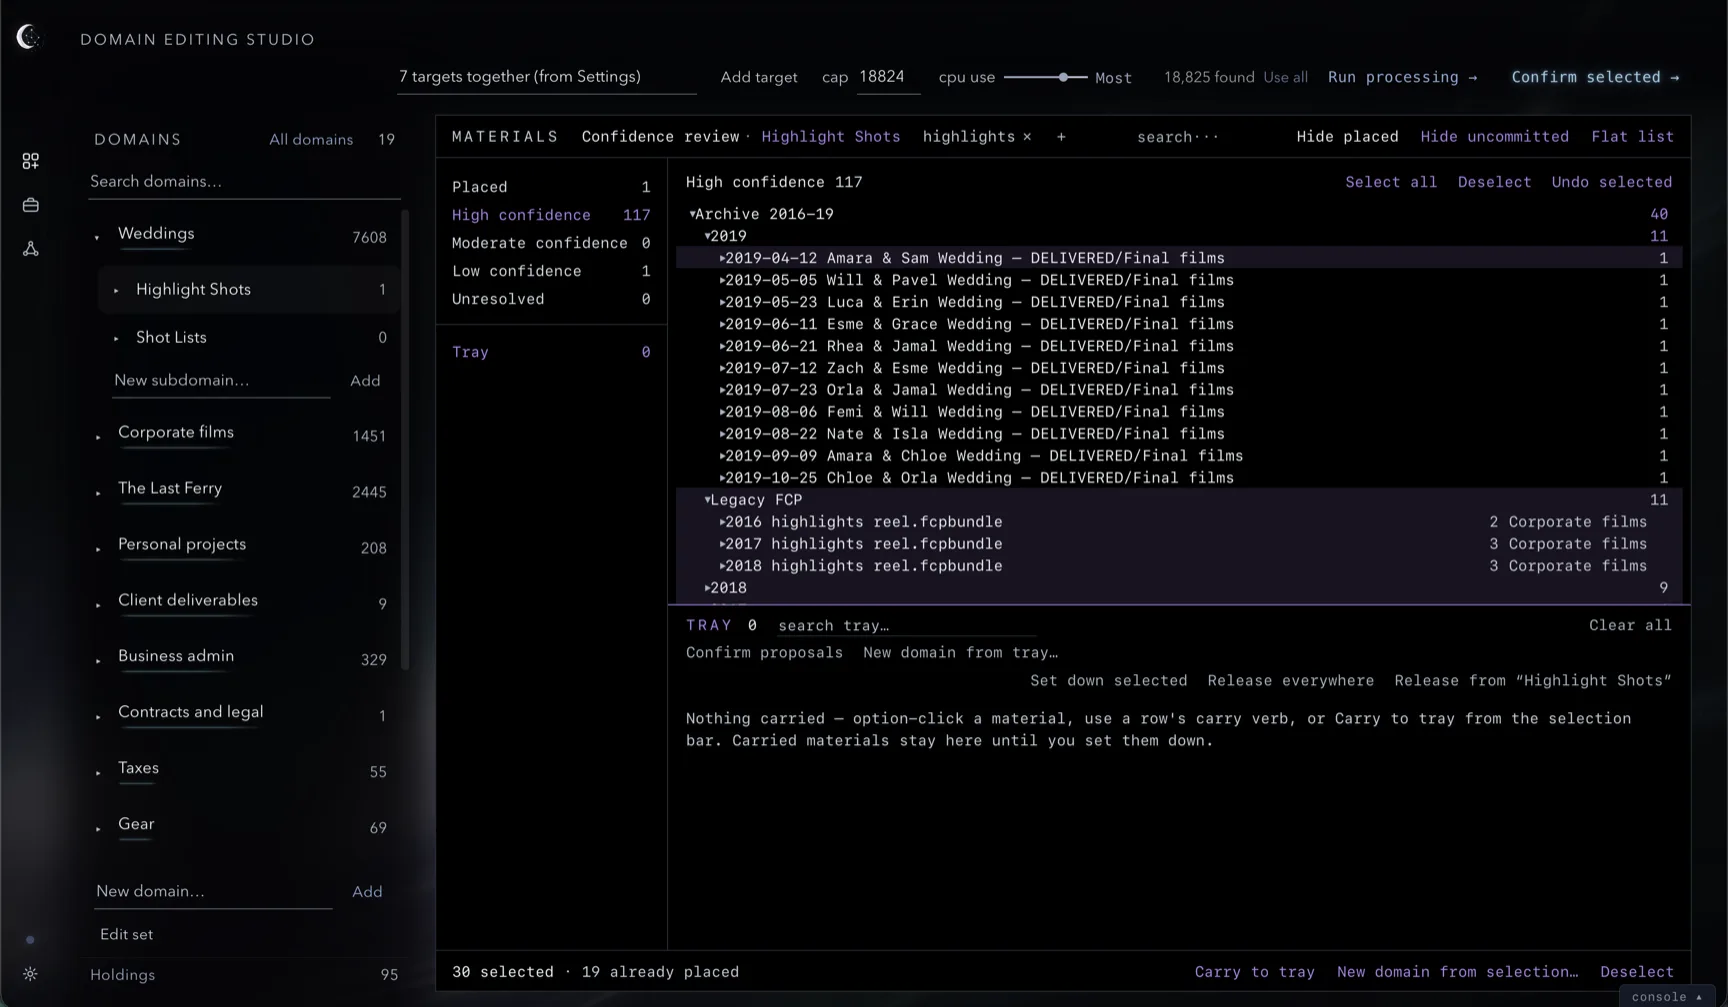
DOMAINS lists your domains and their confirmed placement counts, with a search field, New domain…, Add, Edit set, and Holdings. The centre column lists Placed, High confidence, Moderate confidence, Low confidence, Unresolved, and Tray. Choose one to open its materials window. The window header contains search…, Hide placed and Flat list; lens tabs sit above it.
Drag a domain up or down the list to change its position among its siblings; a line shows where it will land, and its subdomains move with it. Dropping never changes what a domain sits under; use the domain menu to move it under another. The Studio keeps this order with the workspace, separately from the Environment Workspace, so each page can put the domains you reach for most where your cursor travels least. ⌘Z undoes a move.
The same drag works inside a window in folder view: move a folder up or down among the folders on its level, or a file among the files. Folders stay above files, a folder carries everything inside it, and nothing moves into or out of a folder. Until you drag on a level it keeps the usual order (largest folders first, then names); once you do, that level keeps the order you gave it, new arrivals land after it, and a material that leaves the window and comes back returns to its place. The order belongs to the directory, so the same folder shows the same order in every window. To move several at once, select them on the same level and drag any one of them: they move together and keep their order. Saved with the workspace; ⌘Z undoes a move.
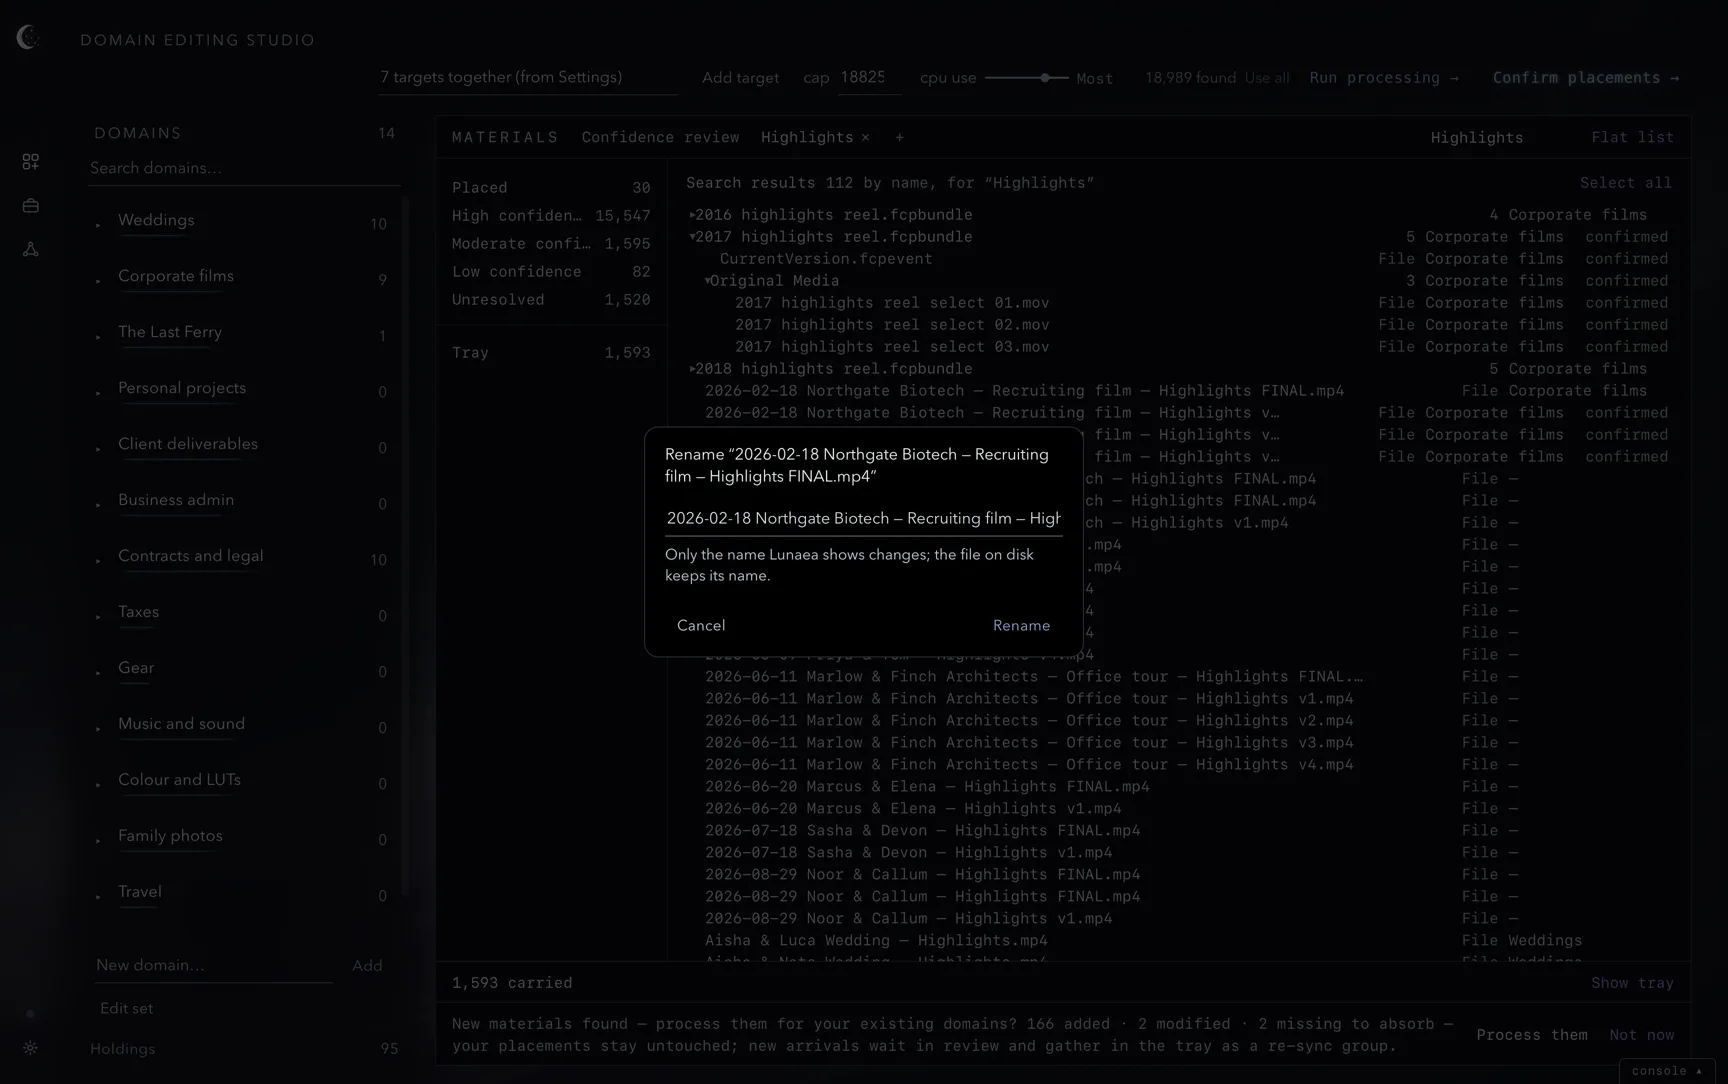
You can also rename a file or a folder as Lunaea shows it: choose Rename… from its menu, or press Return on the row. Only the name in Lunaea changes; the file or folder on disk keeps its name, which the dialog shows and Reveal and Launch still use. The new name is what Lunaea knows the item as, so it sorts and searches by it on both pages. If another item on that level already has the name you type, the dialog says so and lets you keep it. Saved with the workspace; ⌘Z undoes a rename.
Domain counts show confirmed placements. Confidence tiers group materials by proposal confidence; confirmed materials remain visible until you enable Hide placed.
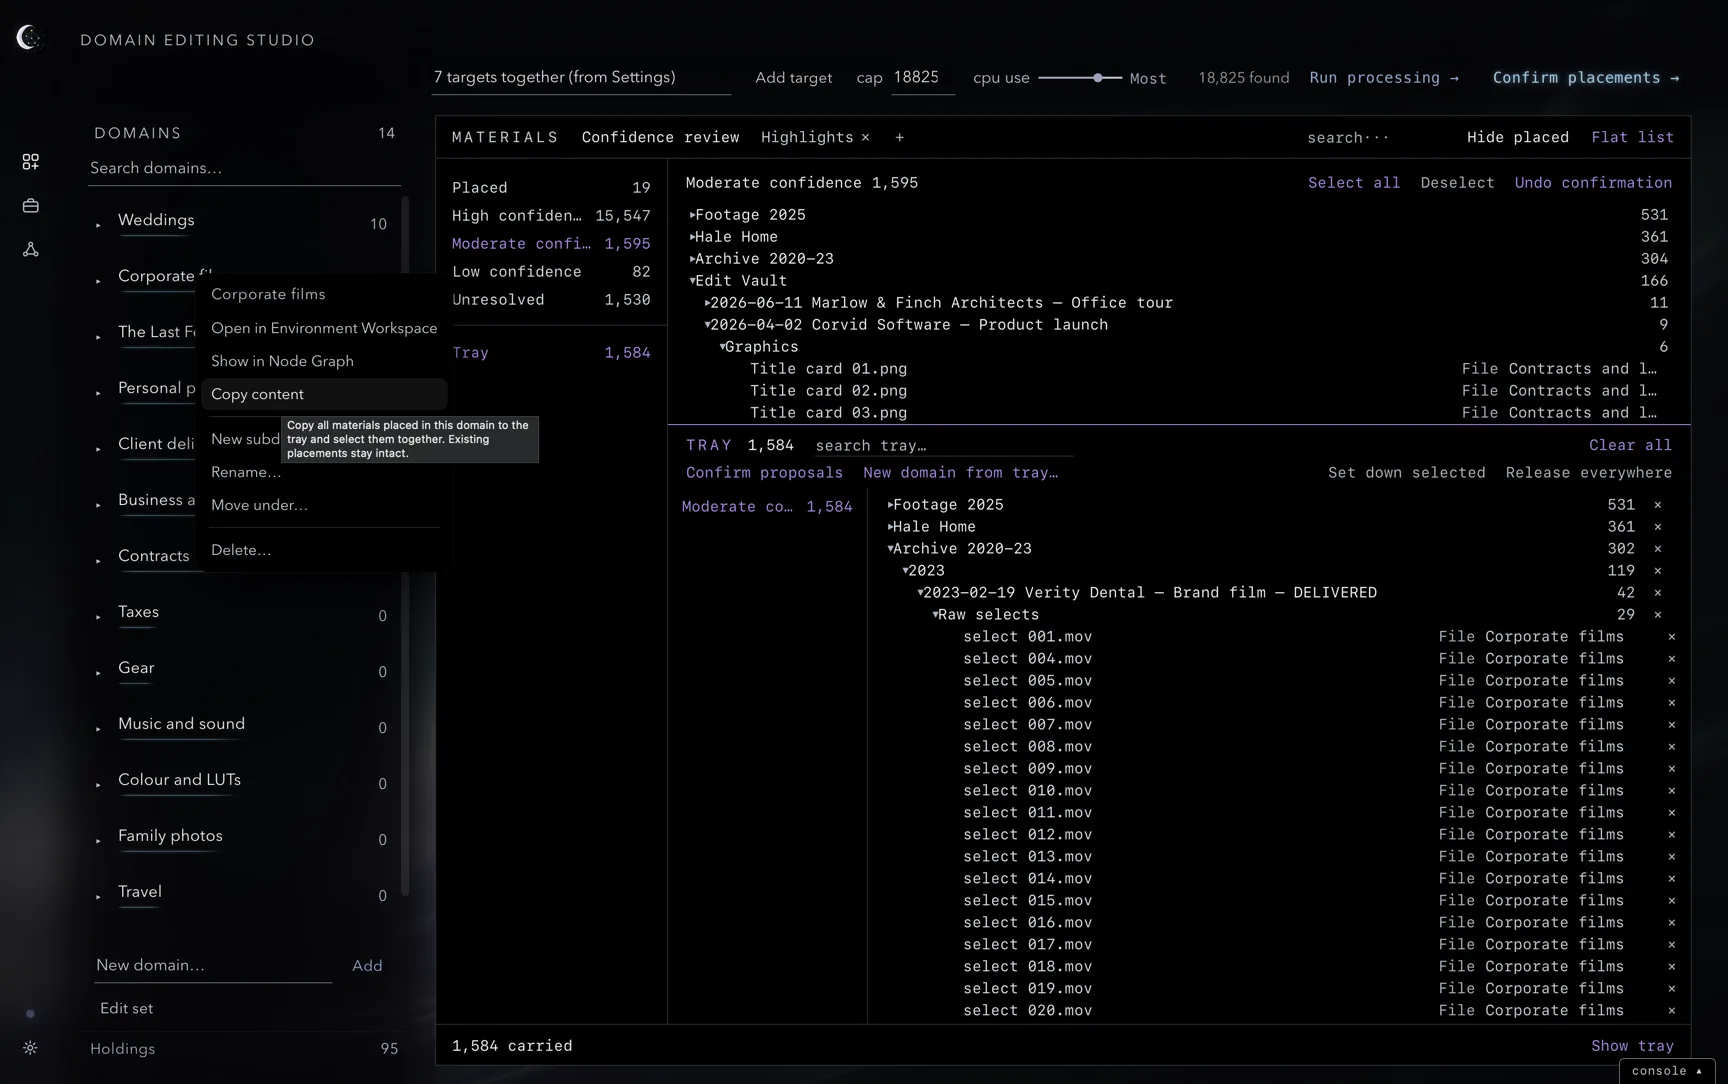
Right-click a domain for Open in Environment Workspace, Show in Node Graph, Copy content, New subdomain…, Rename…, Move under…, and Delete….
The tiers and the window
High, Moderate and Low confidence group proposals by the strength of the available evidence. Unresolved contains materials without enough available evidence for a confident proposal. Select a tier to review its materials and choose which placements to confirm.
Materials appear inside their folders. A folder row shows its material count and the domain proposed for most of them. Click the triangle to expand it. Each file row shows its name, kind, proposed domain and confirmation state.
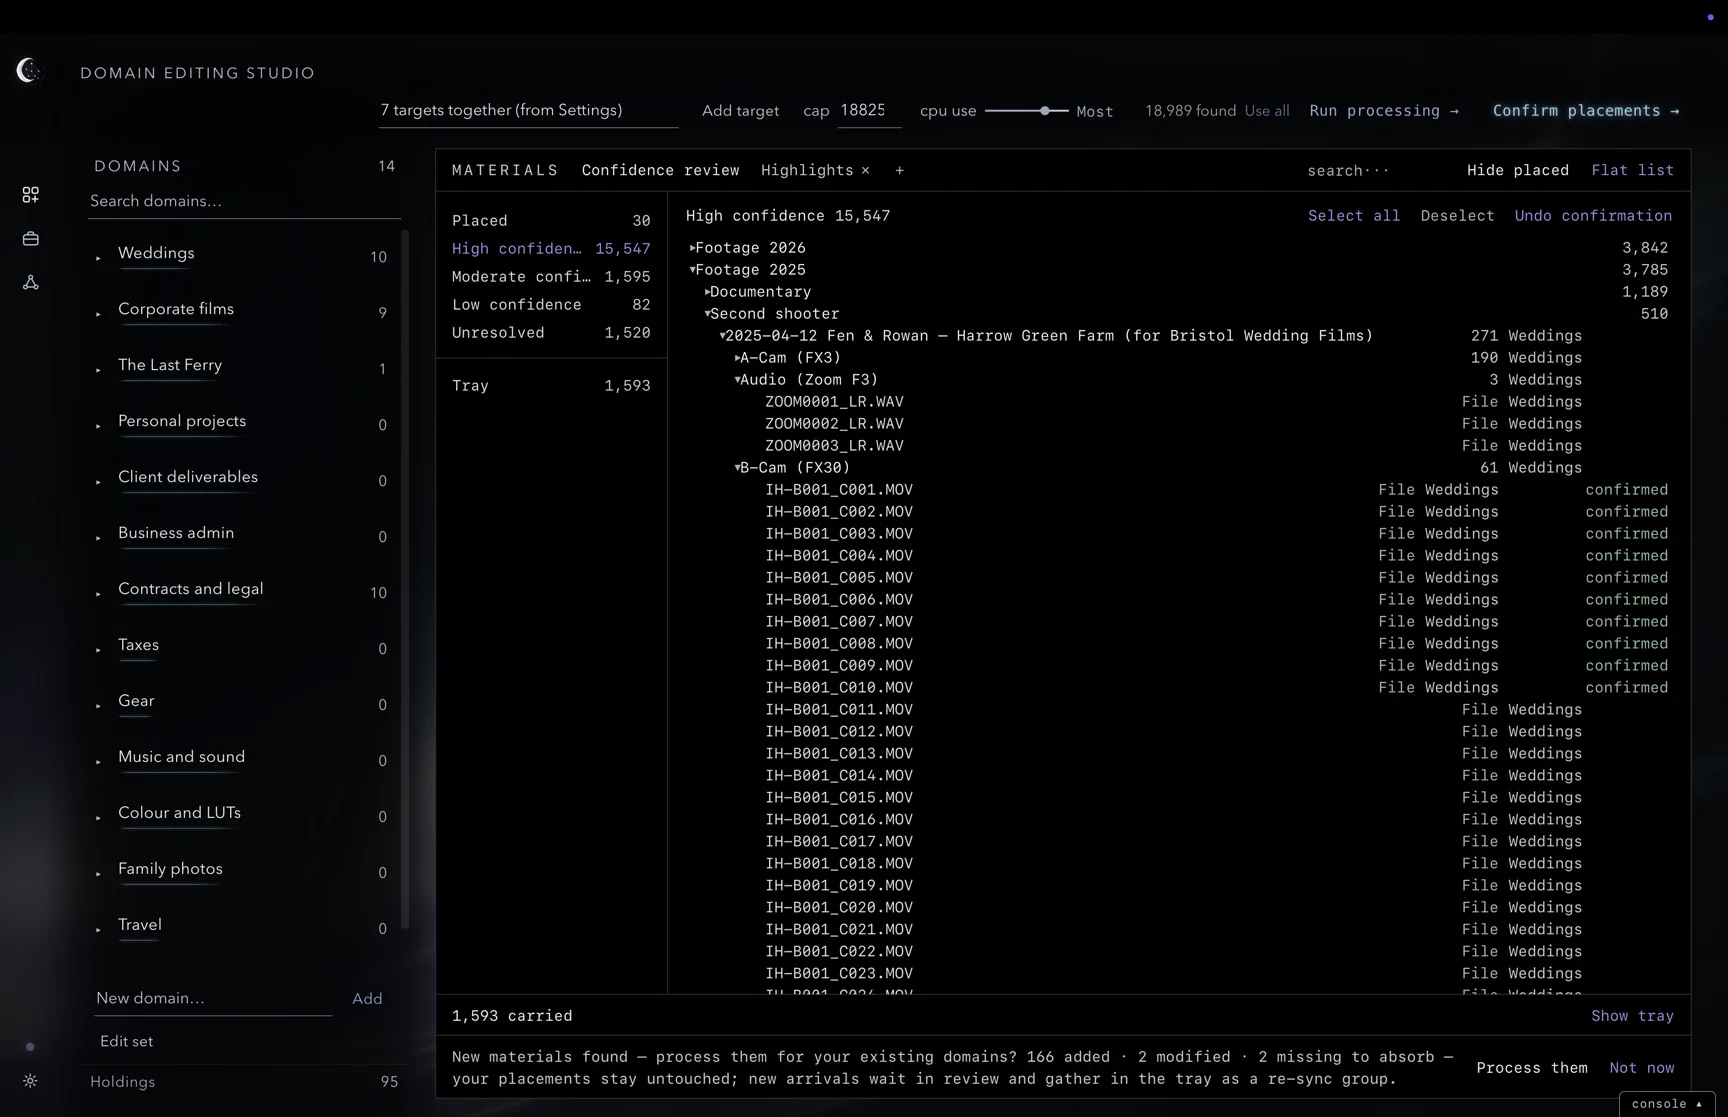
Hide placed and Flat list
Hide placed filters confirmed materials out of the window and updates its counts. Flat list shows files with their full paths and kinds in a single list. Toggle either in the window header. A long list shows Show the next N of M more… at its foot; click it to bring in more.
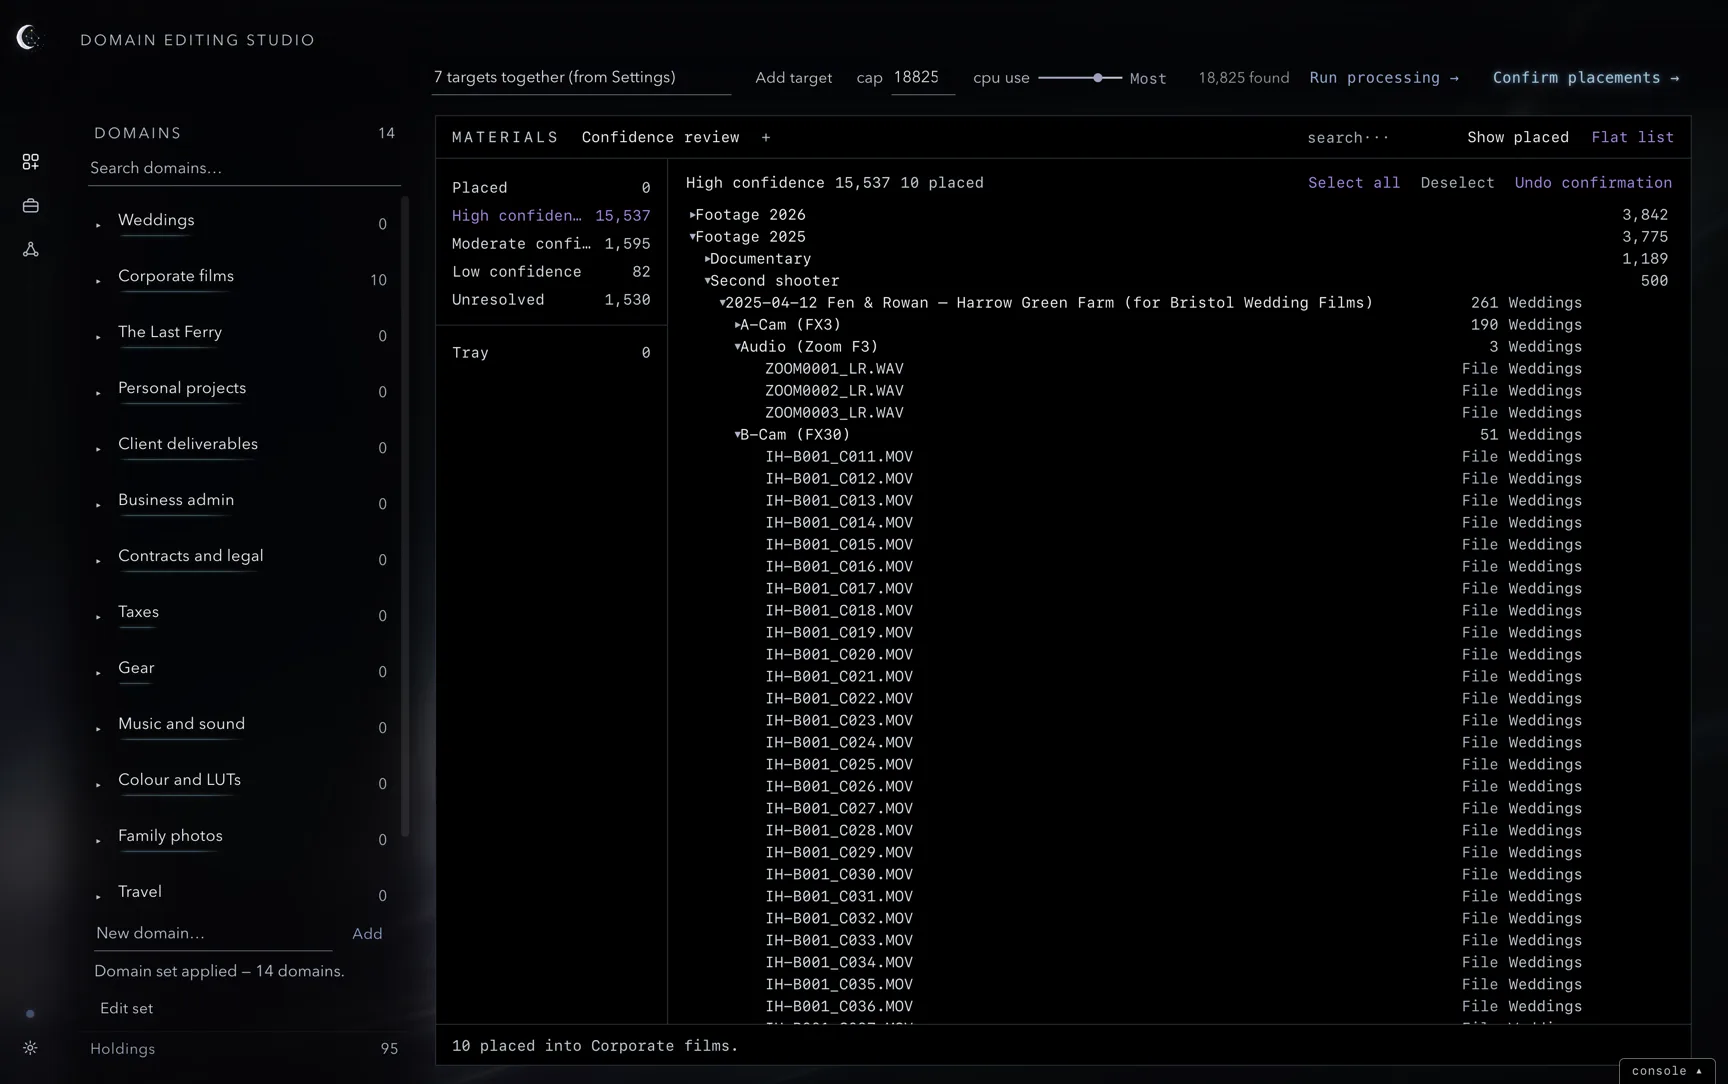
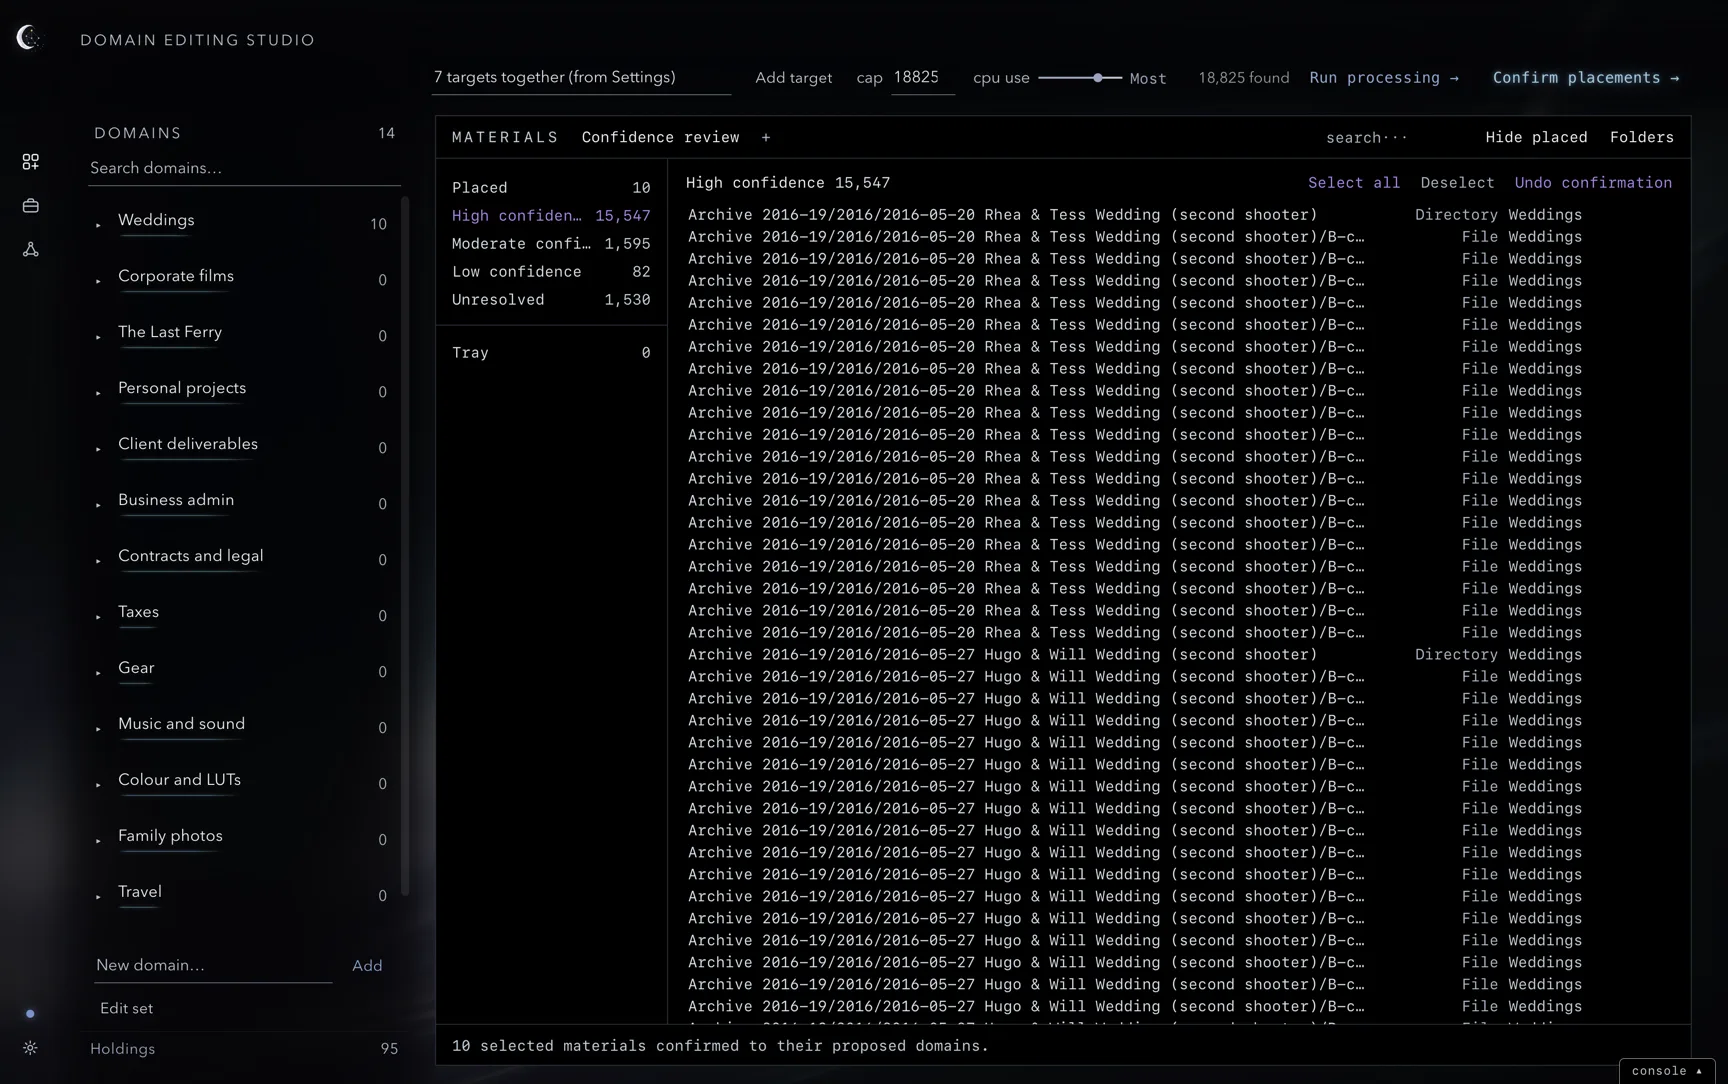
Search
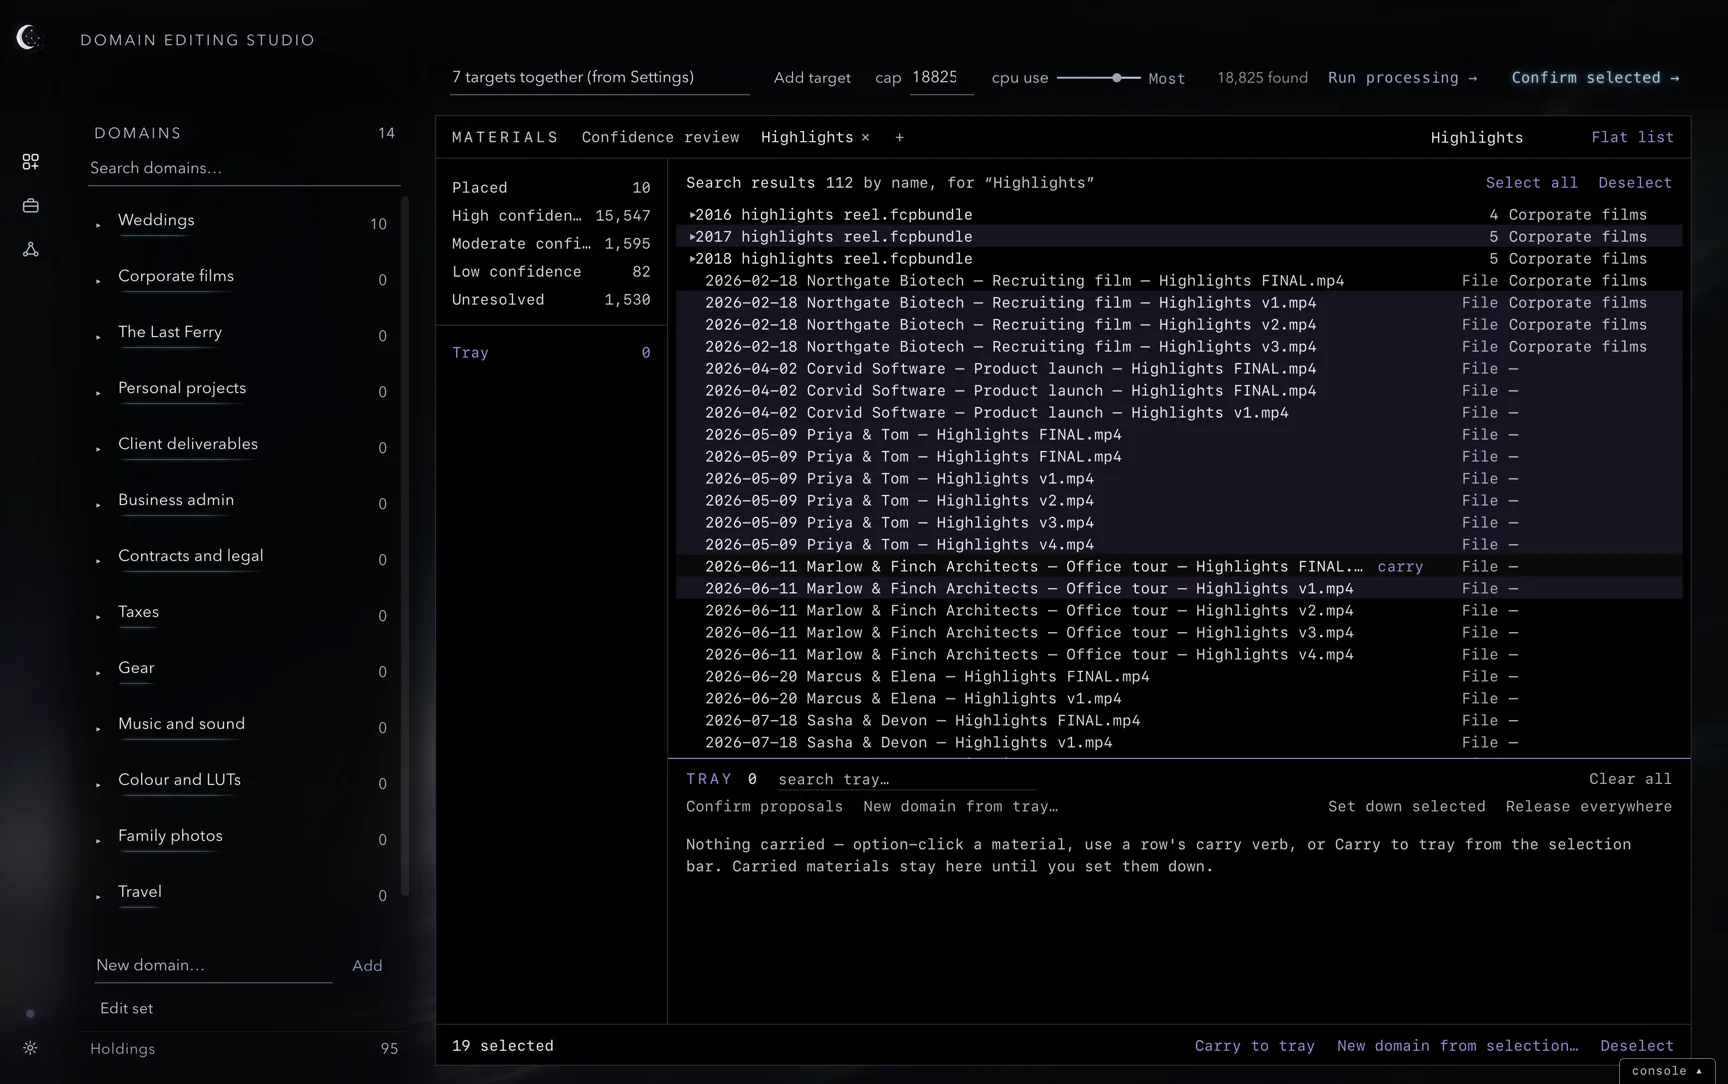
⌘F focuses search… in the window header; ⌘T opens a search tab. Results include name matches and related materials found by meaning. A search matches when every word you type appears somewhere in the name or its folders, in any order, so title card northgate finds the title card inside the Northgate folder. The tray’s search, the domain search and the re-sync log match the same way. The tab footer shows both counts, followed by paging controls. Clear Search returns to the tier.
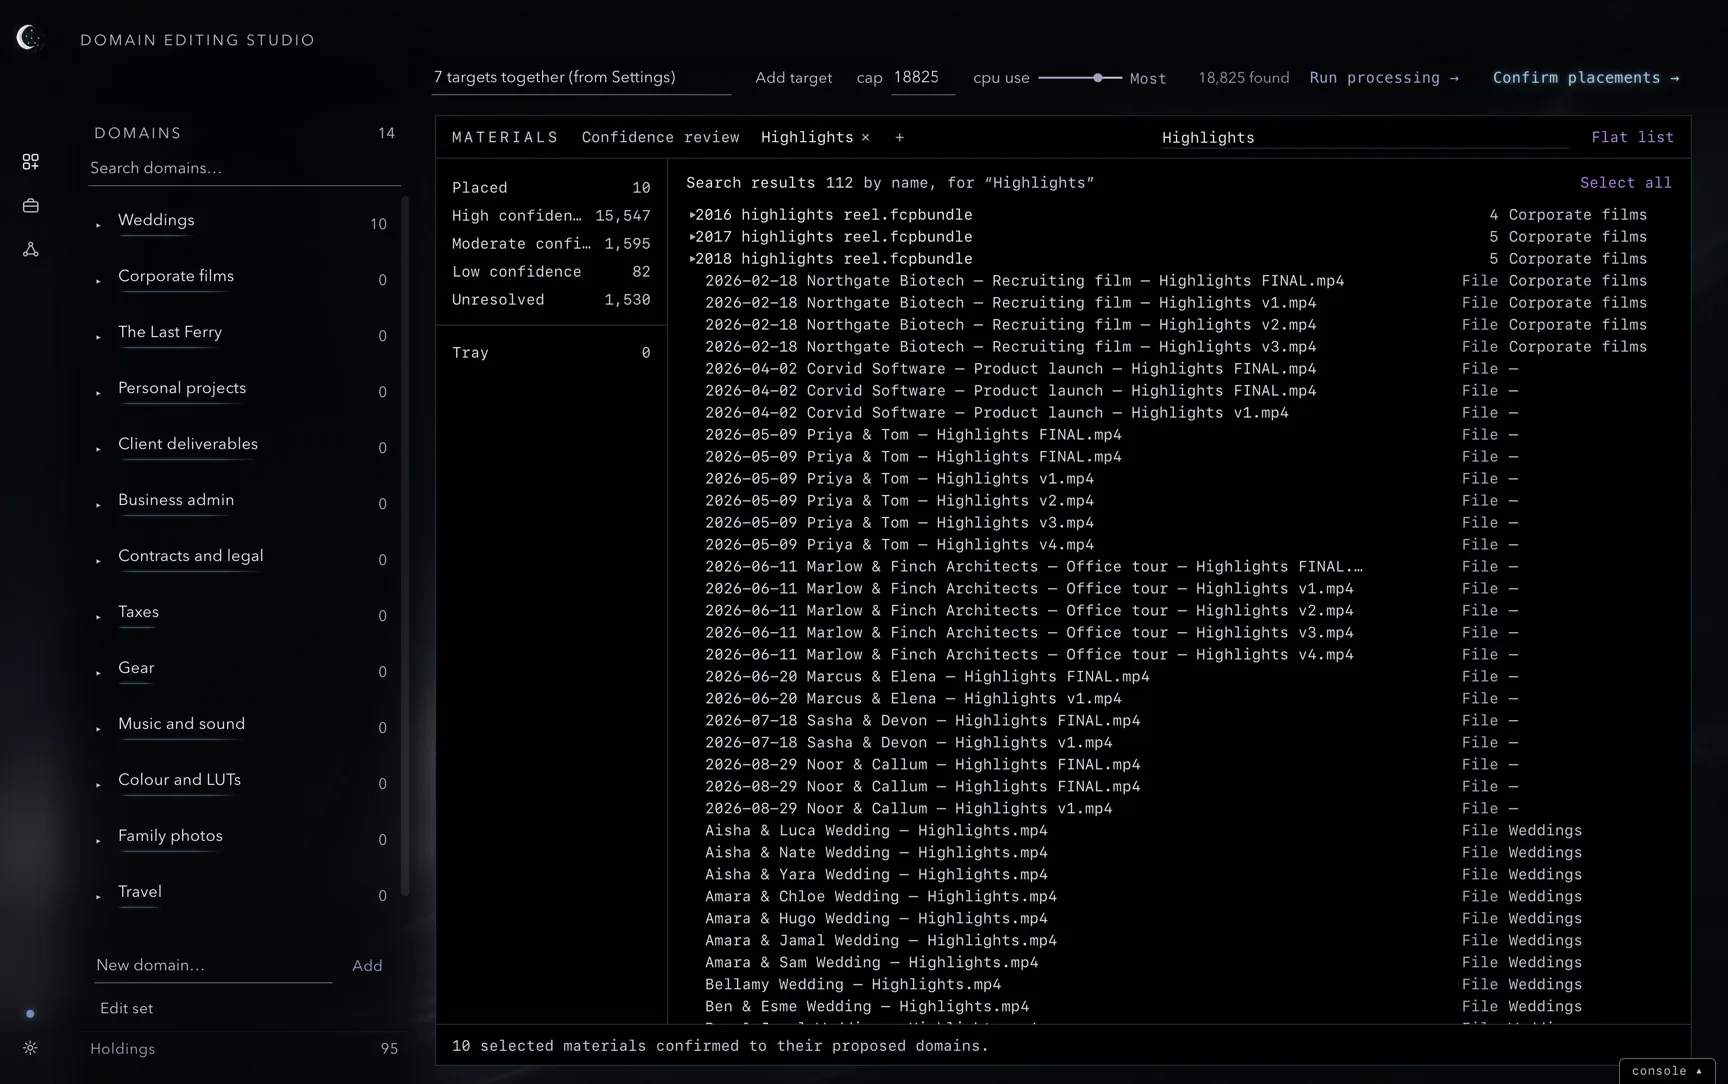
Selecting
Click a row to select it. ⌘-click adds or removes a row; ⇧-click selects a range, including folders. Selecting a folder selects its contents. The selection bar offers Carry to tray (or Set down from tray when everything selected is already carried), New domain from selection… and Deselect.
Select all and Deselect act on the current window, including results on later pages. In a search tab, this includes name matches and related results. Selections in other windows remain selected; the bar shows the current window’s count and the total when both are present.
The row menu
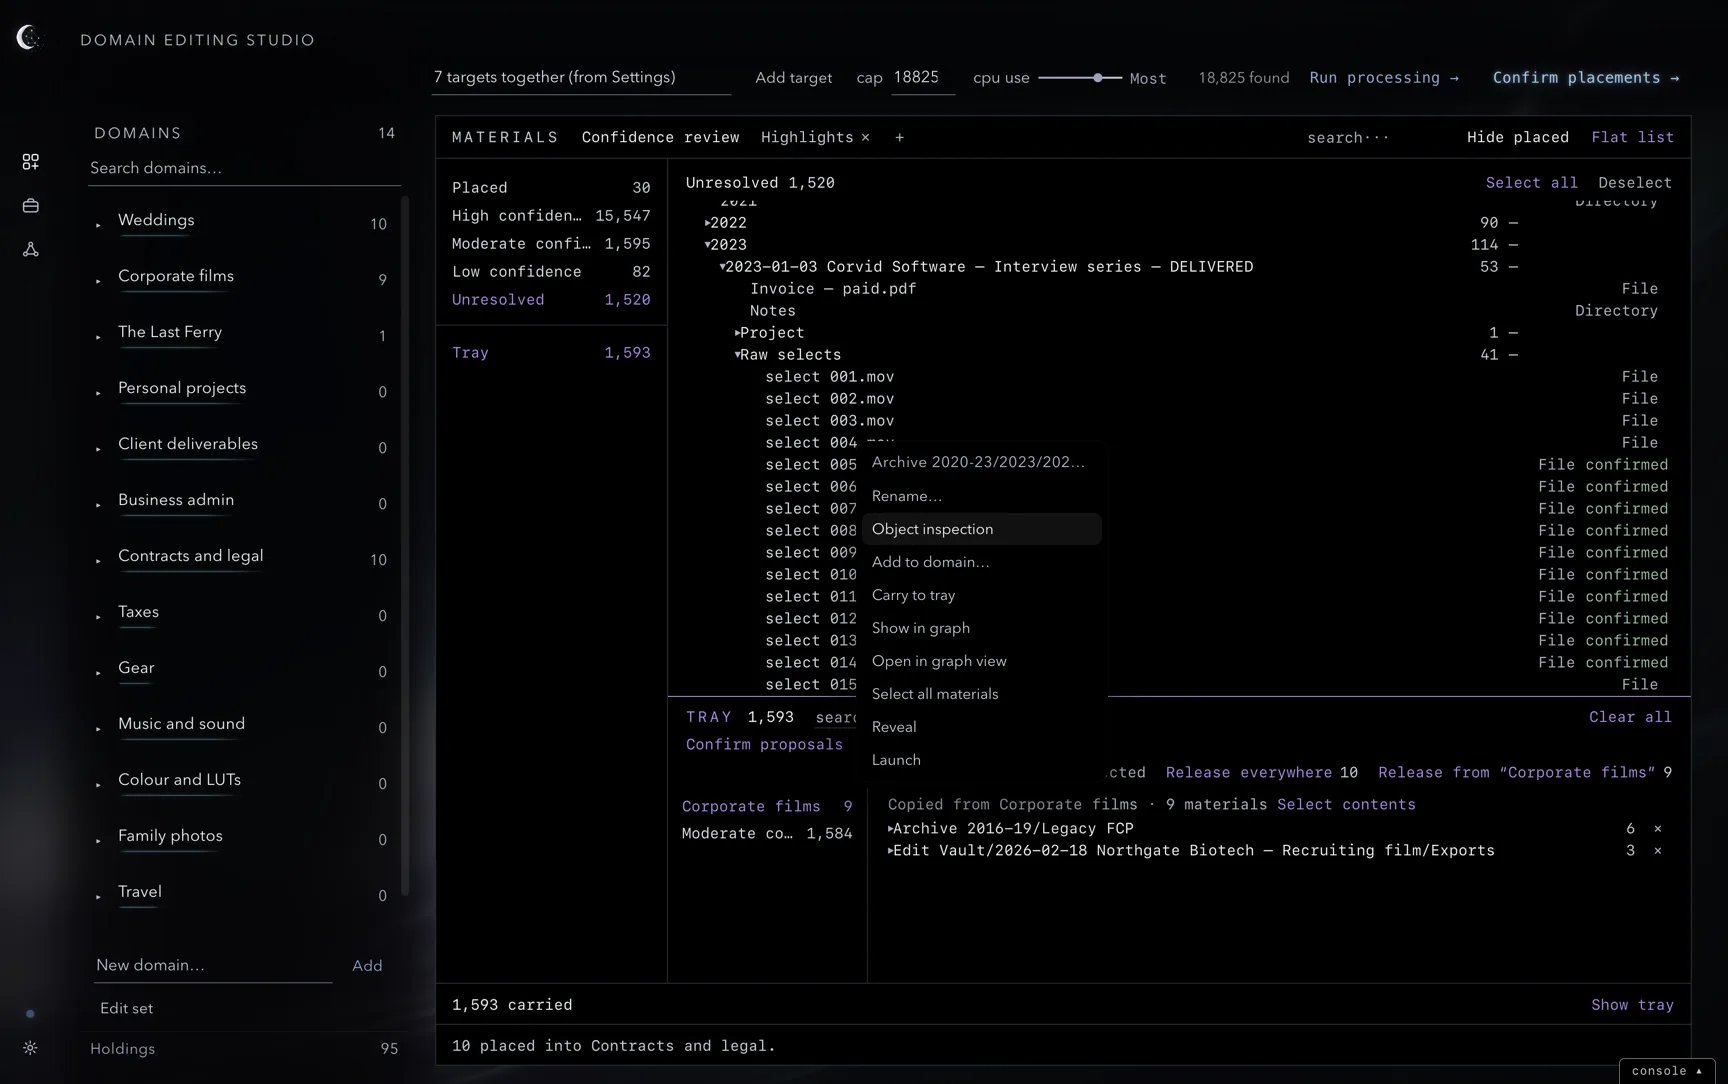
Right-click a row for actions including Object inspection, Undo confirmation, Add to domain…, Carry to tray, graph views, selection controls, Reveal in Finder, and Launch in the file’s application. Available actions depend on the row and selection.
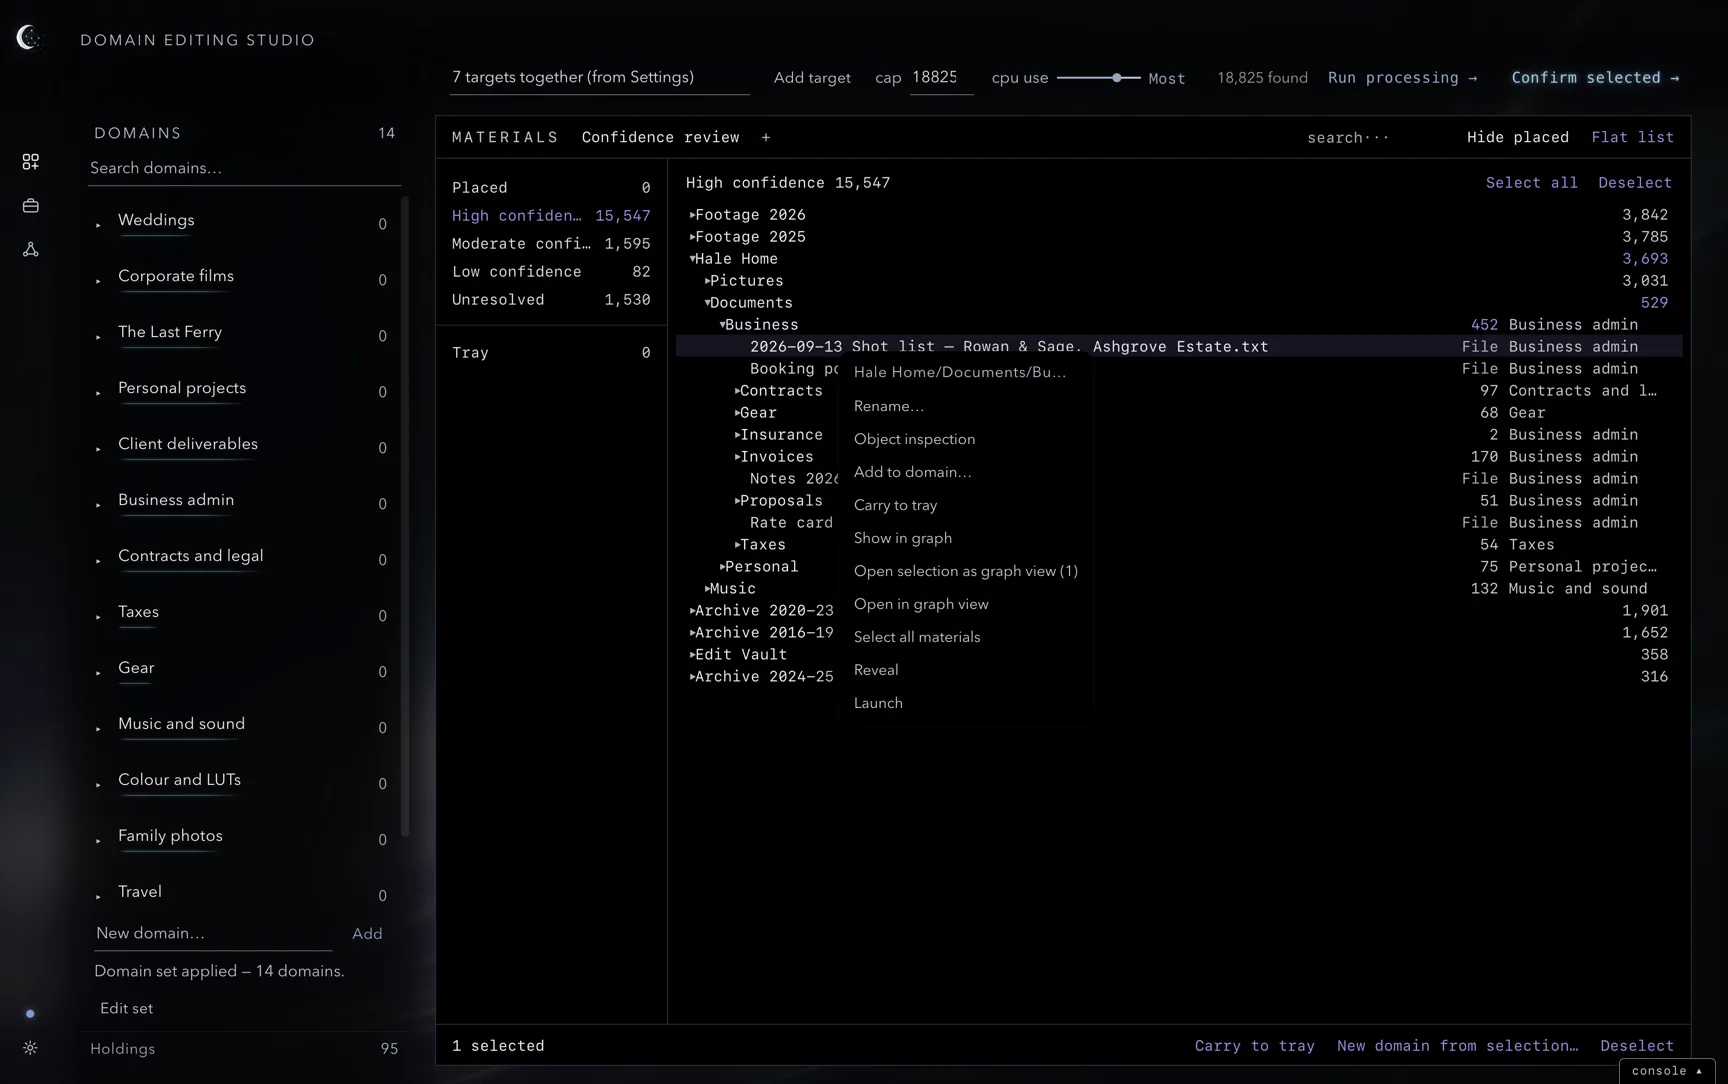
When several rows are selected, right-click any one of them, file or folder, and the menu acts on the whole selection: Add to domain… counts all of them, and Carry N selected to tray appears.
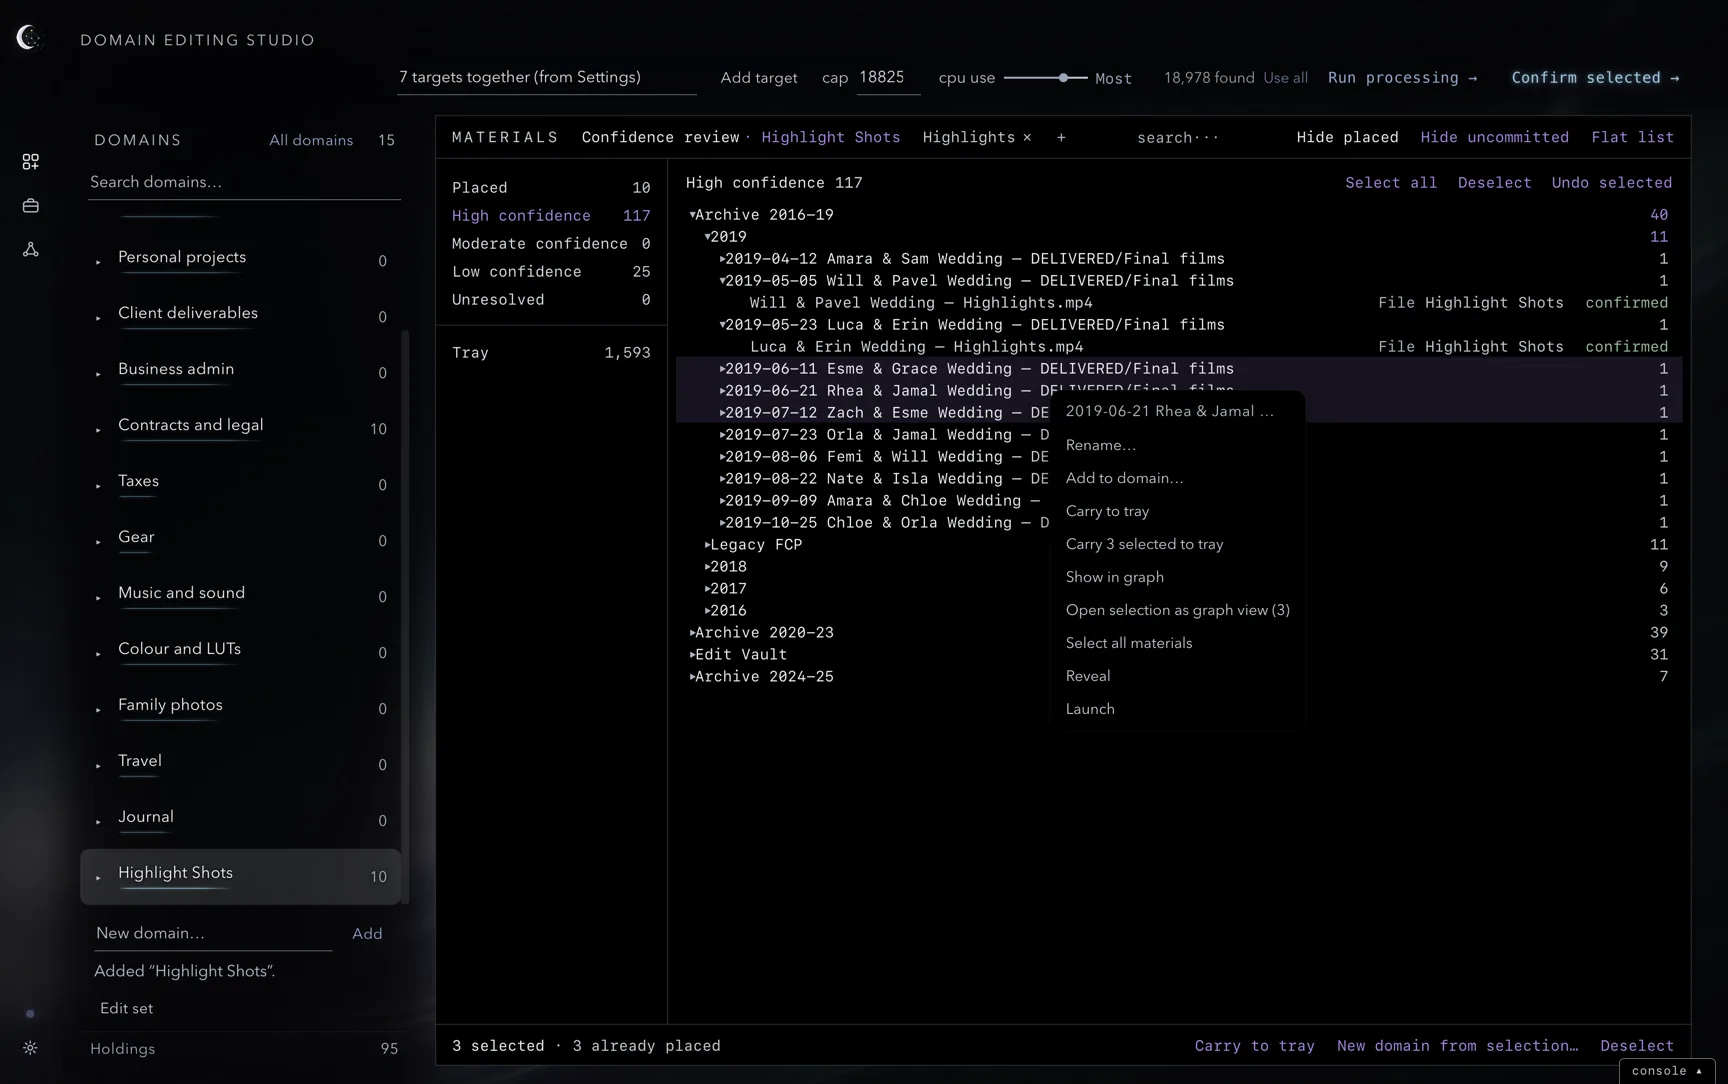
Select several materials, right-click a selected row, then choose Launch N items. It appears only when more than one material is selected; Launch opens only the row you right-clicked.
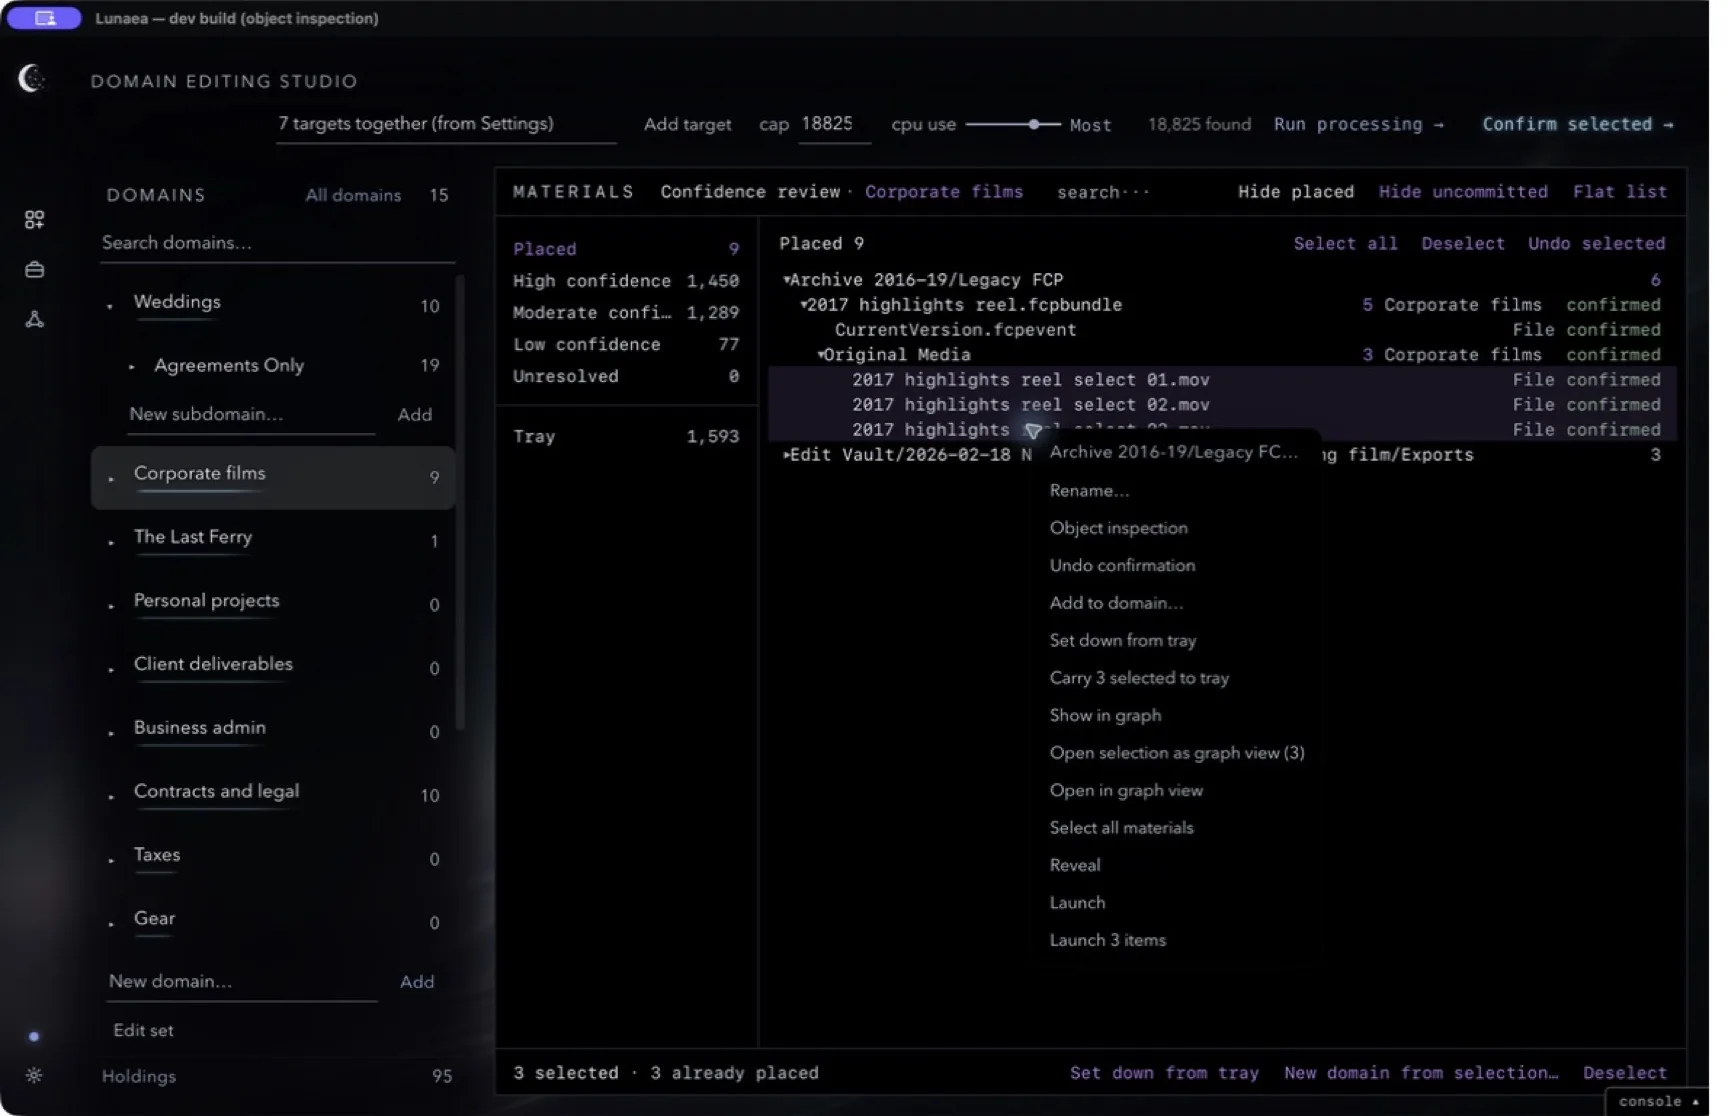
Carry to tray
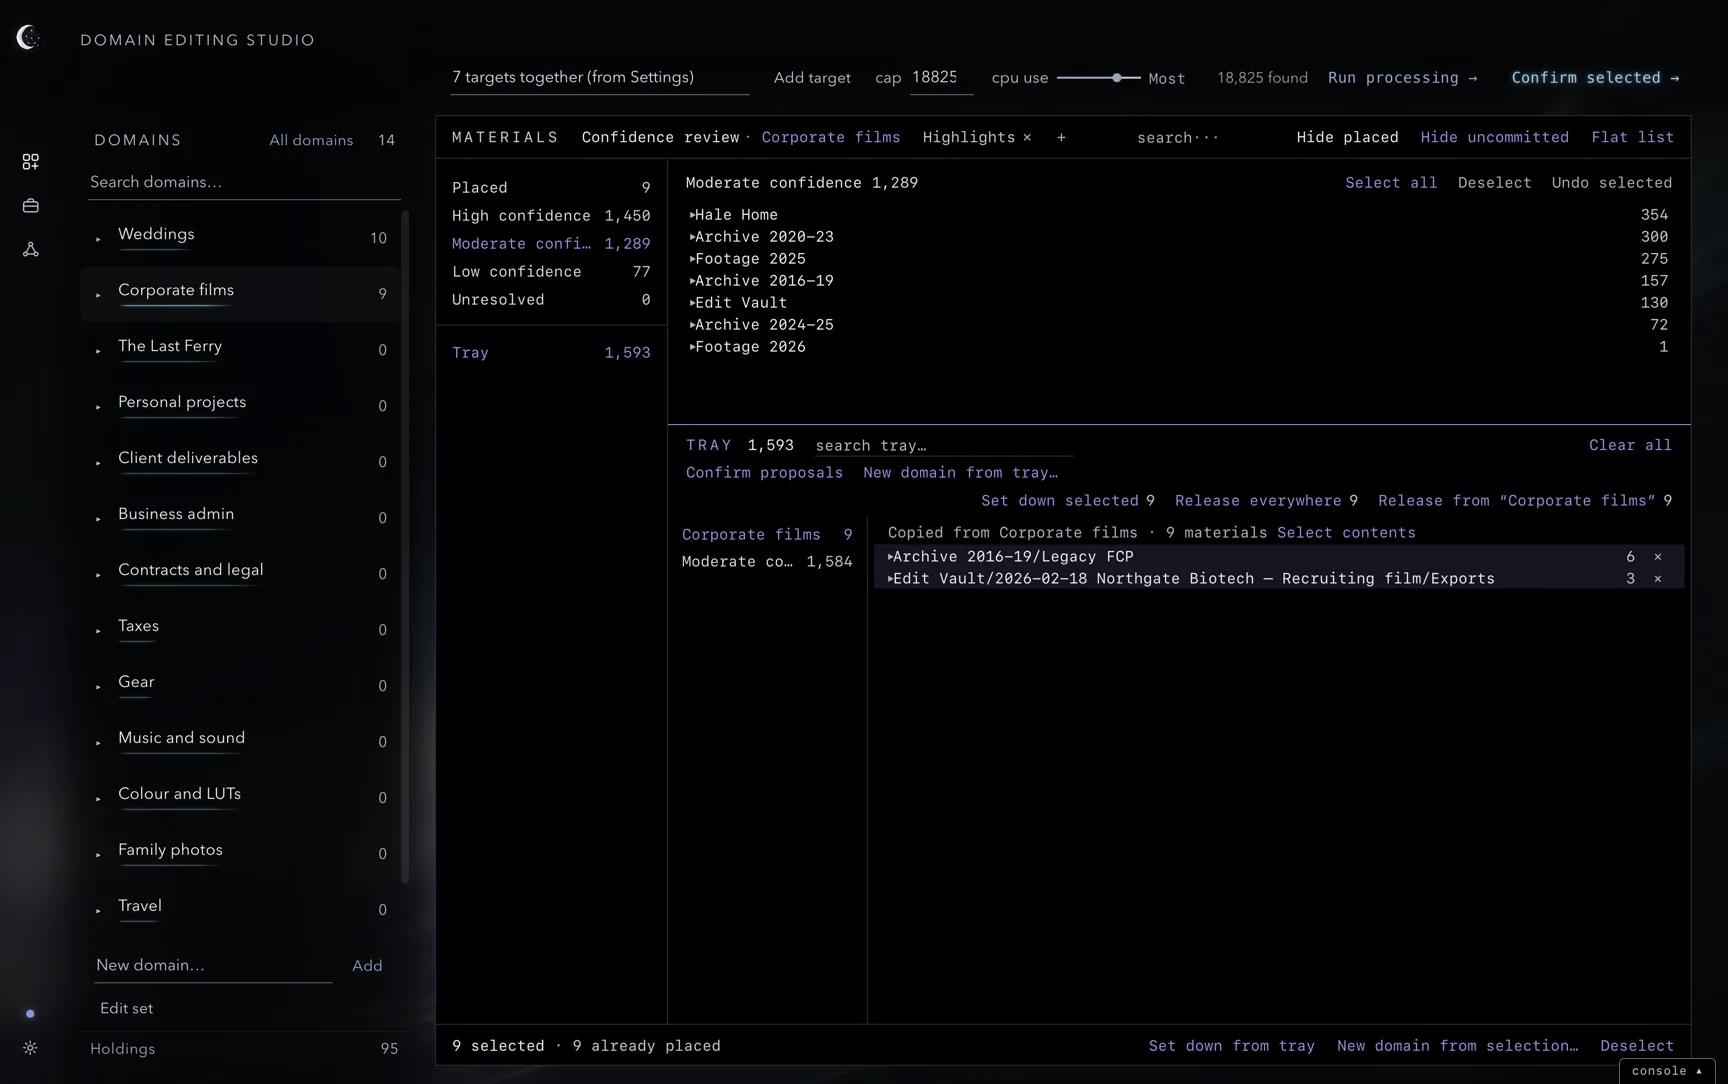
The tray holds materials gathered from different windows. Use Carry to tray in the selection bar or row menu, or ⌥Return on selected materials. ⇧⌘T shows or hides the tray while keeping its contents. Materials are grouped by where they were picked up; a Re-sync absorb adds its arrivals as a group of their own, listed first and named with the time of the absorb.
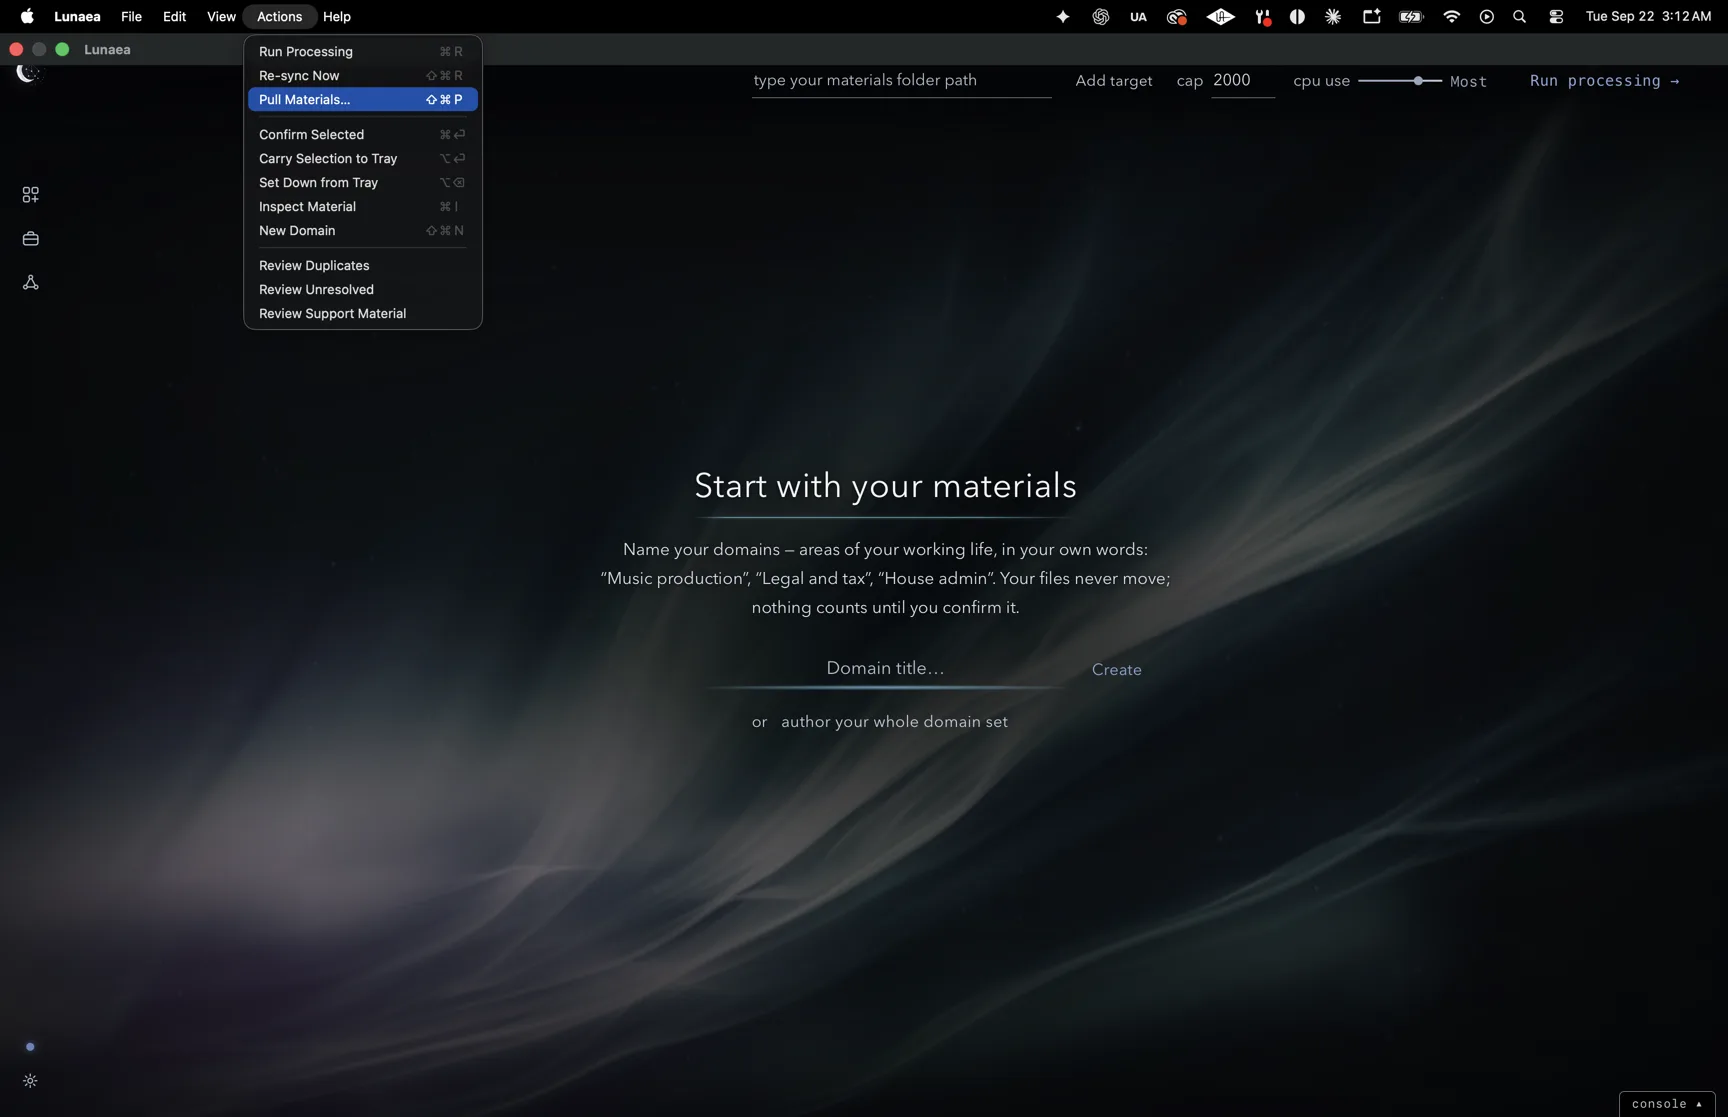
Choose Actions ▸ Pull Materials… or press ⇧⌘P.
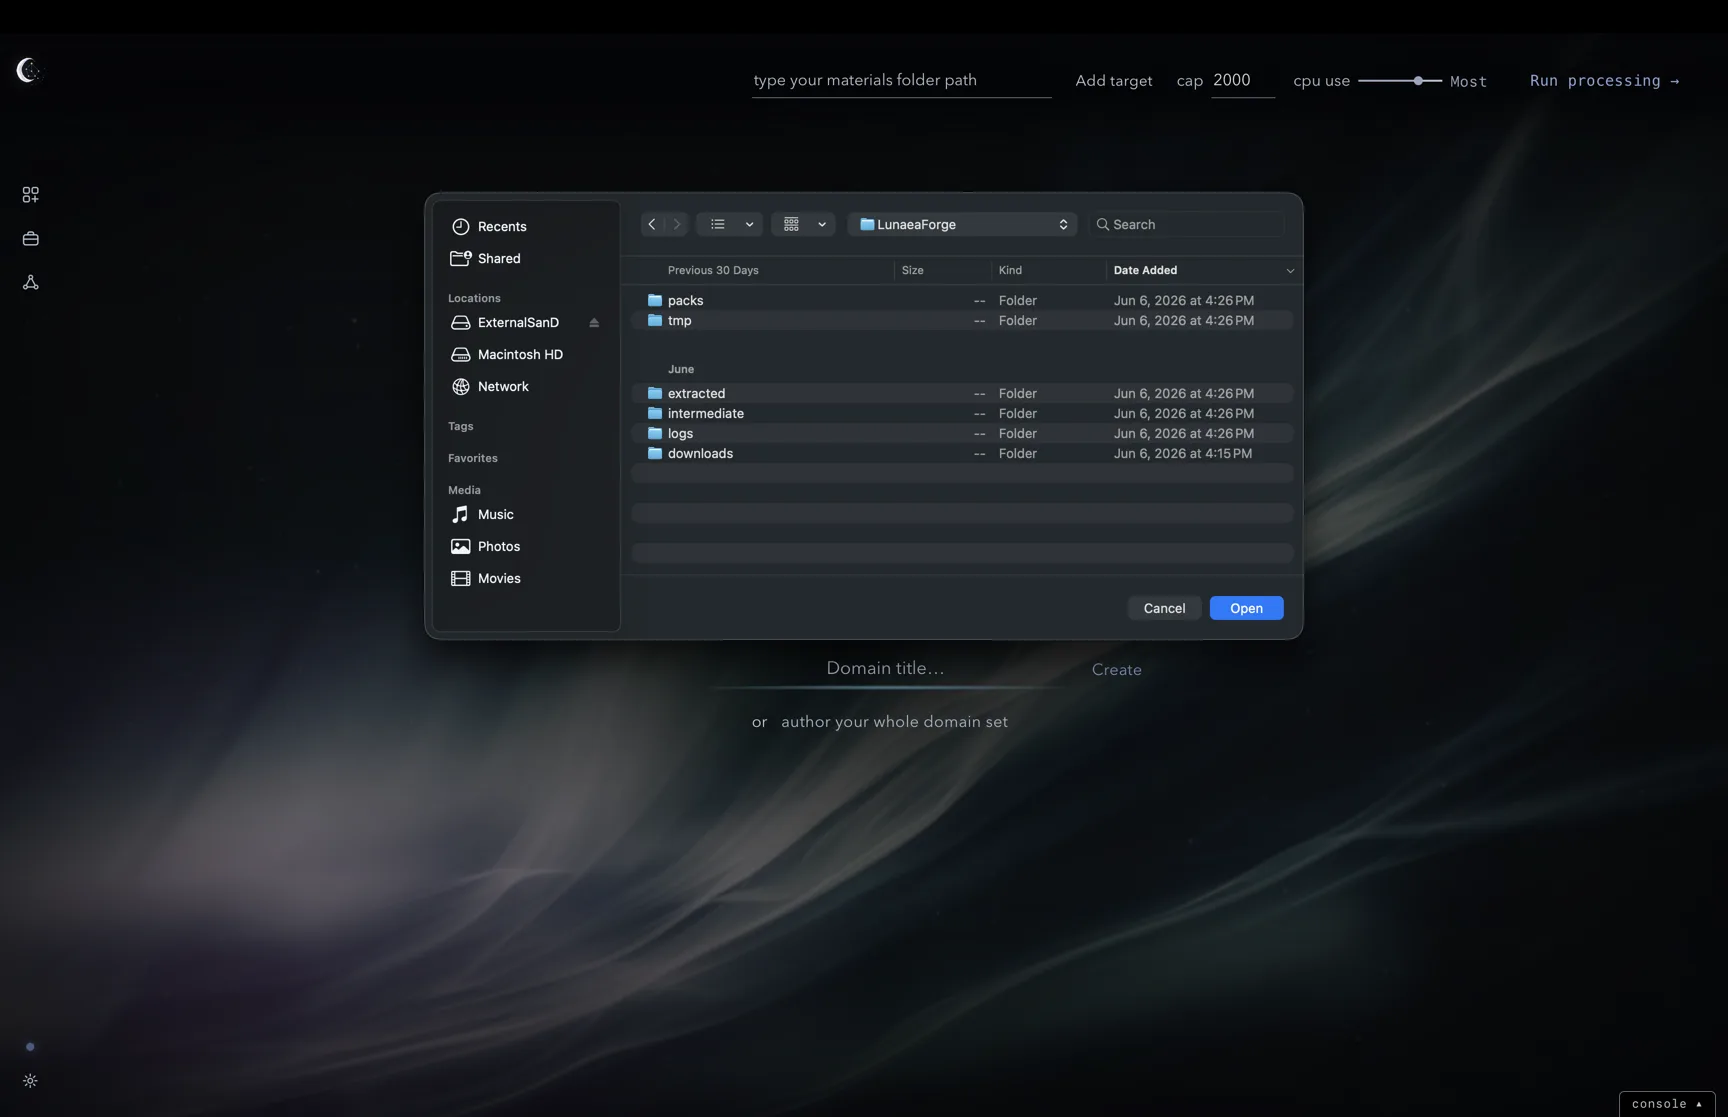
Choose files and folders together in the native file picker, then choose Open. Lunaea includes everything inside each chosen folder and places the arrivals in the tray. The originals stay where they are, and nothing is confirmed automatically.
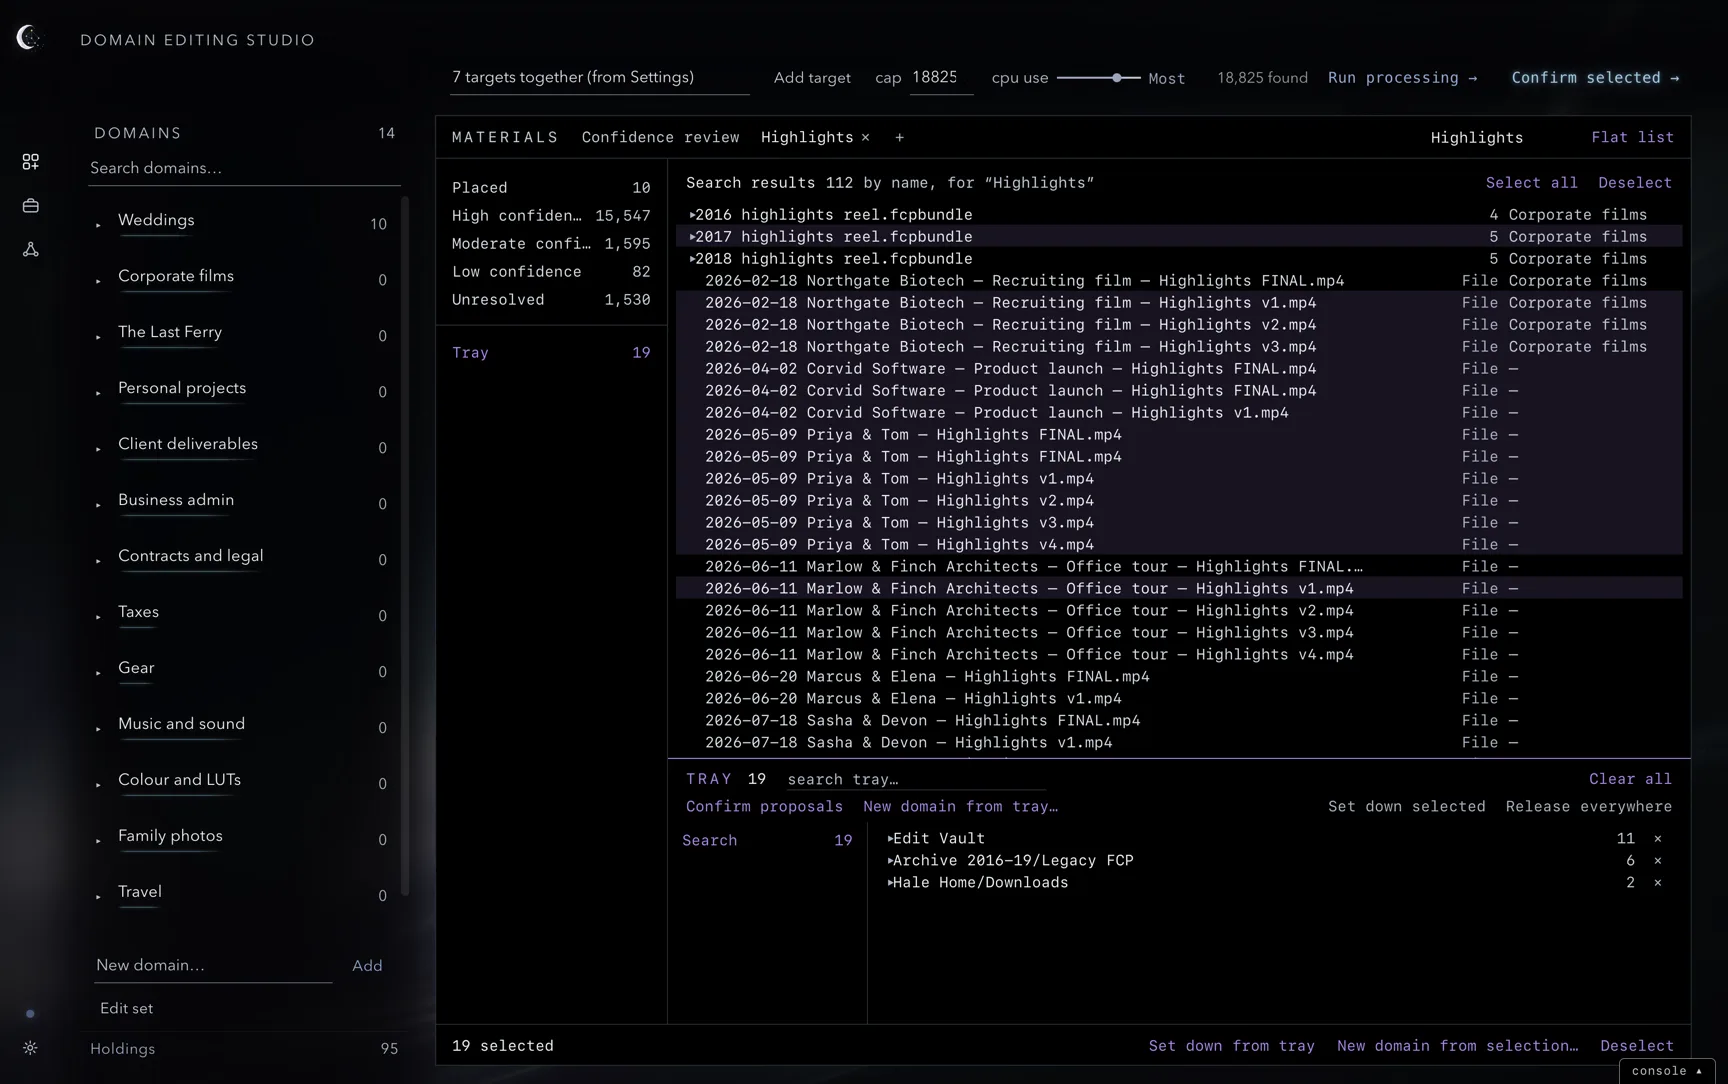
Drag carried materials, or a copied domain group, onto a domain to place them there. Confirm proposals applies the carried materials’ proposed placements. Materials with successful new confirmations leave the tray; Undo restores those materials to it.
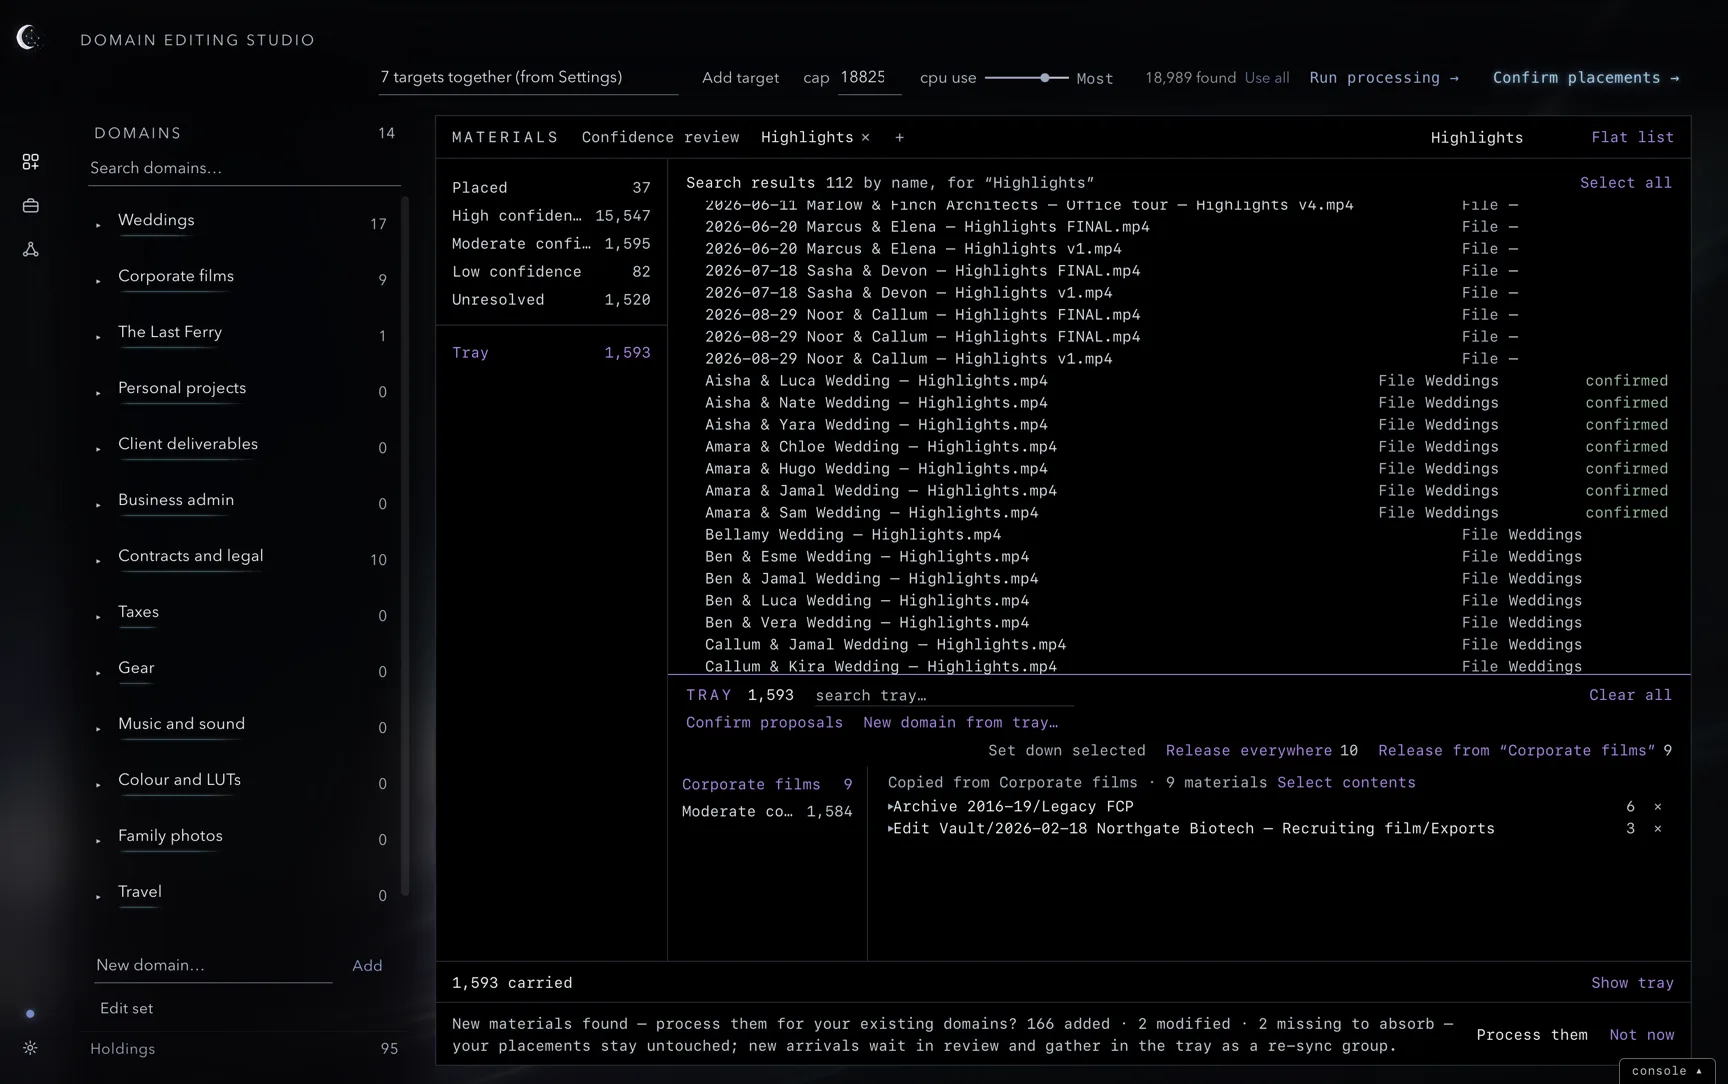
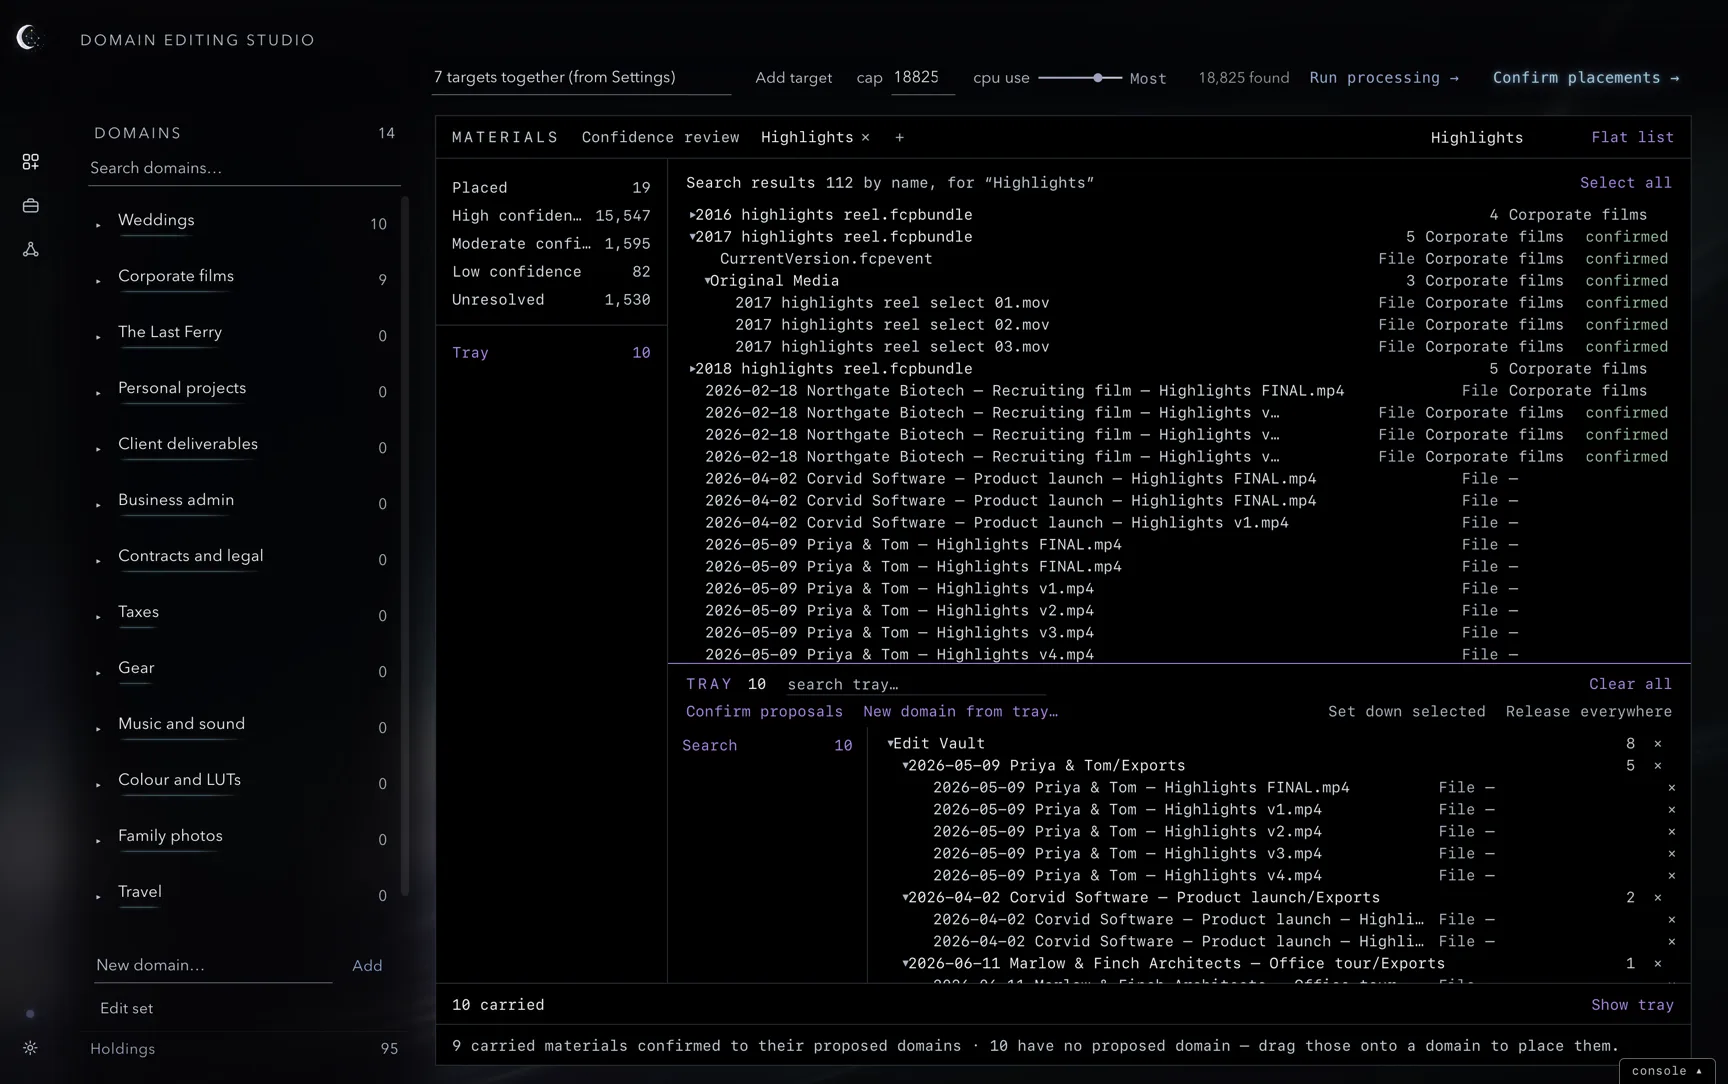
Use the tray’s search field to narrow its contents. Release everywhere removes the carried materials’ confirmed placements from all domains. Release from “X” removes only their placements in the named domain. The materials remain in the tray.
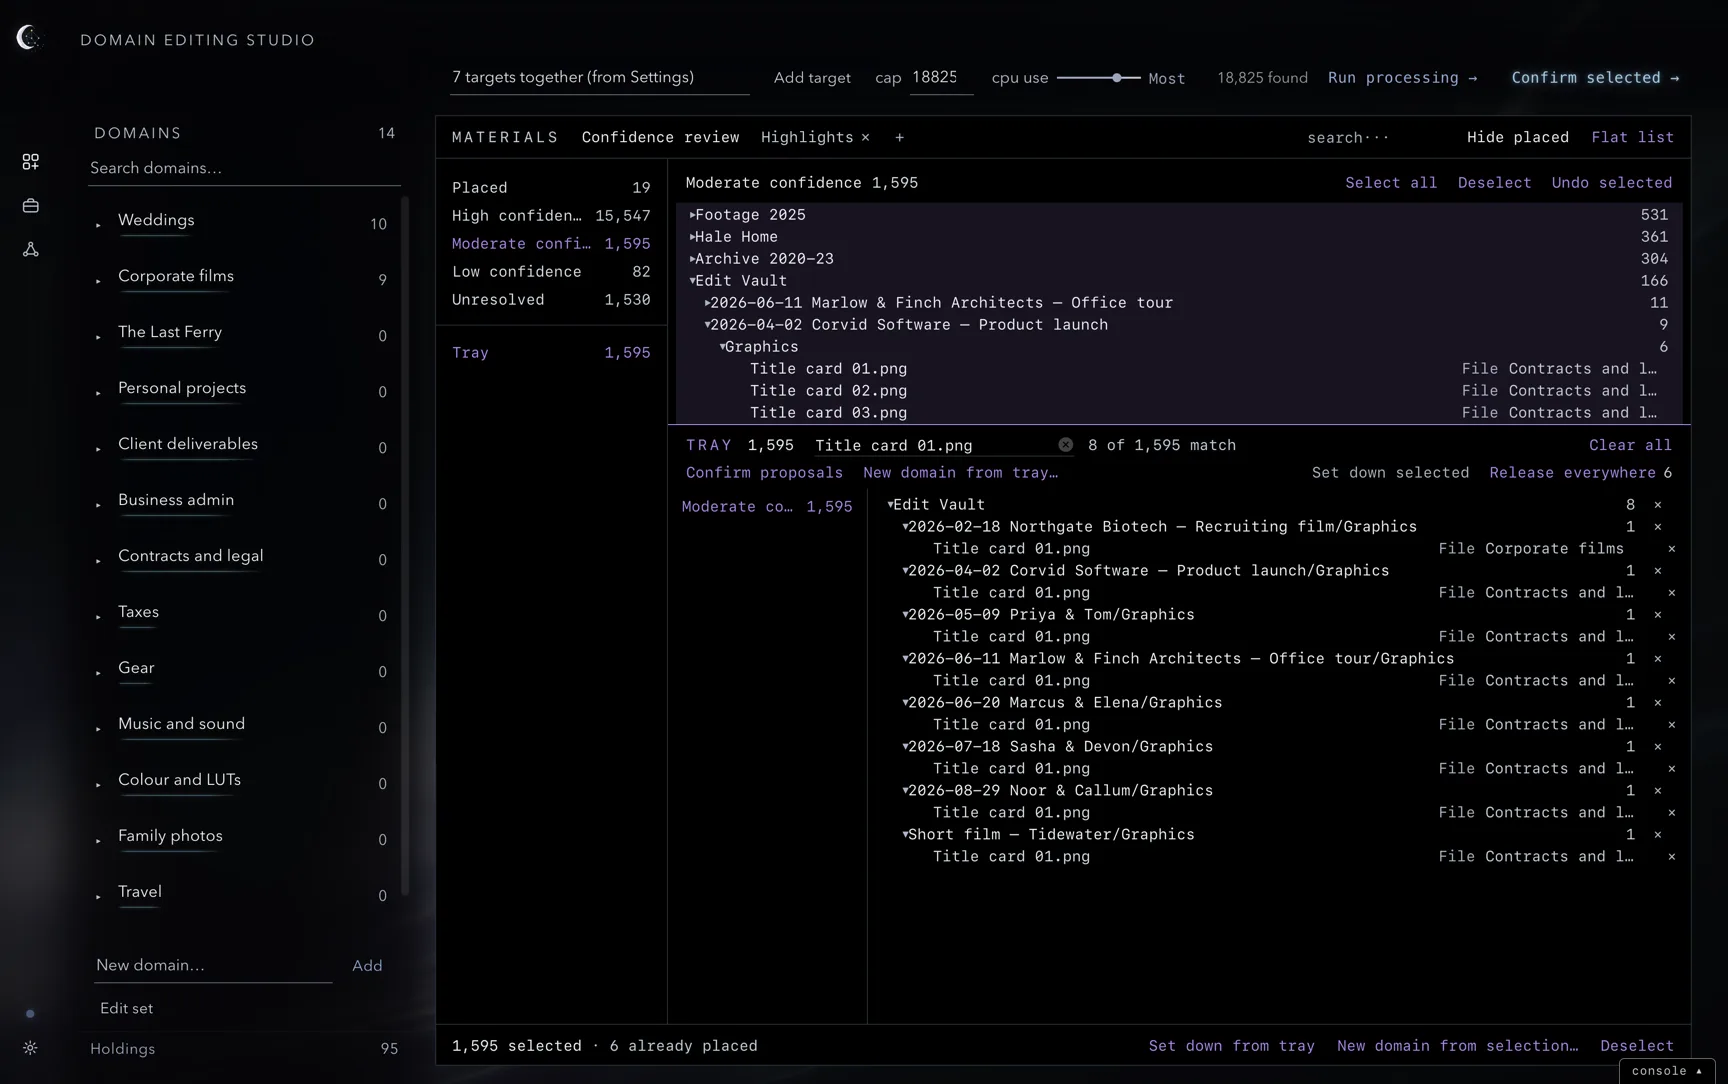
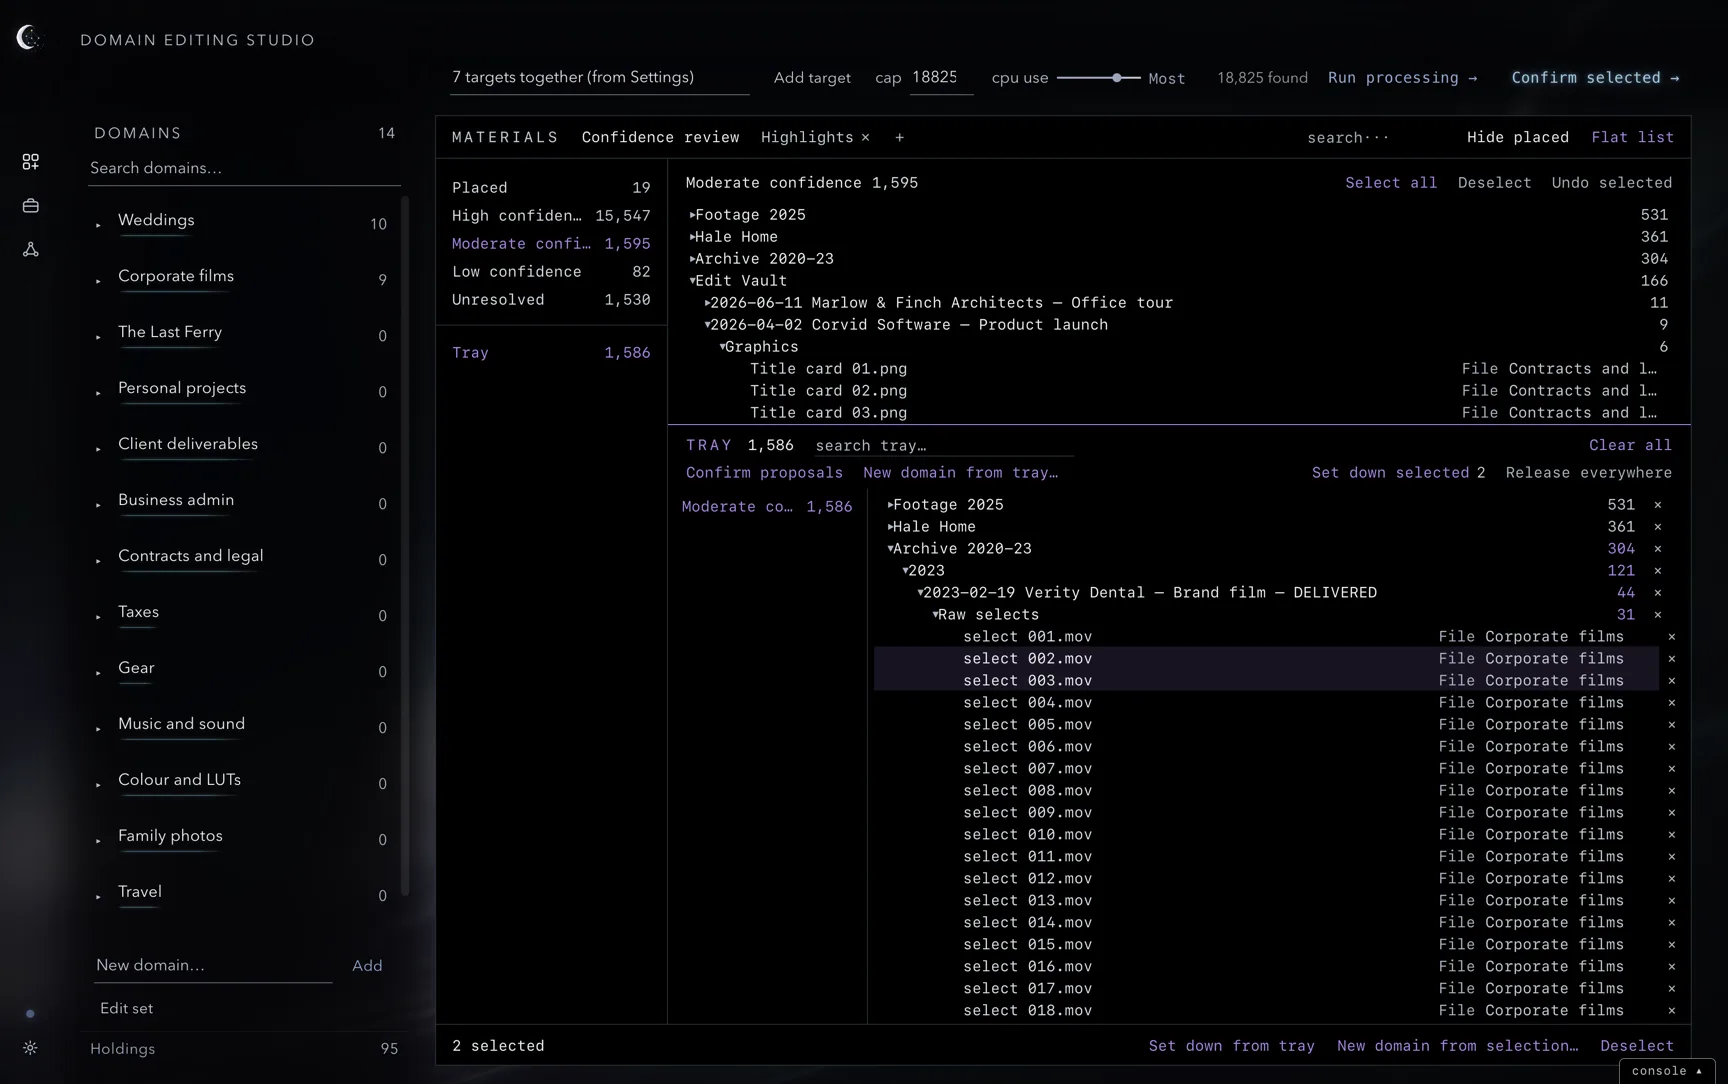
To take materials out of the tray, select them in the tray and use Set down selected in the tray bar, Set down from tray in the selection bar, or ⌥Delete; a row’s × removes that row, and Clear all empties the tray. Set-down returns materials to review and leaves their domain placements unchanged. Deselect in the selection bar clears the selection only.
Copy content
Copy content adds a domain’s placed materials to the tray as a group and selects them. Use the group to place those materials into another domain. Copy each subdomain separately to add its materials as another group.
Placing by hand
Drag a row or folder onto a domain in the sidebar. A material can belong to several domains; each placement adds it to the chosen domain while retaining its existing memberships. The domain count updates after placement.
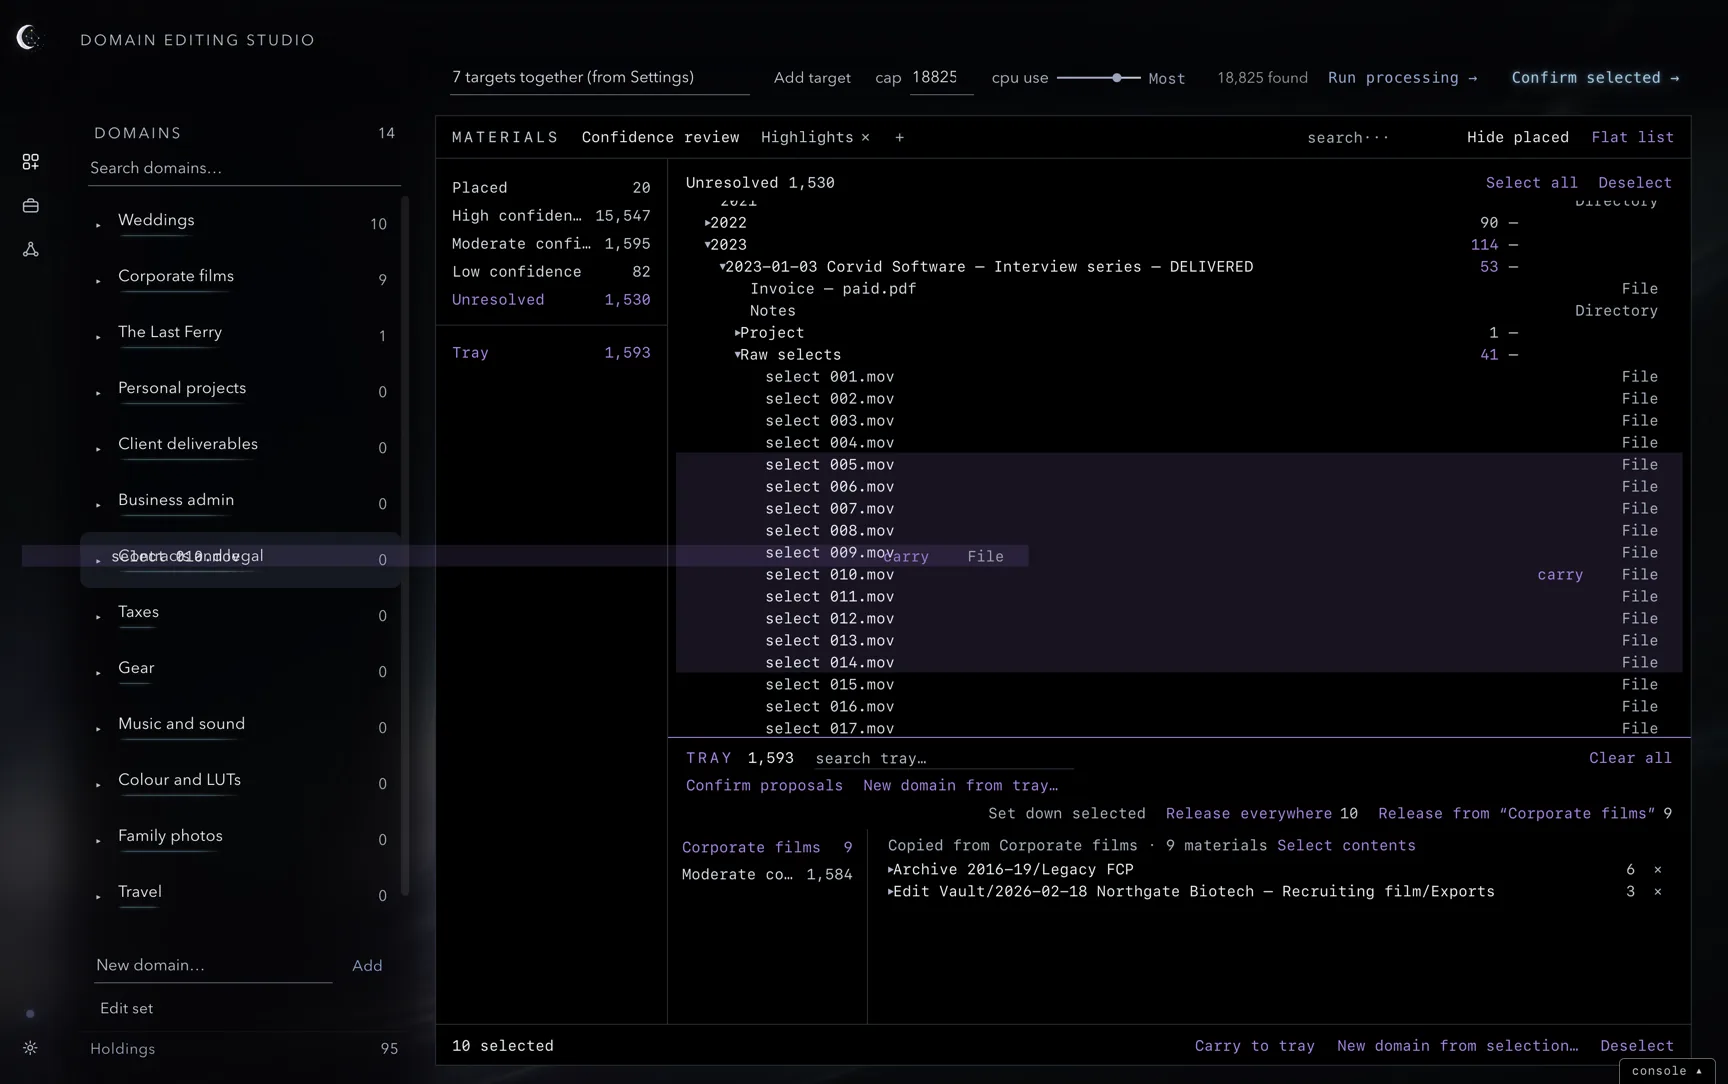
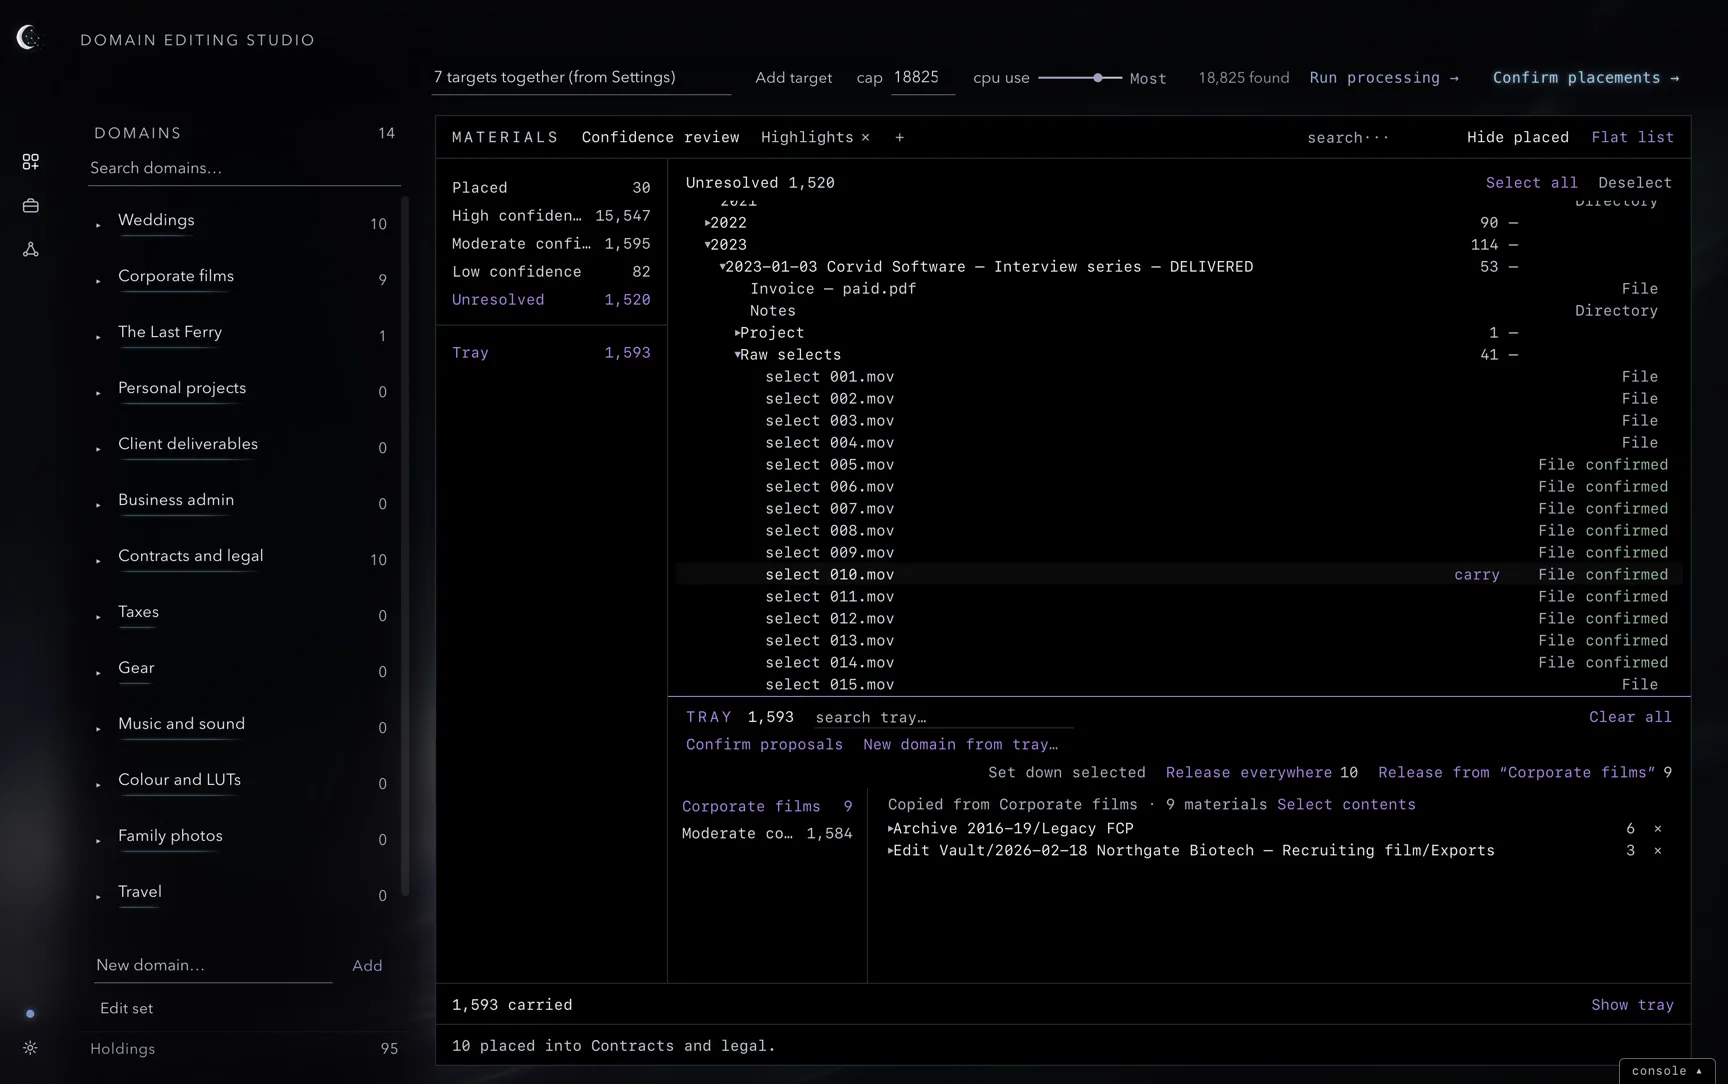
Placements are stored in Lunaea. The original files remain in their existing locations.
Confirming
Confirm selected (⌘Return) confirms each selected material into its proposed domain. Inside a domain’s view, a material proposed for that domain is placed there. To place a material somewhere else, drag it onto the domain or use Add to domain… in its row menu. A material can belong to more than one domain.
With no selection, Confirm placements → makes the current domain set and existing placements available in the Environment Workspace. To accept further proposals, select their materials and confirm them. Undo confirmation in a window header or row menu releases confirmed placements back to review.
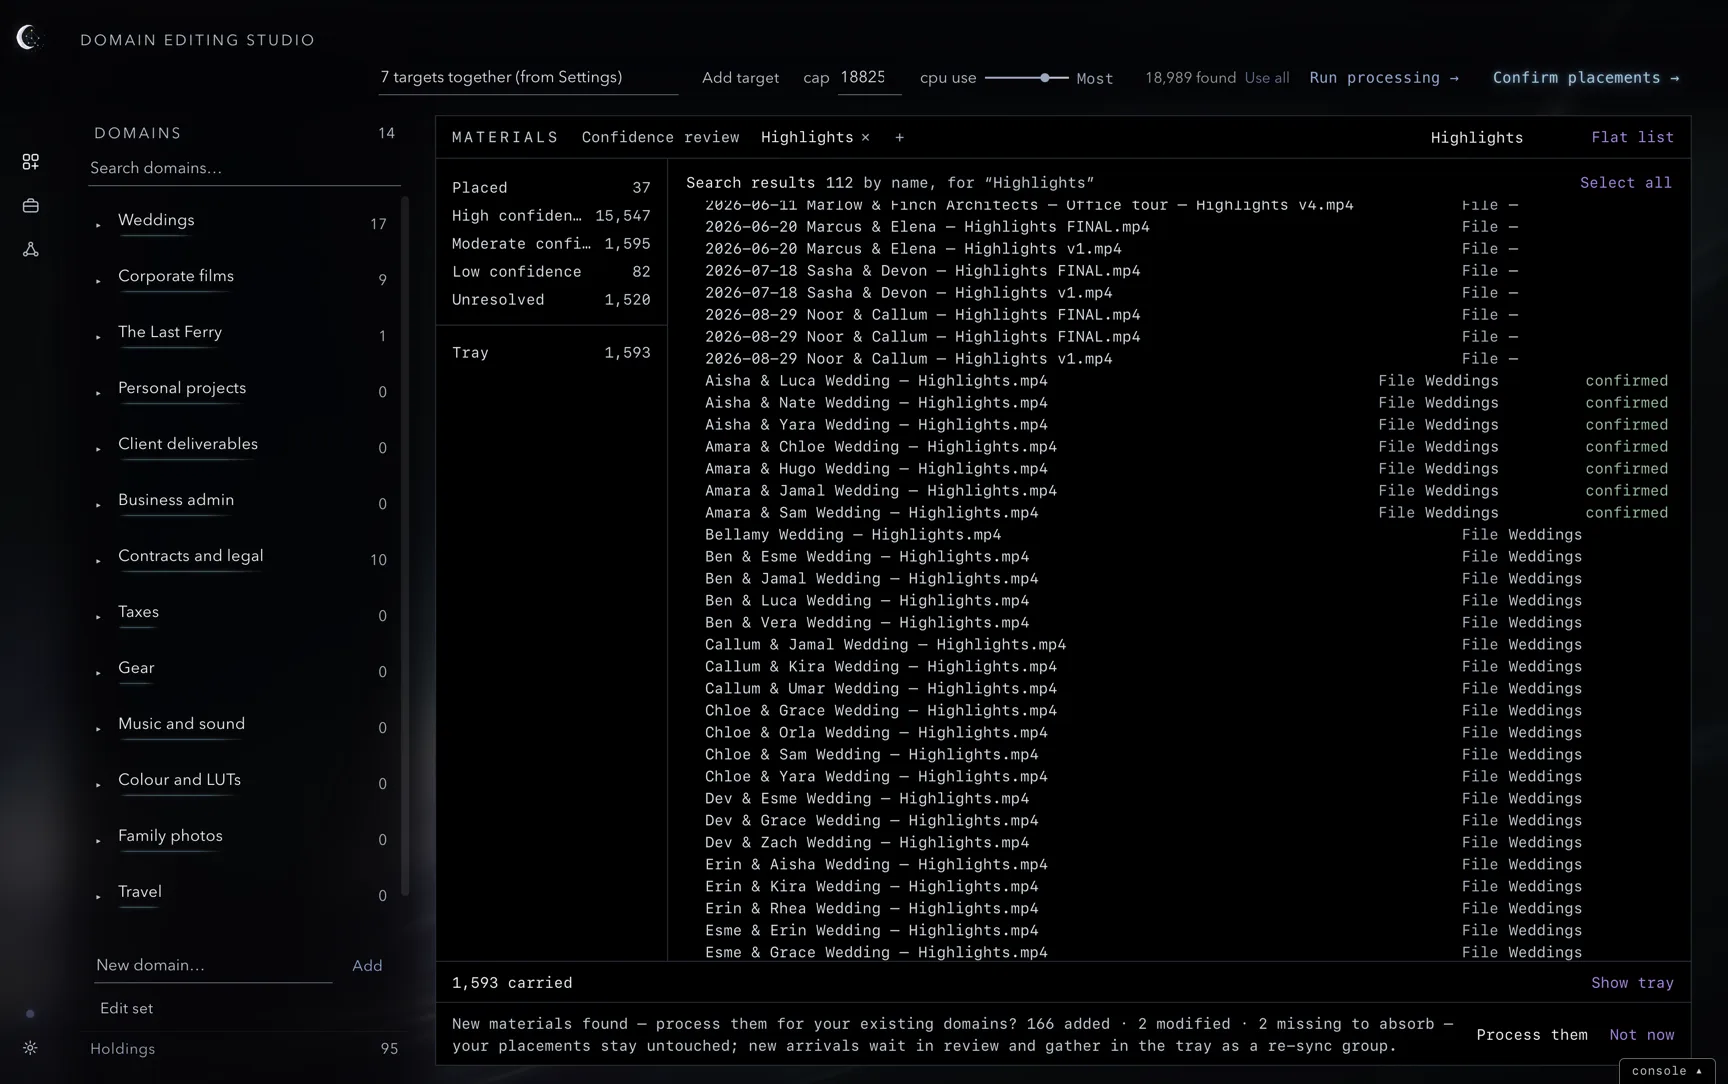
Undo and redo
⌘Z undoes the last placement or domain change; ⇧⌘Z redoes it. This includes confirmations, releases, domain creation and deletion, renaming, moving subdomains, set edits, reordering, and everything done with the tray: carrying, setting down, Copy content and Clear all. Excluding or including a path in the re-sync log can be undone too. Undoing a confirmation removes its new placements and preserves earlier placements. If the action confirmed materials from the tray, those materials return to the tray. Undoing a release restores its placements.
Open Edit ▸ Undo / Redo History (⌥⌘Z) to see the last 50 actions, saved with the workspace. Choose Placements & domains or Graph settings, then click a row to return to the state after that action. Undo and Redo move one step at a time. A new action after Undo replaces the remaining redo history.
The panel shows progress during a restore and marks the last completed action. If an action fails, it remains available to retry. Drag the panel by its title to move it; Esc closes it.
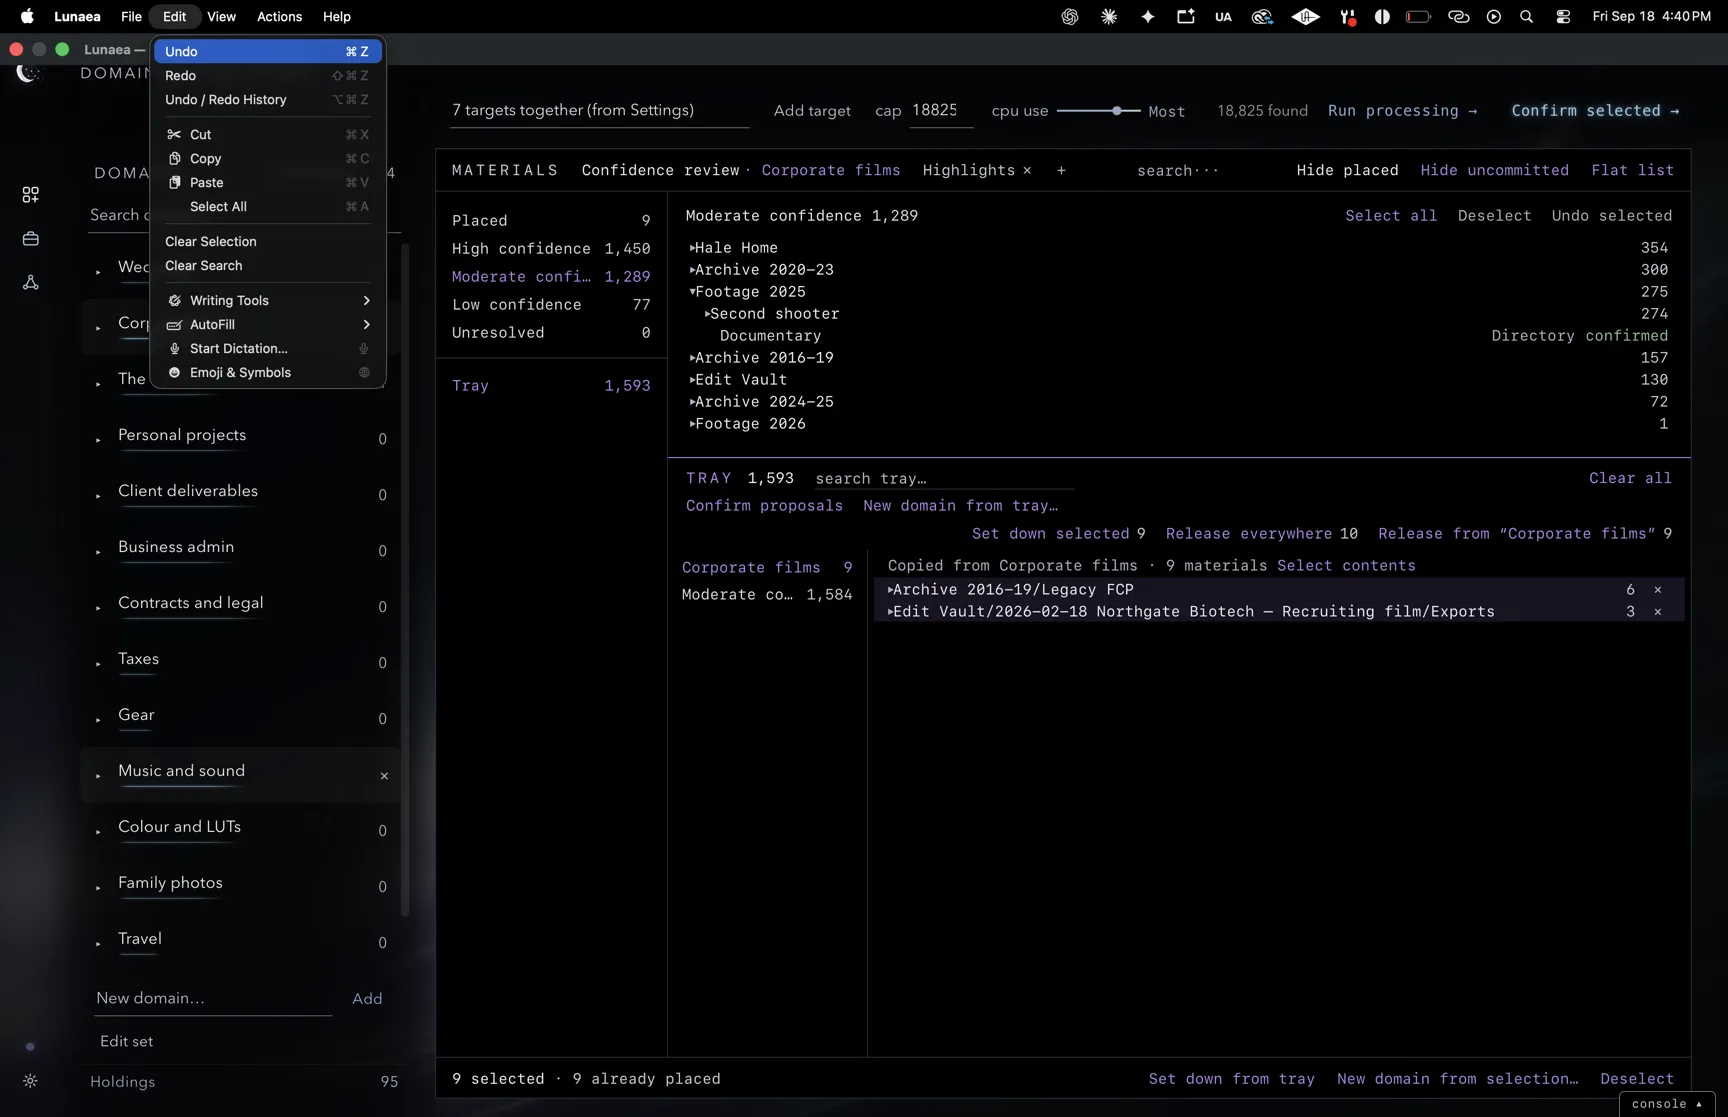
Holdings
Holdings opens Duplicate holding and Libraries & settings. Duplicate holding groups materials with the same name family, exact size and format, keeping one original in review and the extra copies in the holding. Libraries & settings holds application-support material. Use Fold into domain… or make it a domain to place a holding into a domain. Each holding also has a control to turn it off.
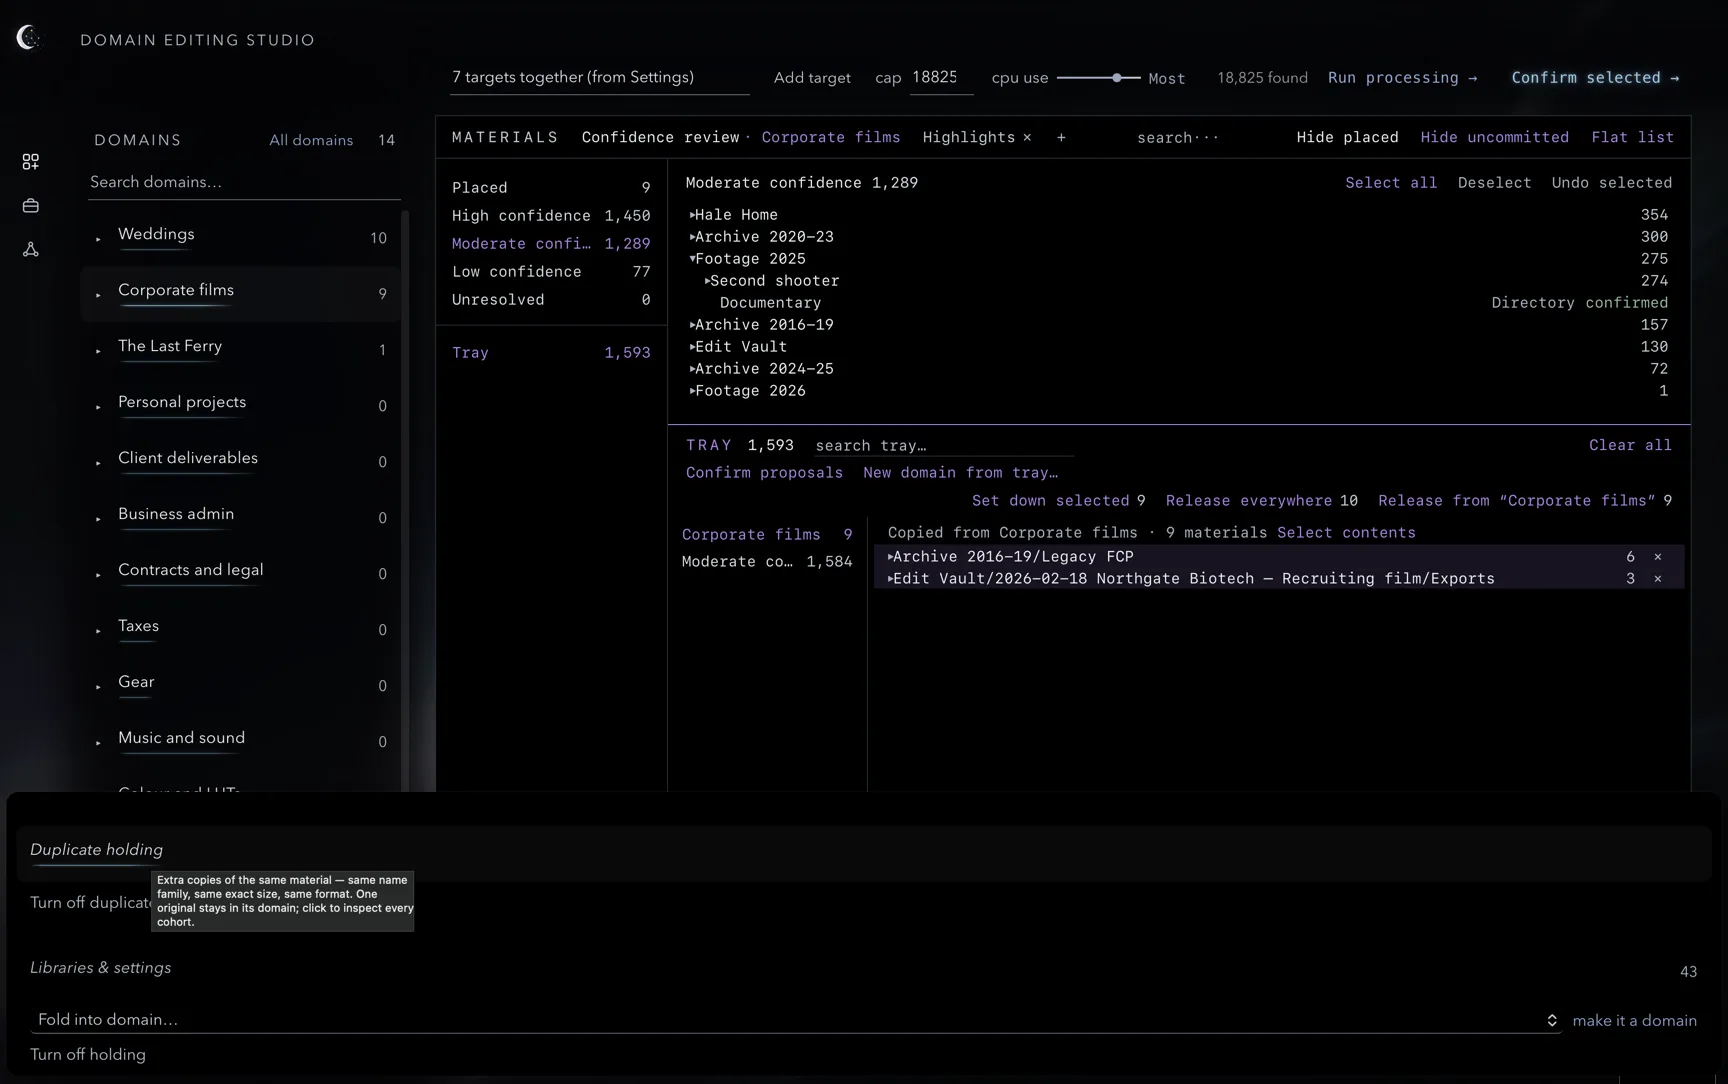
Click a holding to open its materials. Duplicate holding shows the number of cohorts and held copies, grouped by location.
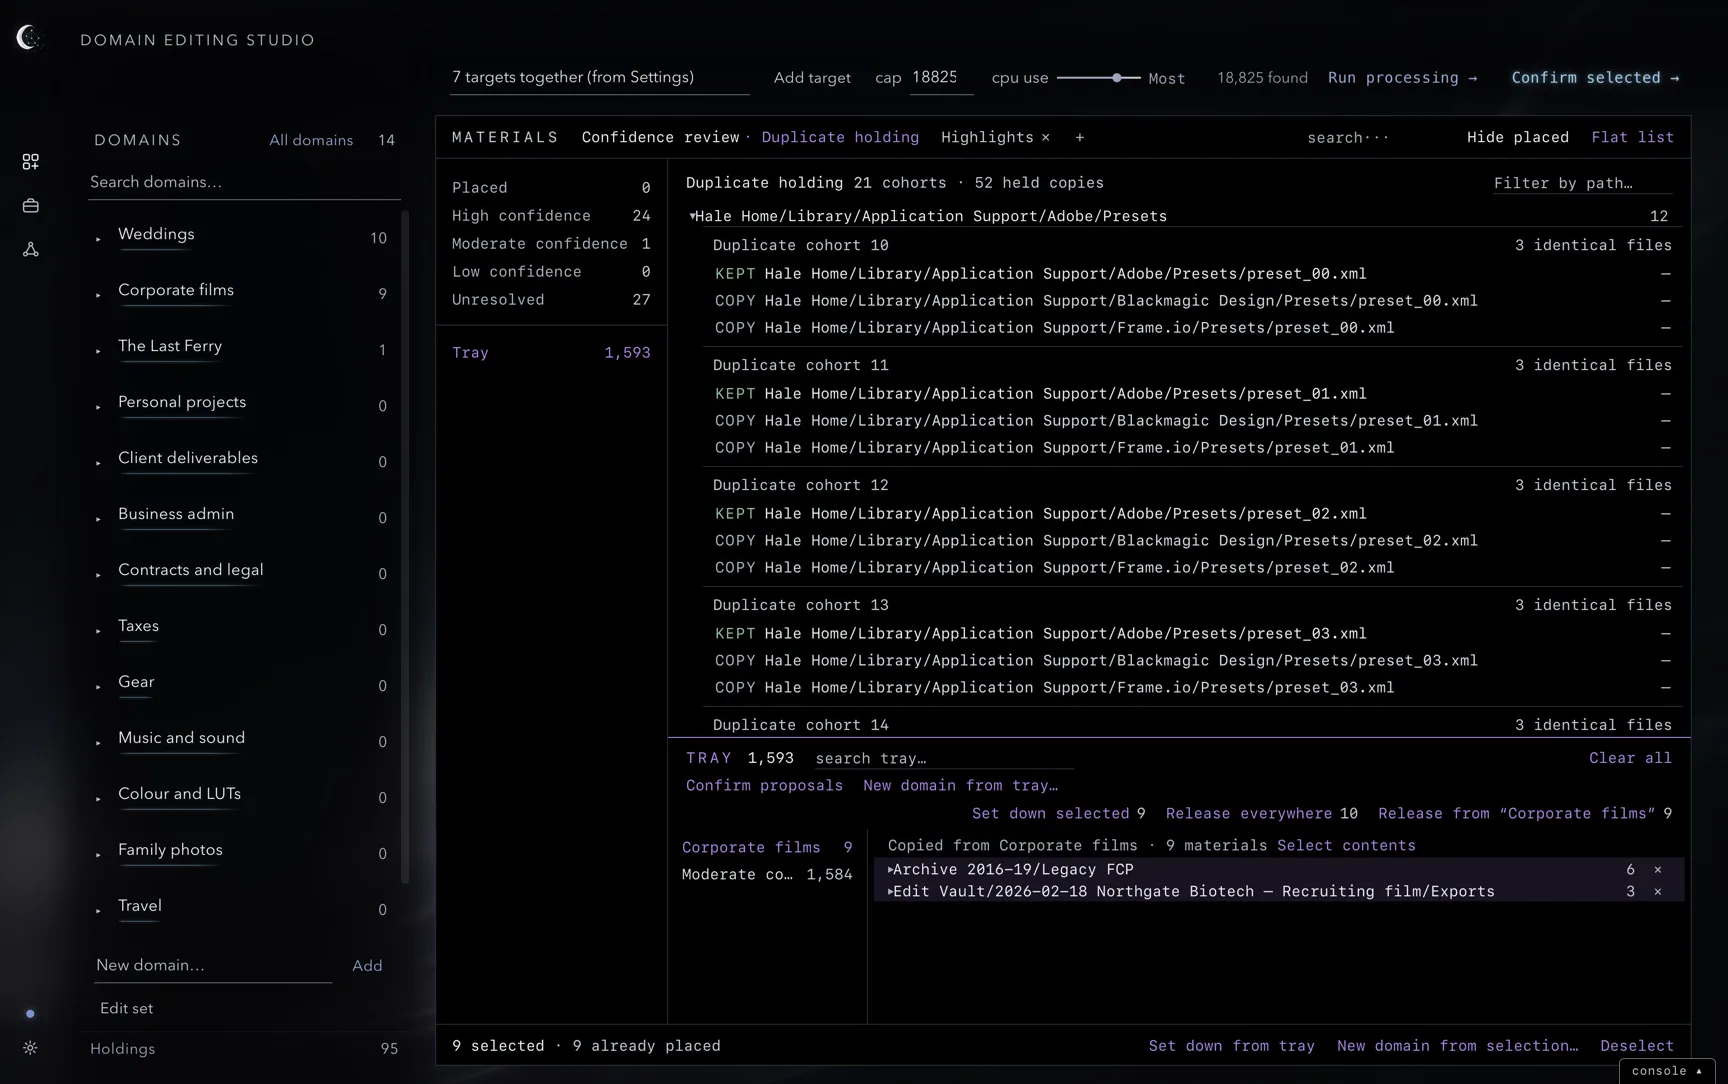
Unresolved
Unresolved contains materials without enough available evidence for a confident proposal. You can place them by hand, carry them to the tray, create a domain from a selection, or leave them for later review.
Subdomains
Create a subdomain with New subdomain… in a domain’s menu, or use the field below an expanded domain. A subdomain has its own placement count. Materials can belong to both a parent and a subdomain.
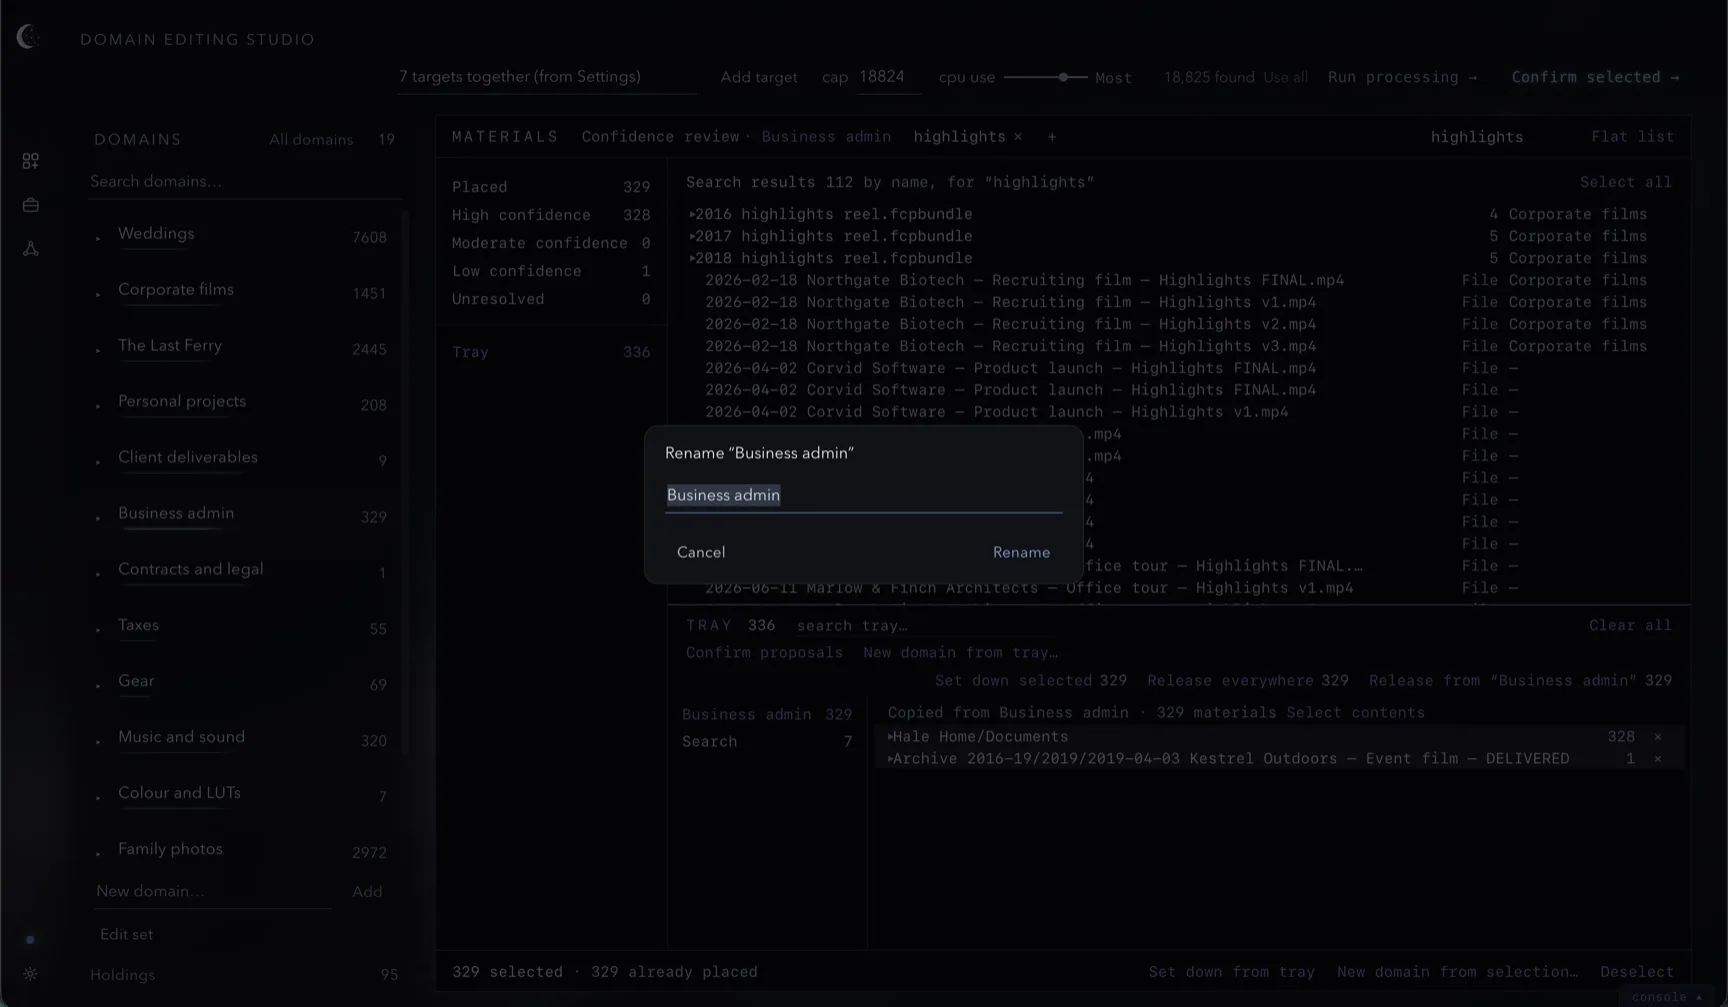
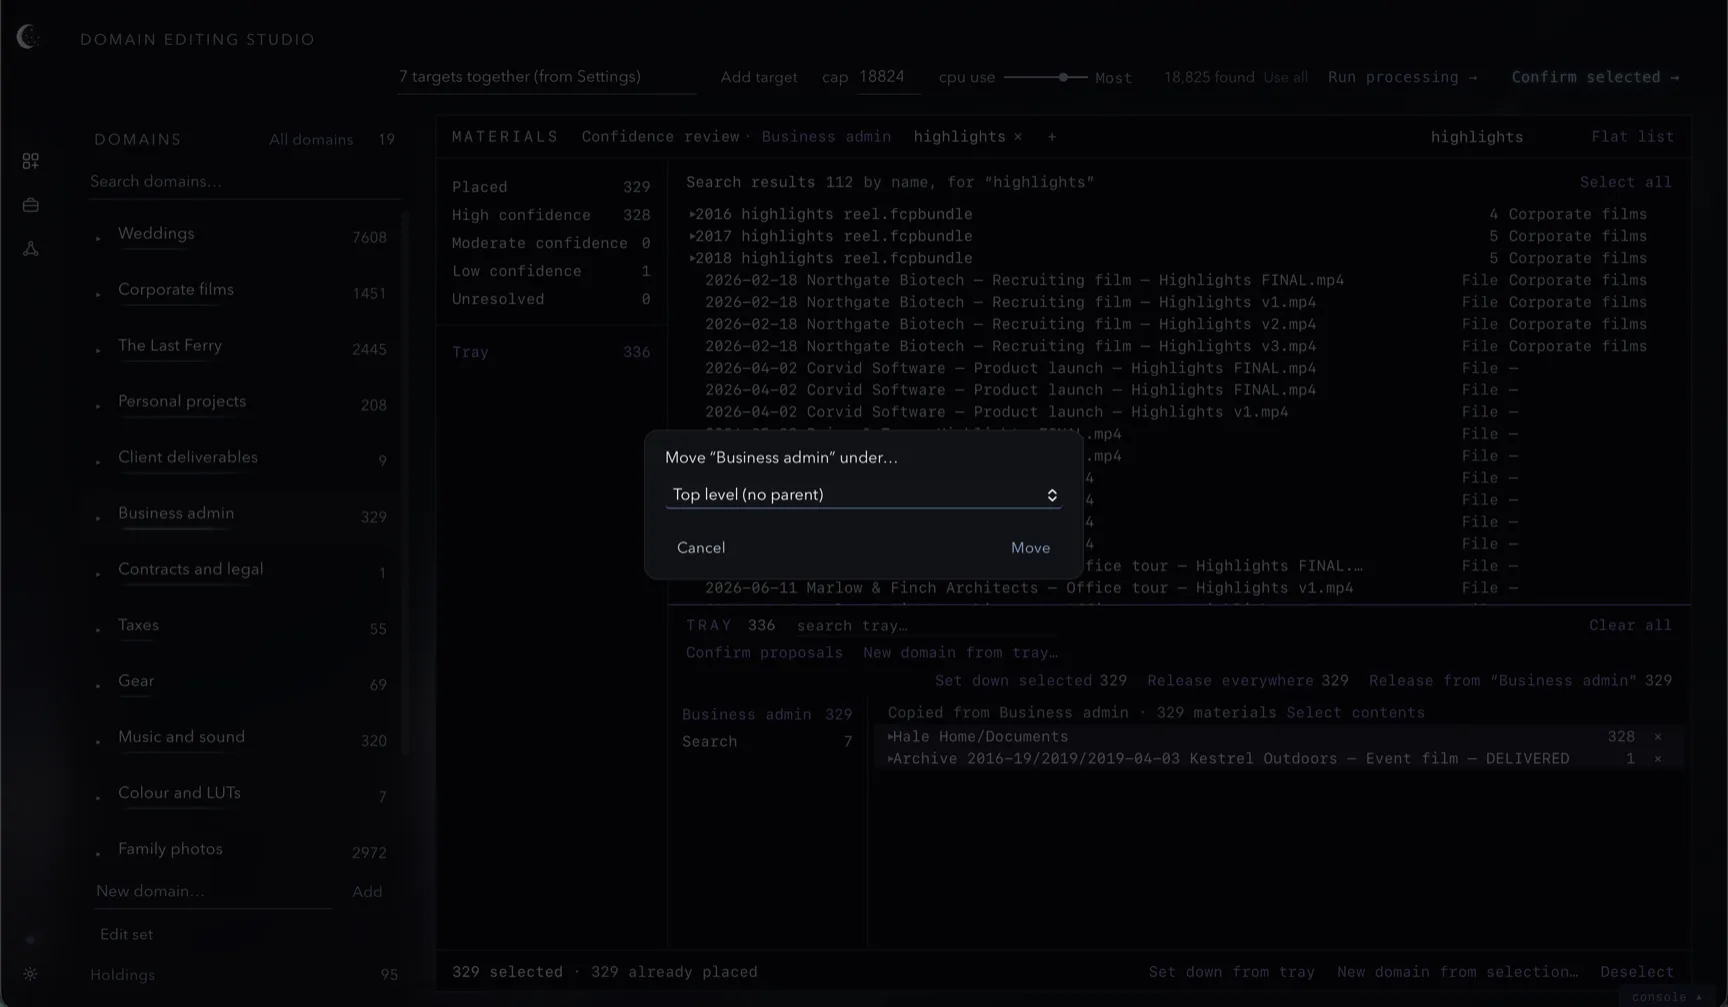
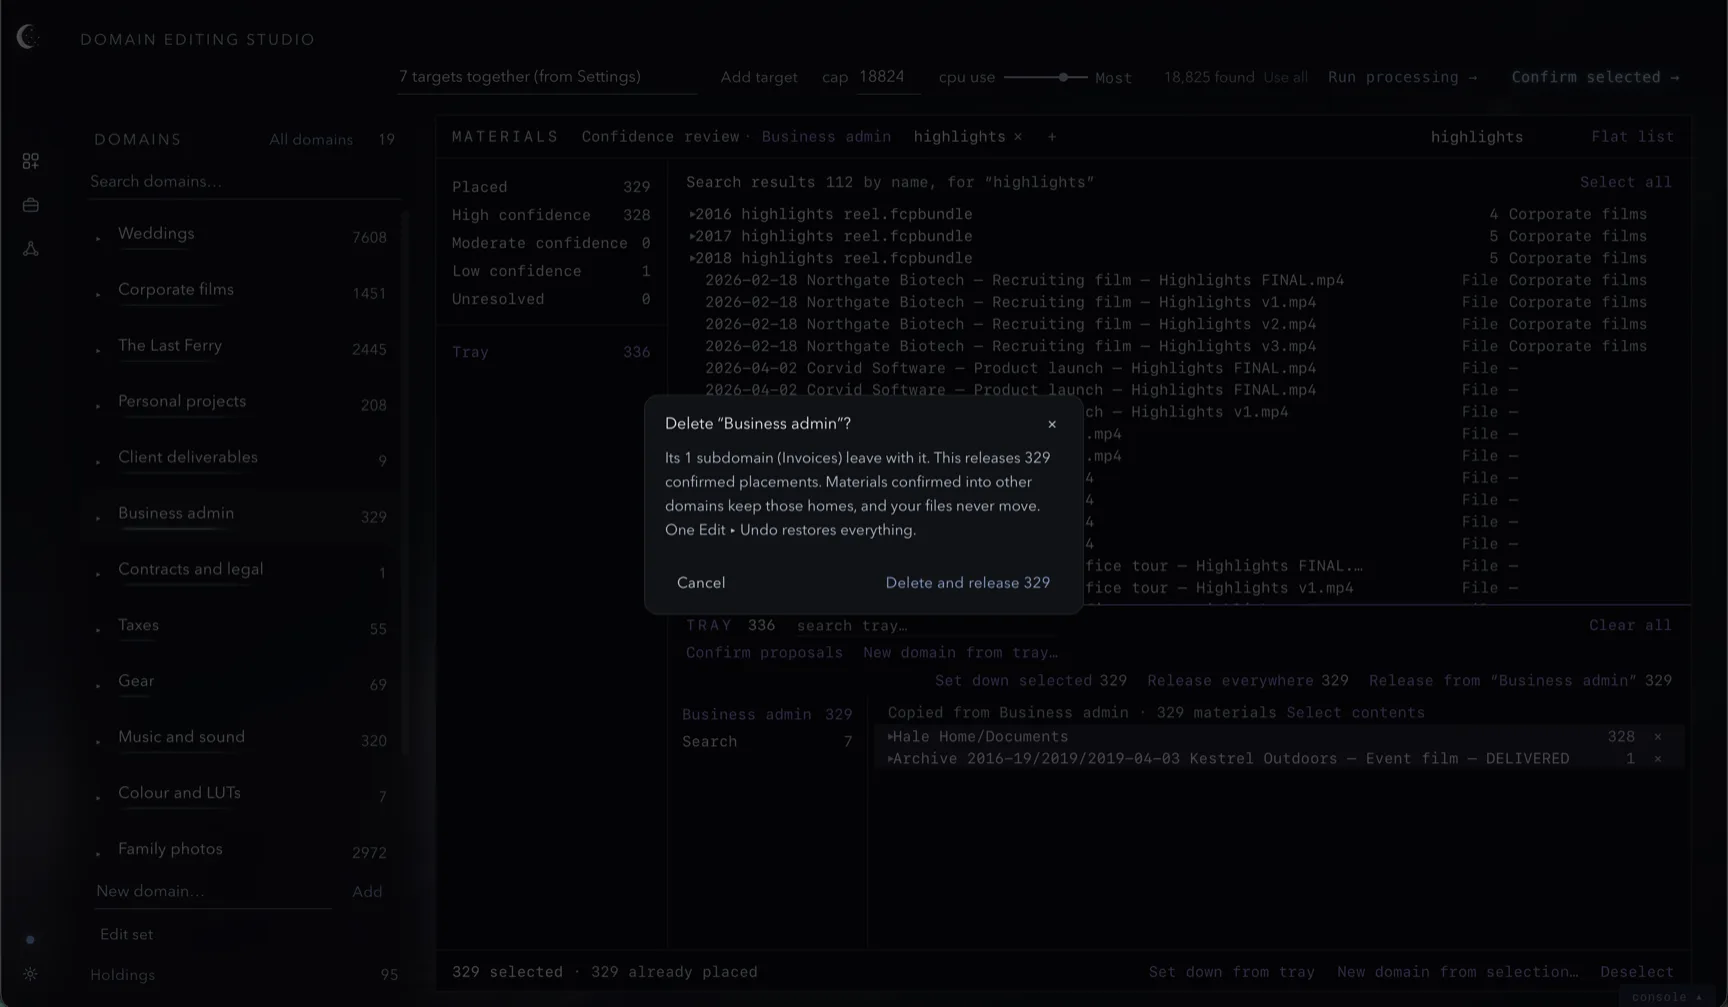
Use Rename… to change a title or Move under… to change its parent. Existing confirmations stay with the domain. Before deleting a parent, the dialog lists its subdomains and the placements that will be released.
Filling a new domain or subdomain
Fill a new domain or subdomain by dragging materials onto it, placing a tray group, using Add to domain…, or choosing New domain from selection…. Run processing again to receive proposals for it. Existing confirmations are retained.
The inspector
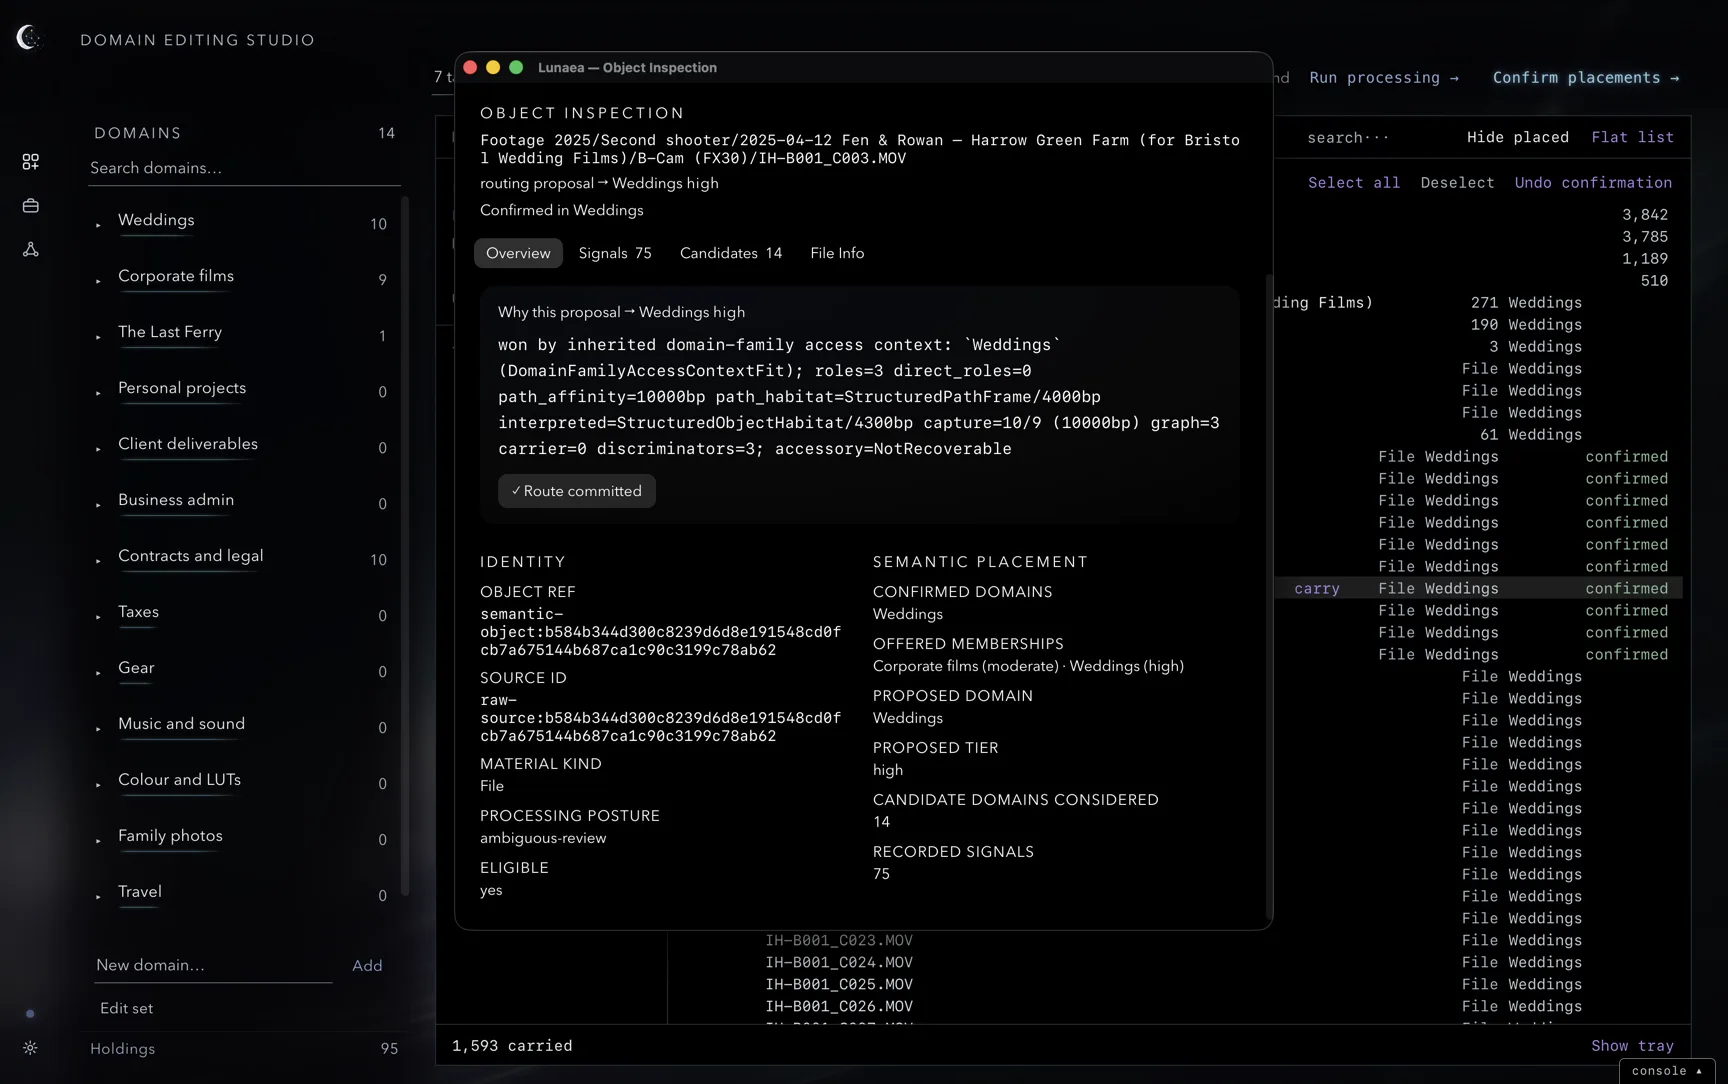
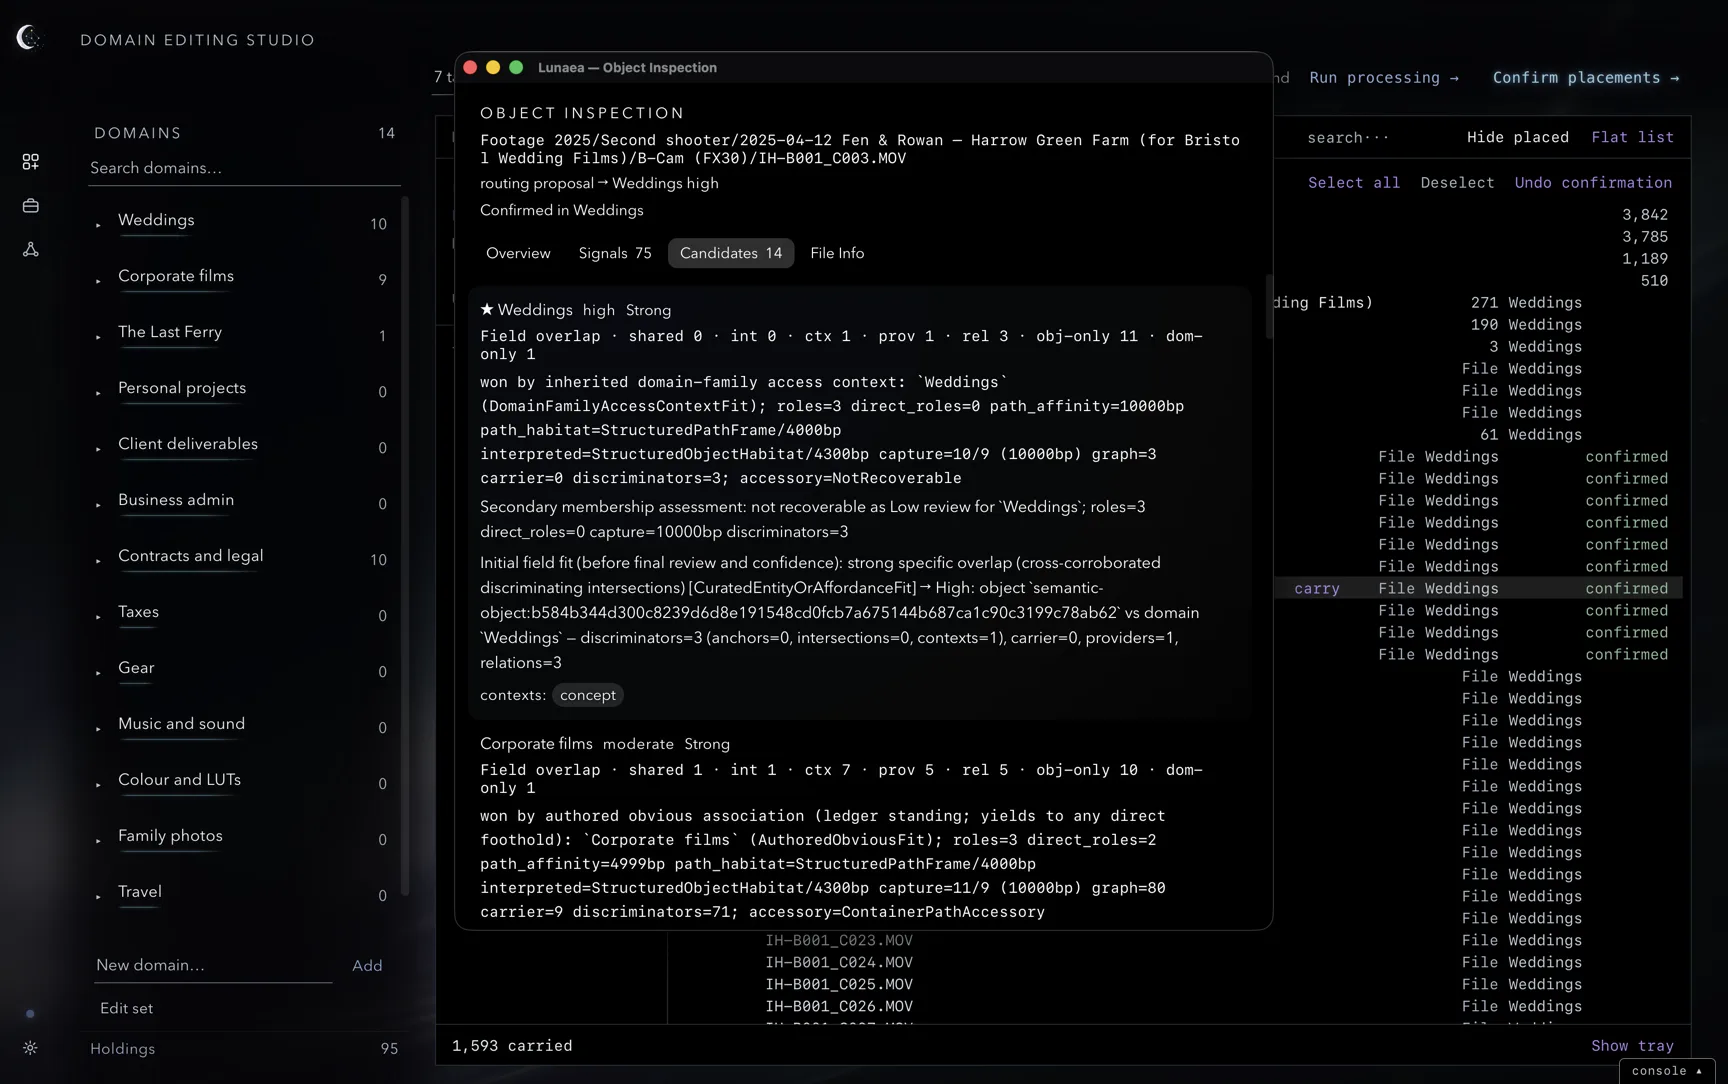
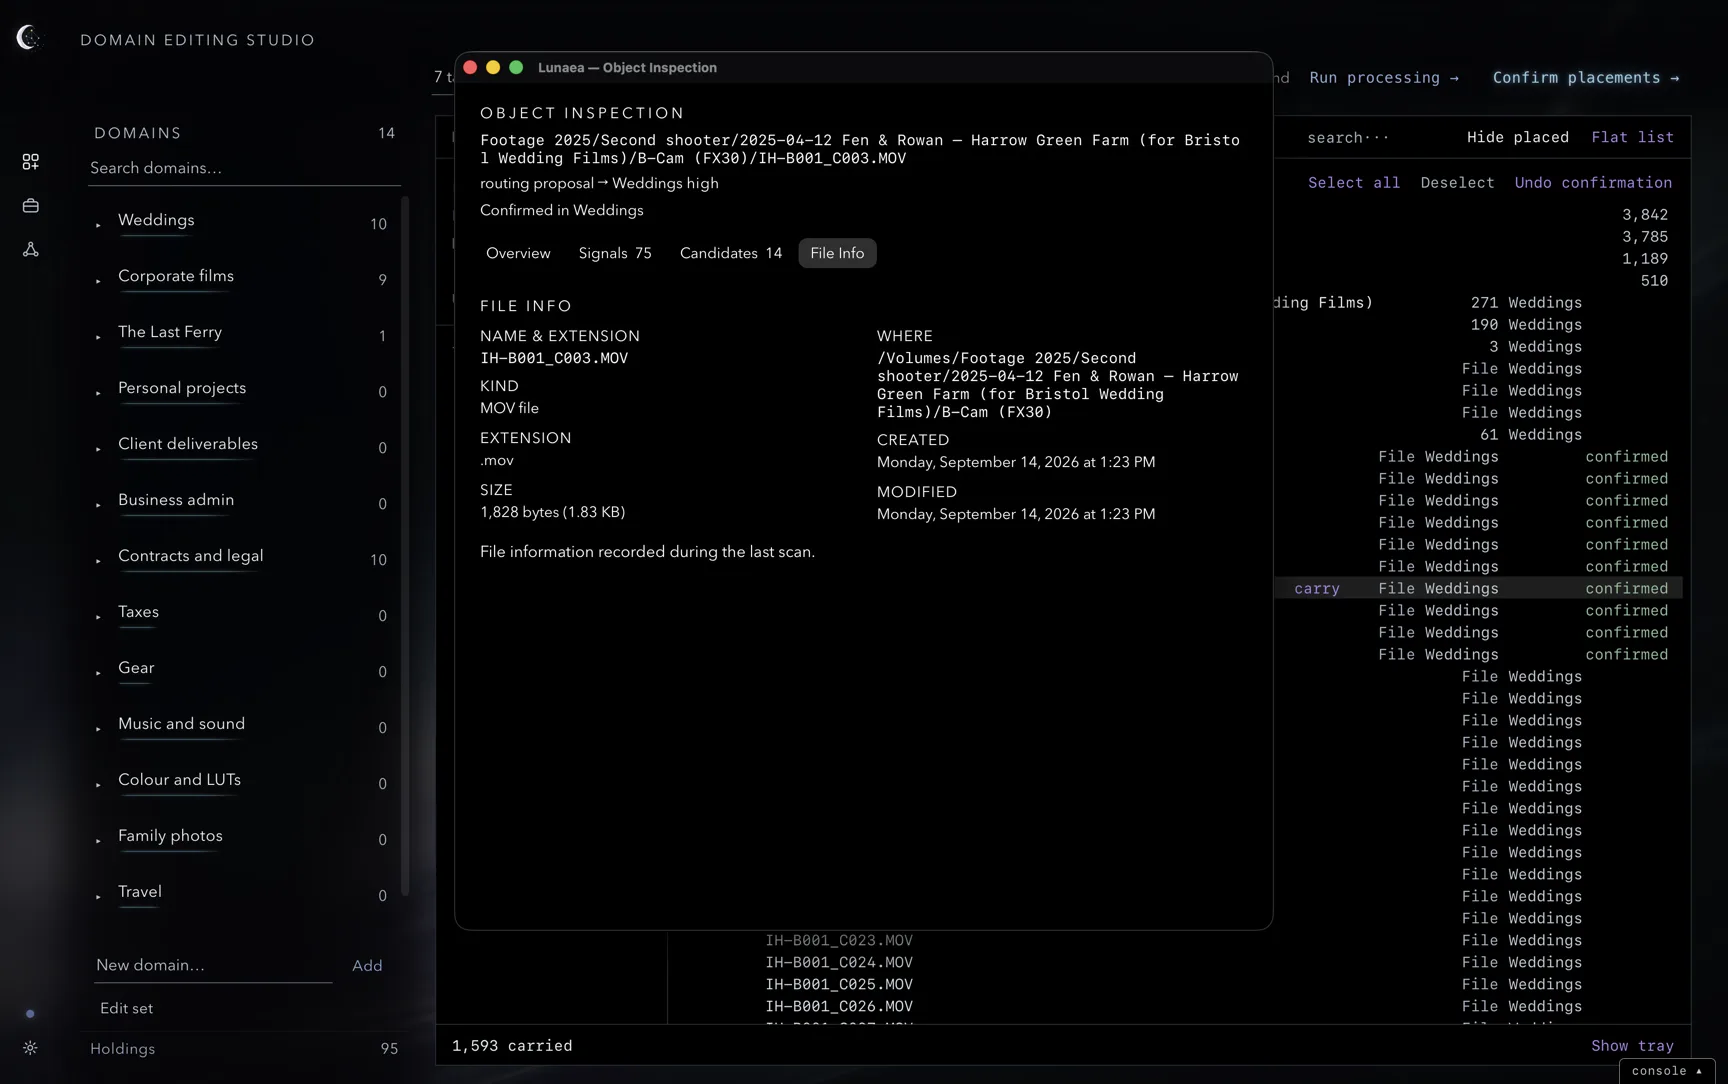
Object inspection in a row’s menu, or ⌘I on a focused material, opens an explanation of its proposed placement in a separate window.
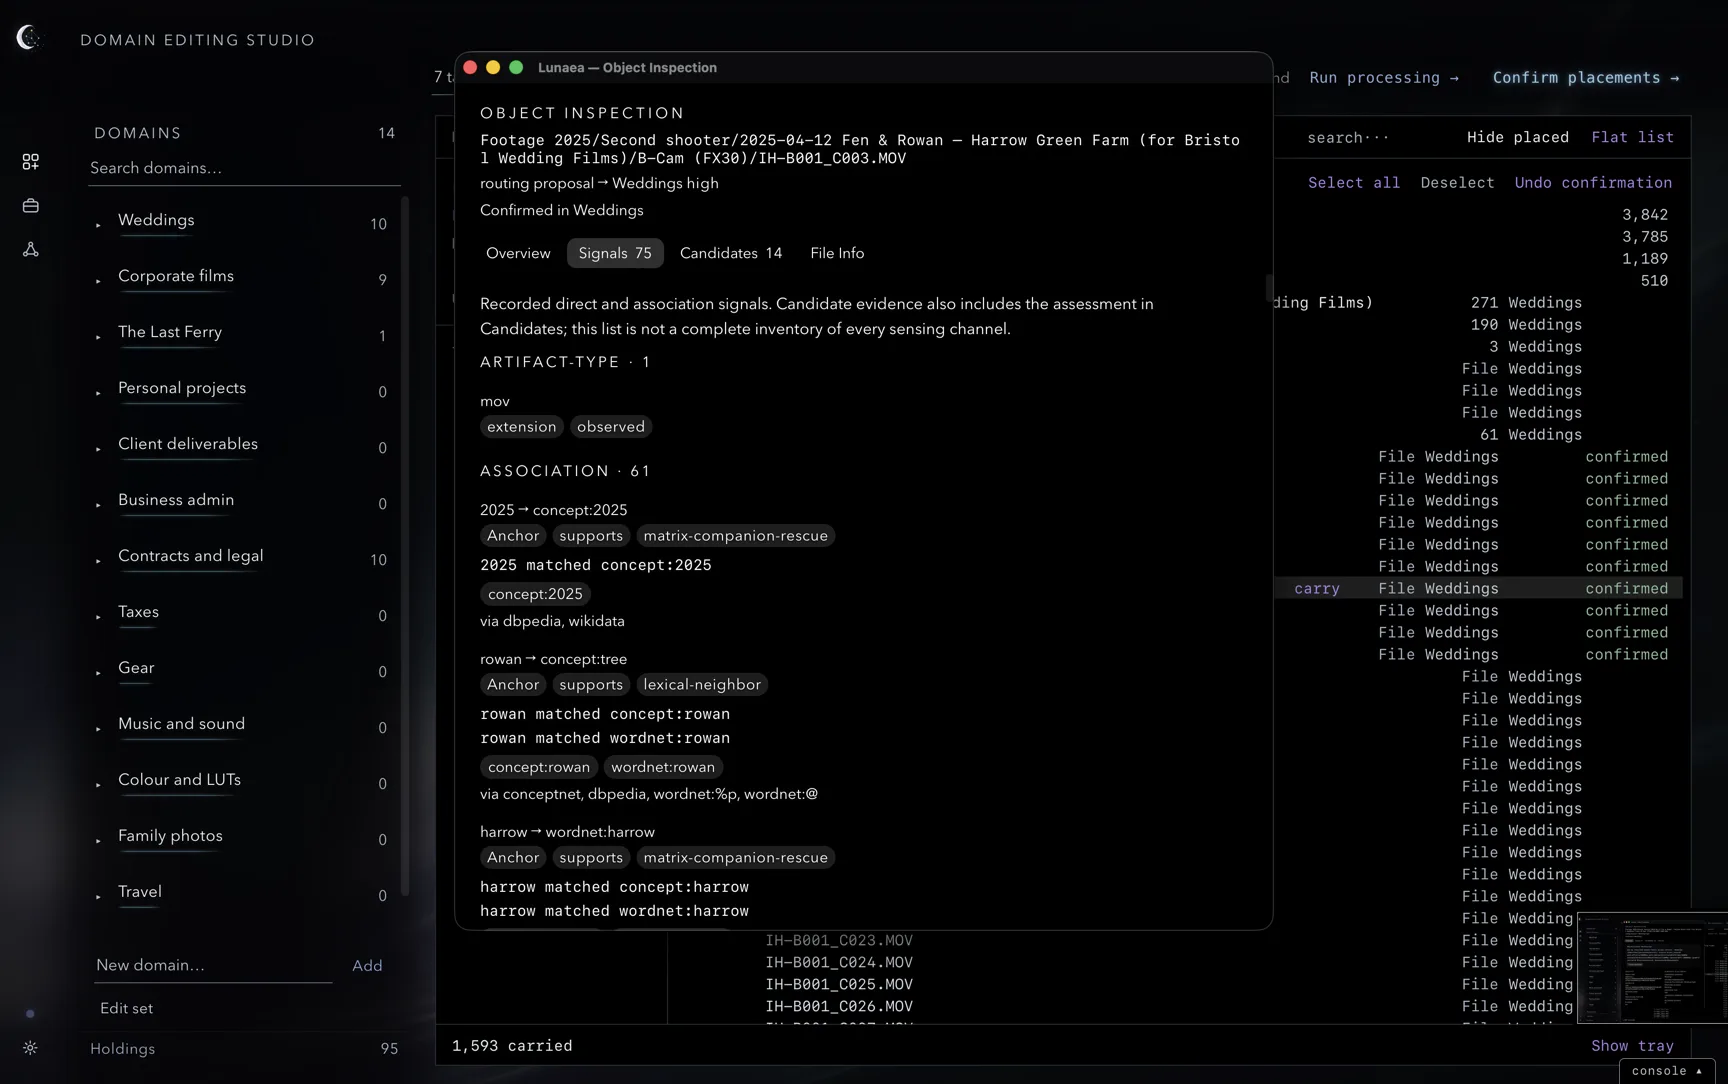
Overview shows the proposal, confirmations, offered memberships, domains considered and recorded signals. Signals shows the observed file type and associations found in its name and path. Candidates explains the assessment of each considered domain. File Info contains the name, kind, extension, size, location and dates from the latest scan. Close the inspector with Esc or ⌘W.
The Environment Workspace
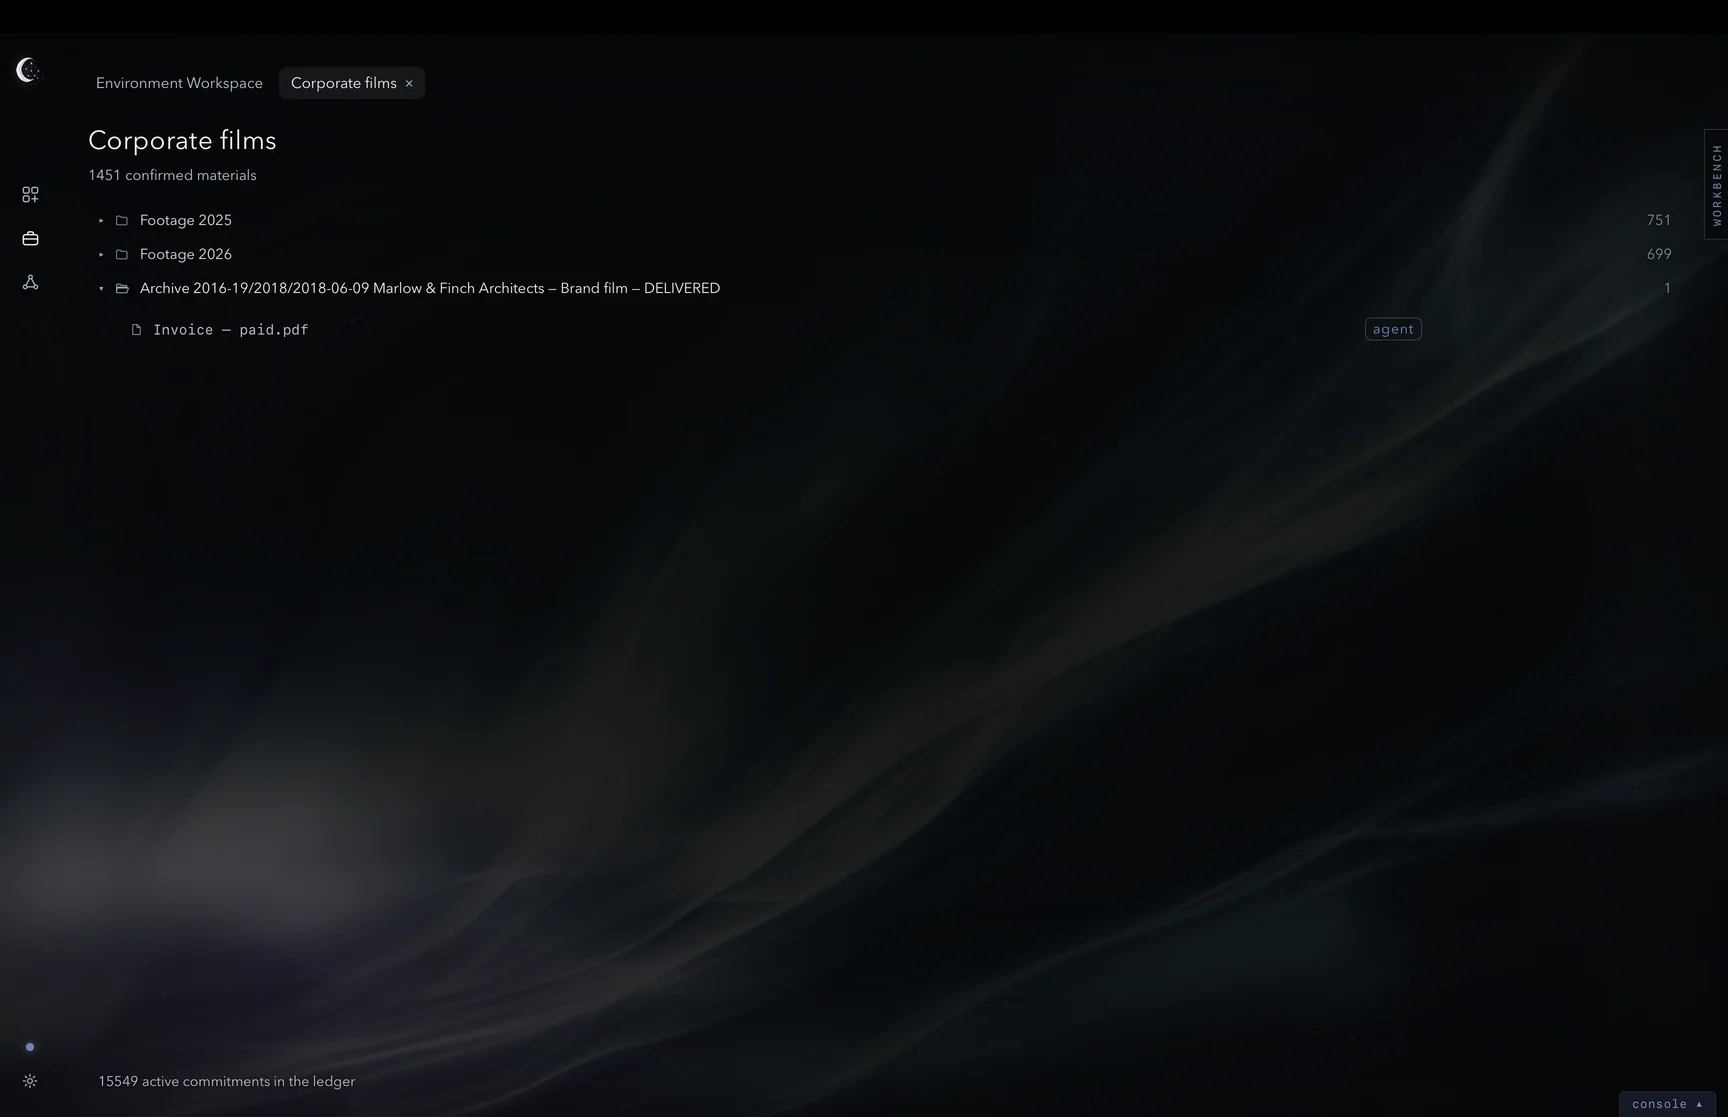
The Environment Workspace brings together confirmed domain contents, notes and a placement ledger. Open domains as environments to browse and work with their materials.
Your environments
Your environments lists domains with their confirmed placement counts. Subdomains appear beneath their parents with separate counts. Open an environment to browse its materials in their original folder structure.
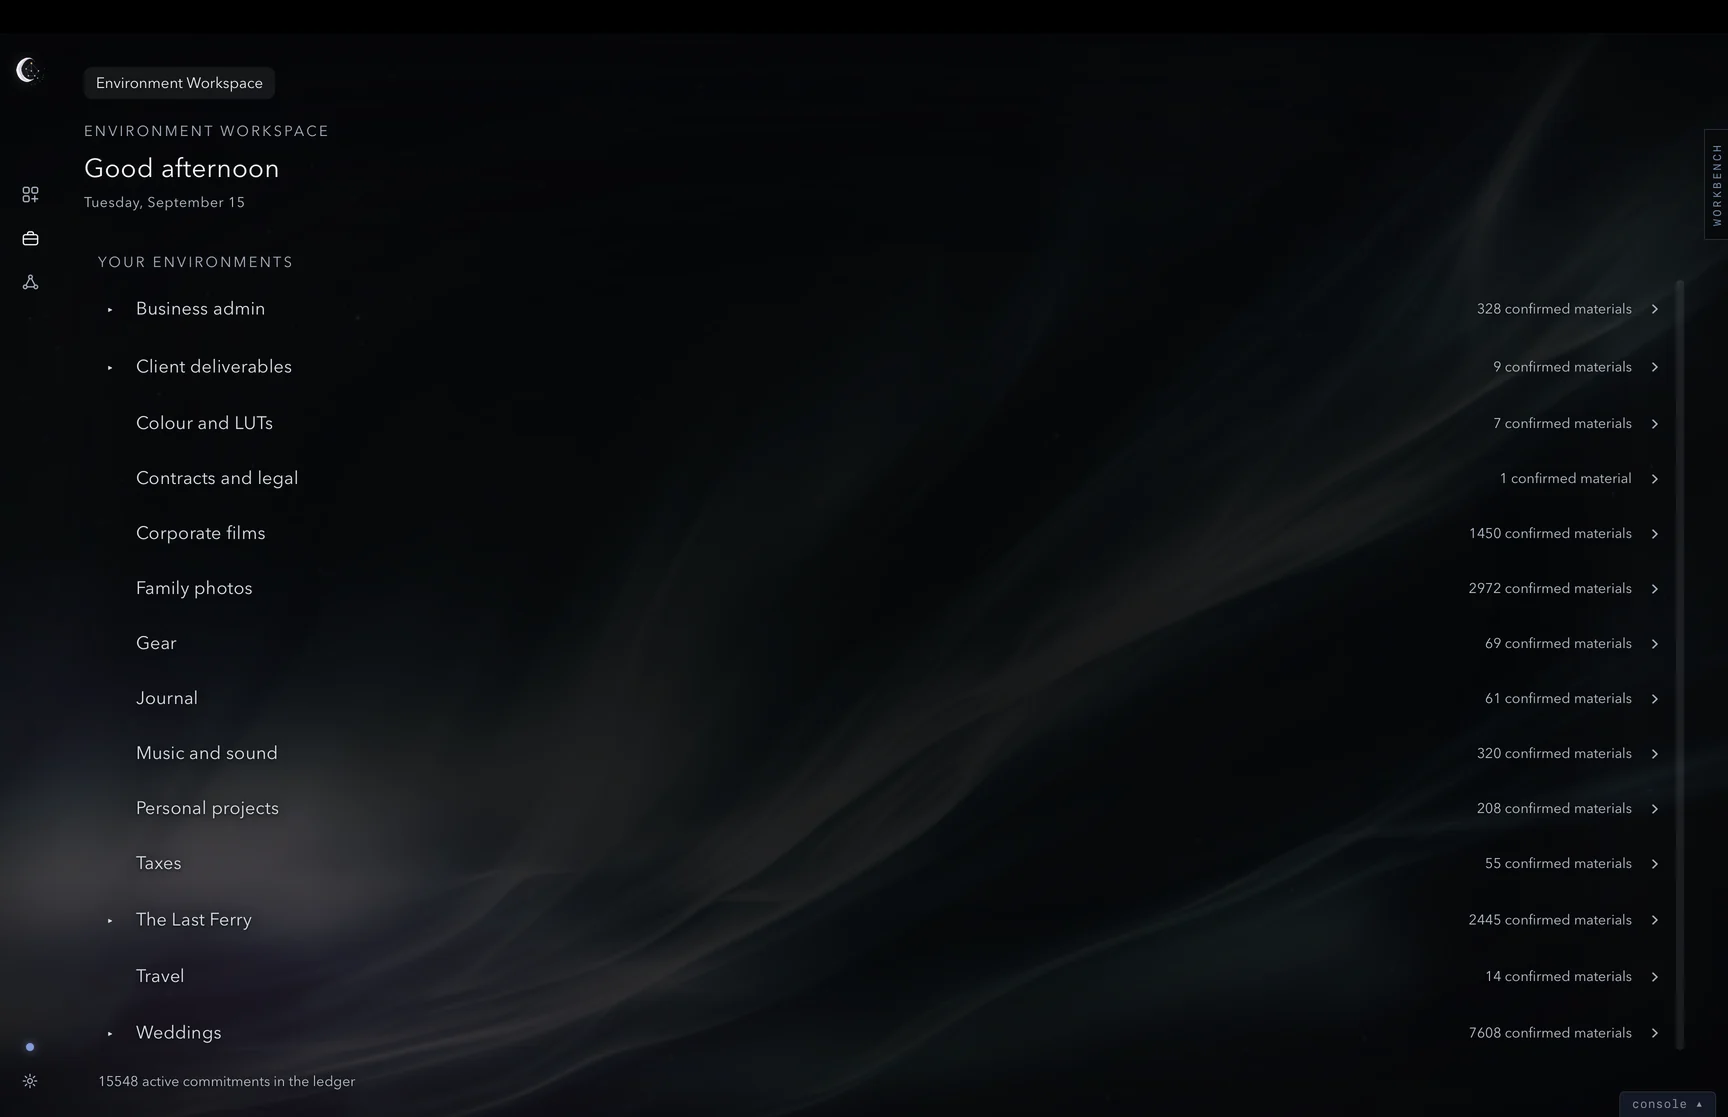
Drag an environment up or down to change its position among its siblings; a line shows where it will land, and its subdomains move with it. This order belongs to the Workspace: until you drag here it follows the Domain Editing Studio, and after your first drag it stays yours, so the environment you always open can sit at the top here while the Studio keeps its own order. Saved with the workspace; ⌘Z undoes a move.
Inside an environment, drag a folder or a file up or down among its siblings the same way. Folders stay above files and keep their contents; the order you give a level is the Workspace's own, separate from the Studio's, and it is saved with the workspace. Dragging pauses while a holdings search narrows the list.
Rename a file or folder here the same way, from its menu or with Return on the row. The name is the item's in Lunaea, shared with the Domain Editing Studio; the disk is untouched.
Inside an environment
Release removes a material’s placement in the current environment and returns it to review. ⌫ on selected materials does the same; Undo restores the placements. Reveal opens the file’s location in Finder. Launch opens the file in its associated application.
Right-click a material and choose Object inspection. This opens the shared inspector described in Chapter 4, with Overview, Signals, Candidates and File Info tabs.
The domain menu
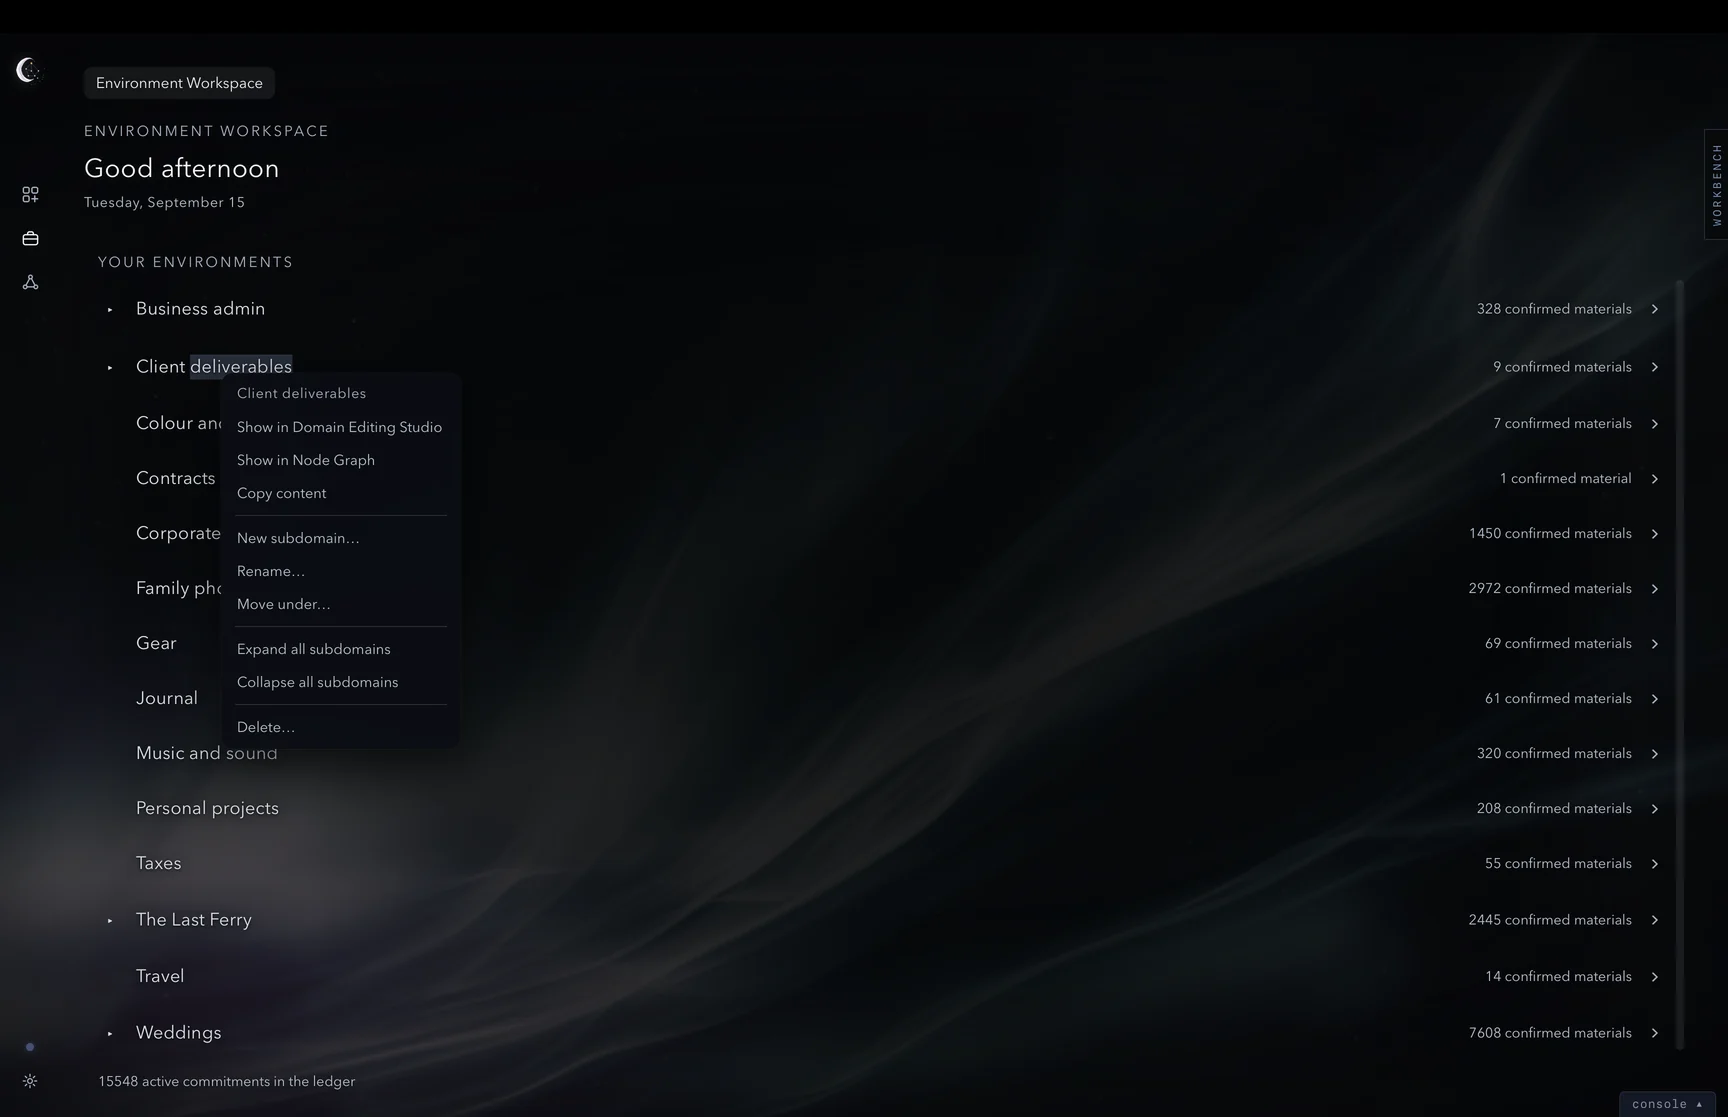
Right-click an environment to open it in the Domain Editing Studio or Node Graph, copy its content to the tray, add a subdomain, rename it, move it under another domain, expand or collapse its subdomains, or delete it.
Placed by your agent
Placements made through the agent bridge carry a Placed by your agent label. The rail indicator shows when the bridge is open. Settings contains the bridge controls described in Chapter 8.
The workbench
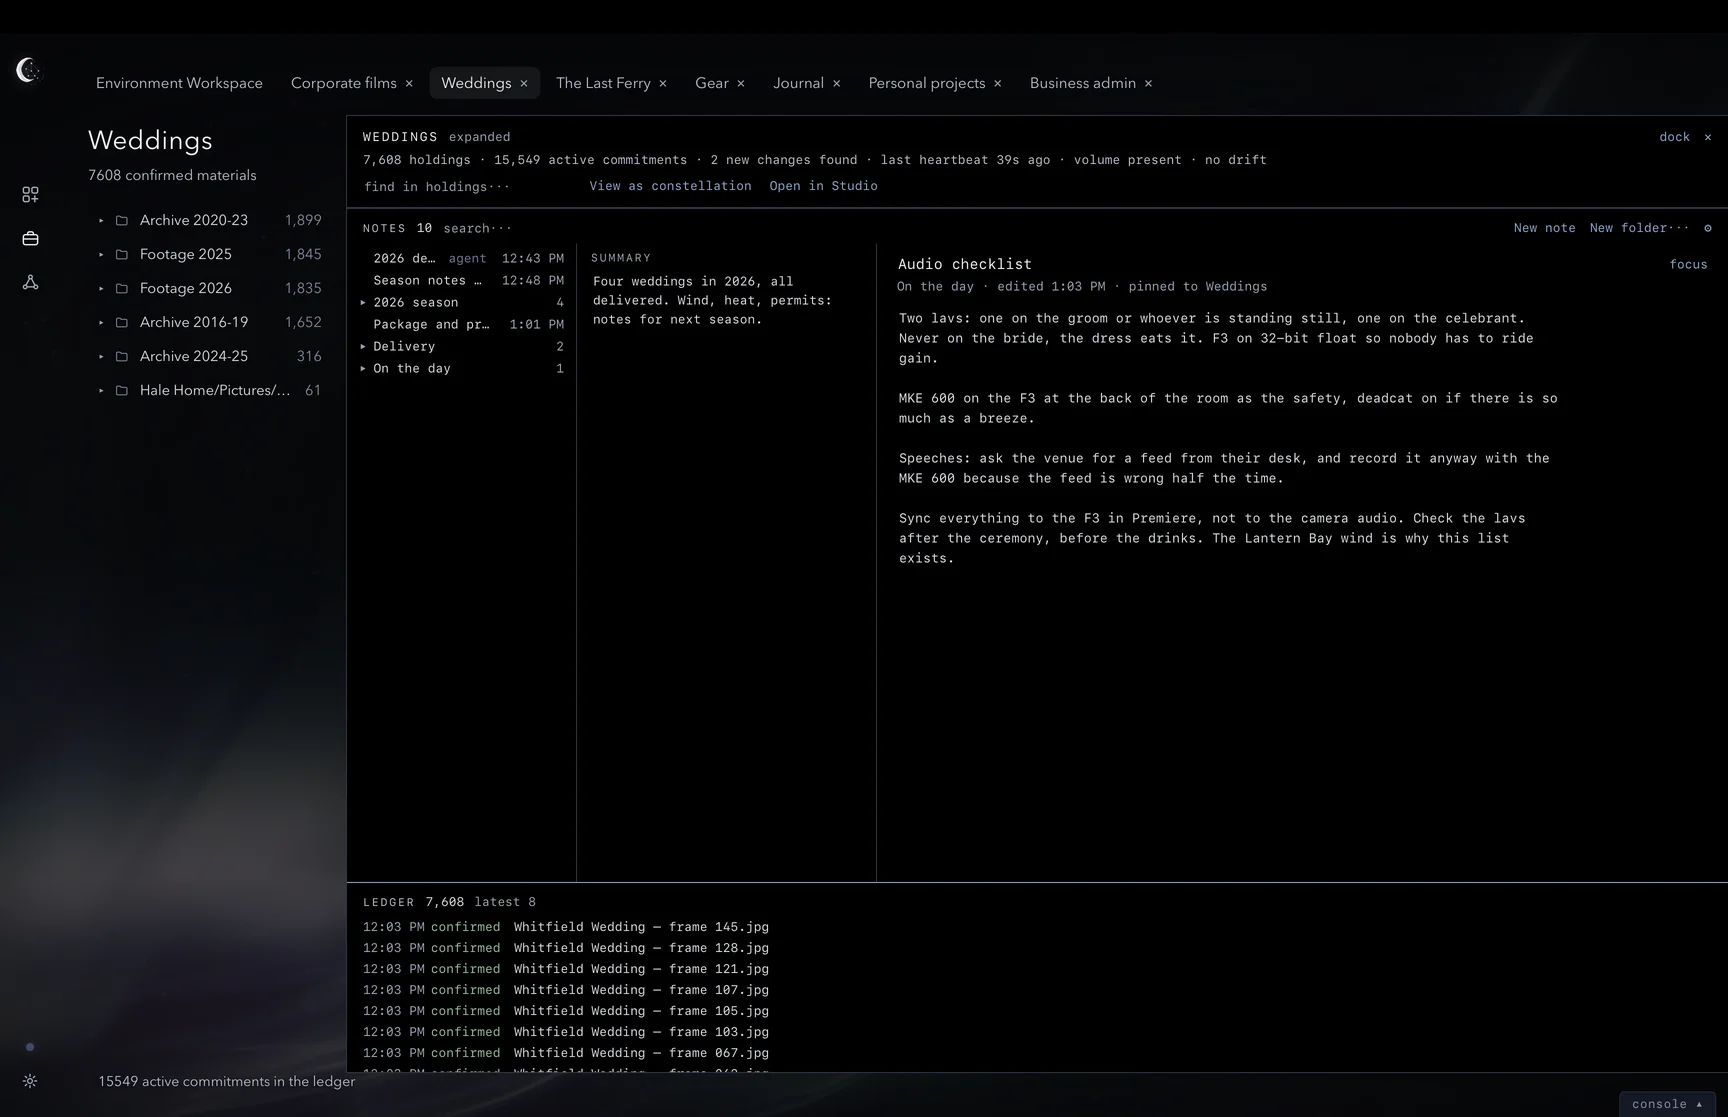
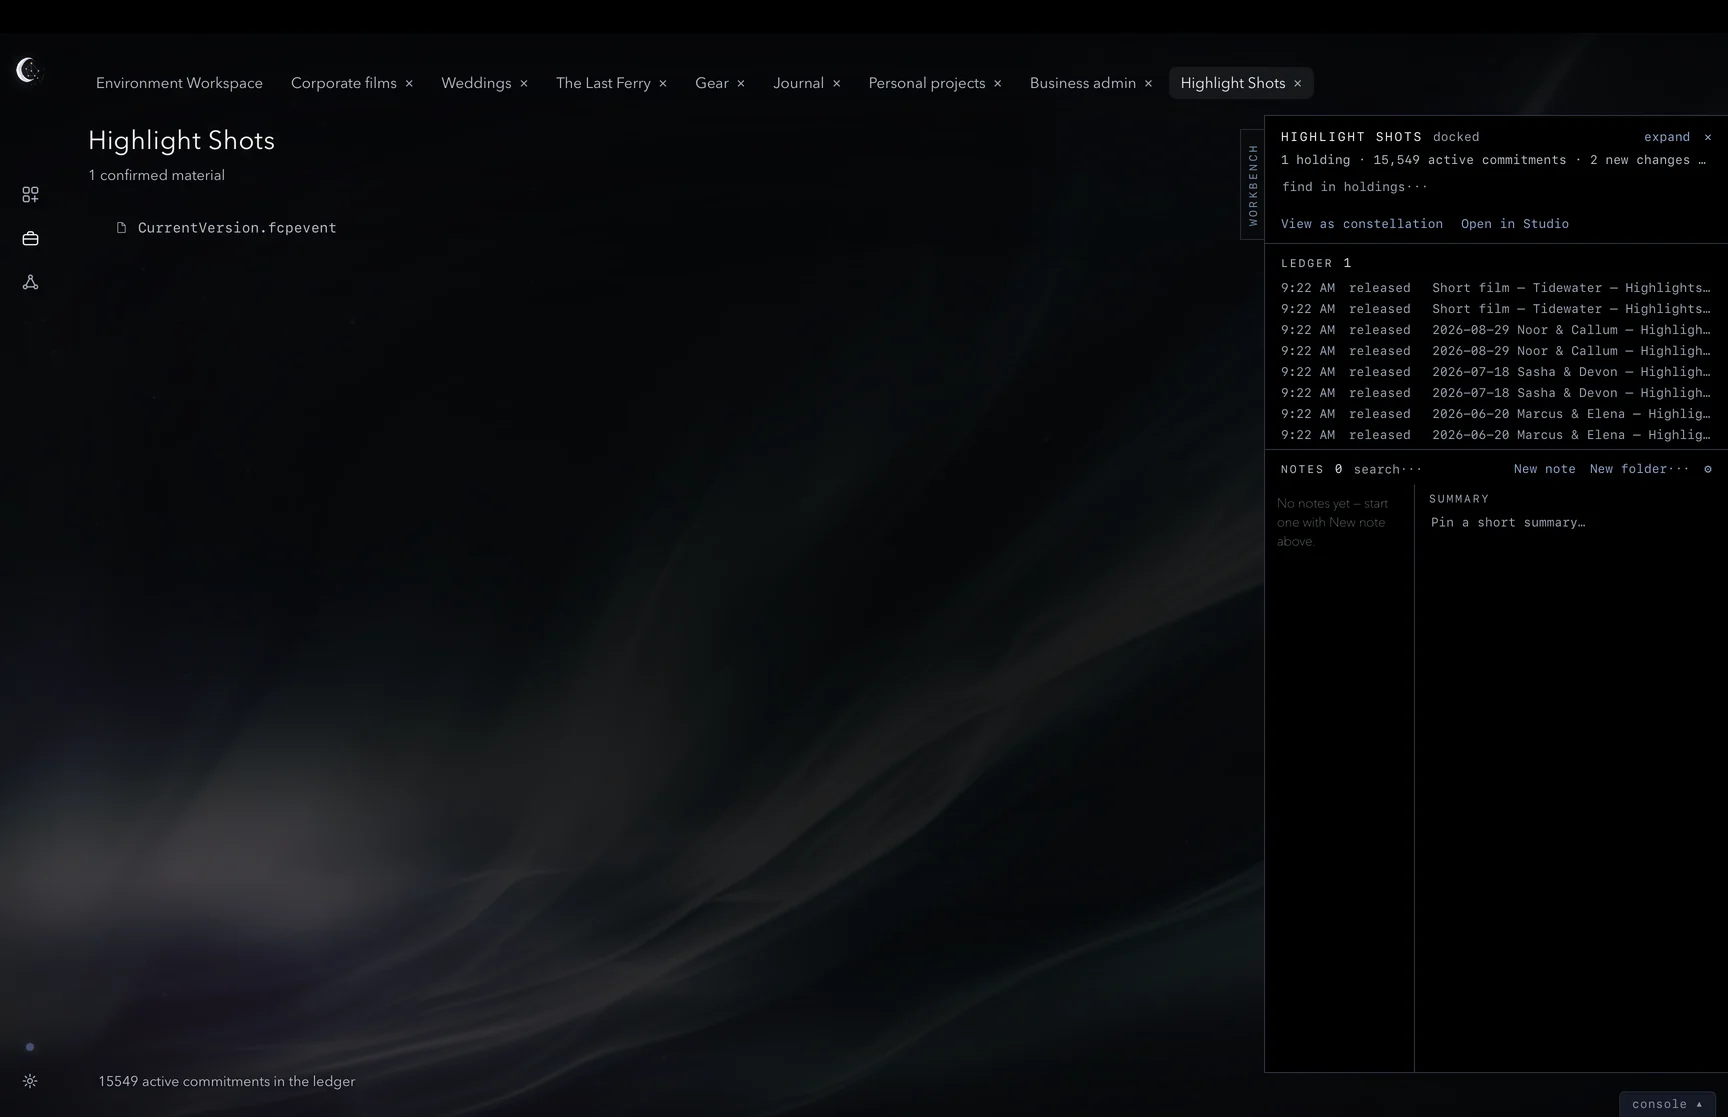
The workbench has four positions. Closed leaves a tab at the side of the environments page. Docked places the workbench beside the environments. Expanded opens its notes, ledger and reference column across the page. Focus gives one note the full pane.
Notes save with the workspace. The editor provides a summary field and plain-text content; the ledger records placements and releases.
Workbench settings
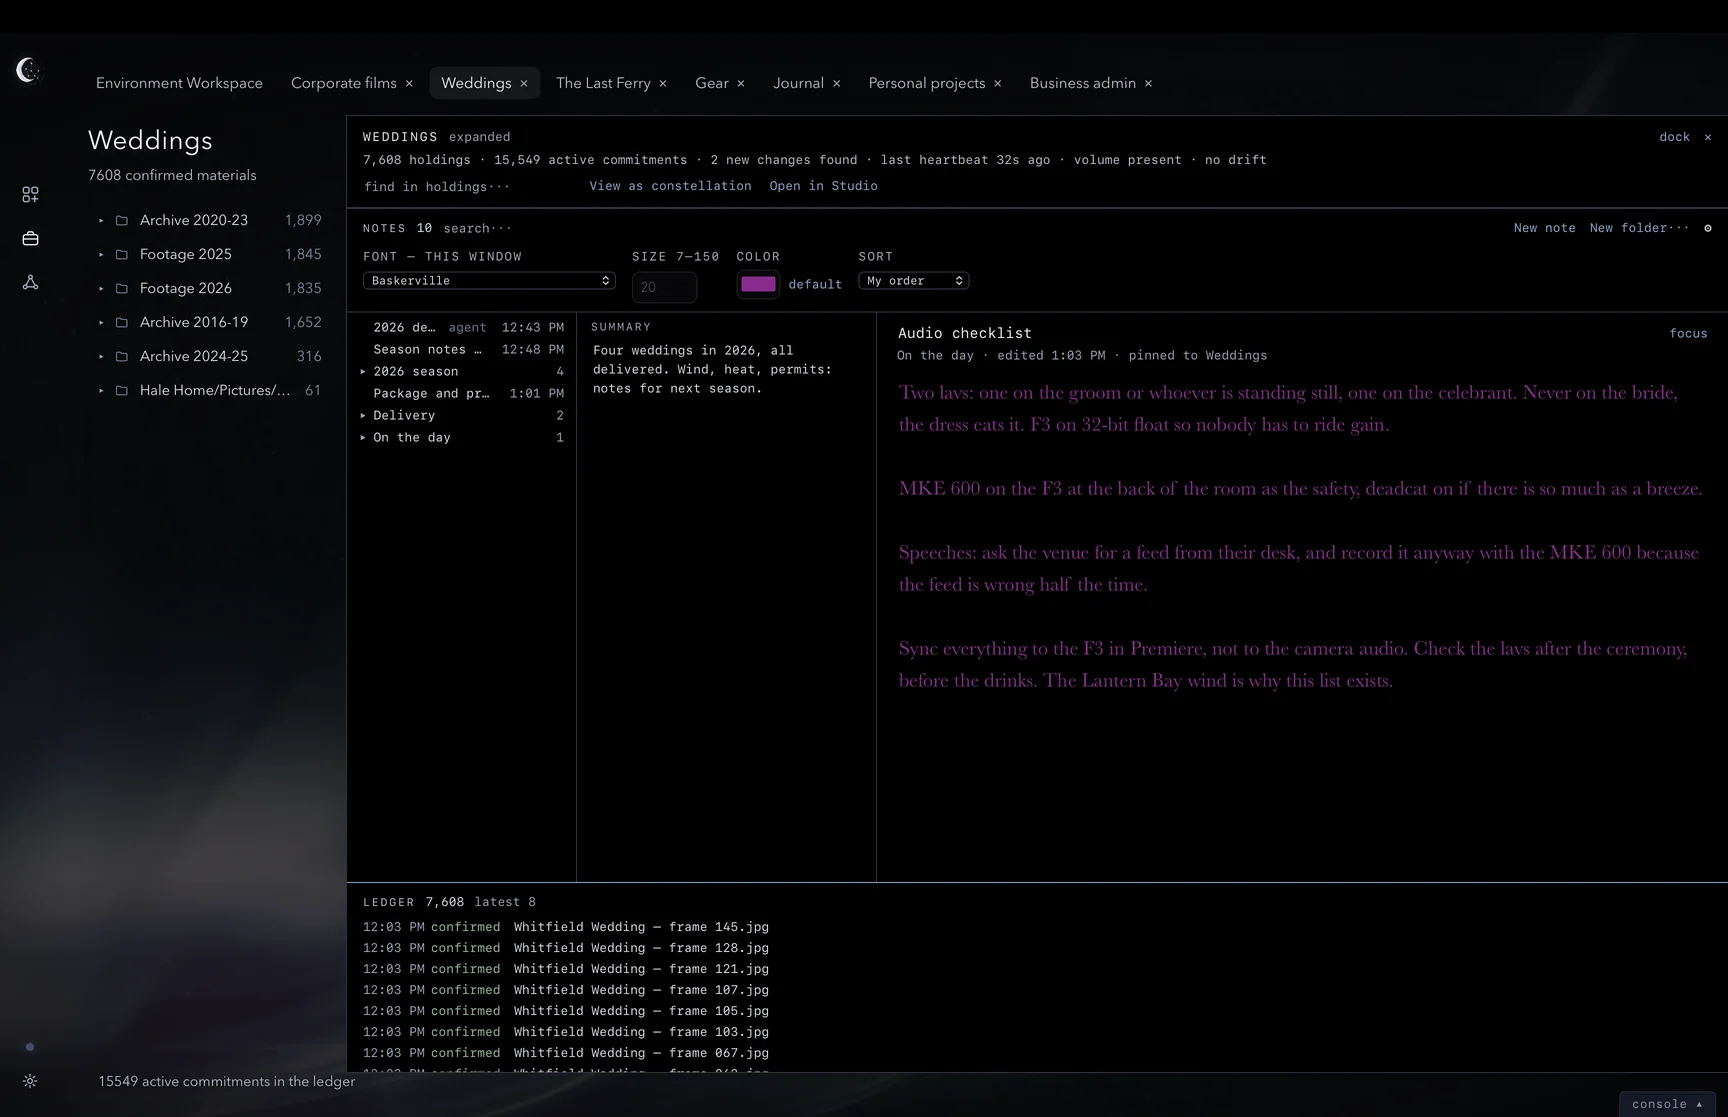
Click the gear beside New note and New folder to open Notes preferences. Font, size and colour apply to the note text in this Workbench window. These settings save with the workspace.
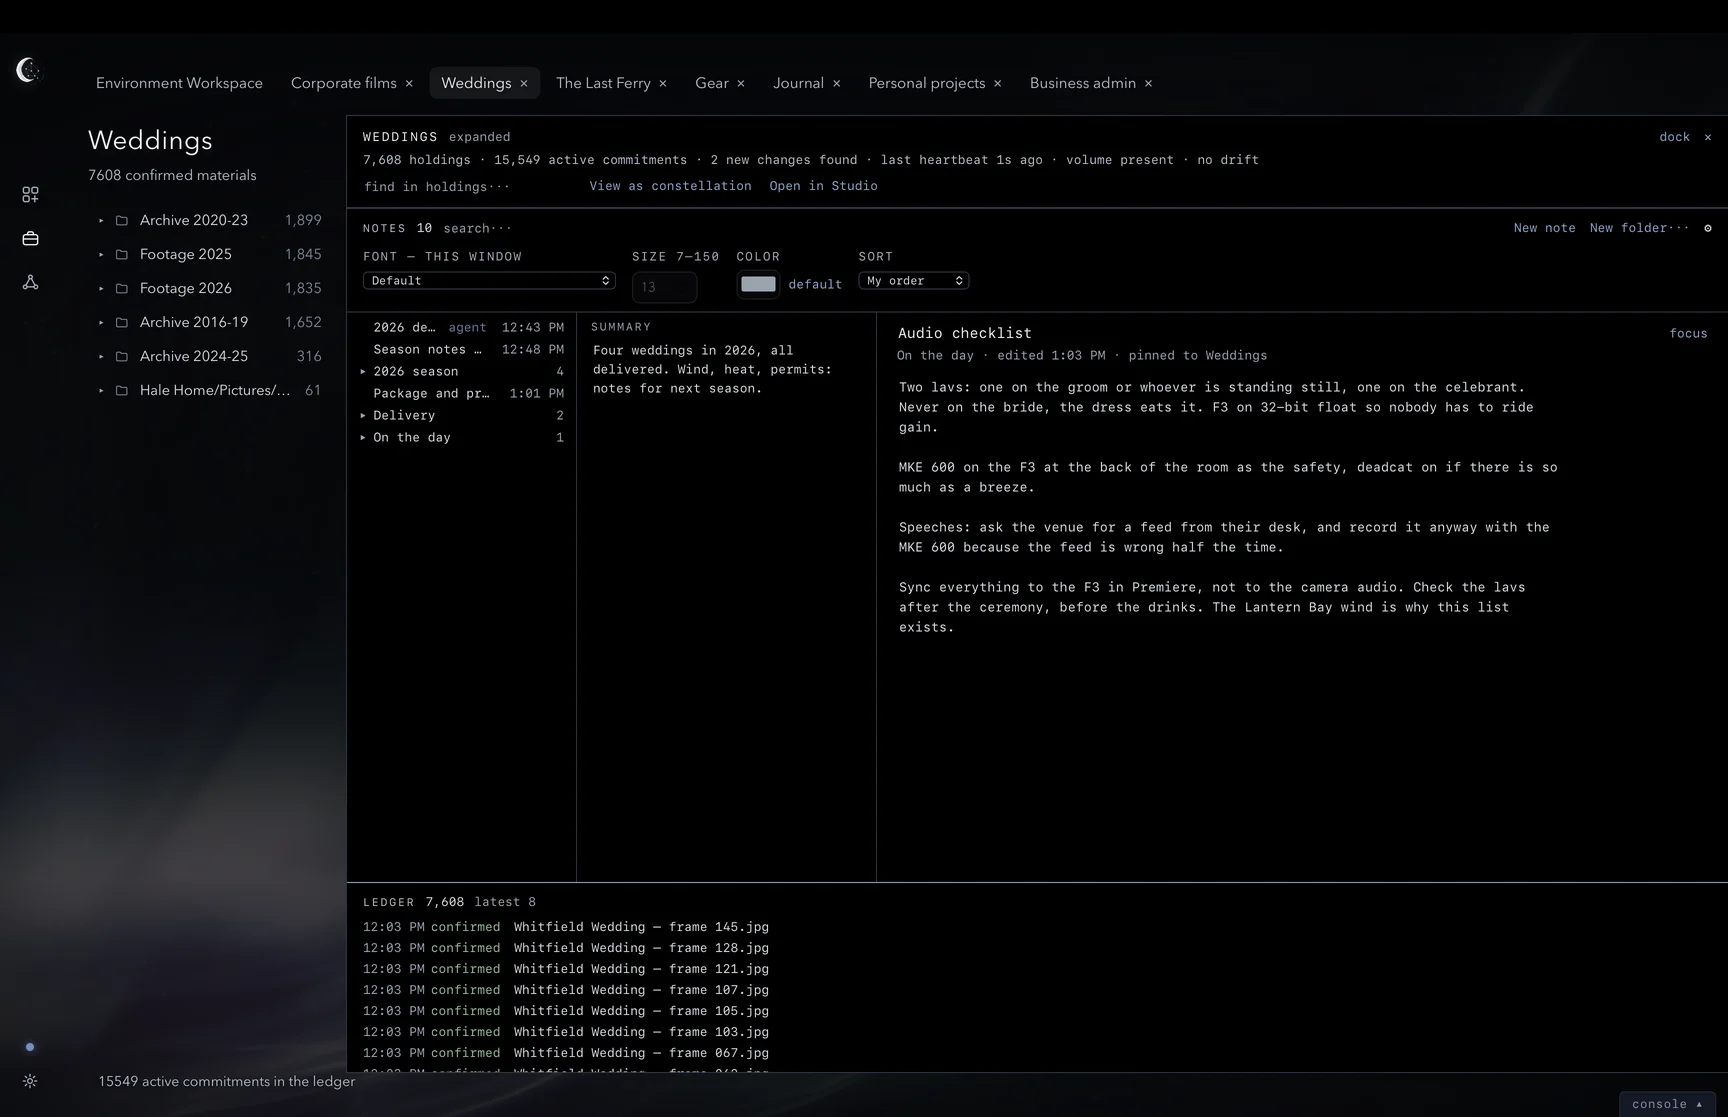
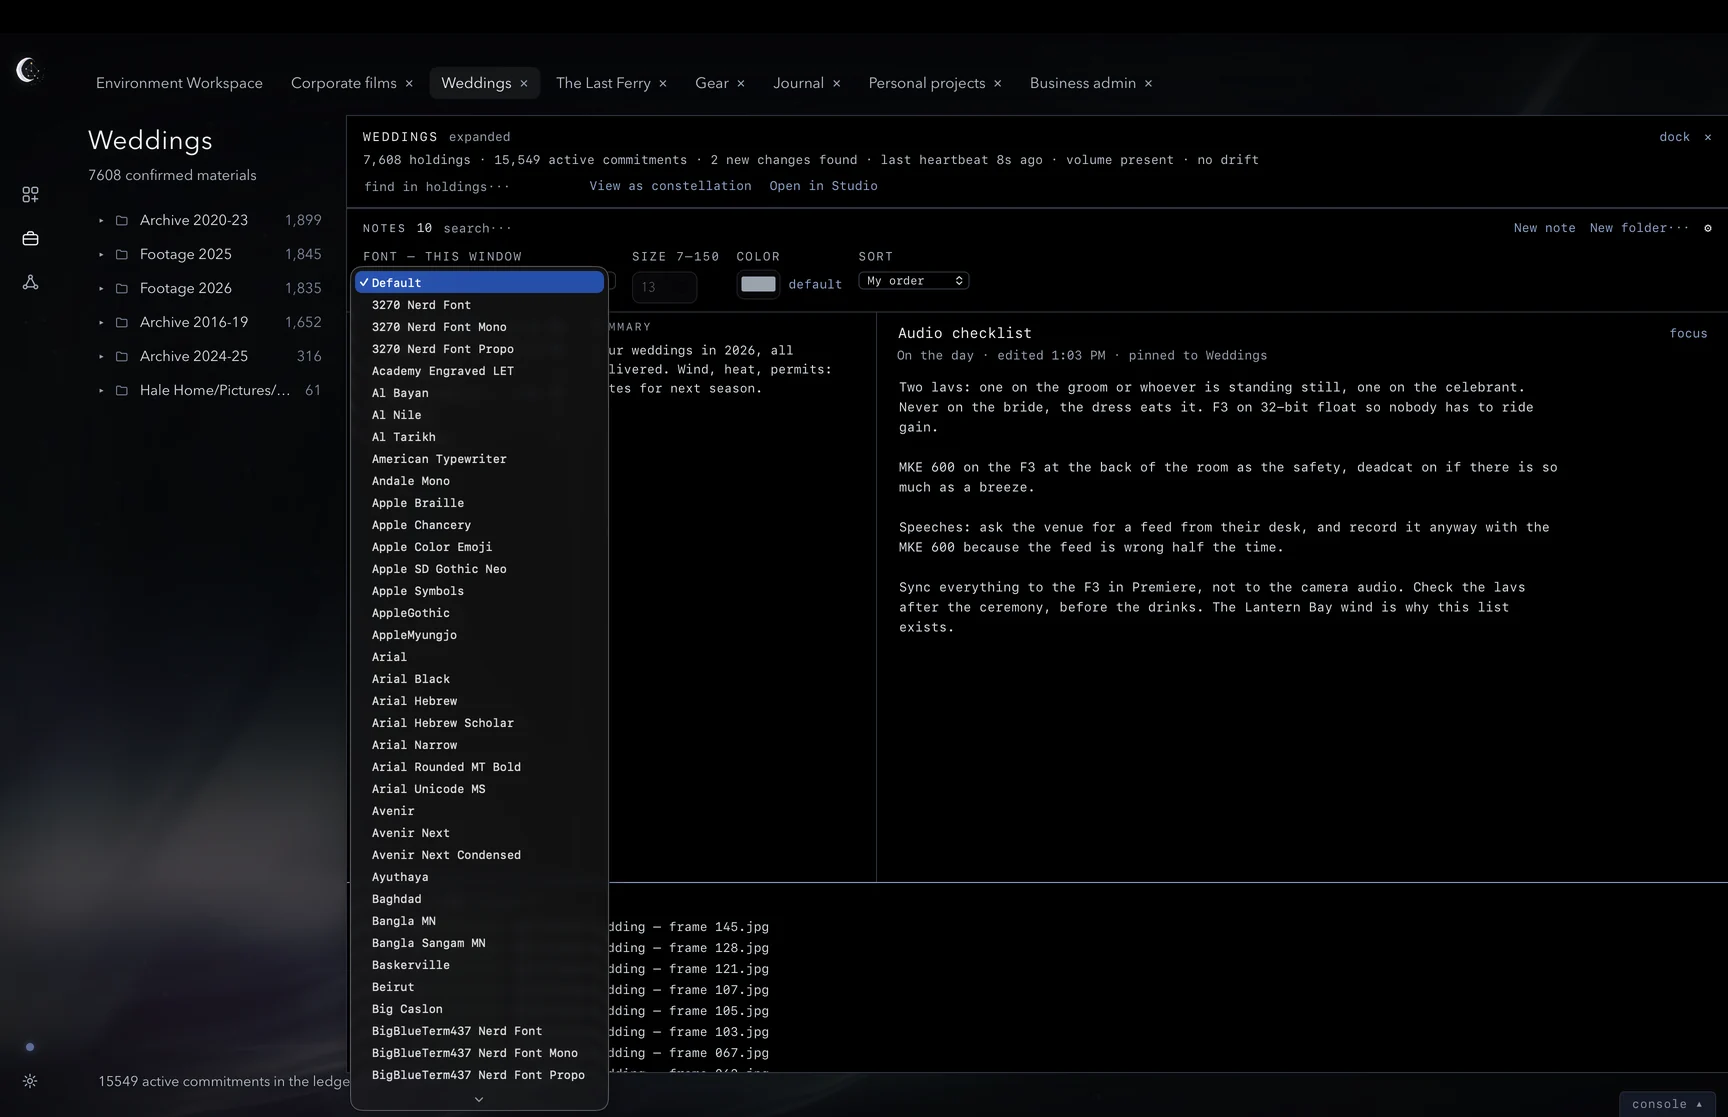
Choose an installed font from the FONT — THIS WINDOW menu. Choose Default to return to the default font.
Set SIZE between 7 and 150. The example below uses size 20.
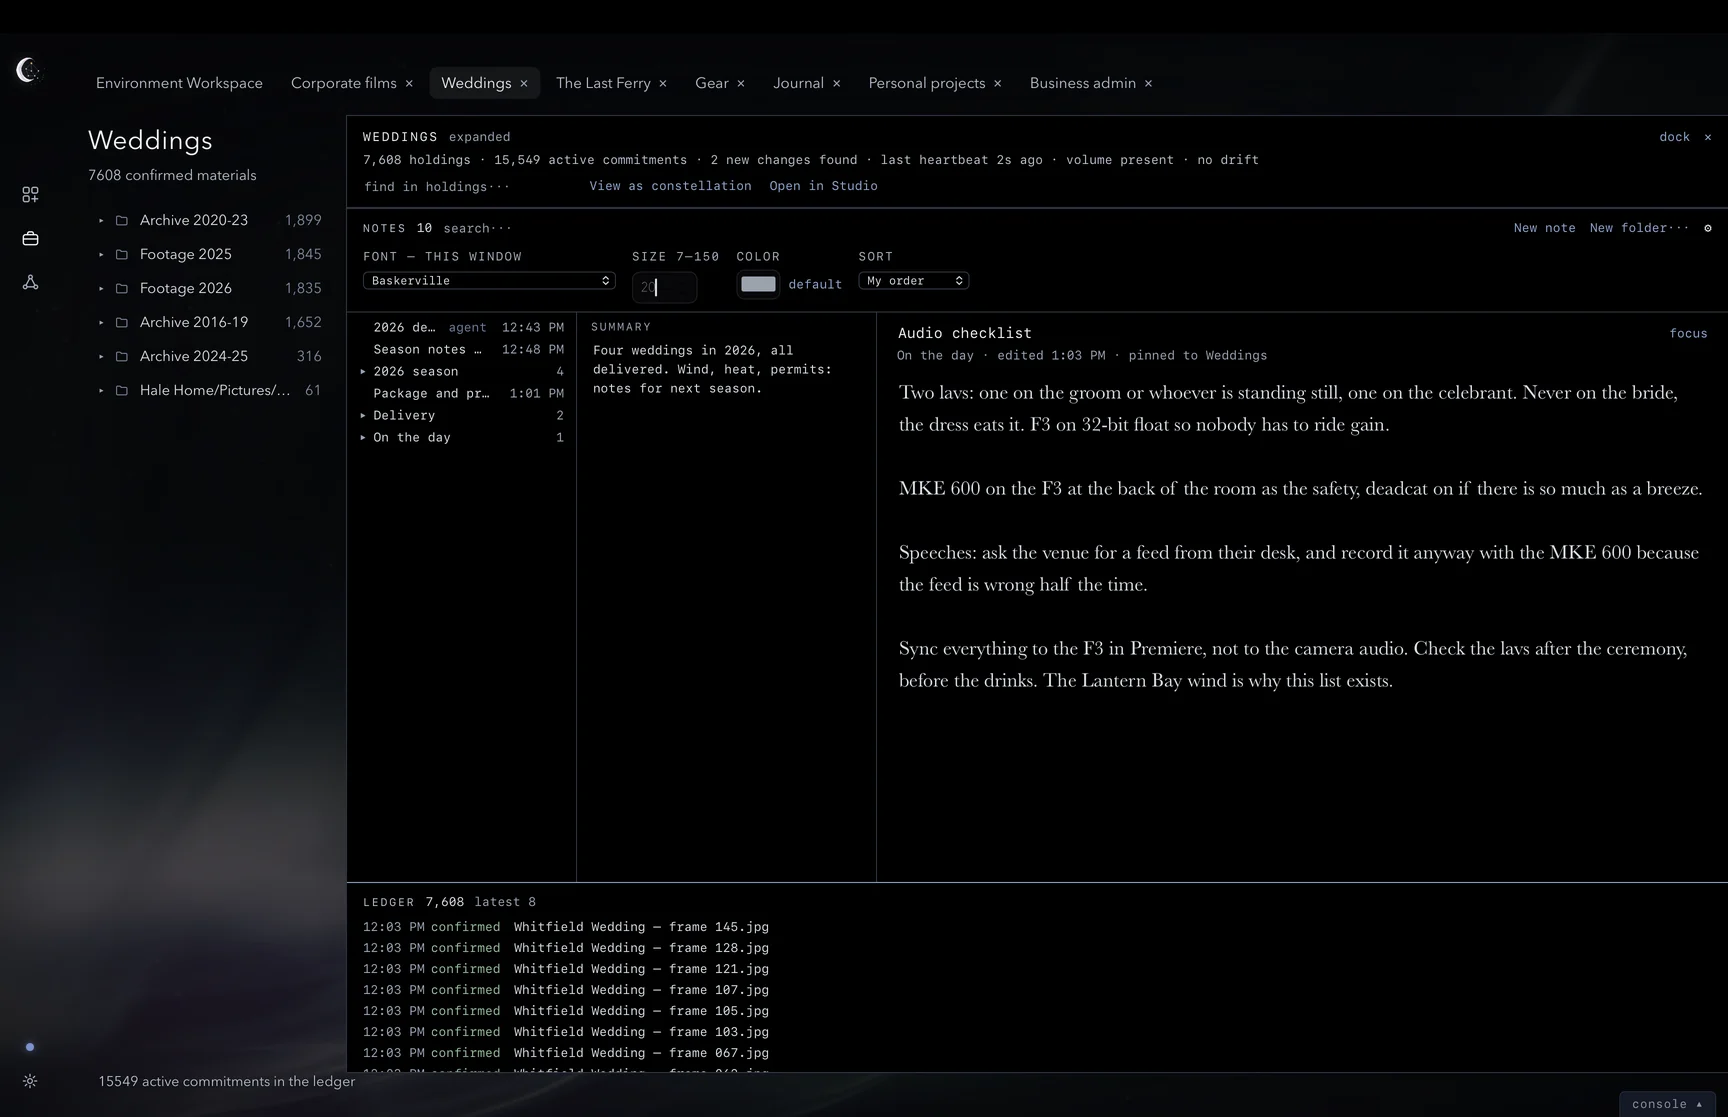
Click the COLOR swatch to choose a text colour. default restores the default colour.
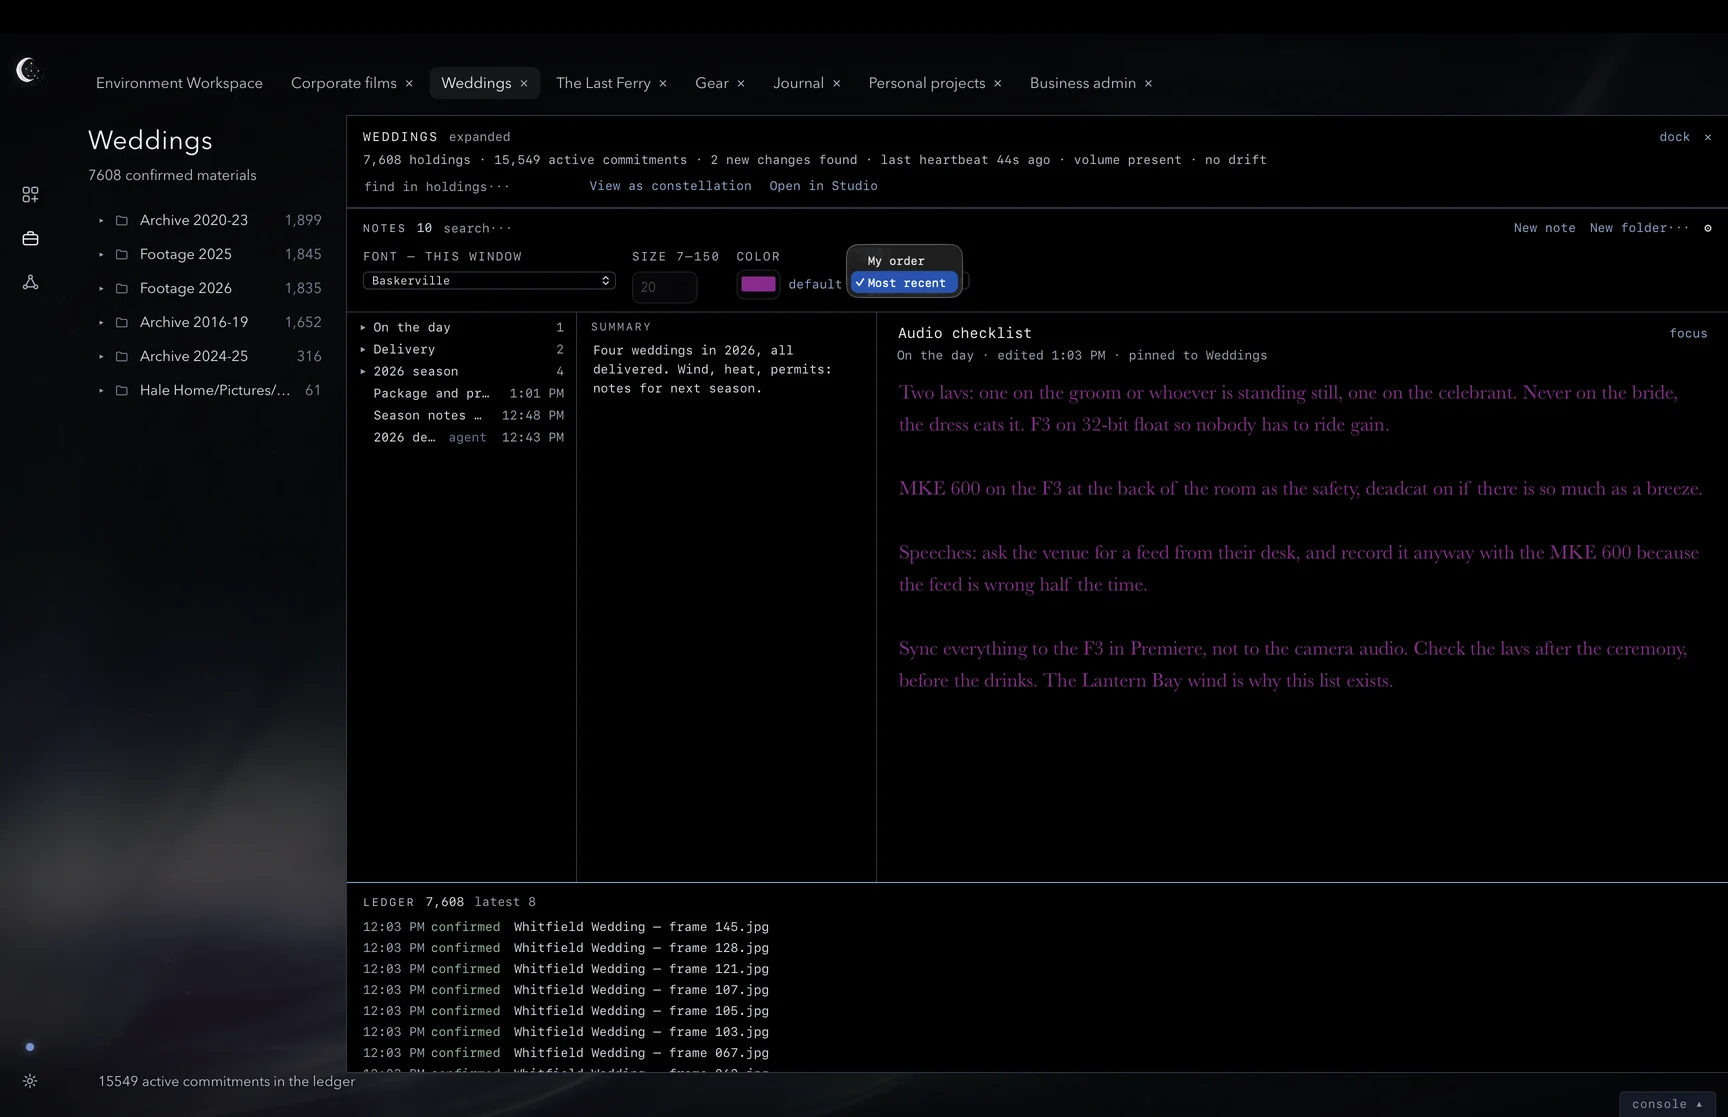
SORT offers My order and Most recent. Sorting applies across the Workbench.
Subdomains in the Workspace
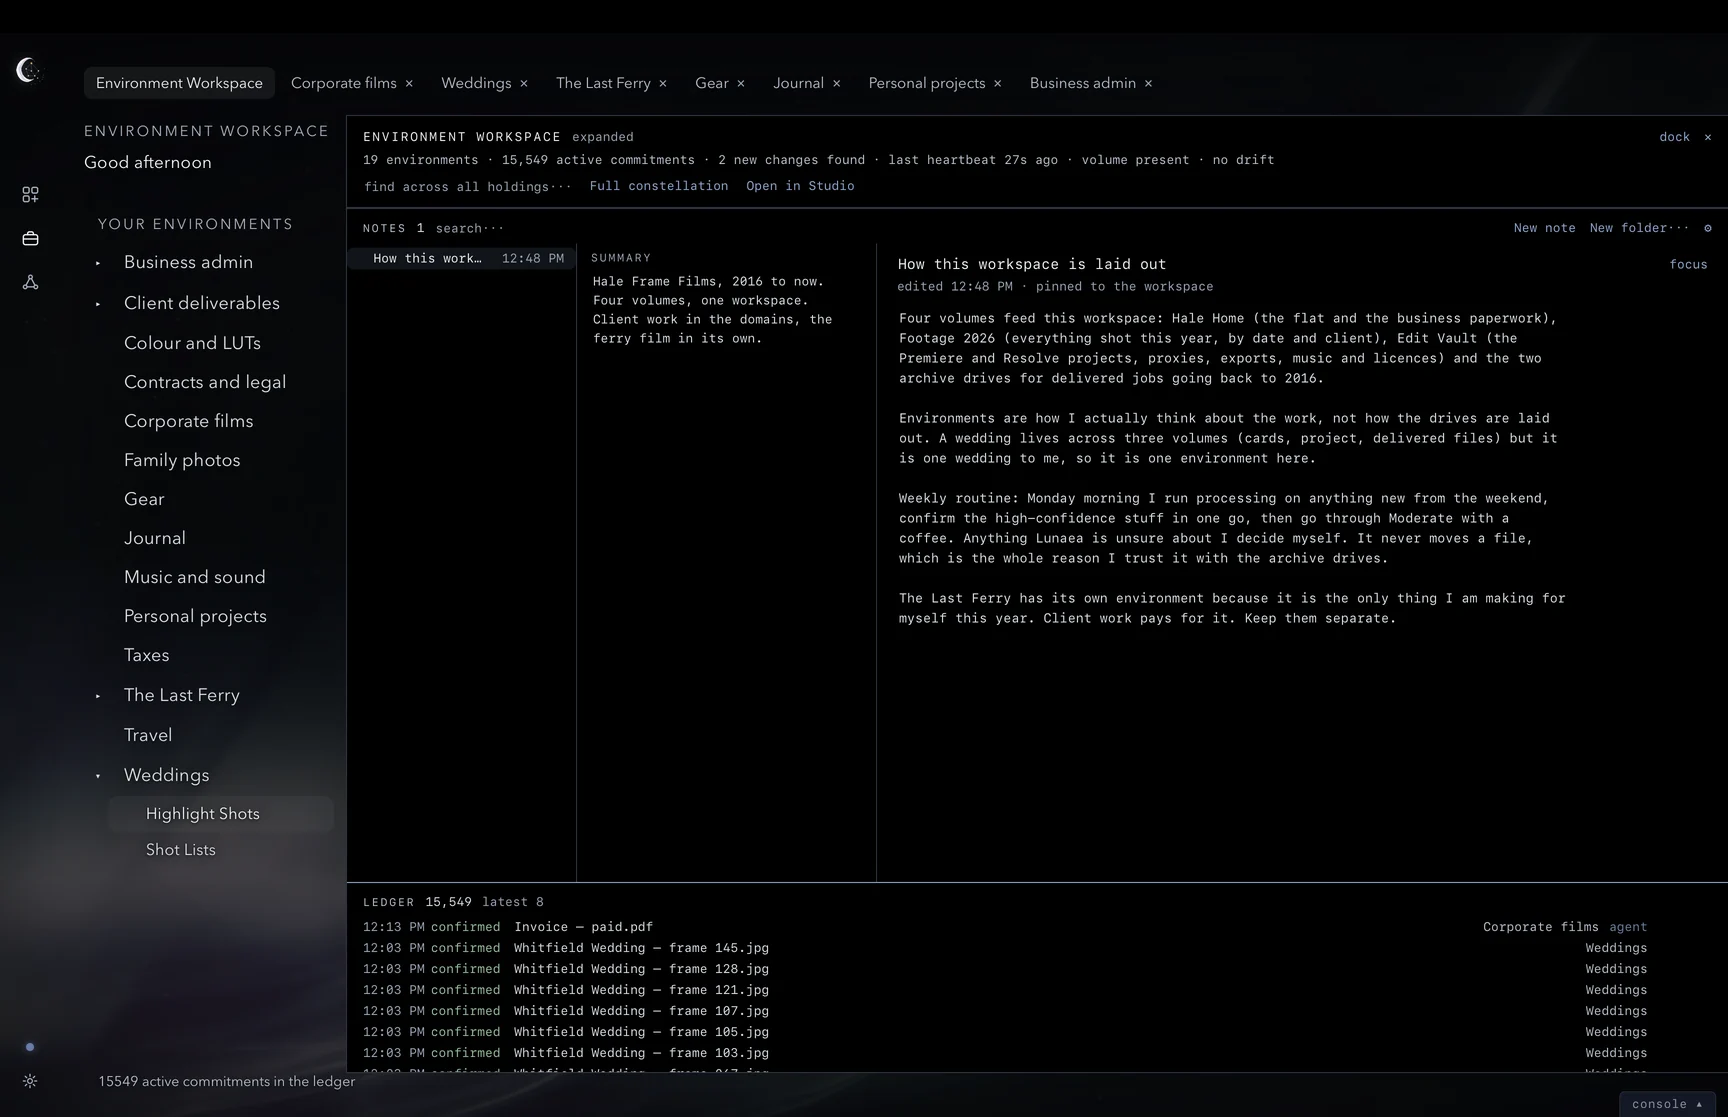
Open a subdomain from Your environments to give it its own environment tab and material tree.
The Node Graph
Explore your workspace as a constellation of files, folders and domains. Follow their relationships, choose which association lines to see, and move between the full constellation and focused graph views.
Full constellation
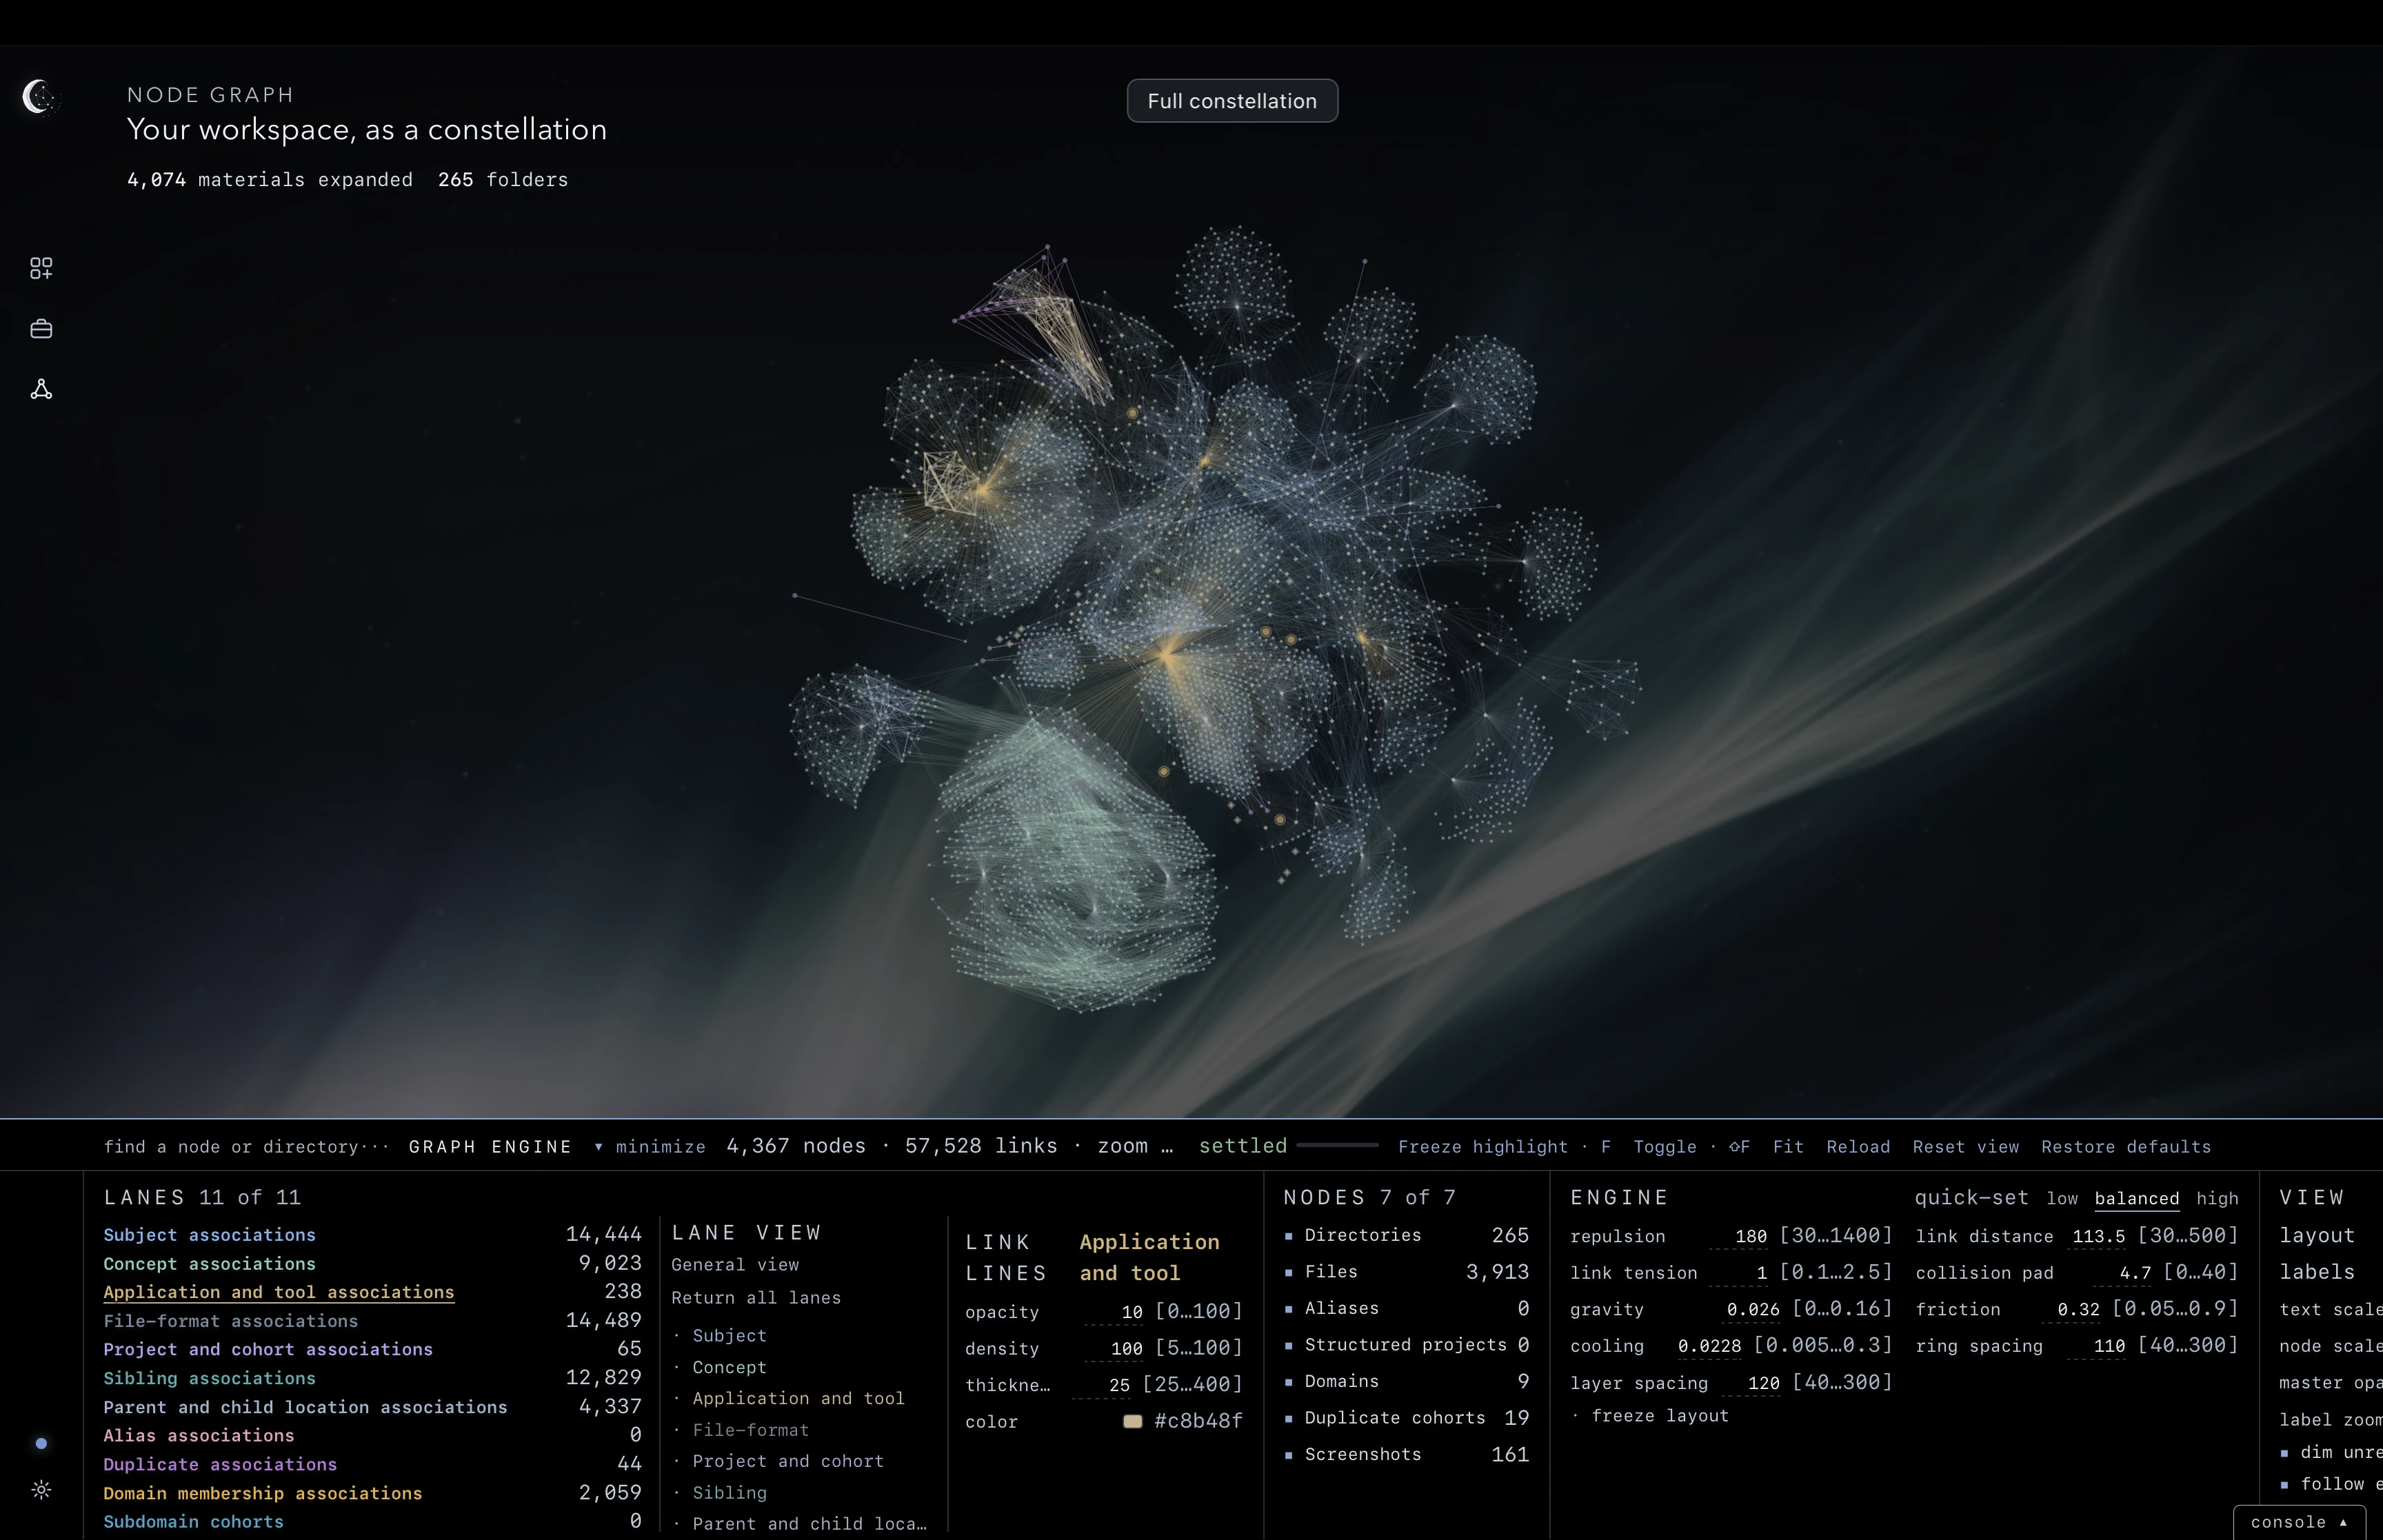
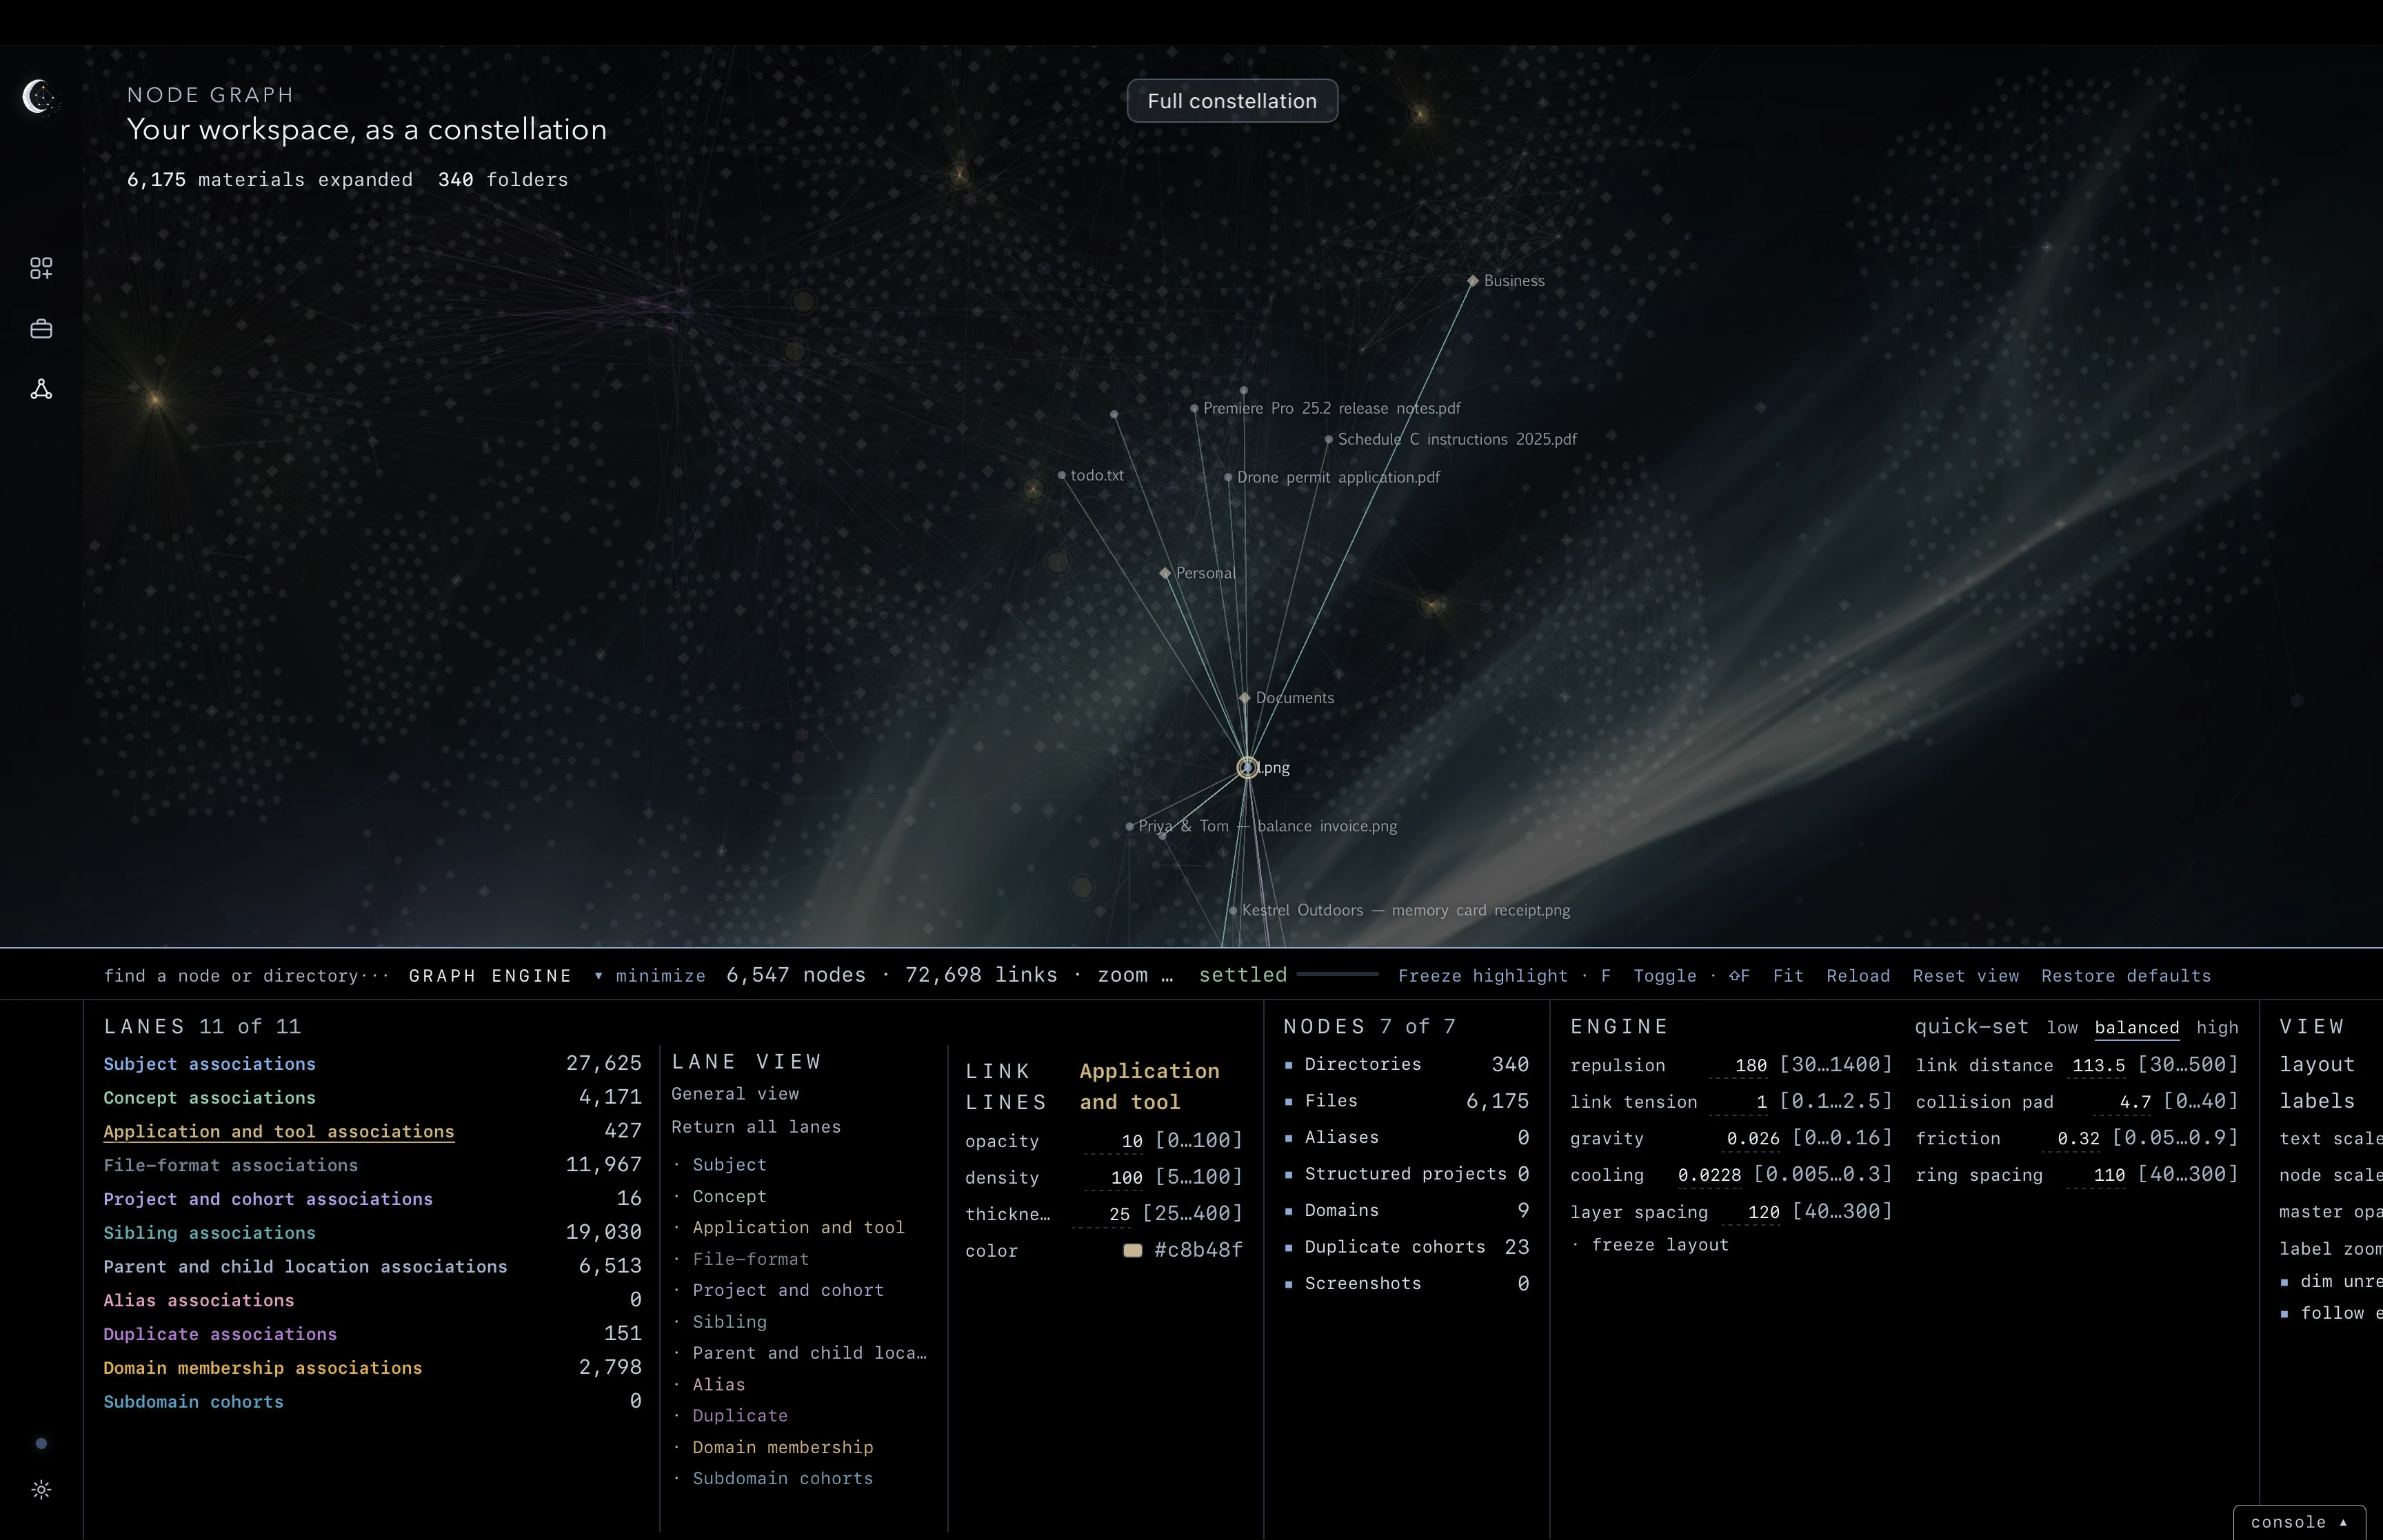
⌘4 opens the Node Graph. Full constellation is the workspace-wide view. It begins with source roots; opening folders brings their contents into the canvas. This example has been expanded to show the workspace together.
Nodes represent materials and groups; coloured lines show associations between them. Exploring the graph or changing its display leaves your source files and confirmed placements unchanged.
Navigate the canvas
Drag an empty area to pan and scroll to zoom. Zoom out to see the overall shape, then zoom in to read names and follow individual connections. The range extends down to 1% for very large constellations. Fit brings the visible graph into the available canvas.
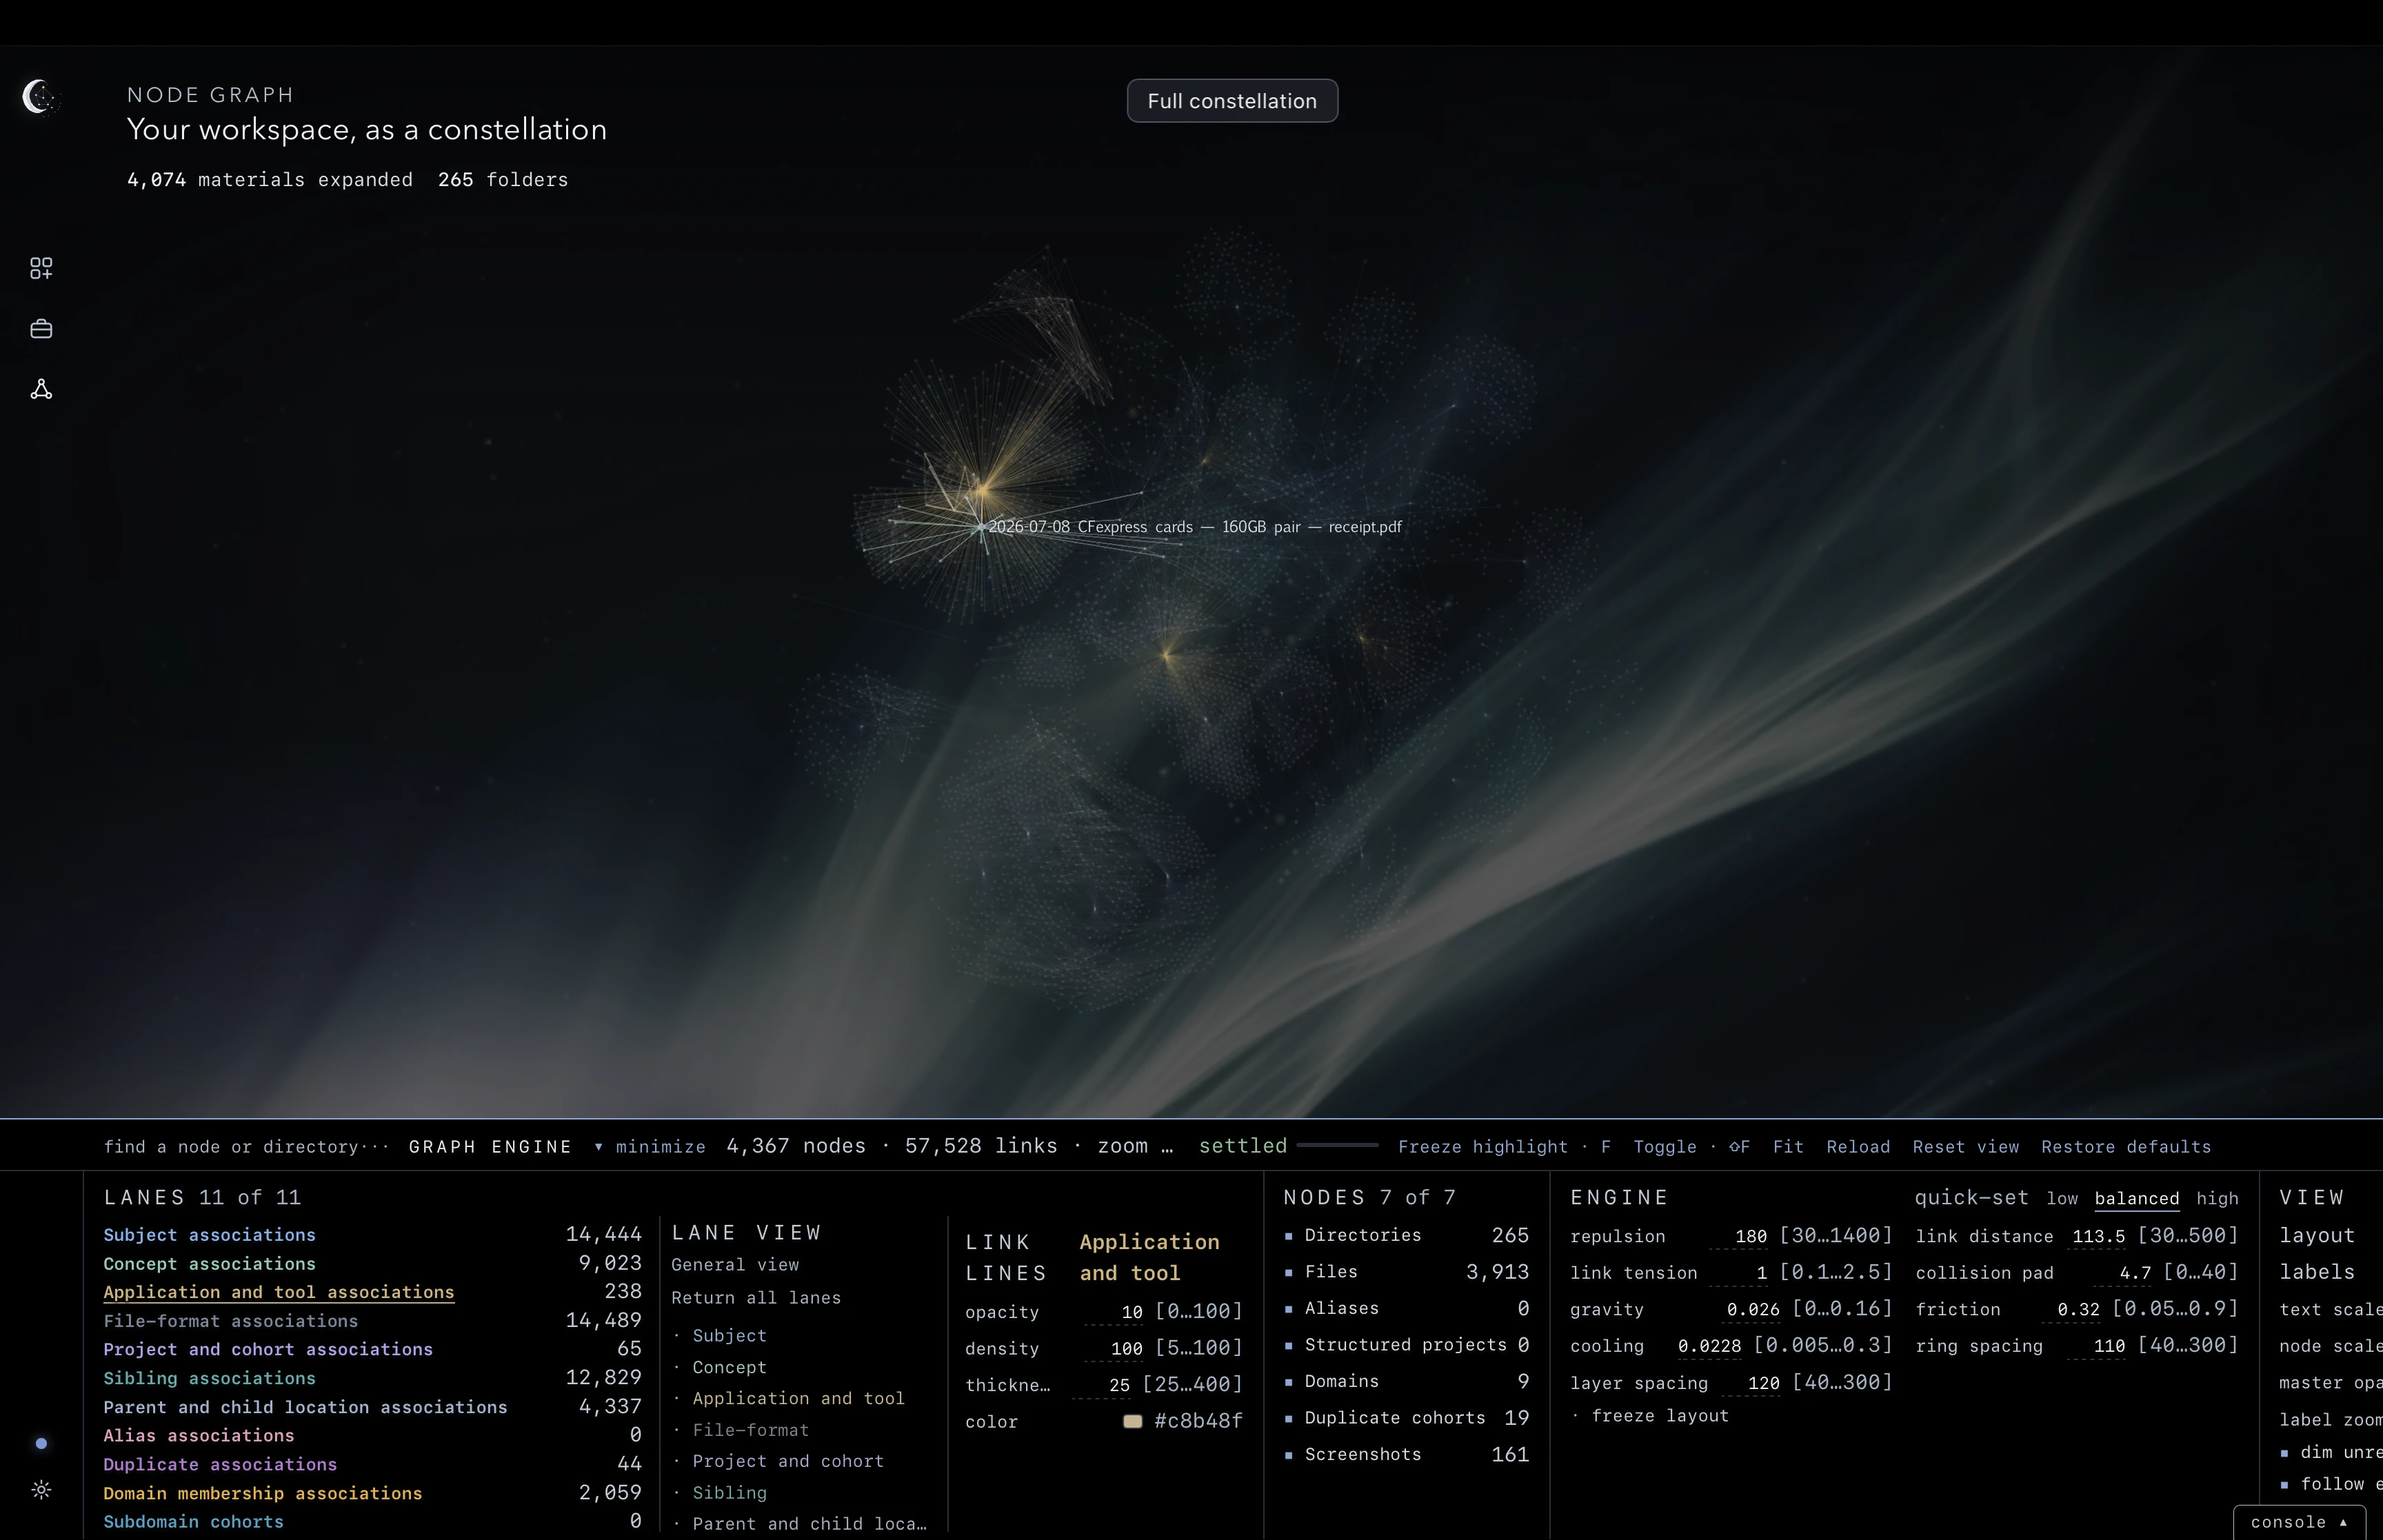
Hover over a node to read its name and connections. The labels modes and dim unrelated on hover control in VIEW help you read a crowded area. Right-click a node for the actions available for that material.
Keep a relationship highlighted
Hover over a node and press F. Its relationship cluster stays highlighted when you move the pointer away, so you can examine its links without keeping the pointer on the node.
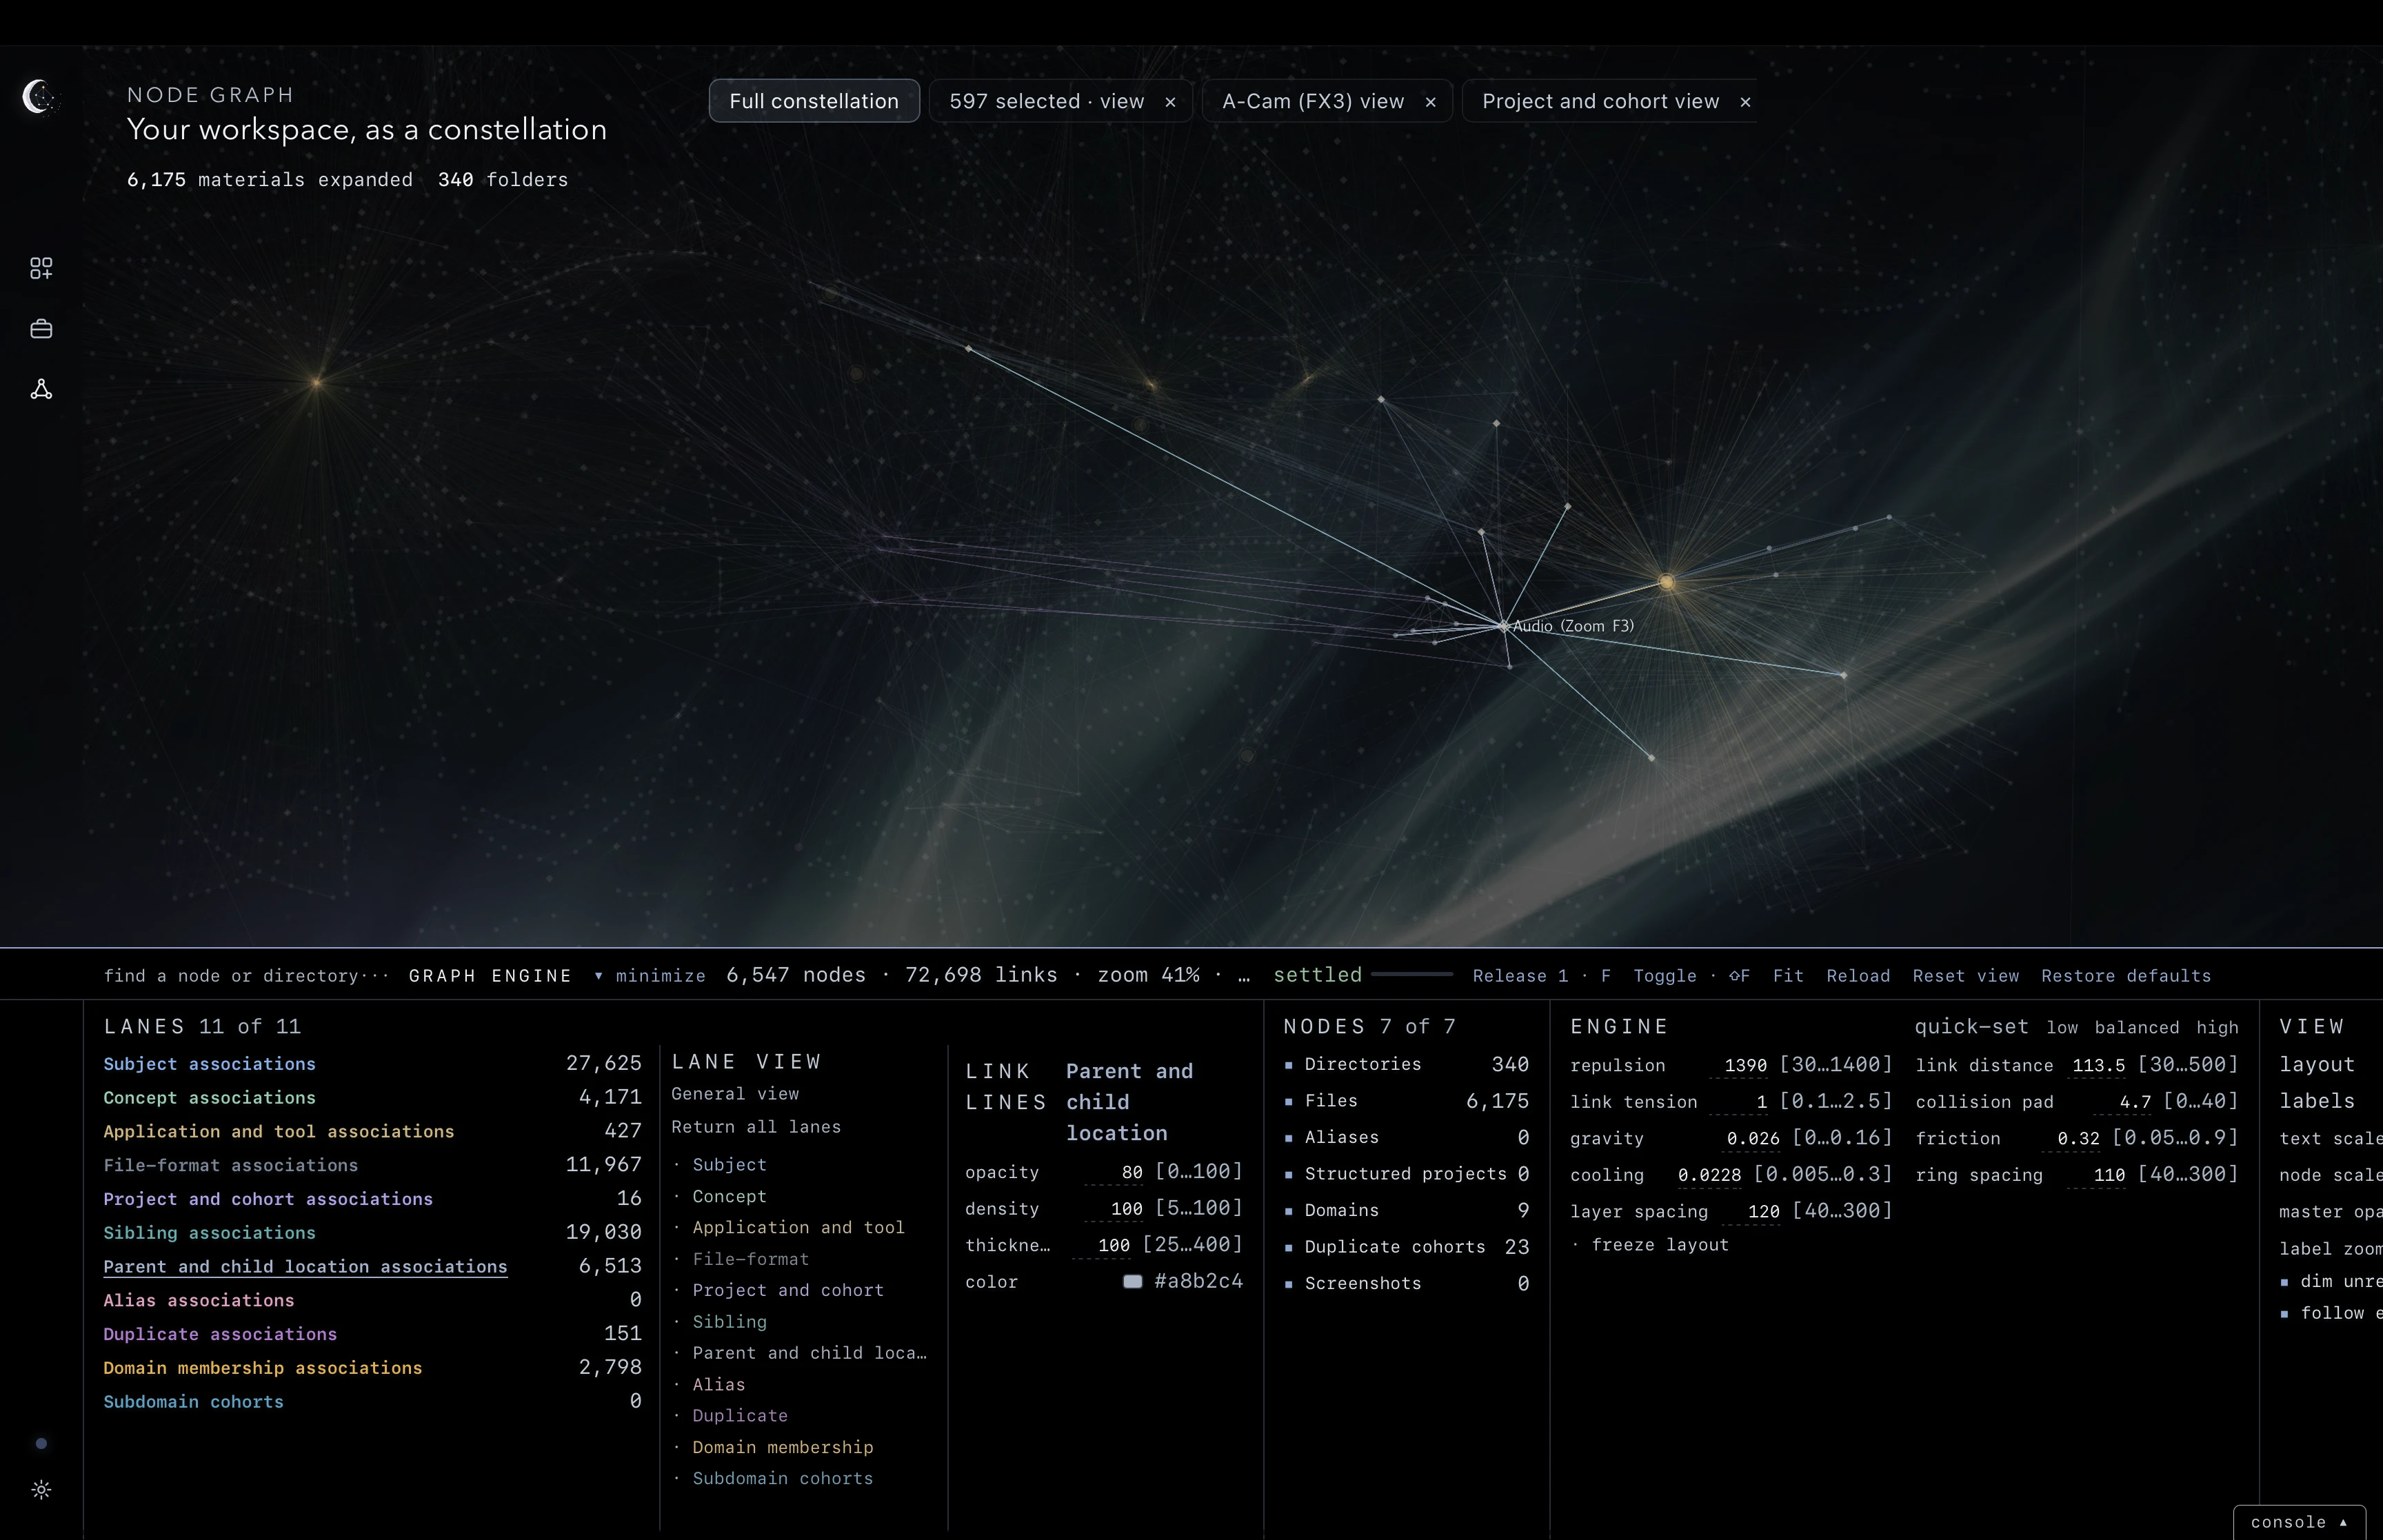
Press F again to release the frozen highlight. You can also choose Release 1 in the bottom bar. Ordinary hover highlighting resumes.
The Freeze highlight button uses the last node you hovered, so you can move the pointer from the canvas to the button. To freeze a node with the keyboard, keep the pointer over that node.
Freeze several relationship clusters
With one cluster frozen, hover another node and press Shift+F to add its relationships. Repeat on other nodes to compare several clusters together.
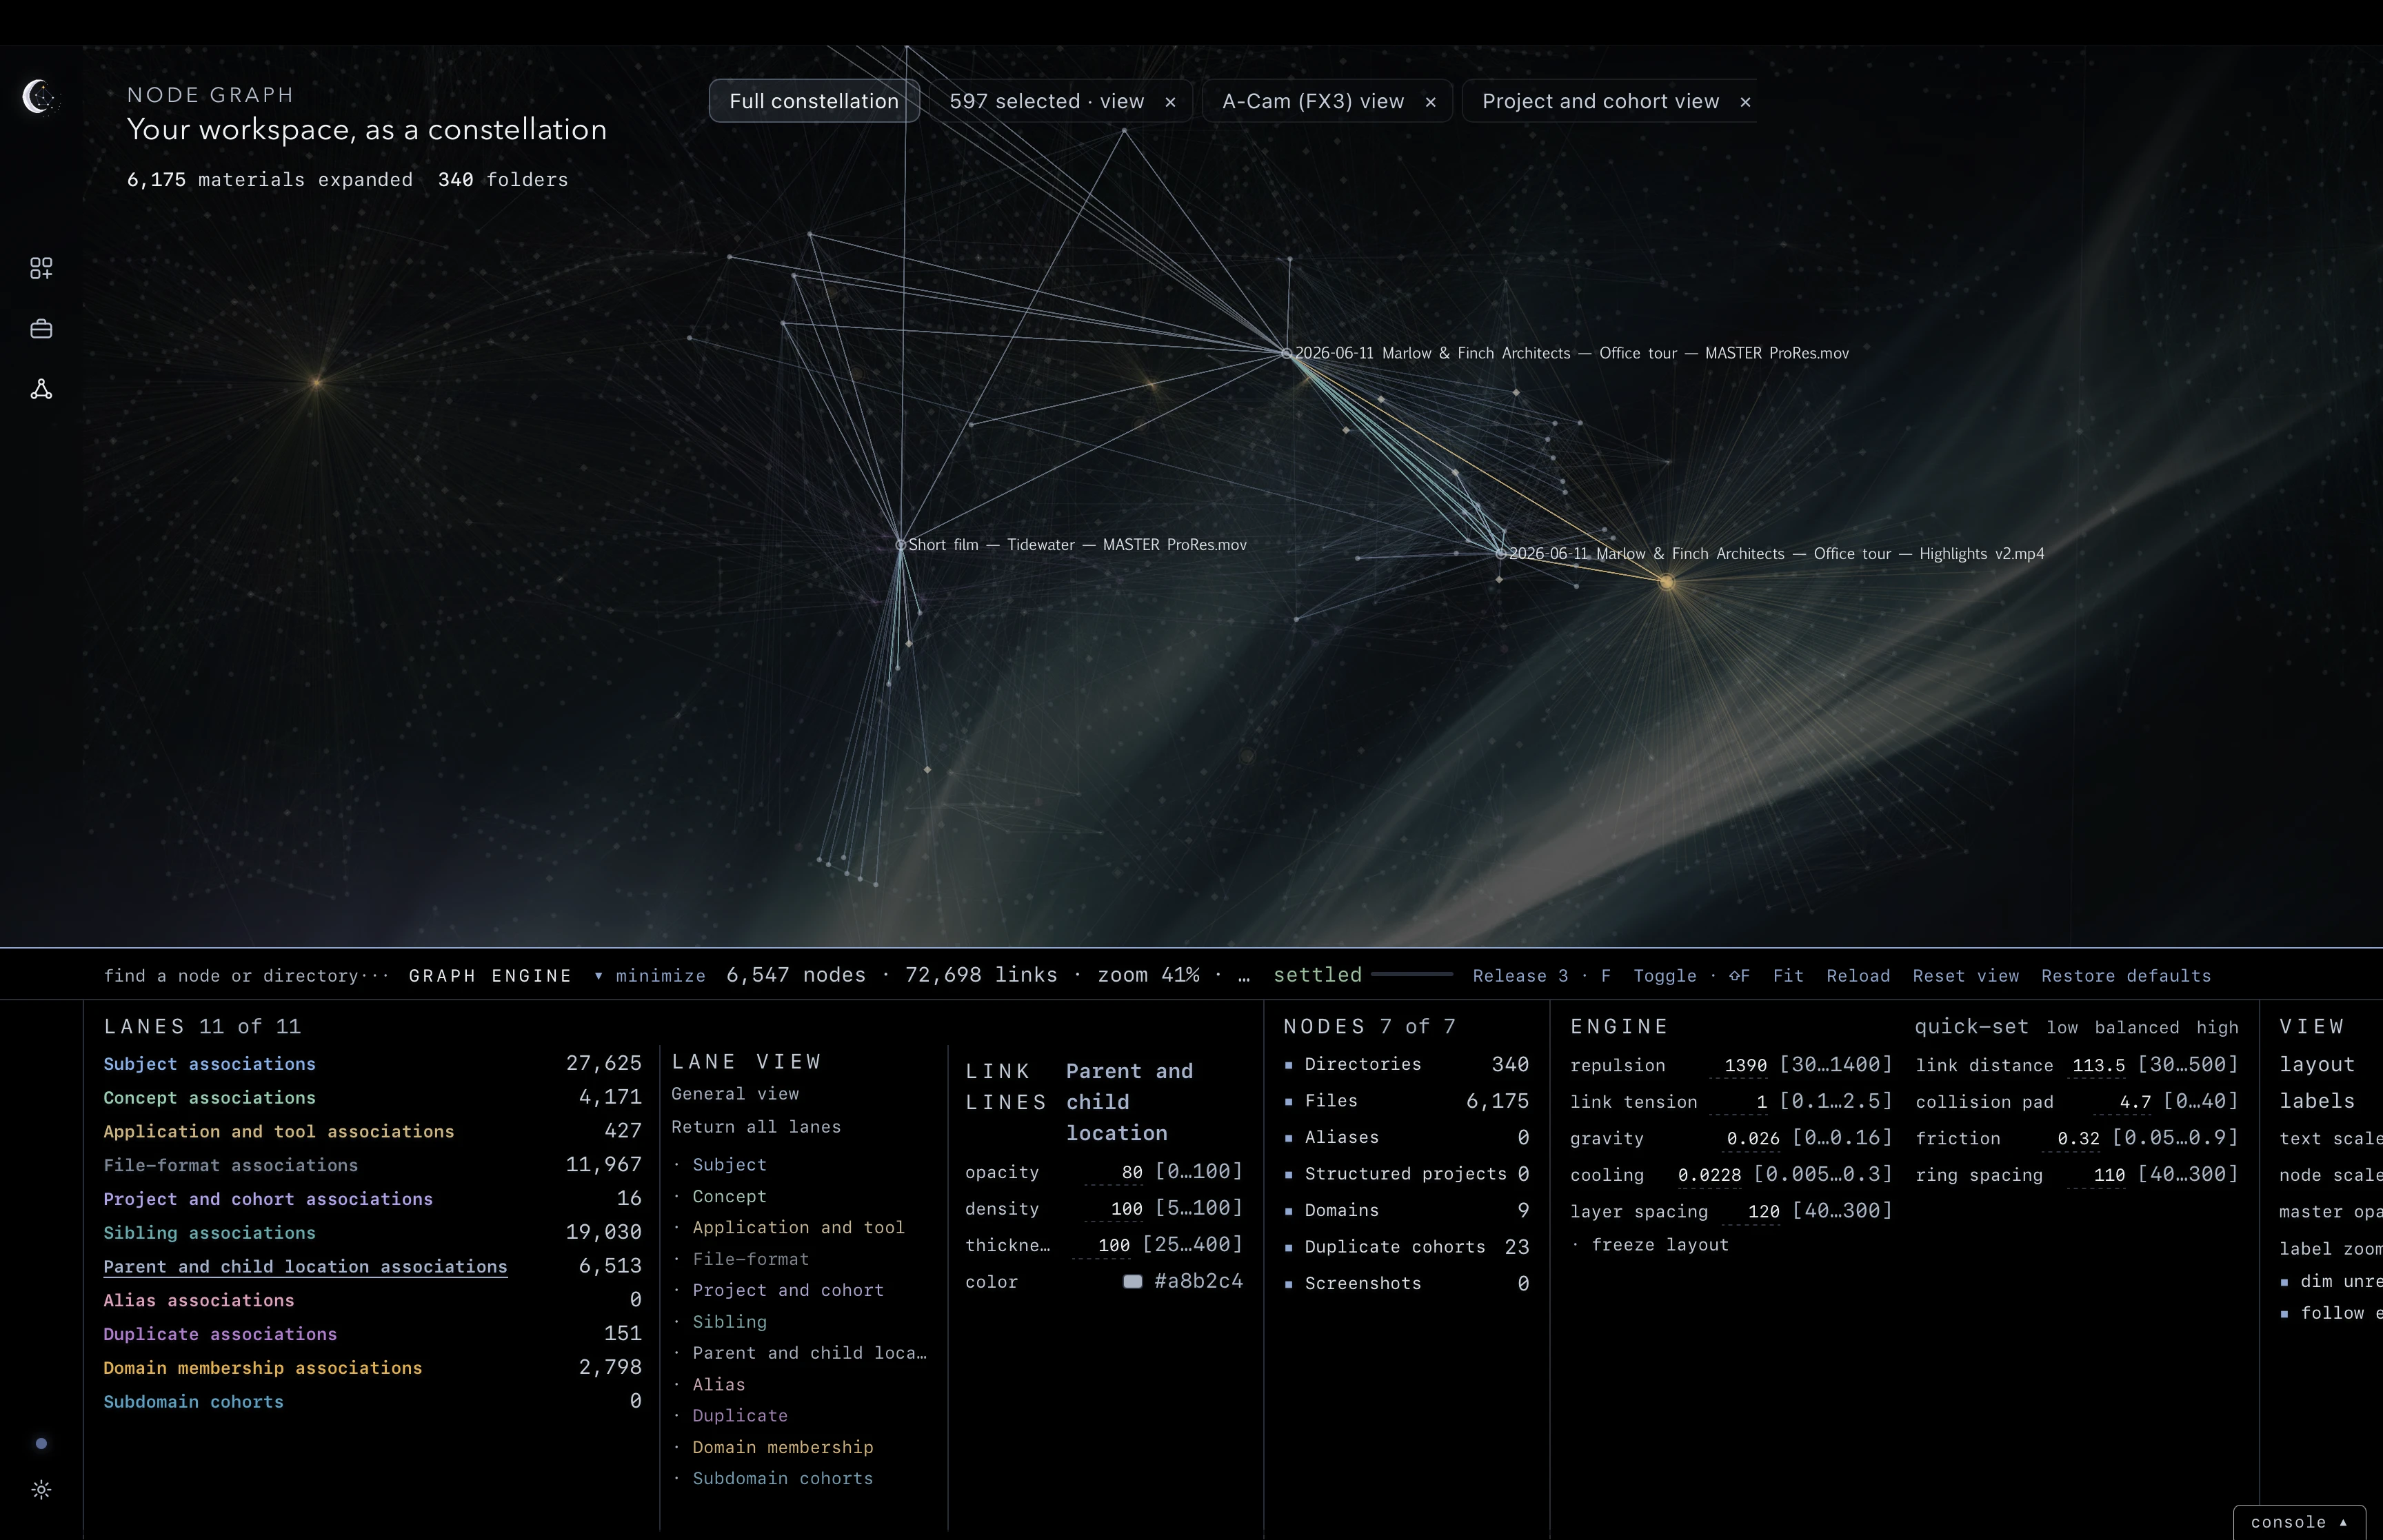
To release just one cluster, hover its original node again and press Shift+F. The other frozen clusters stay highlighted. Shared neighbours and links remain emphasized while they belong to another frozen cluster.
Press F to release every frozen cluster at once, whether you have one or several. The bottom-bar Release action does the same; Toggle adds or removes the last node you hovered.
Frozen highlights are temporary and are not saved with the workspace. They change how you explore the graph, without changing its relationships or your materials.
Lanes
Links are grouped into lanes such as subject, concept, application and tool, file format, project and cohort, sibling, parent and child location, alias, duplicate, and domain membership. Each lane has a colour and a count of its links on the canvas.
Use tune beside a lane to bind the LINK LINES controls to it: opacity, density, thickness and colour. Right-click a lane name to quiet or light its lines in your general view. Clicking a lane name that supports its own view opens a separate tab for that relationship type.
Alias associations connect an alias material to the target it actually resolves to. A matching or former name alone does not create an alias relationship.
Choose which lanes to see
With Full constellation active, select Subject in LANE VIEW. The first selection shows only that lane’s lines. The canvas keeps its nodes and titles, so you can see which materials connect through that relationship.
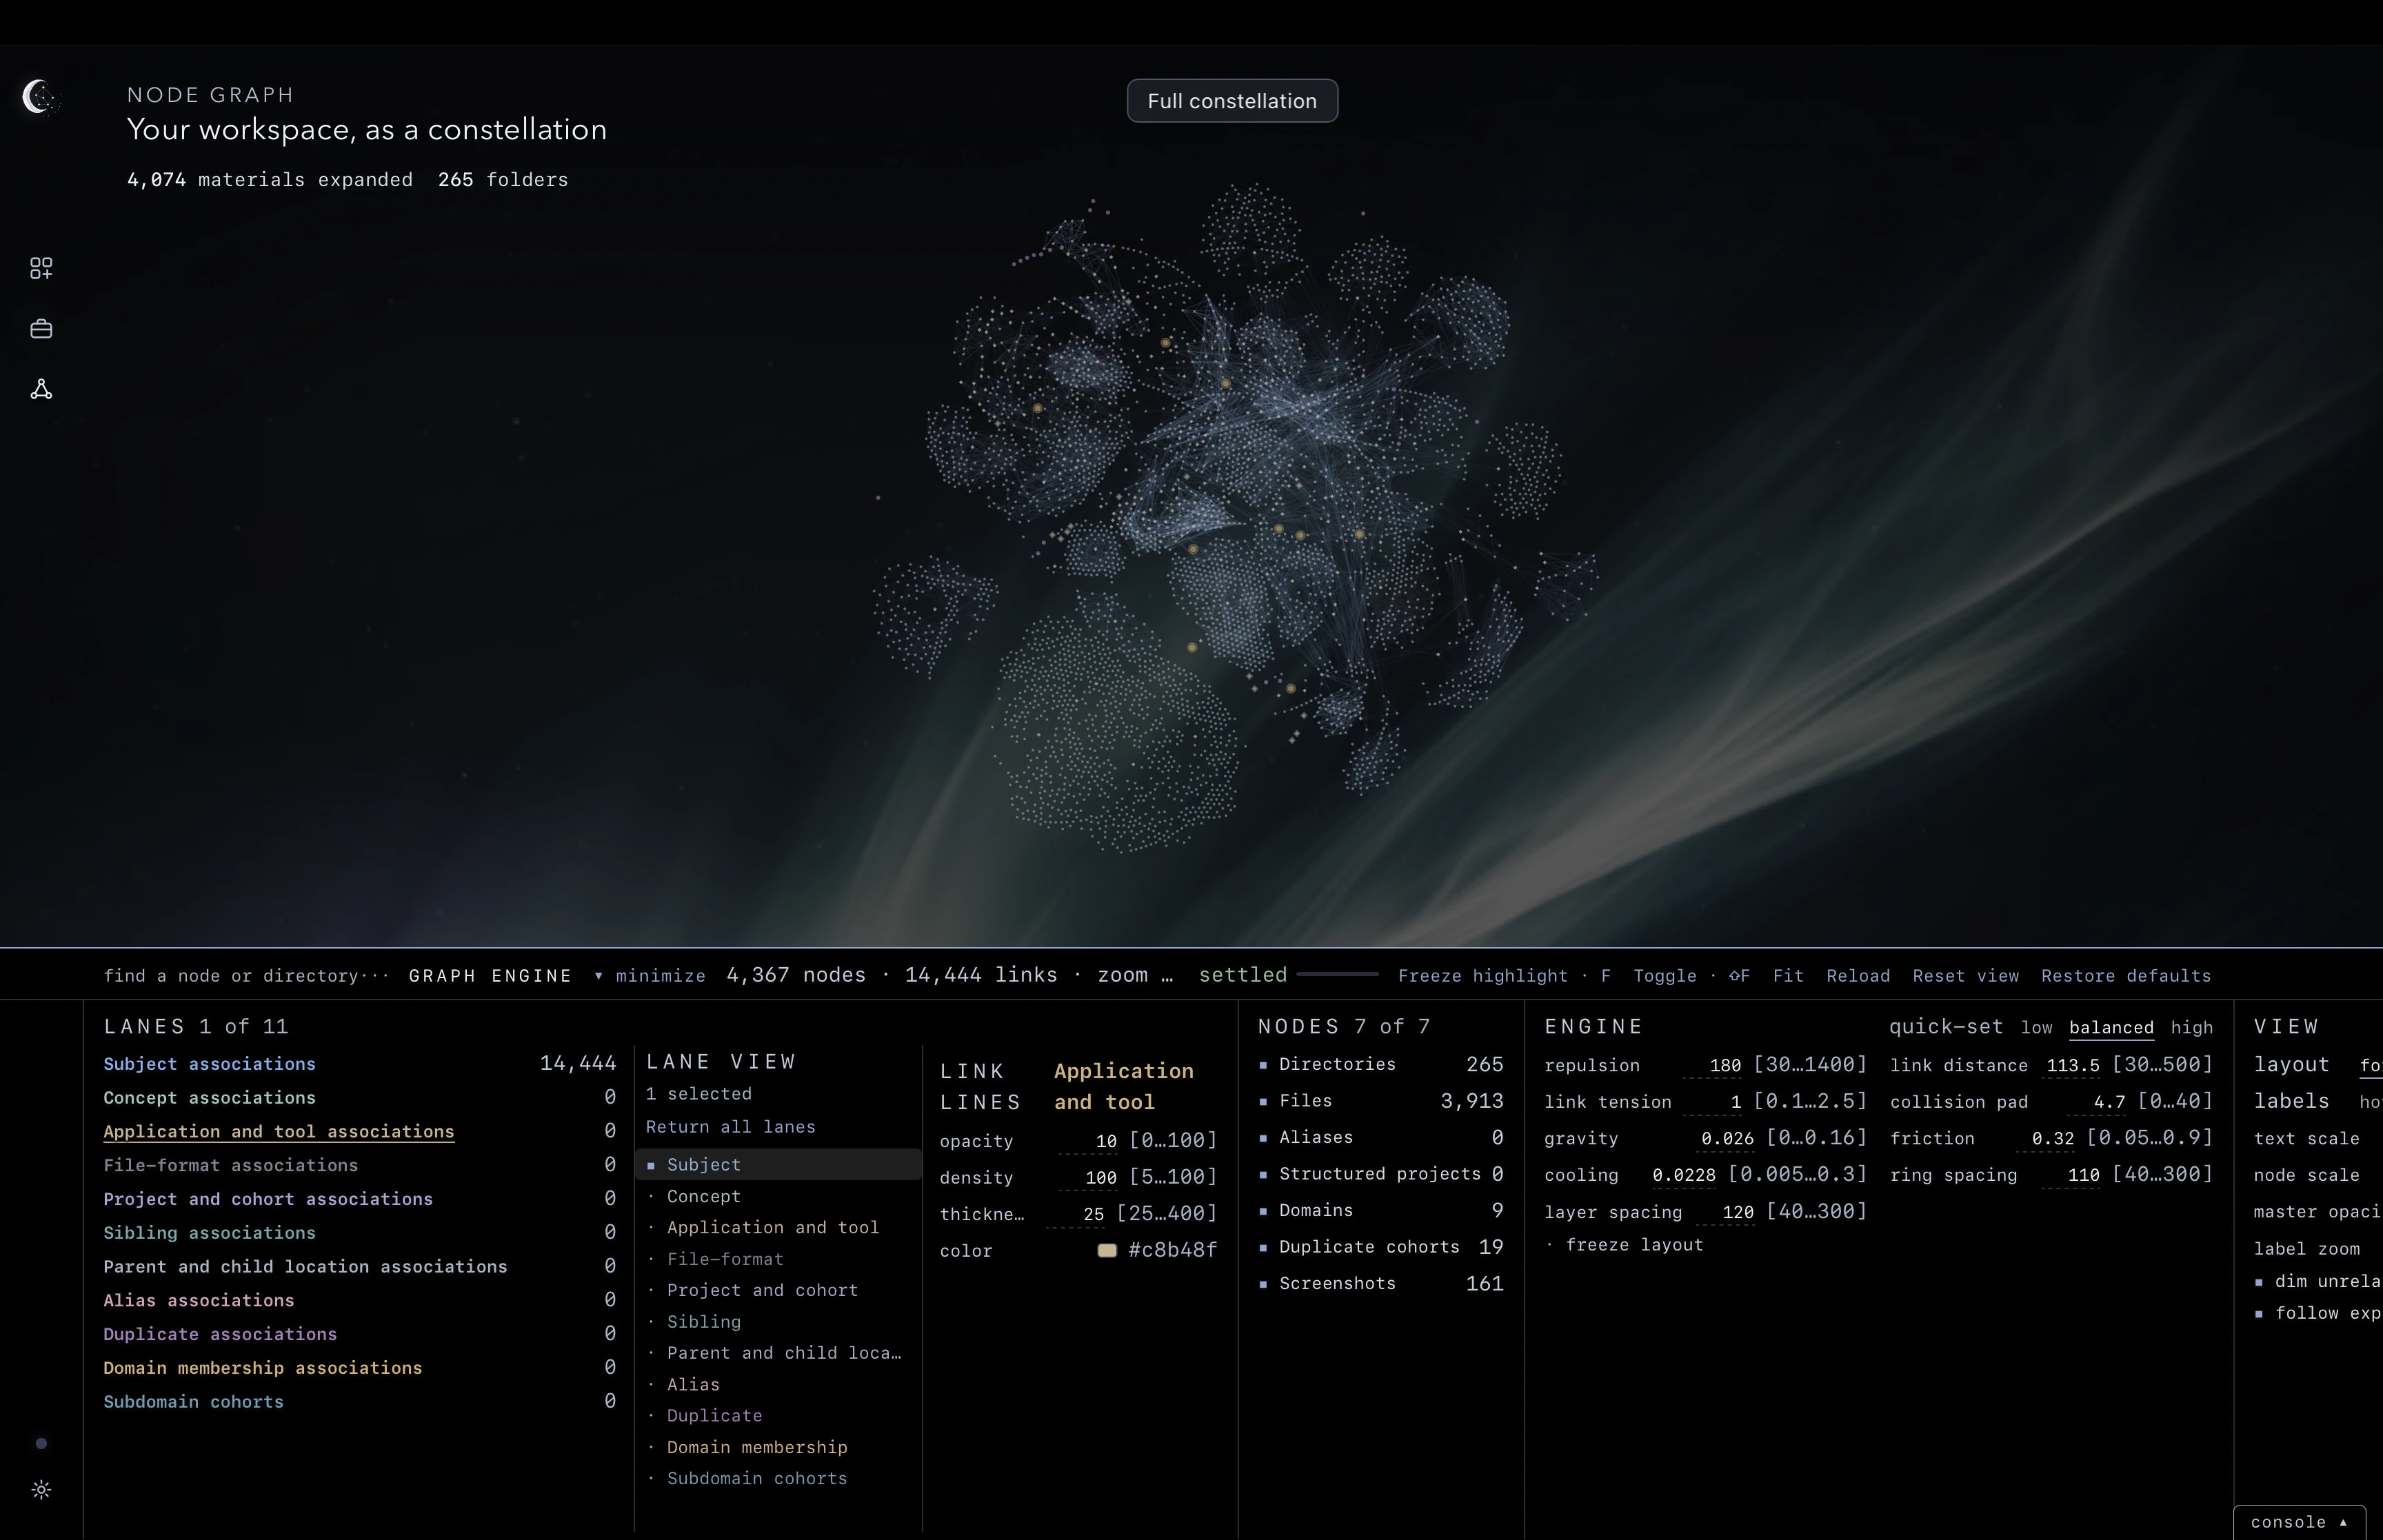
Select additional lanes to combine their lines. Each selected lane has a marked toggle; select it again to remove just that lane from the comparison.
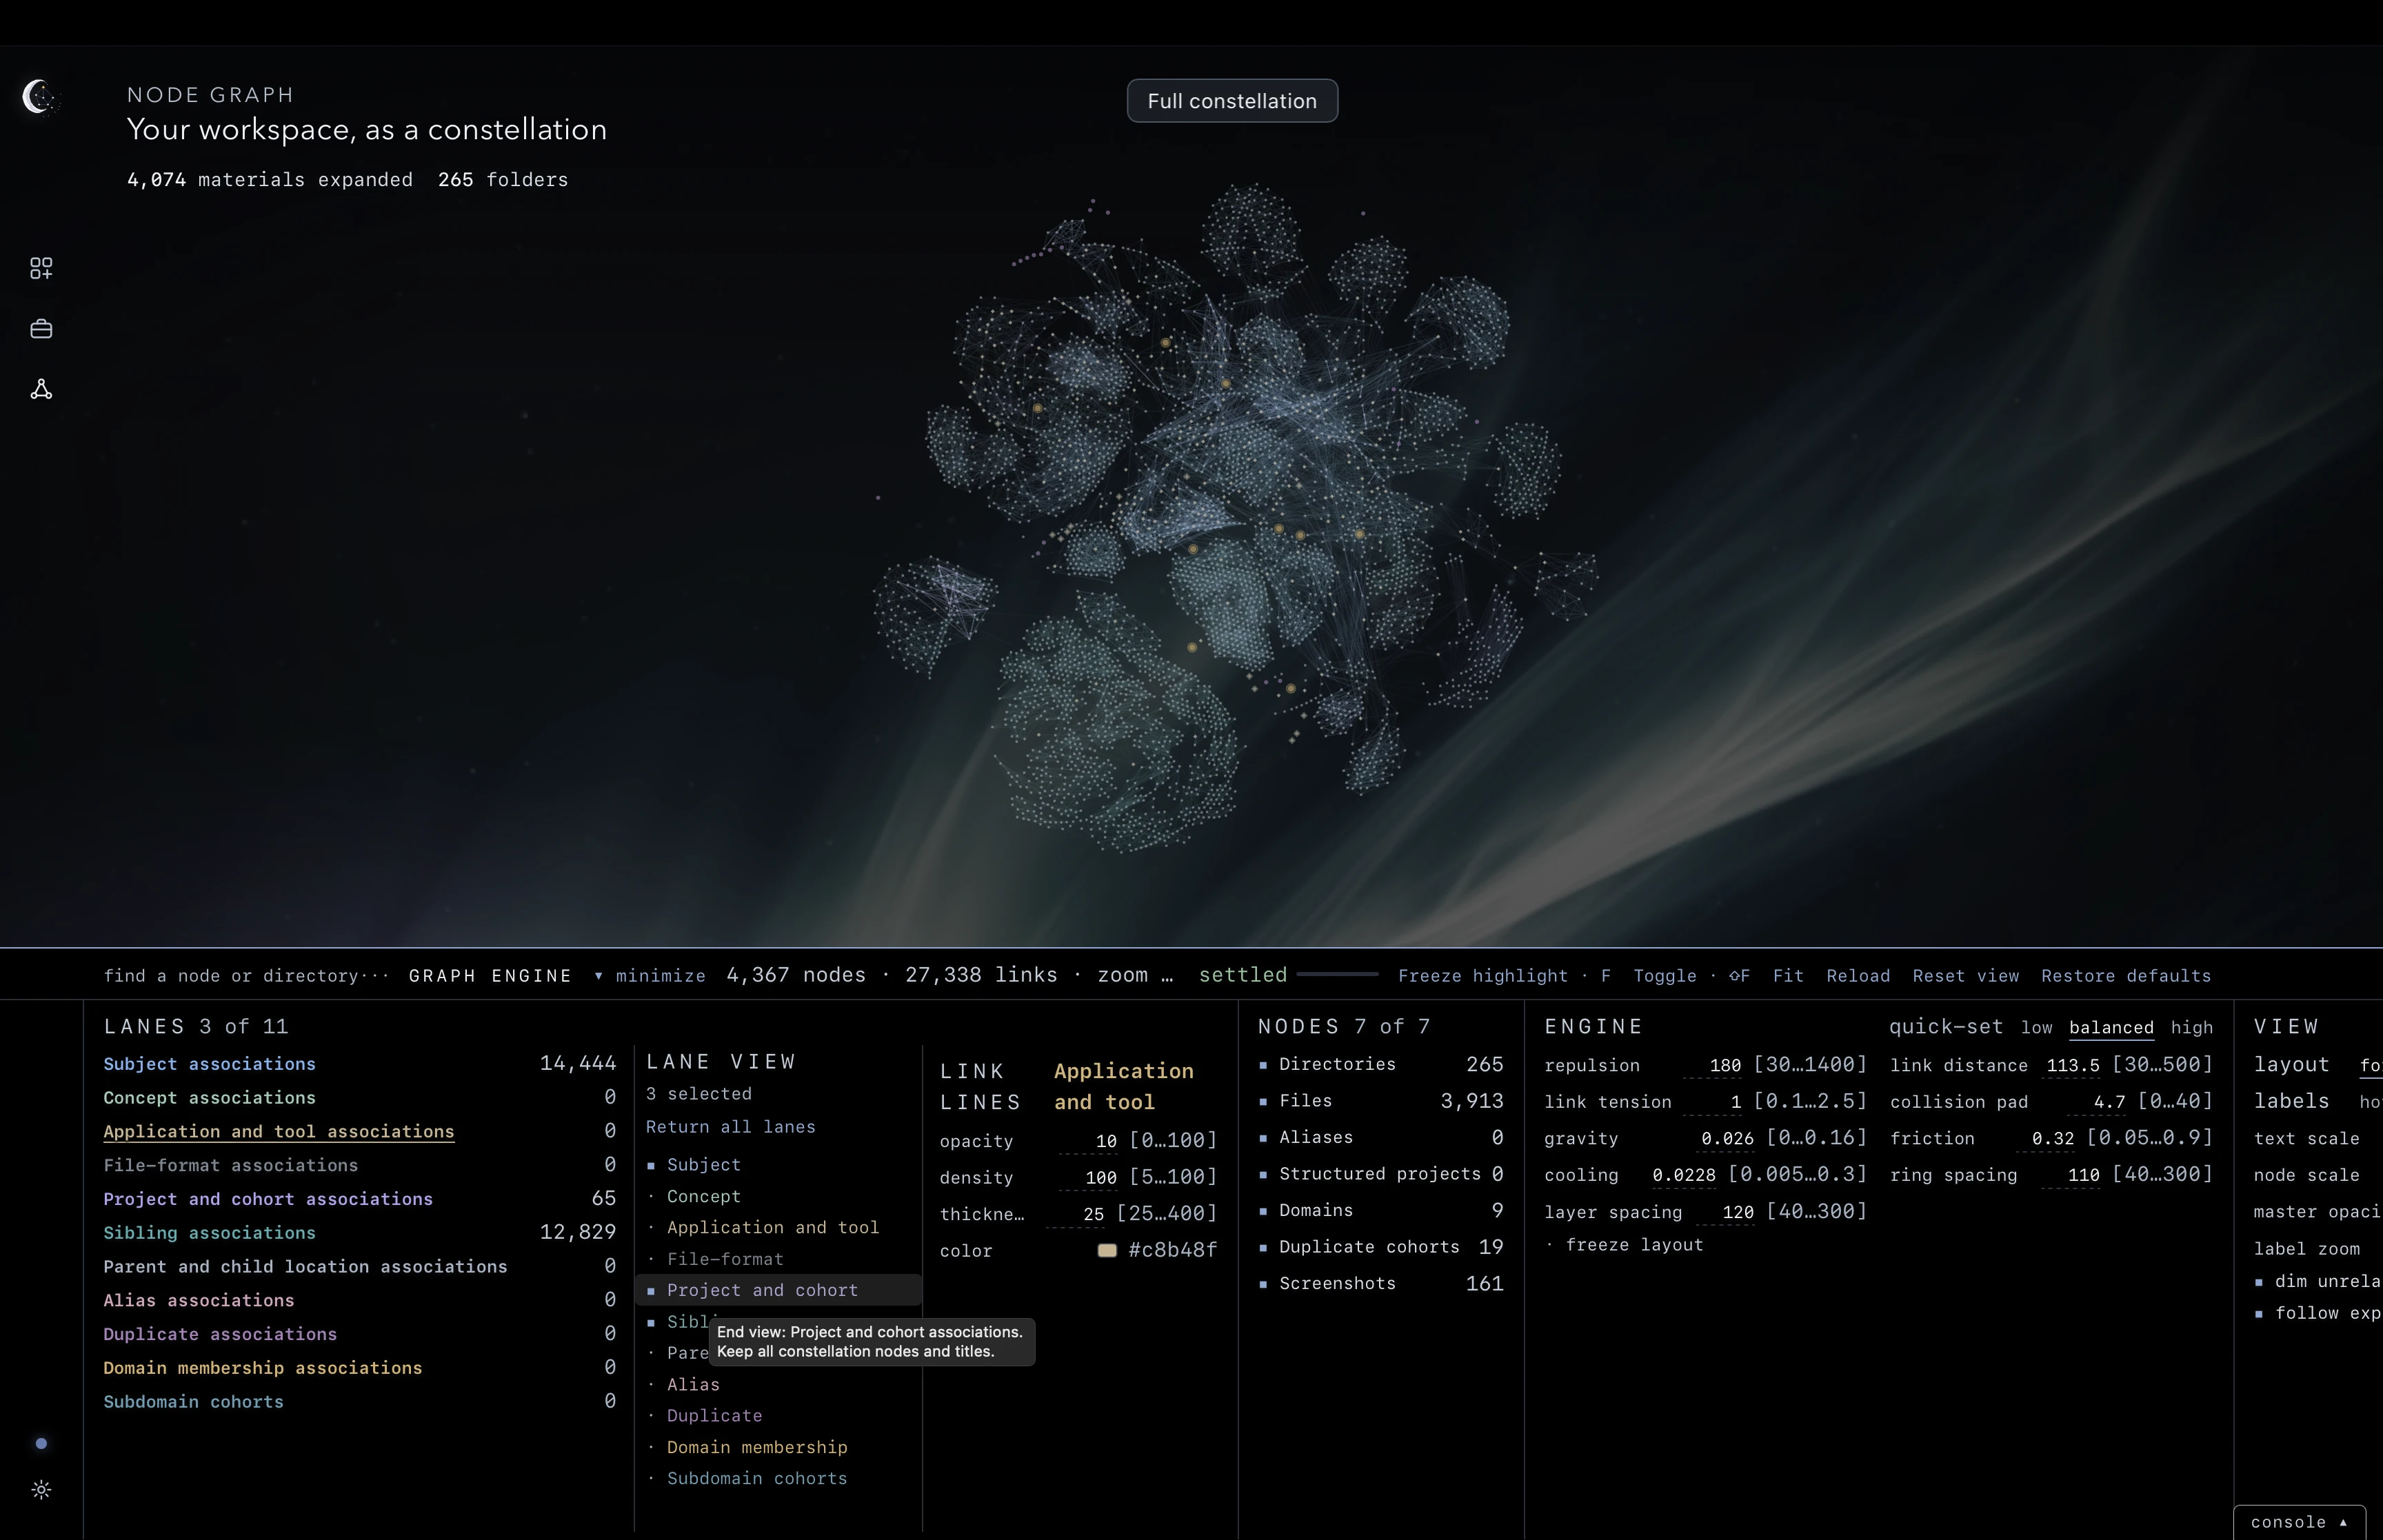
Choose Return all lanes, or turn off the last selected toggle, to return to your general lane visibility. If you previously quieted a lane by right-clicking its name, that preference applies again when you return.
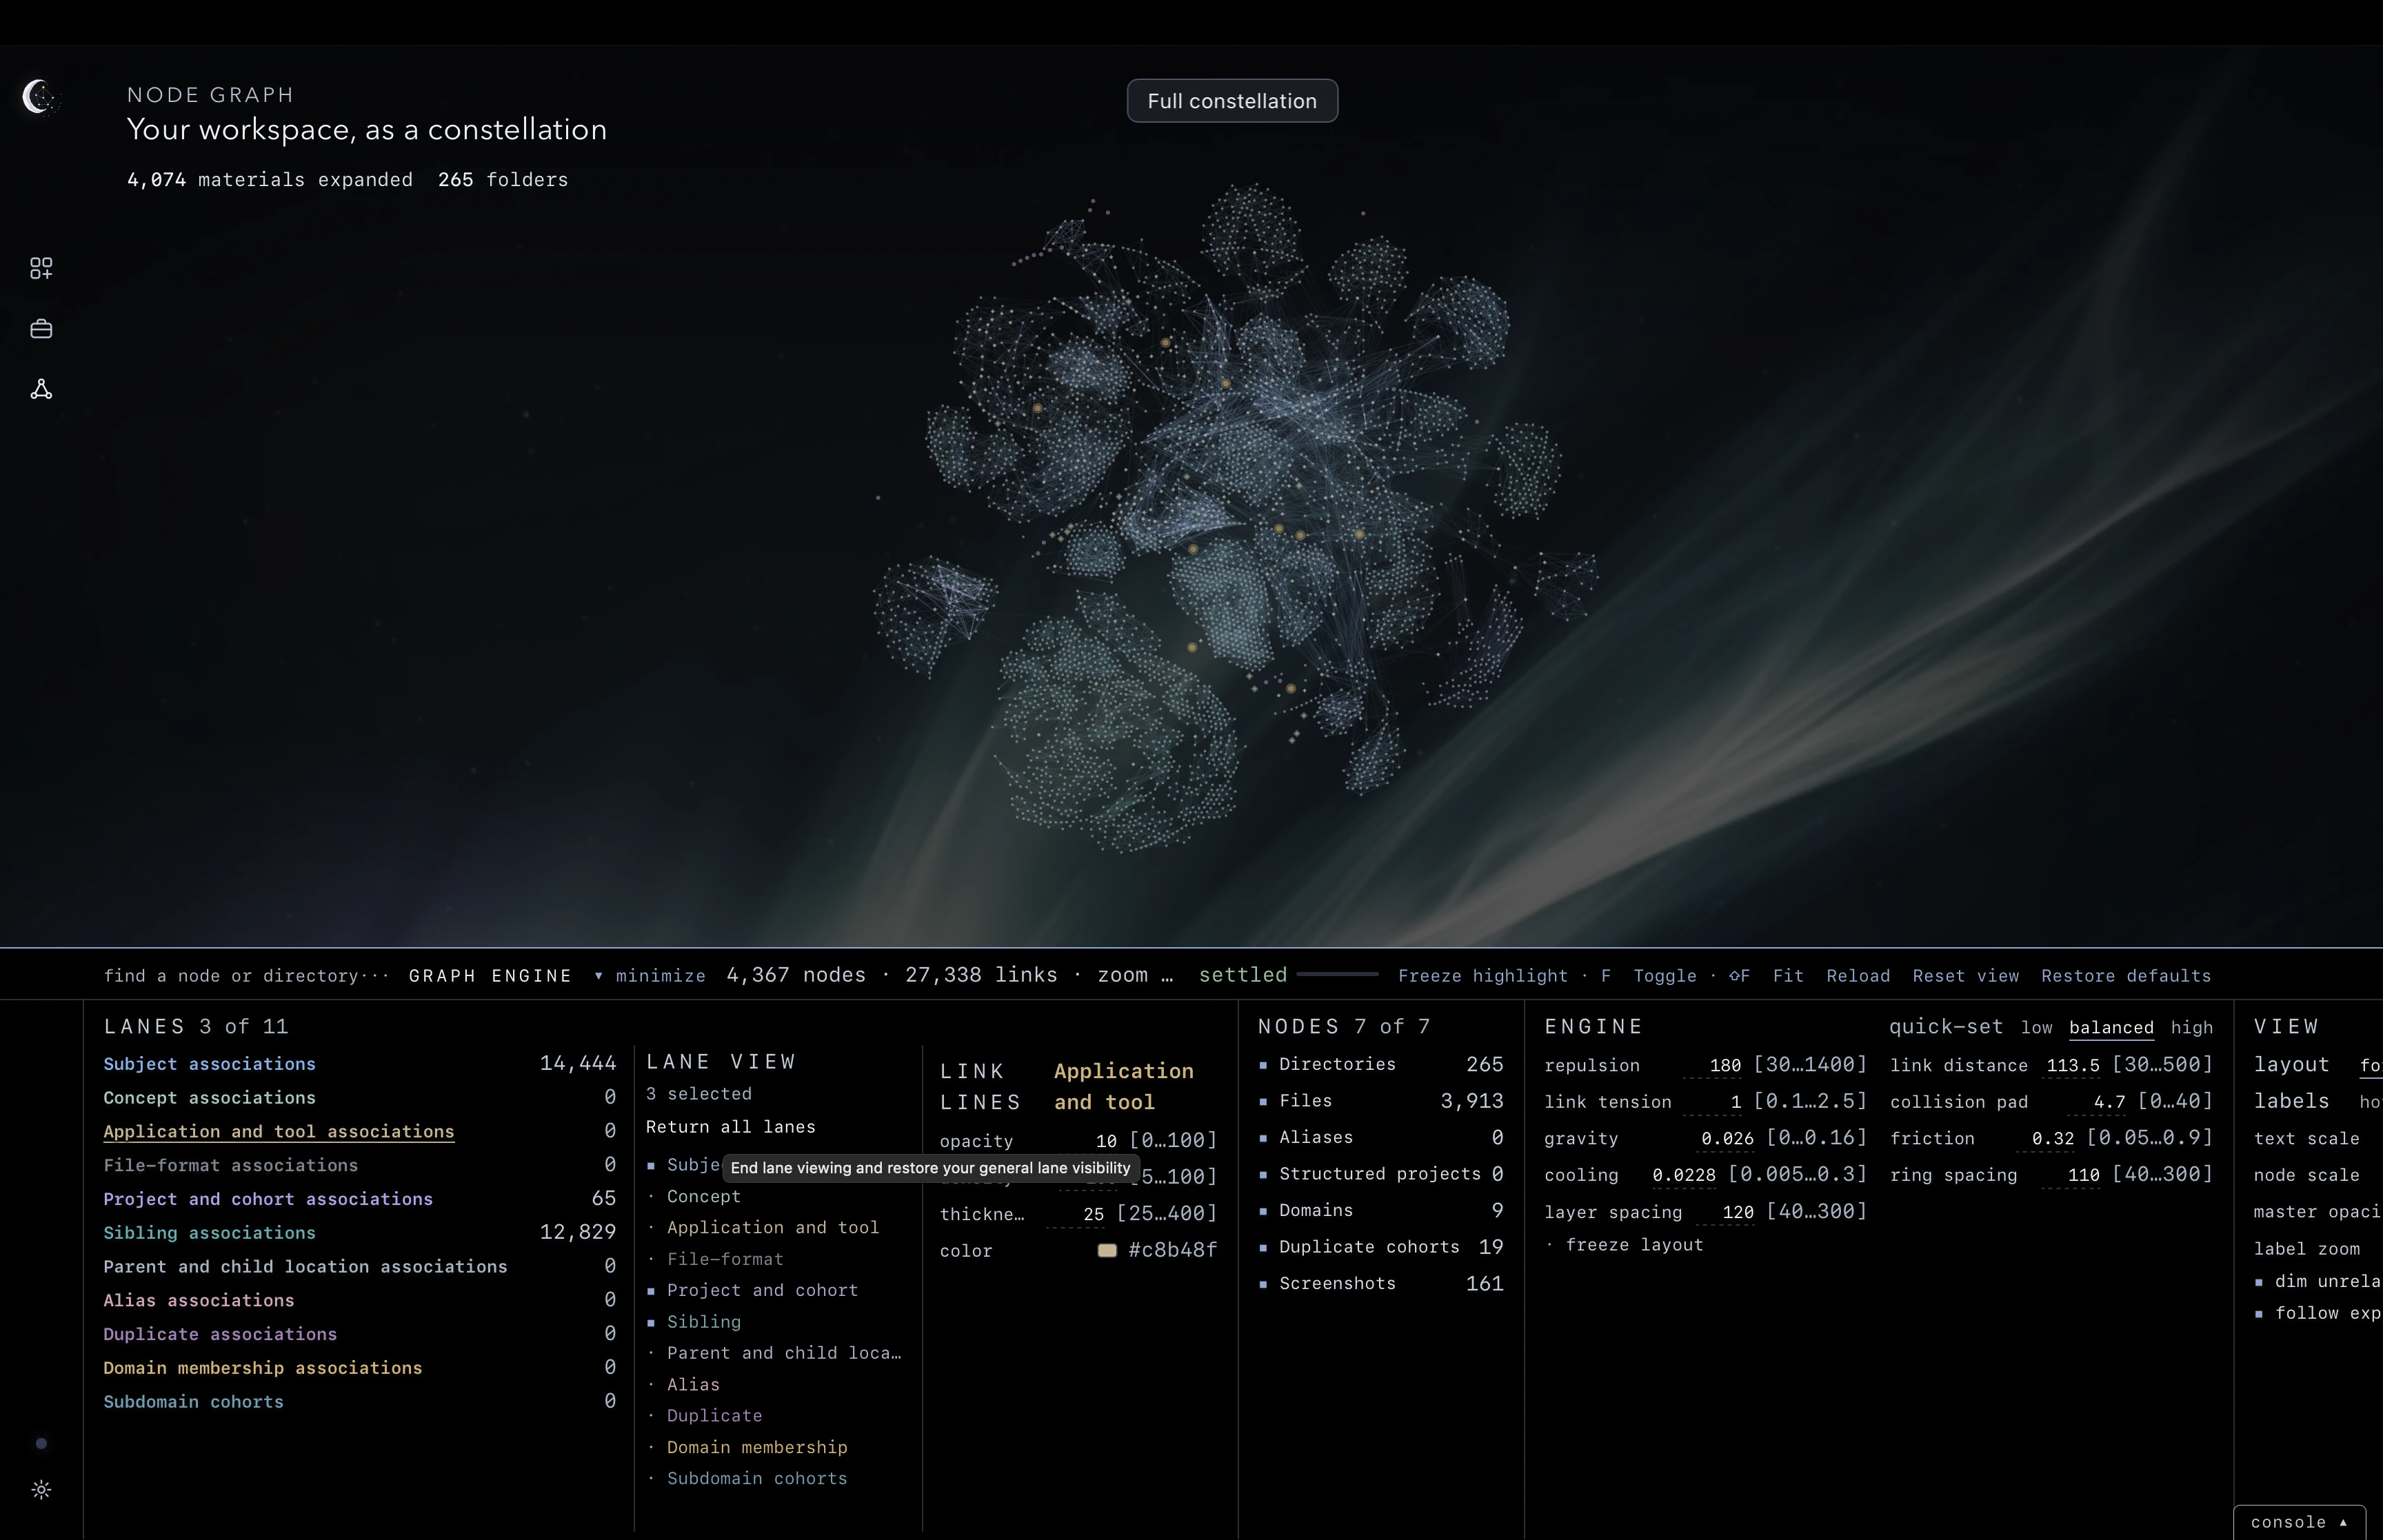
LANE VIEW is available in the full constellation. The lane-name list and tune controls remain available in separate graph tabs.
Open and collapse folders
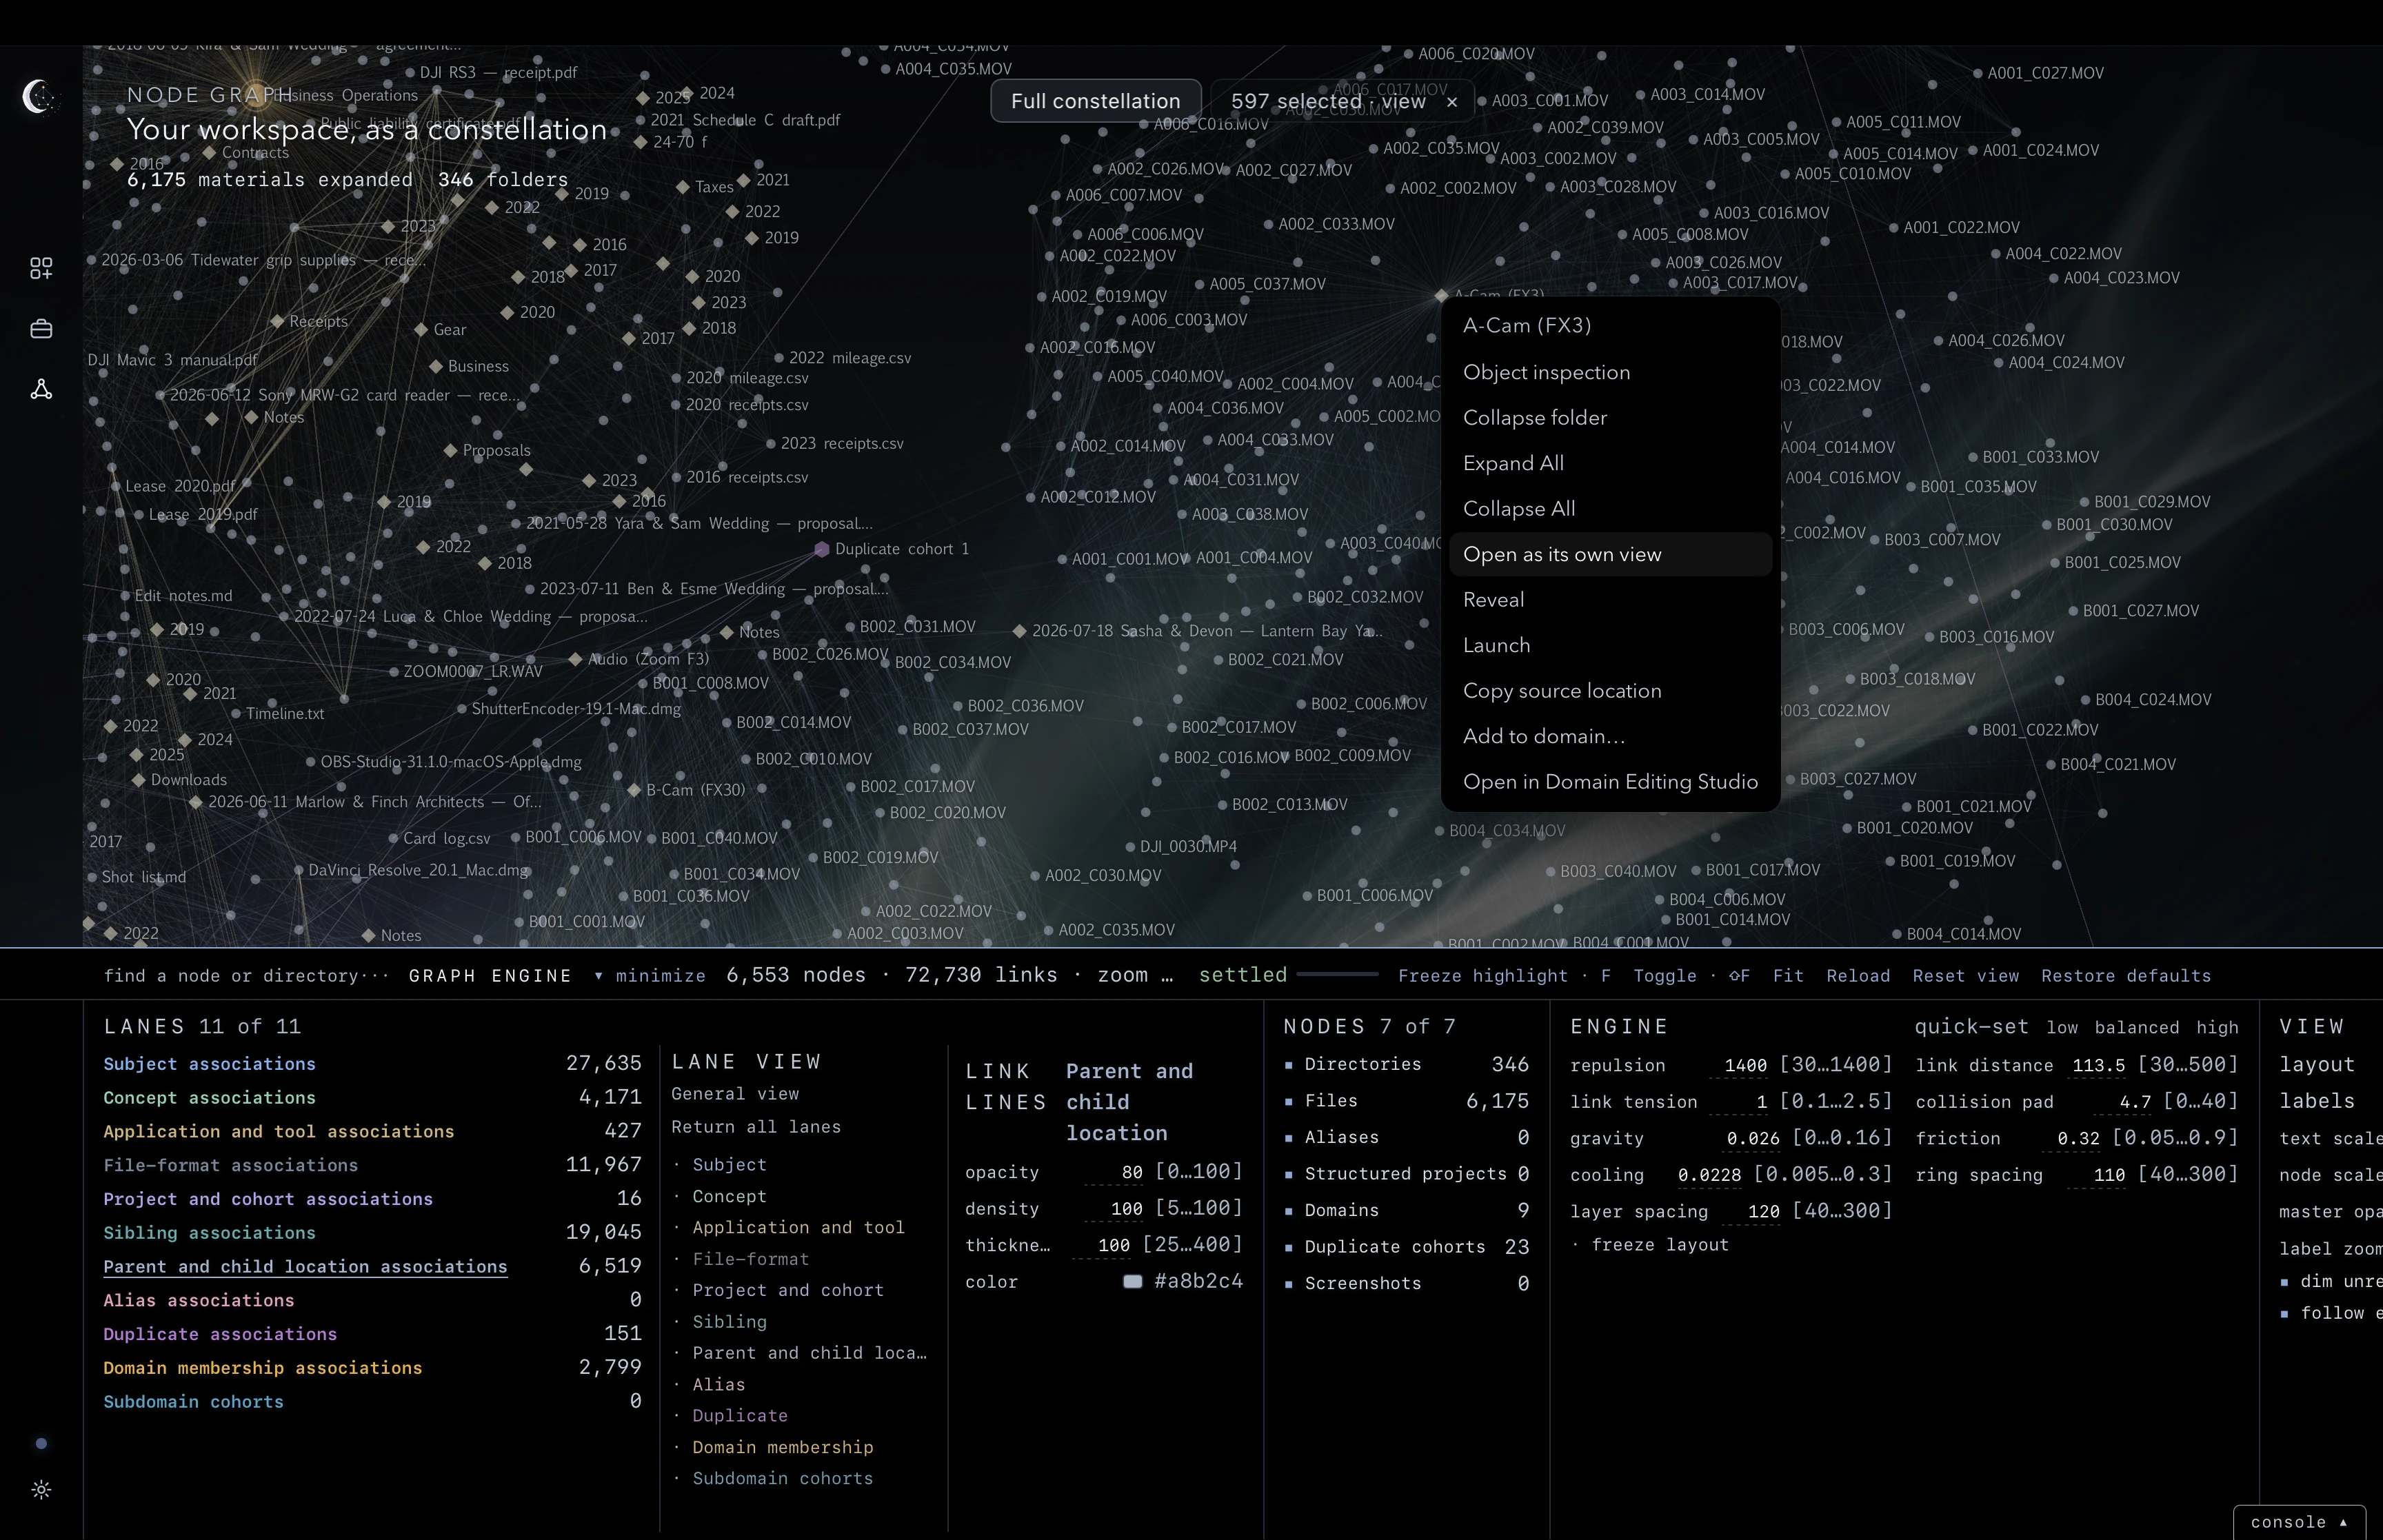
Double-click a folder, or right-click it and choose Open folder, to show its immediate children. Collapse folder folds its opened contents back in. Double-click a file to show or hide its copies and same-name relatives.
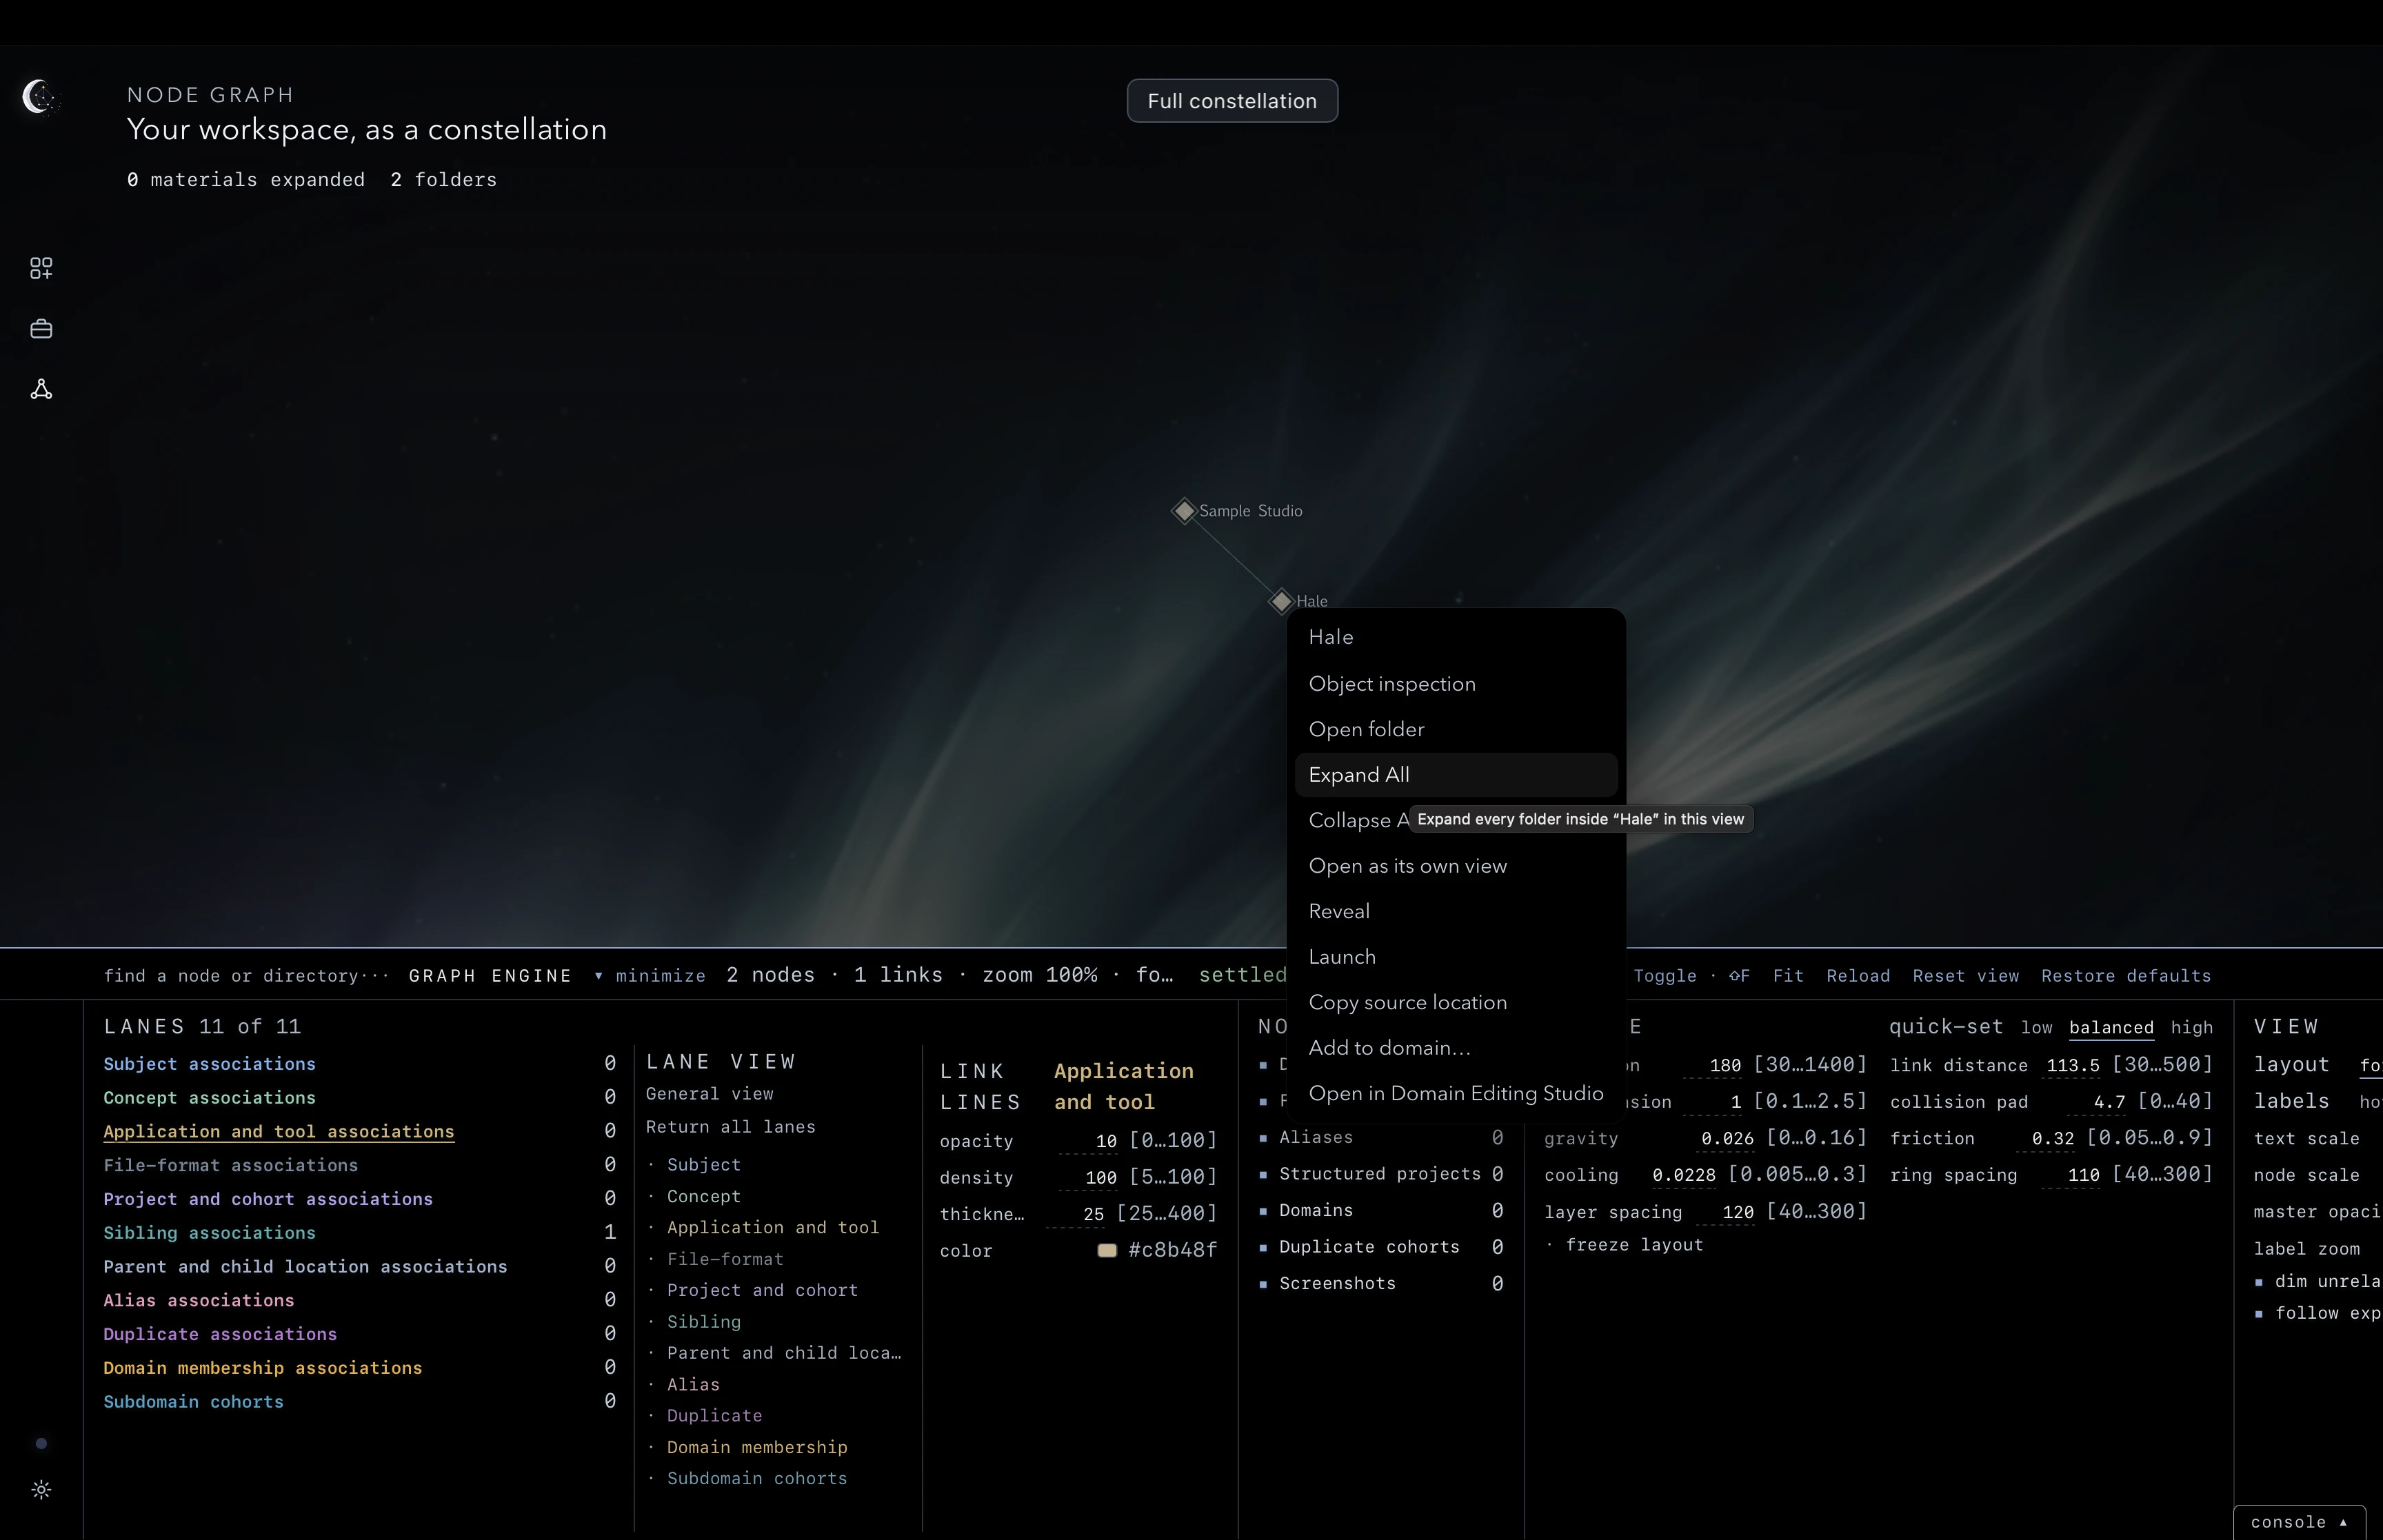
To open every nested folder, choose Expand All. Collapse All folds the folders and materials beneath that directory back in, leaving the directory itself visible.
Both commands apply to the clicked directory and its descendants in the current view. Parent folders, sibling branches and other views remain outside that boundary. Association links do not extend the target subtree.
Watch or cancel an expansion
The summary under Node Graph reports materials expanded and folders loaded in the current view. It remains visible when the engine controls are minimized and includes material types hidden by the display controls.
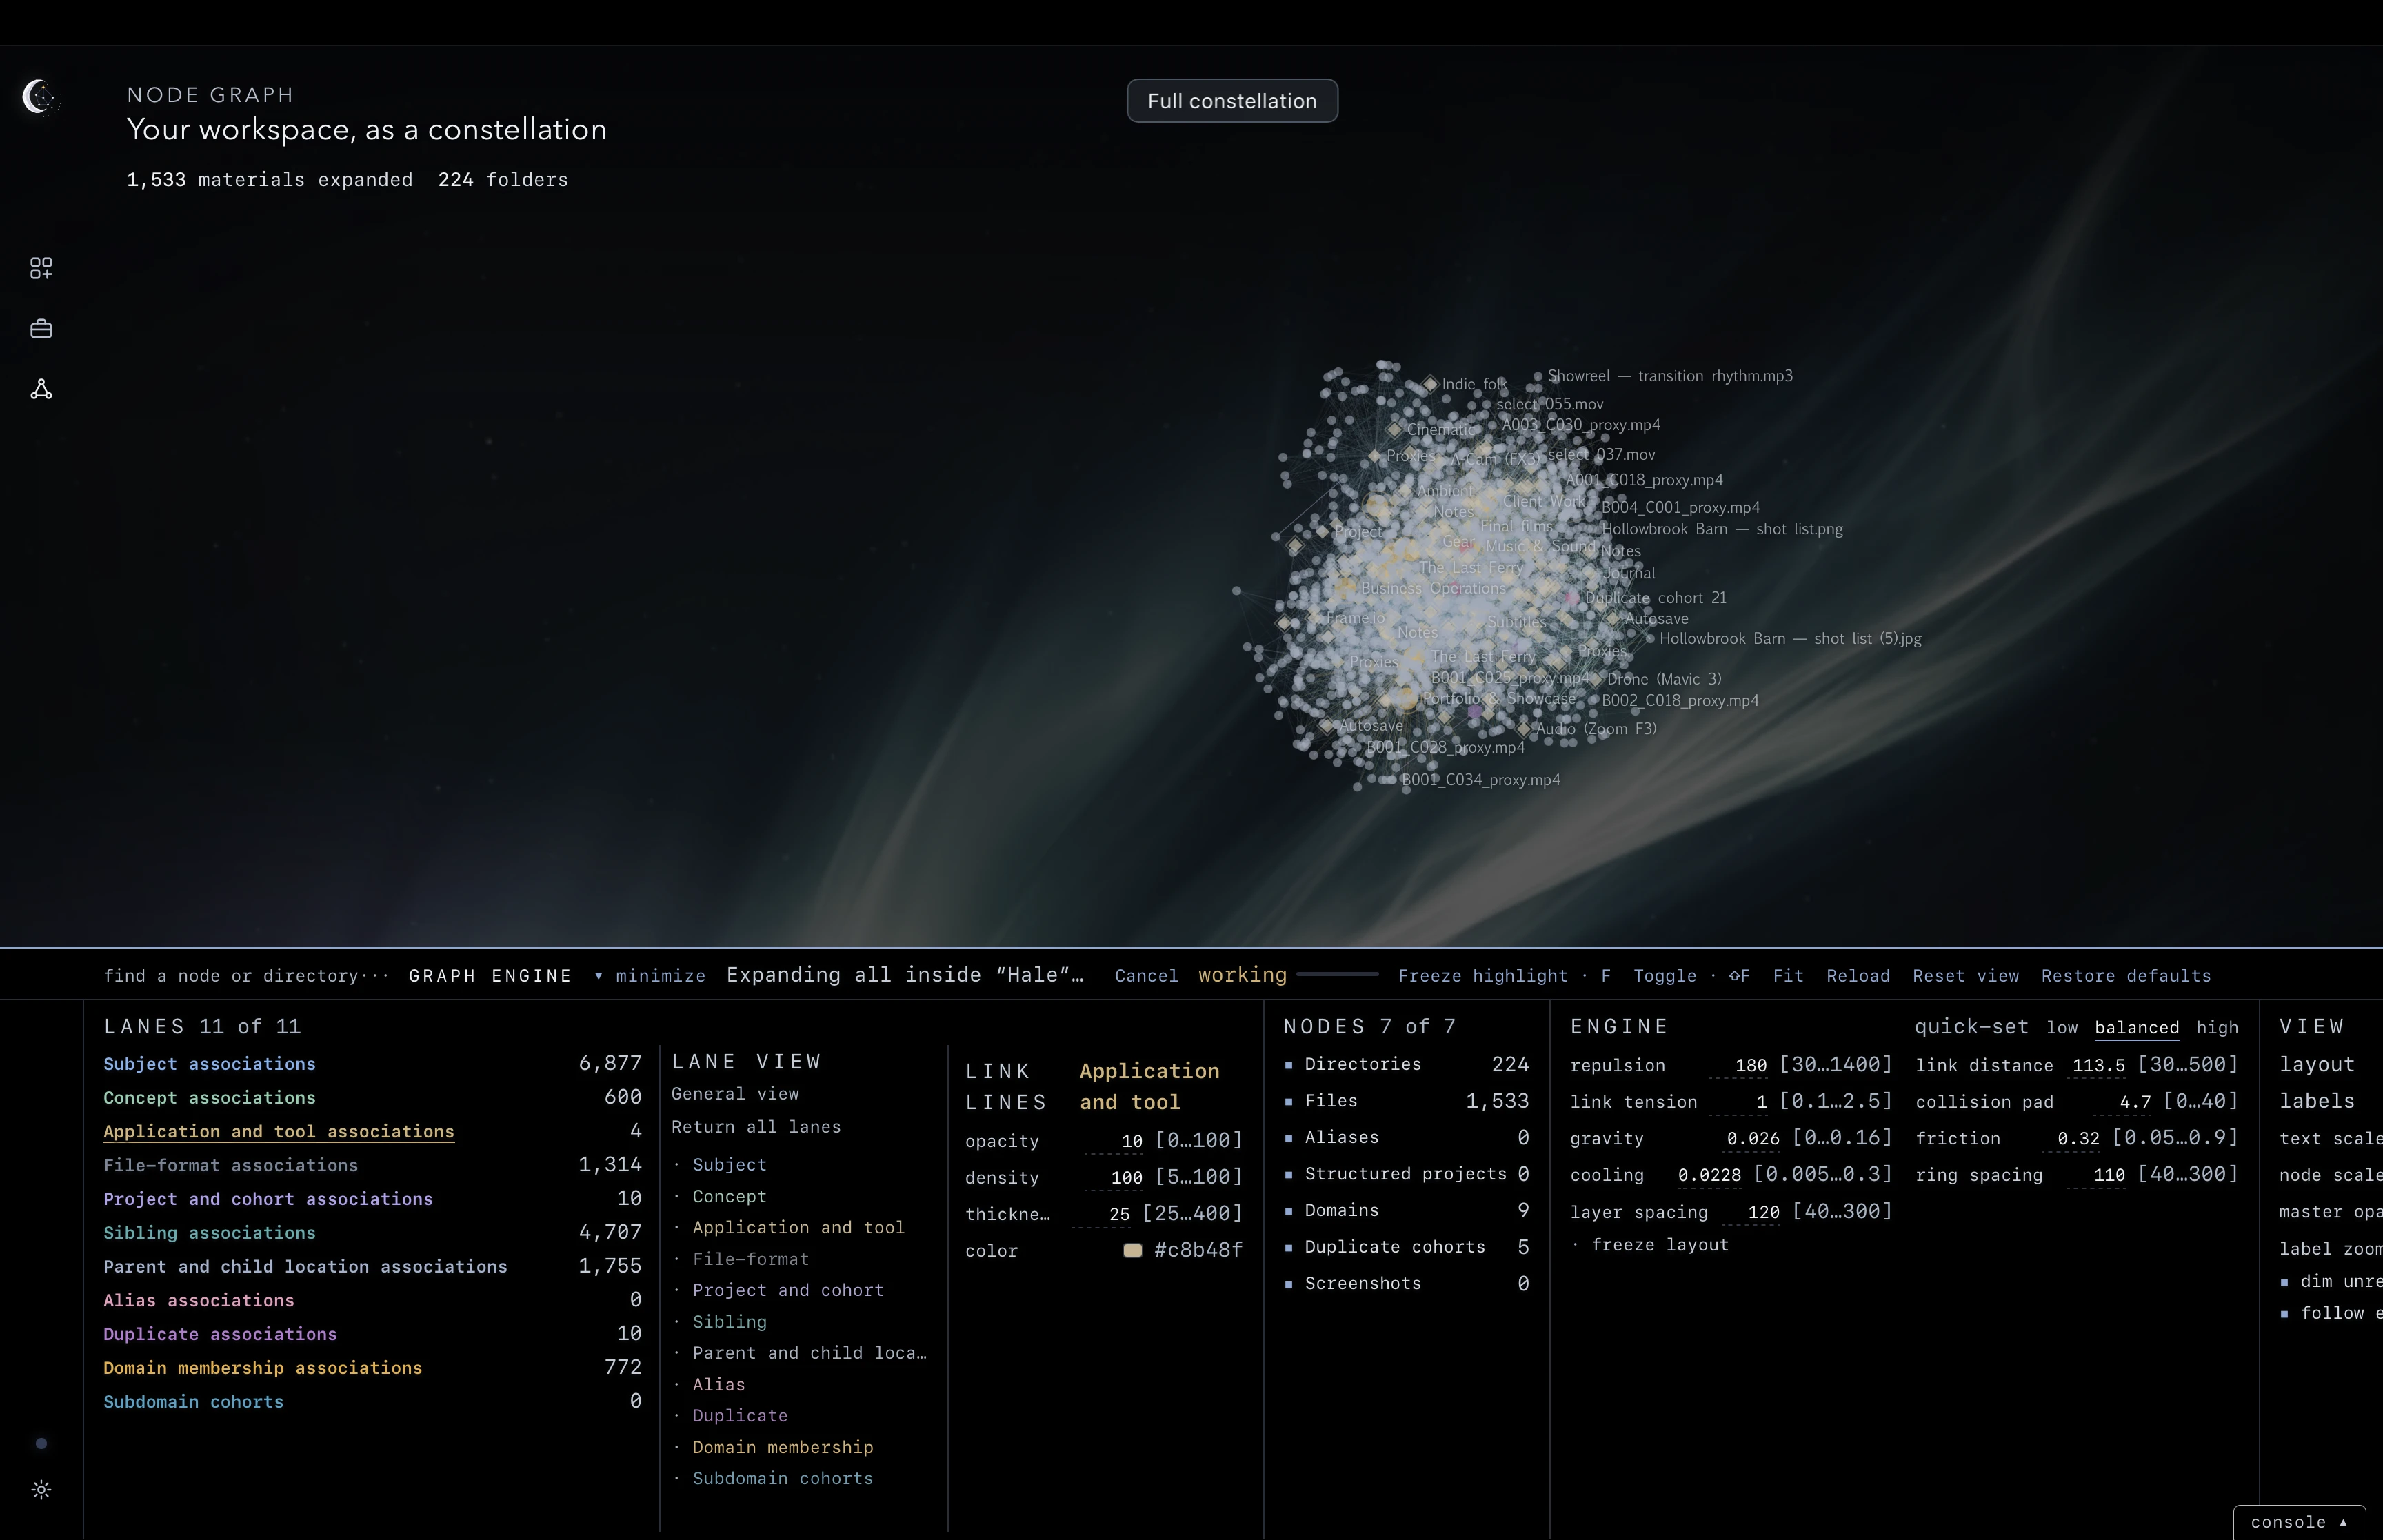
Choose Cancel to stop the remaining expansion work. Folders already opened stay open. The status reads Cancelling expansion… until the in-flight work has stopped.
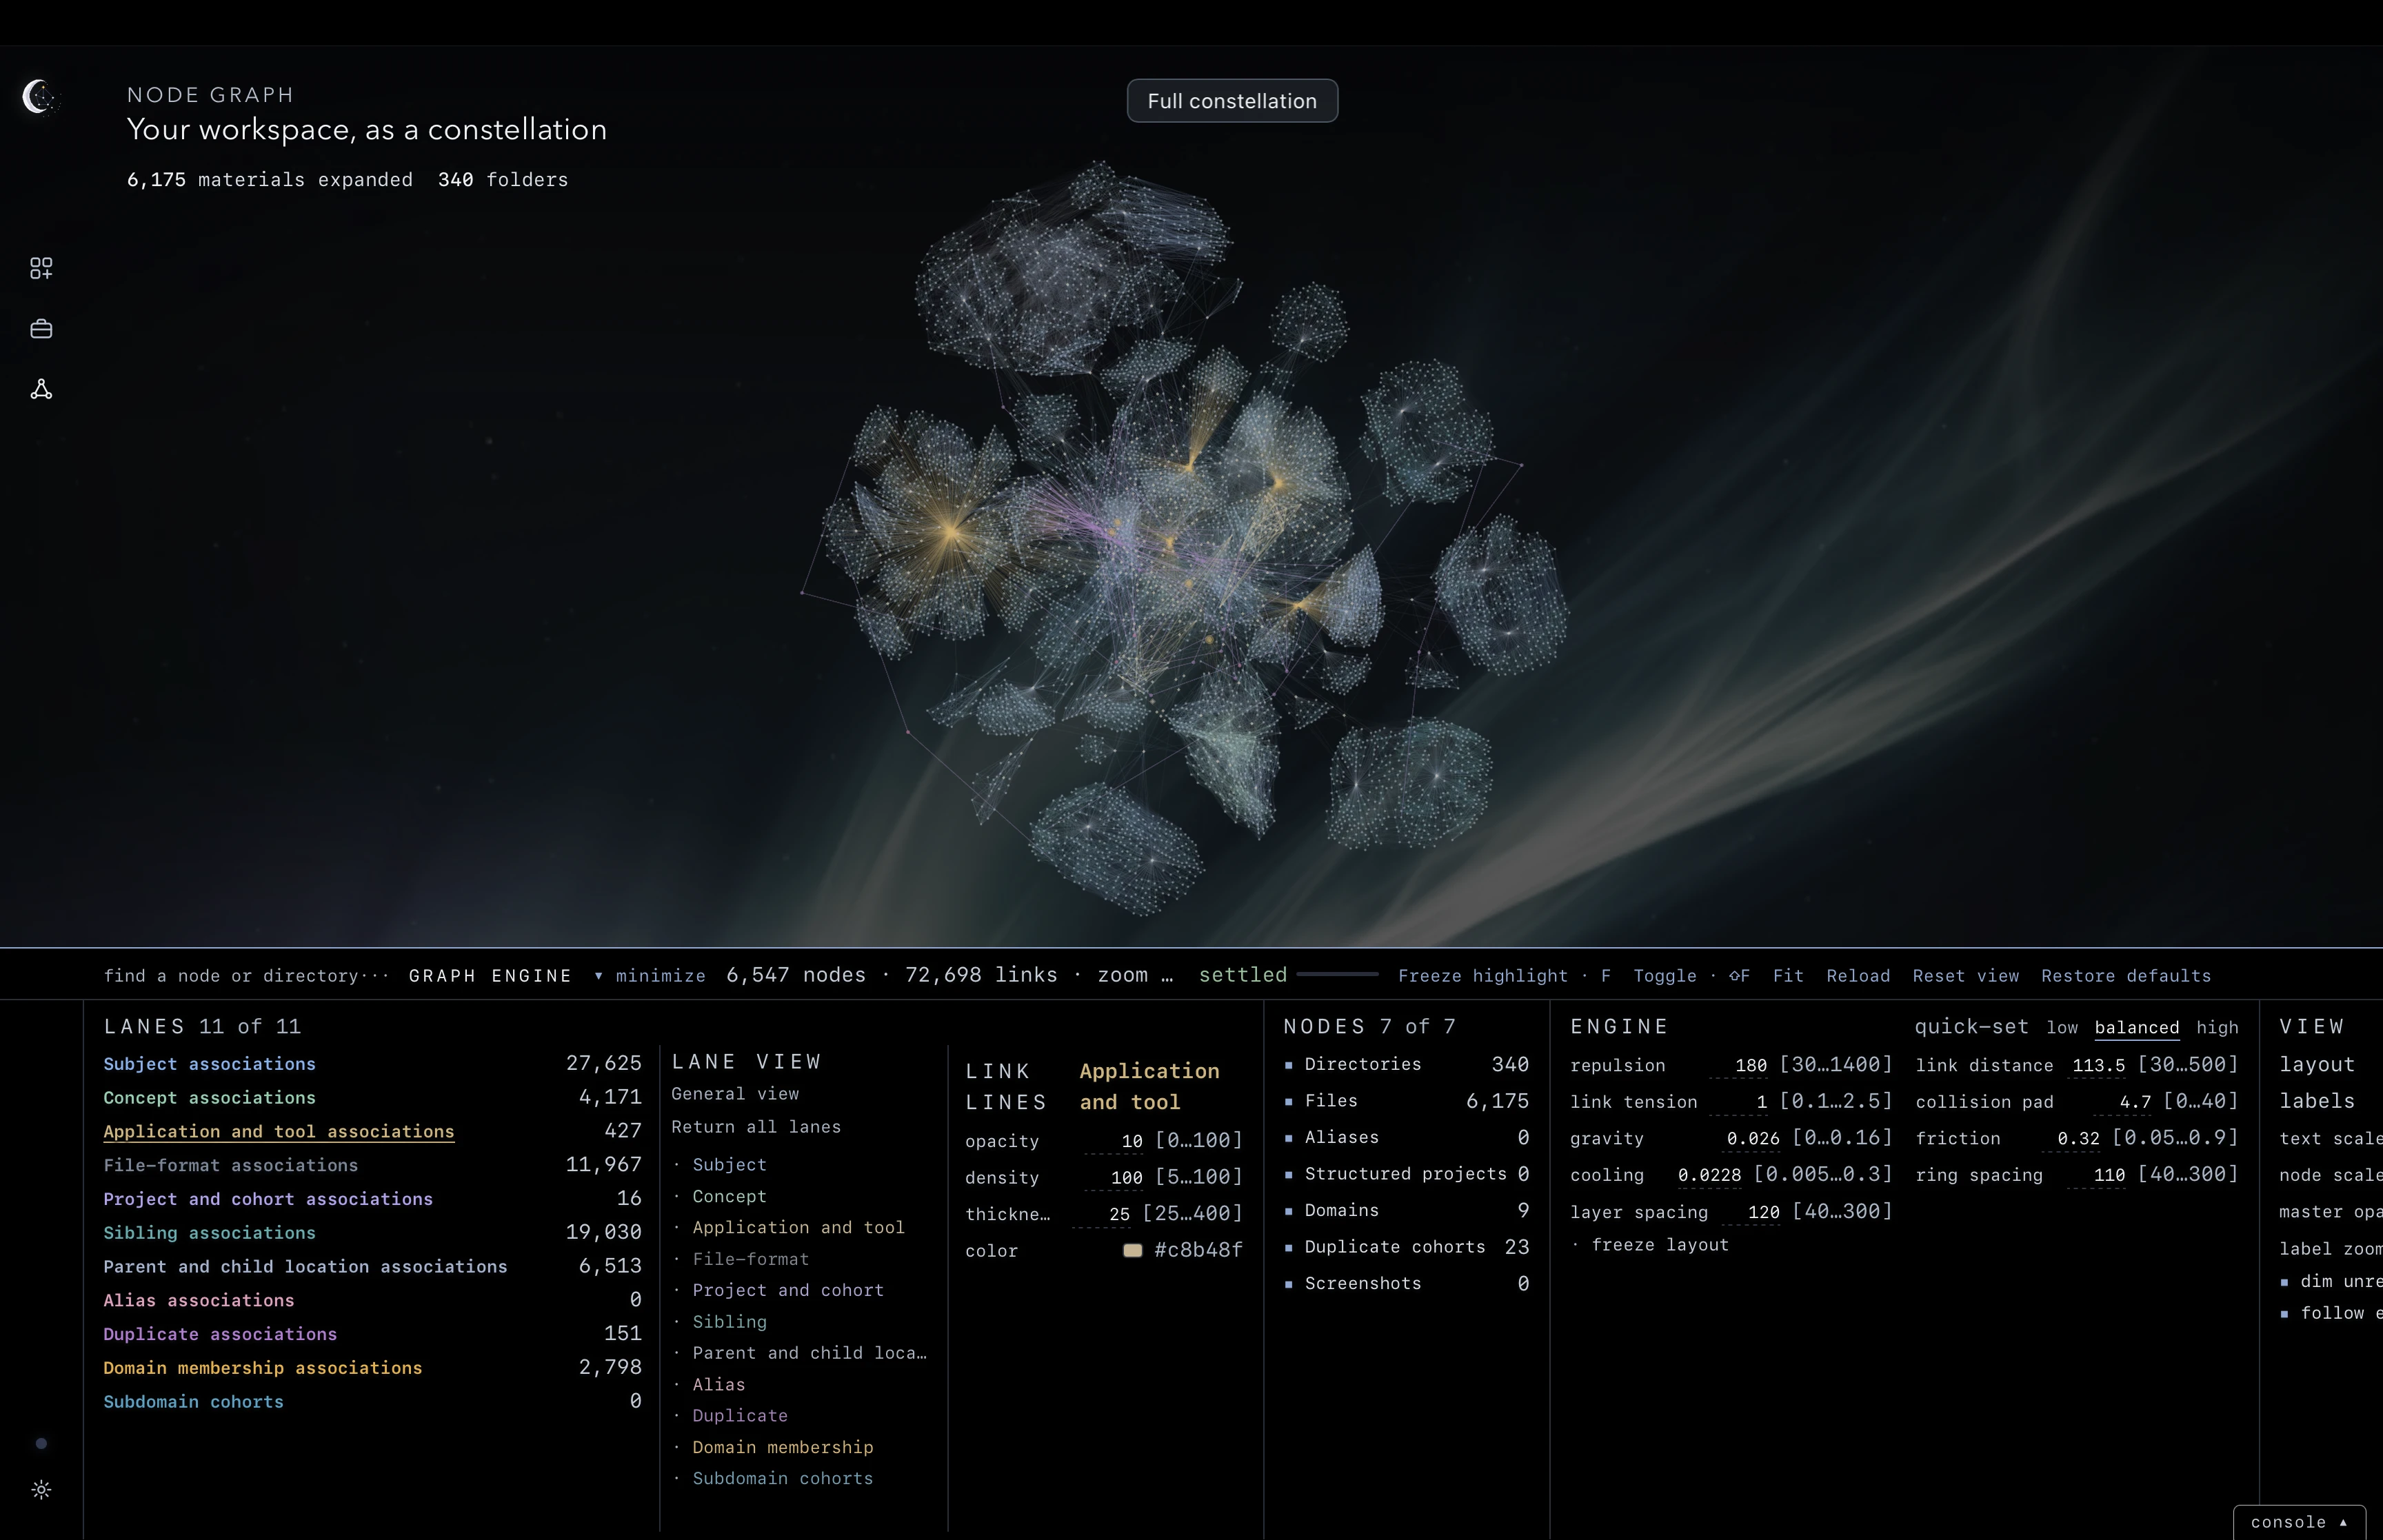
Materials expanded and visible nodes are different counts: hidden material types still count as expanded, while the canvas can also contain folders, domains and duplicate cohorts.
Find a material
Type a name into find a node or directory… in the bottom bar. Matching files and directories appear above the field; use the kind beside each result to choose the one you want.
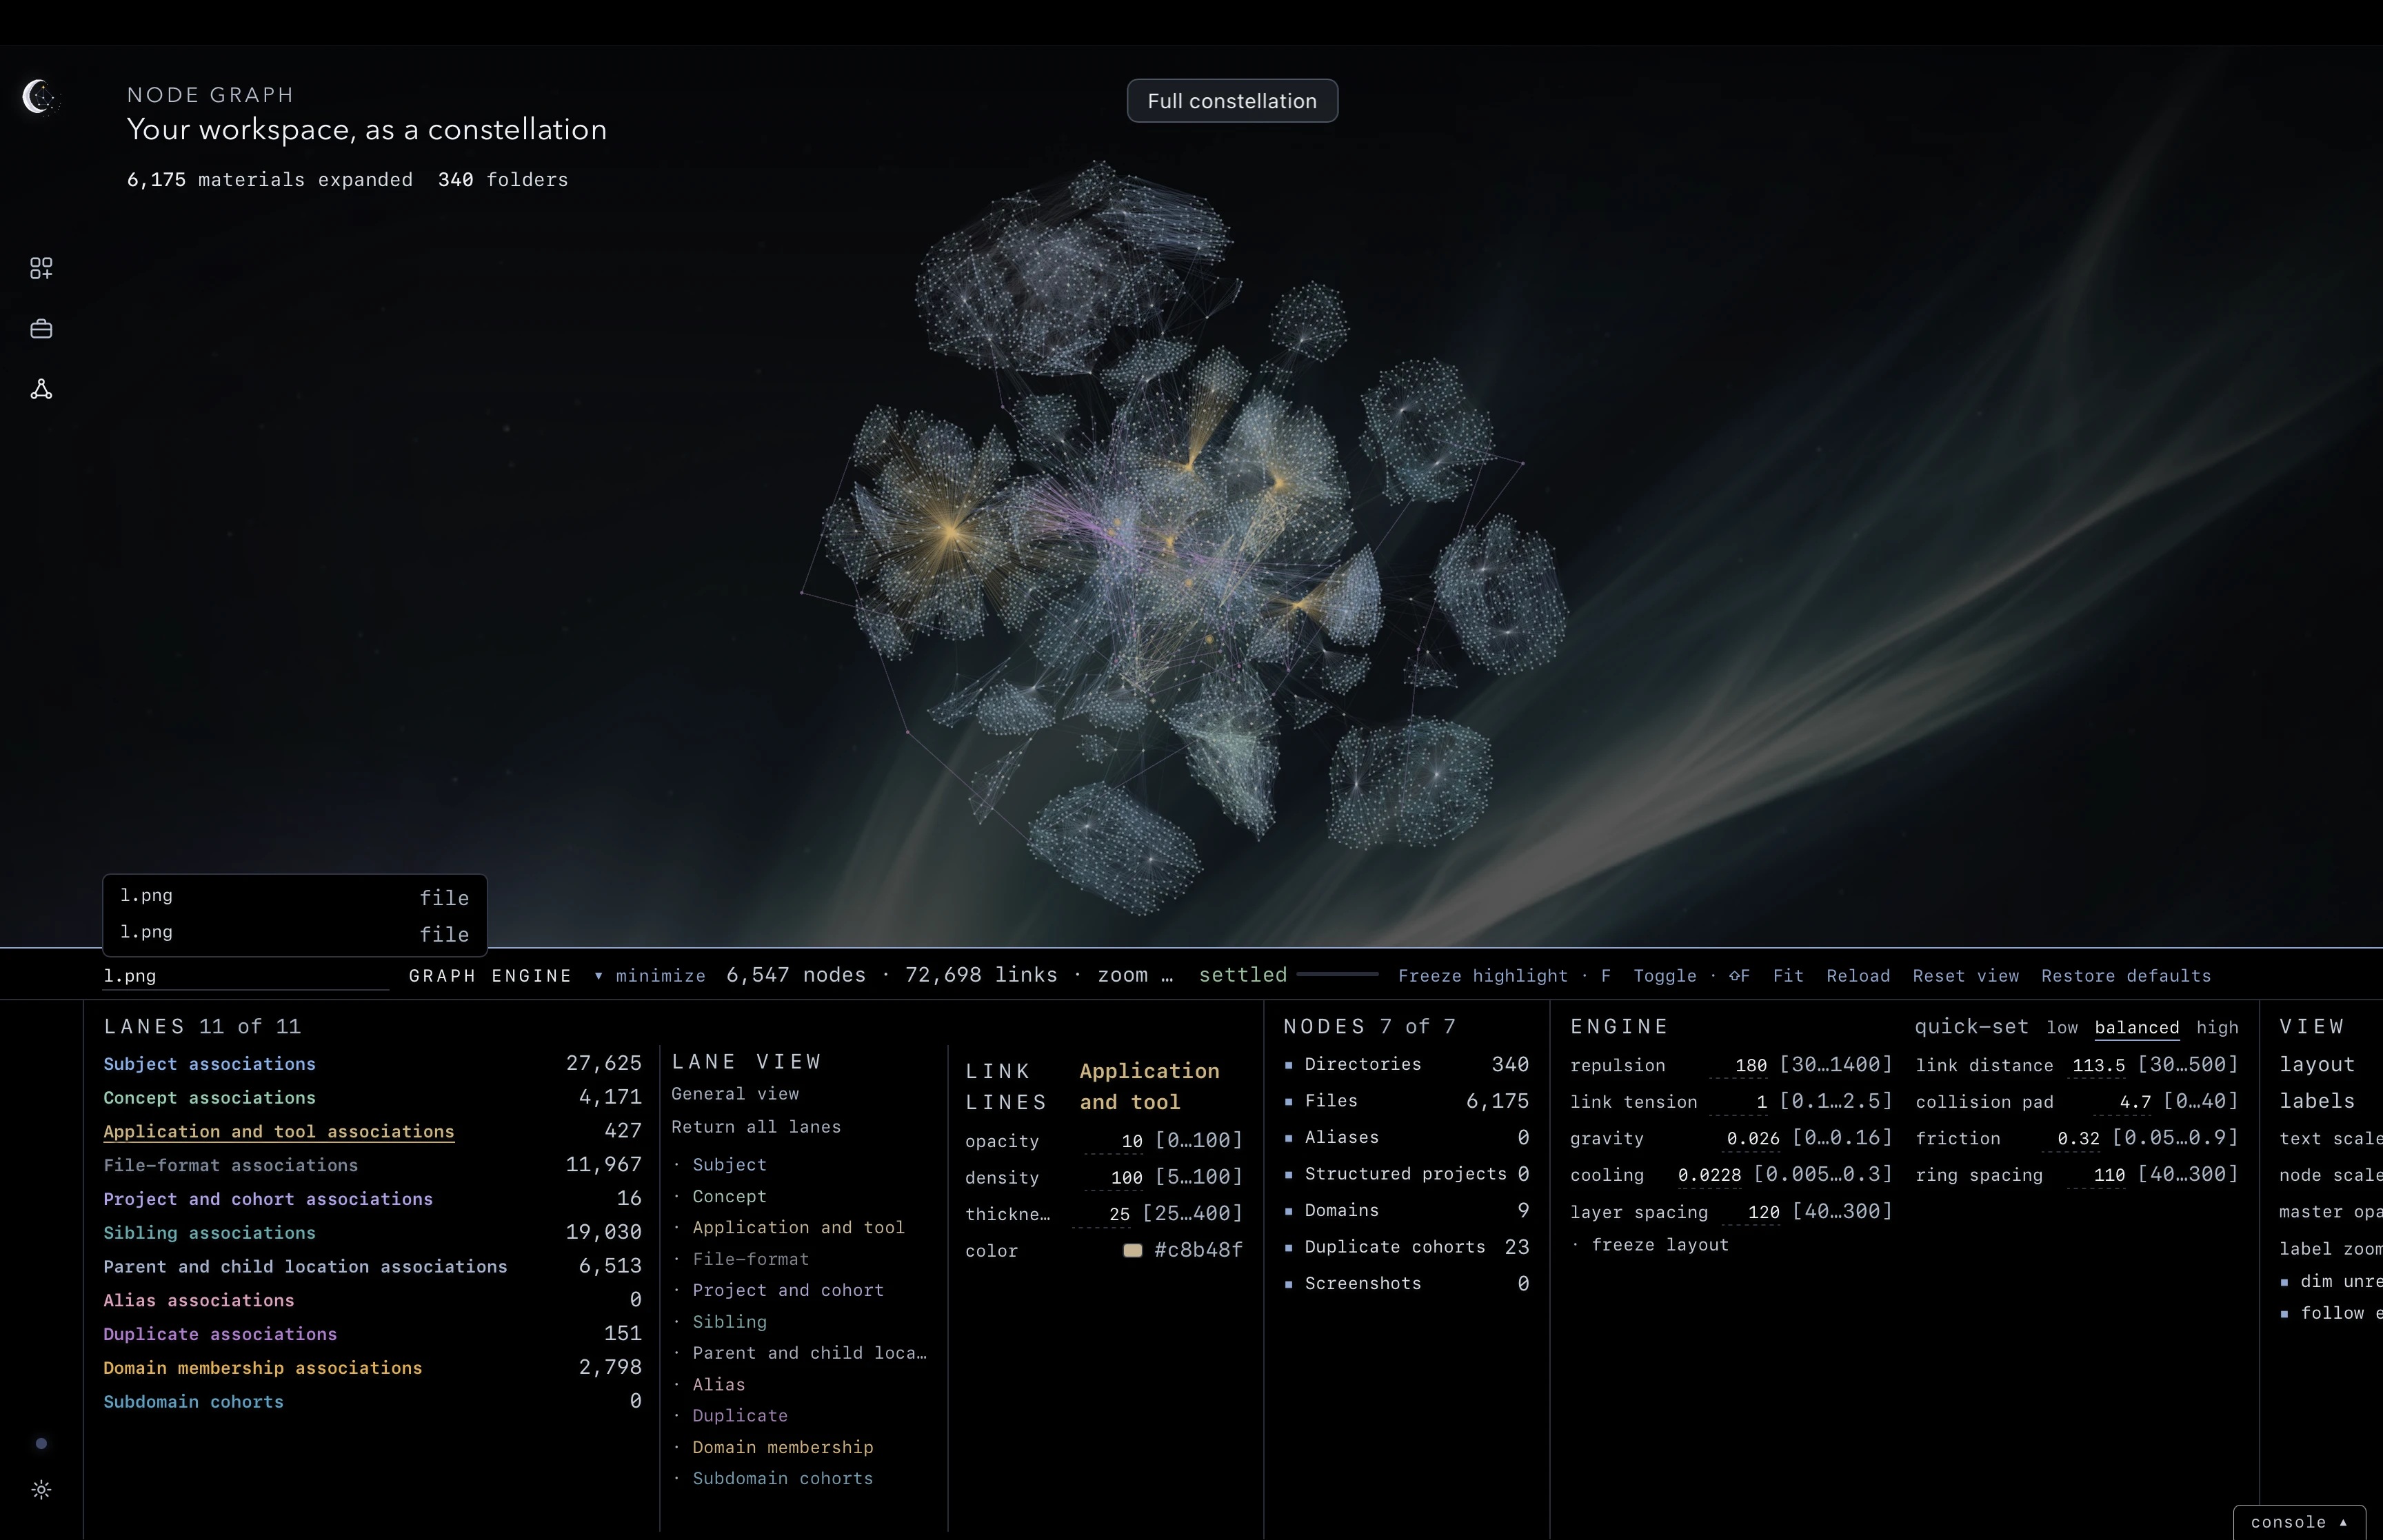
Choose a result. The graph opens the folders needed to reveal it, centres it and marks it with a yellow focus ring. The ring lasts for 30 seconds, remains while you pan, and ends when you click the material.
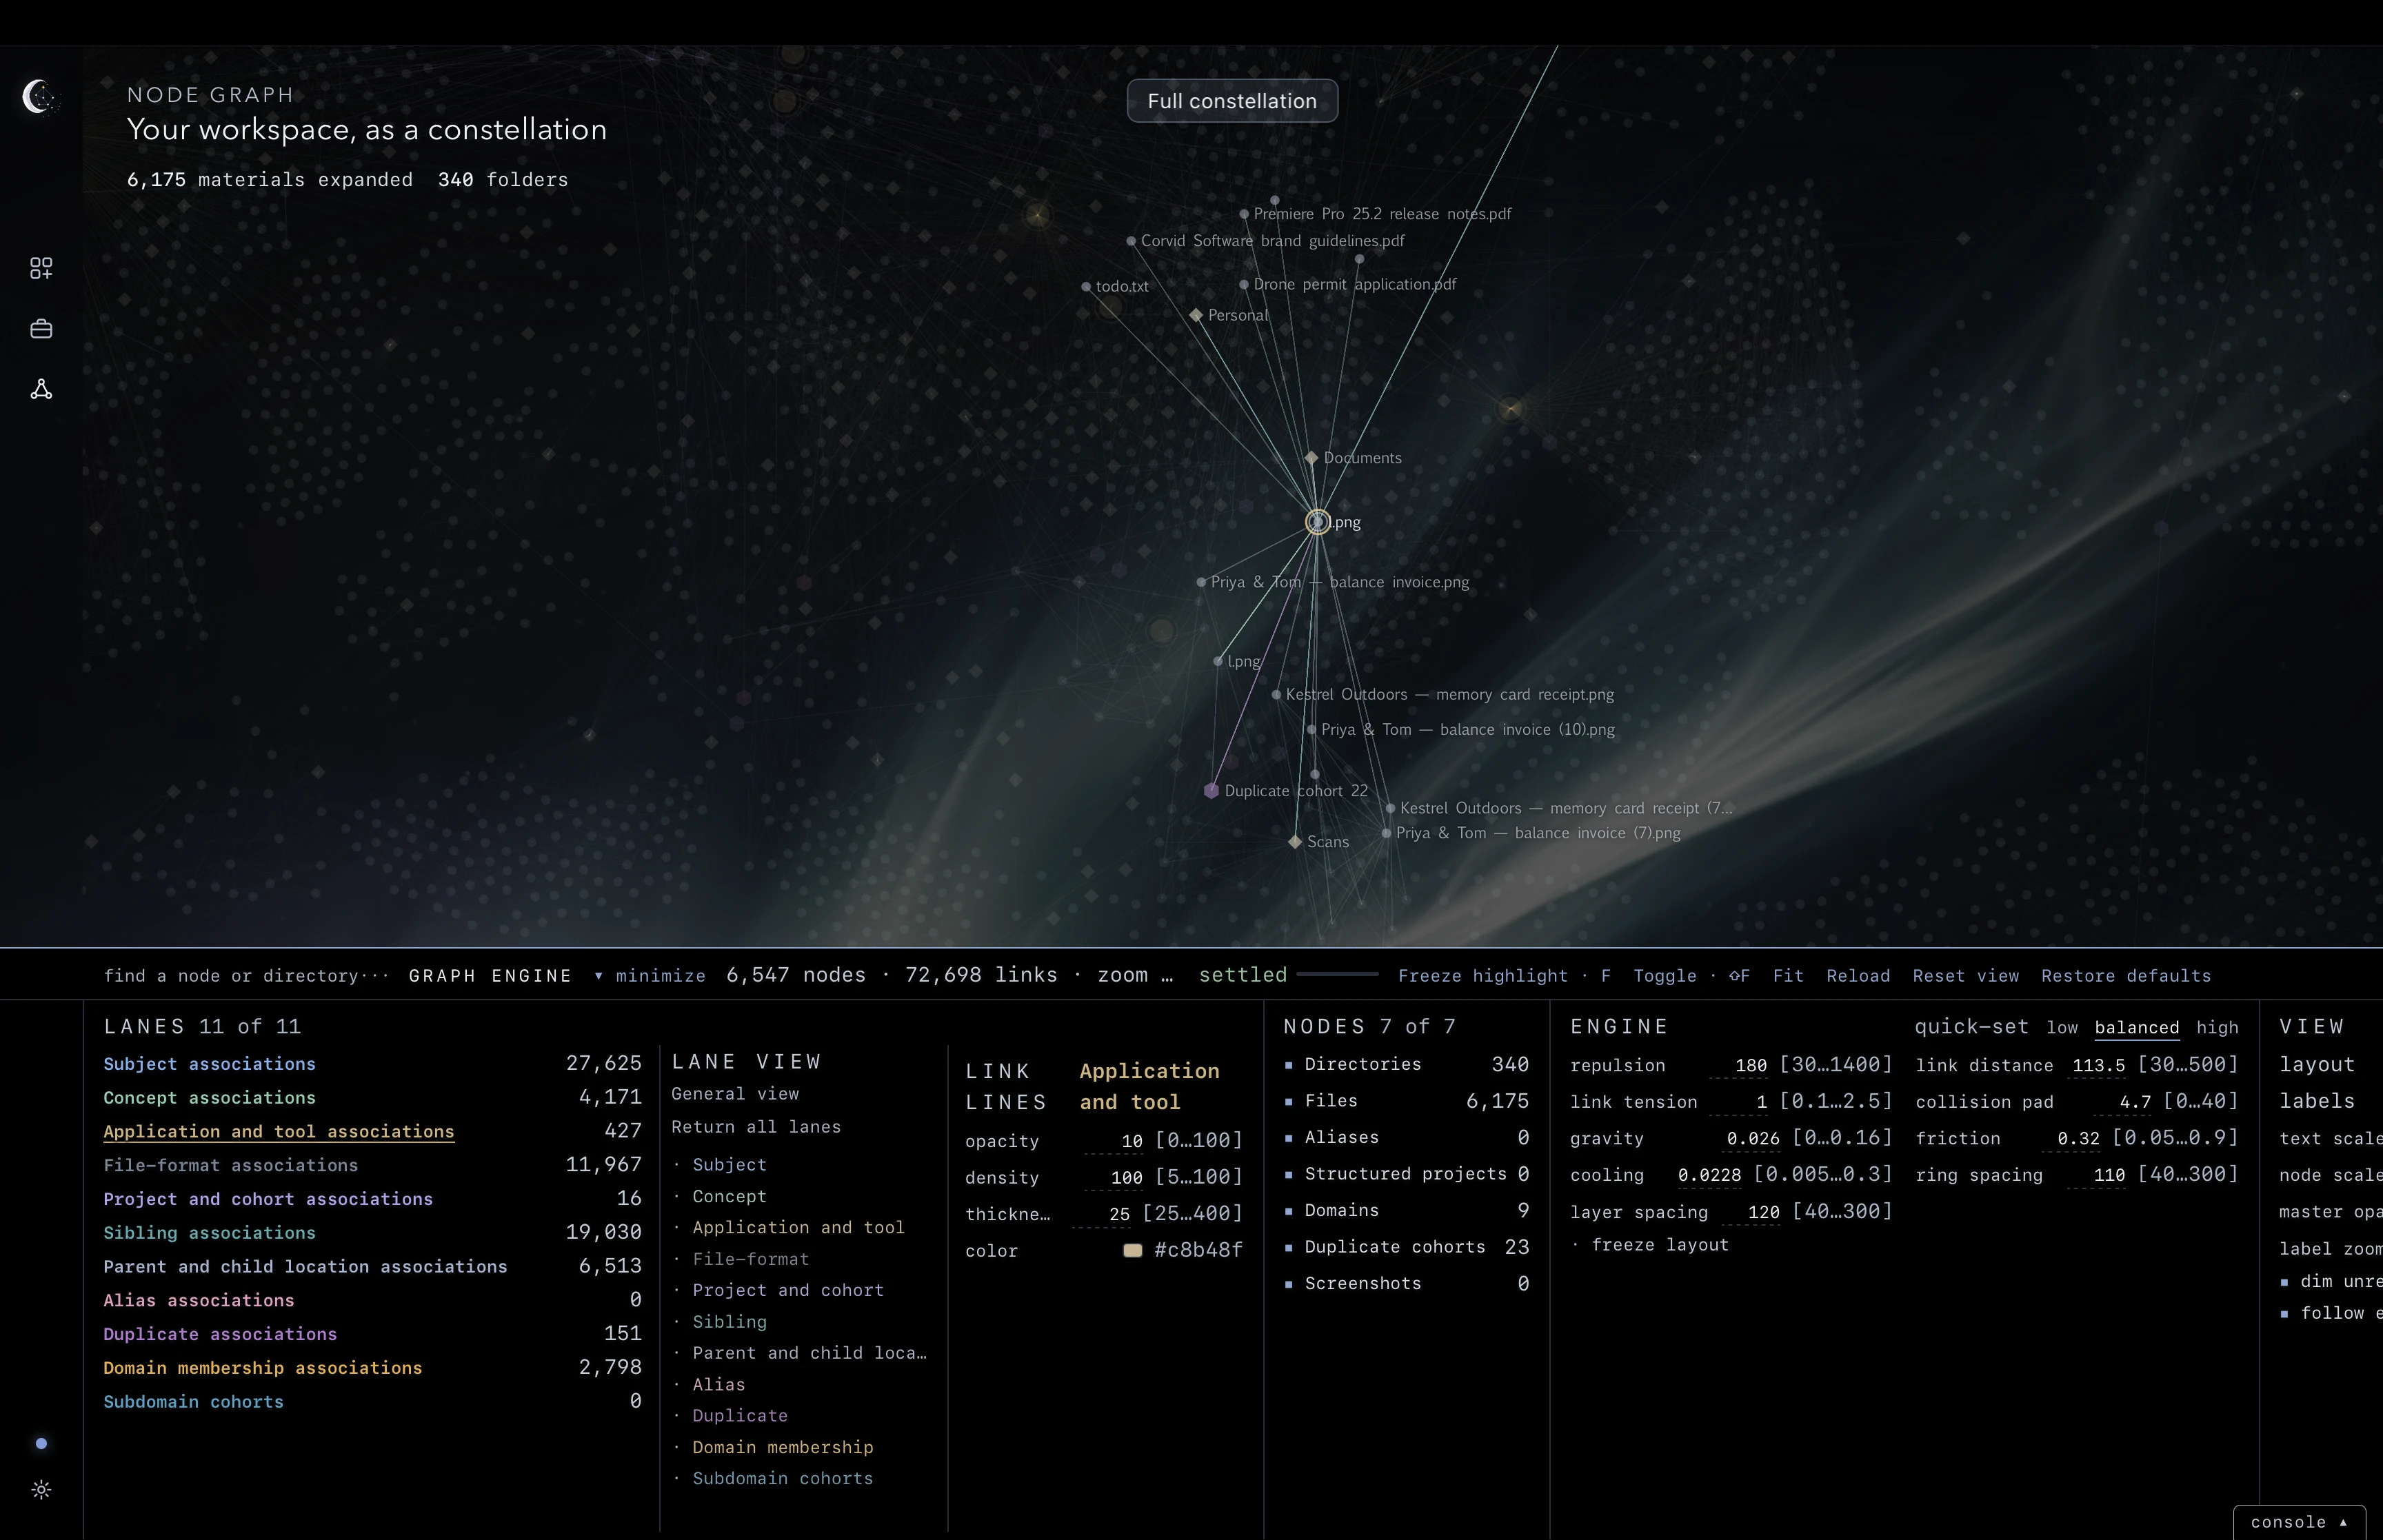
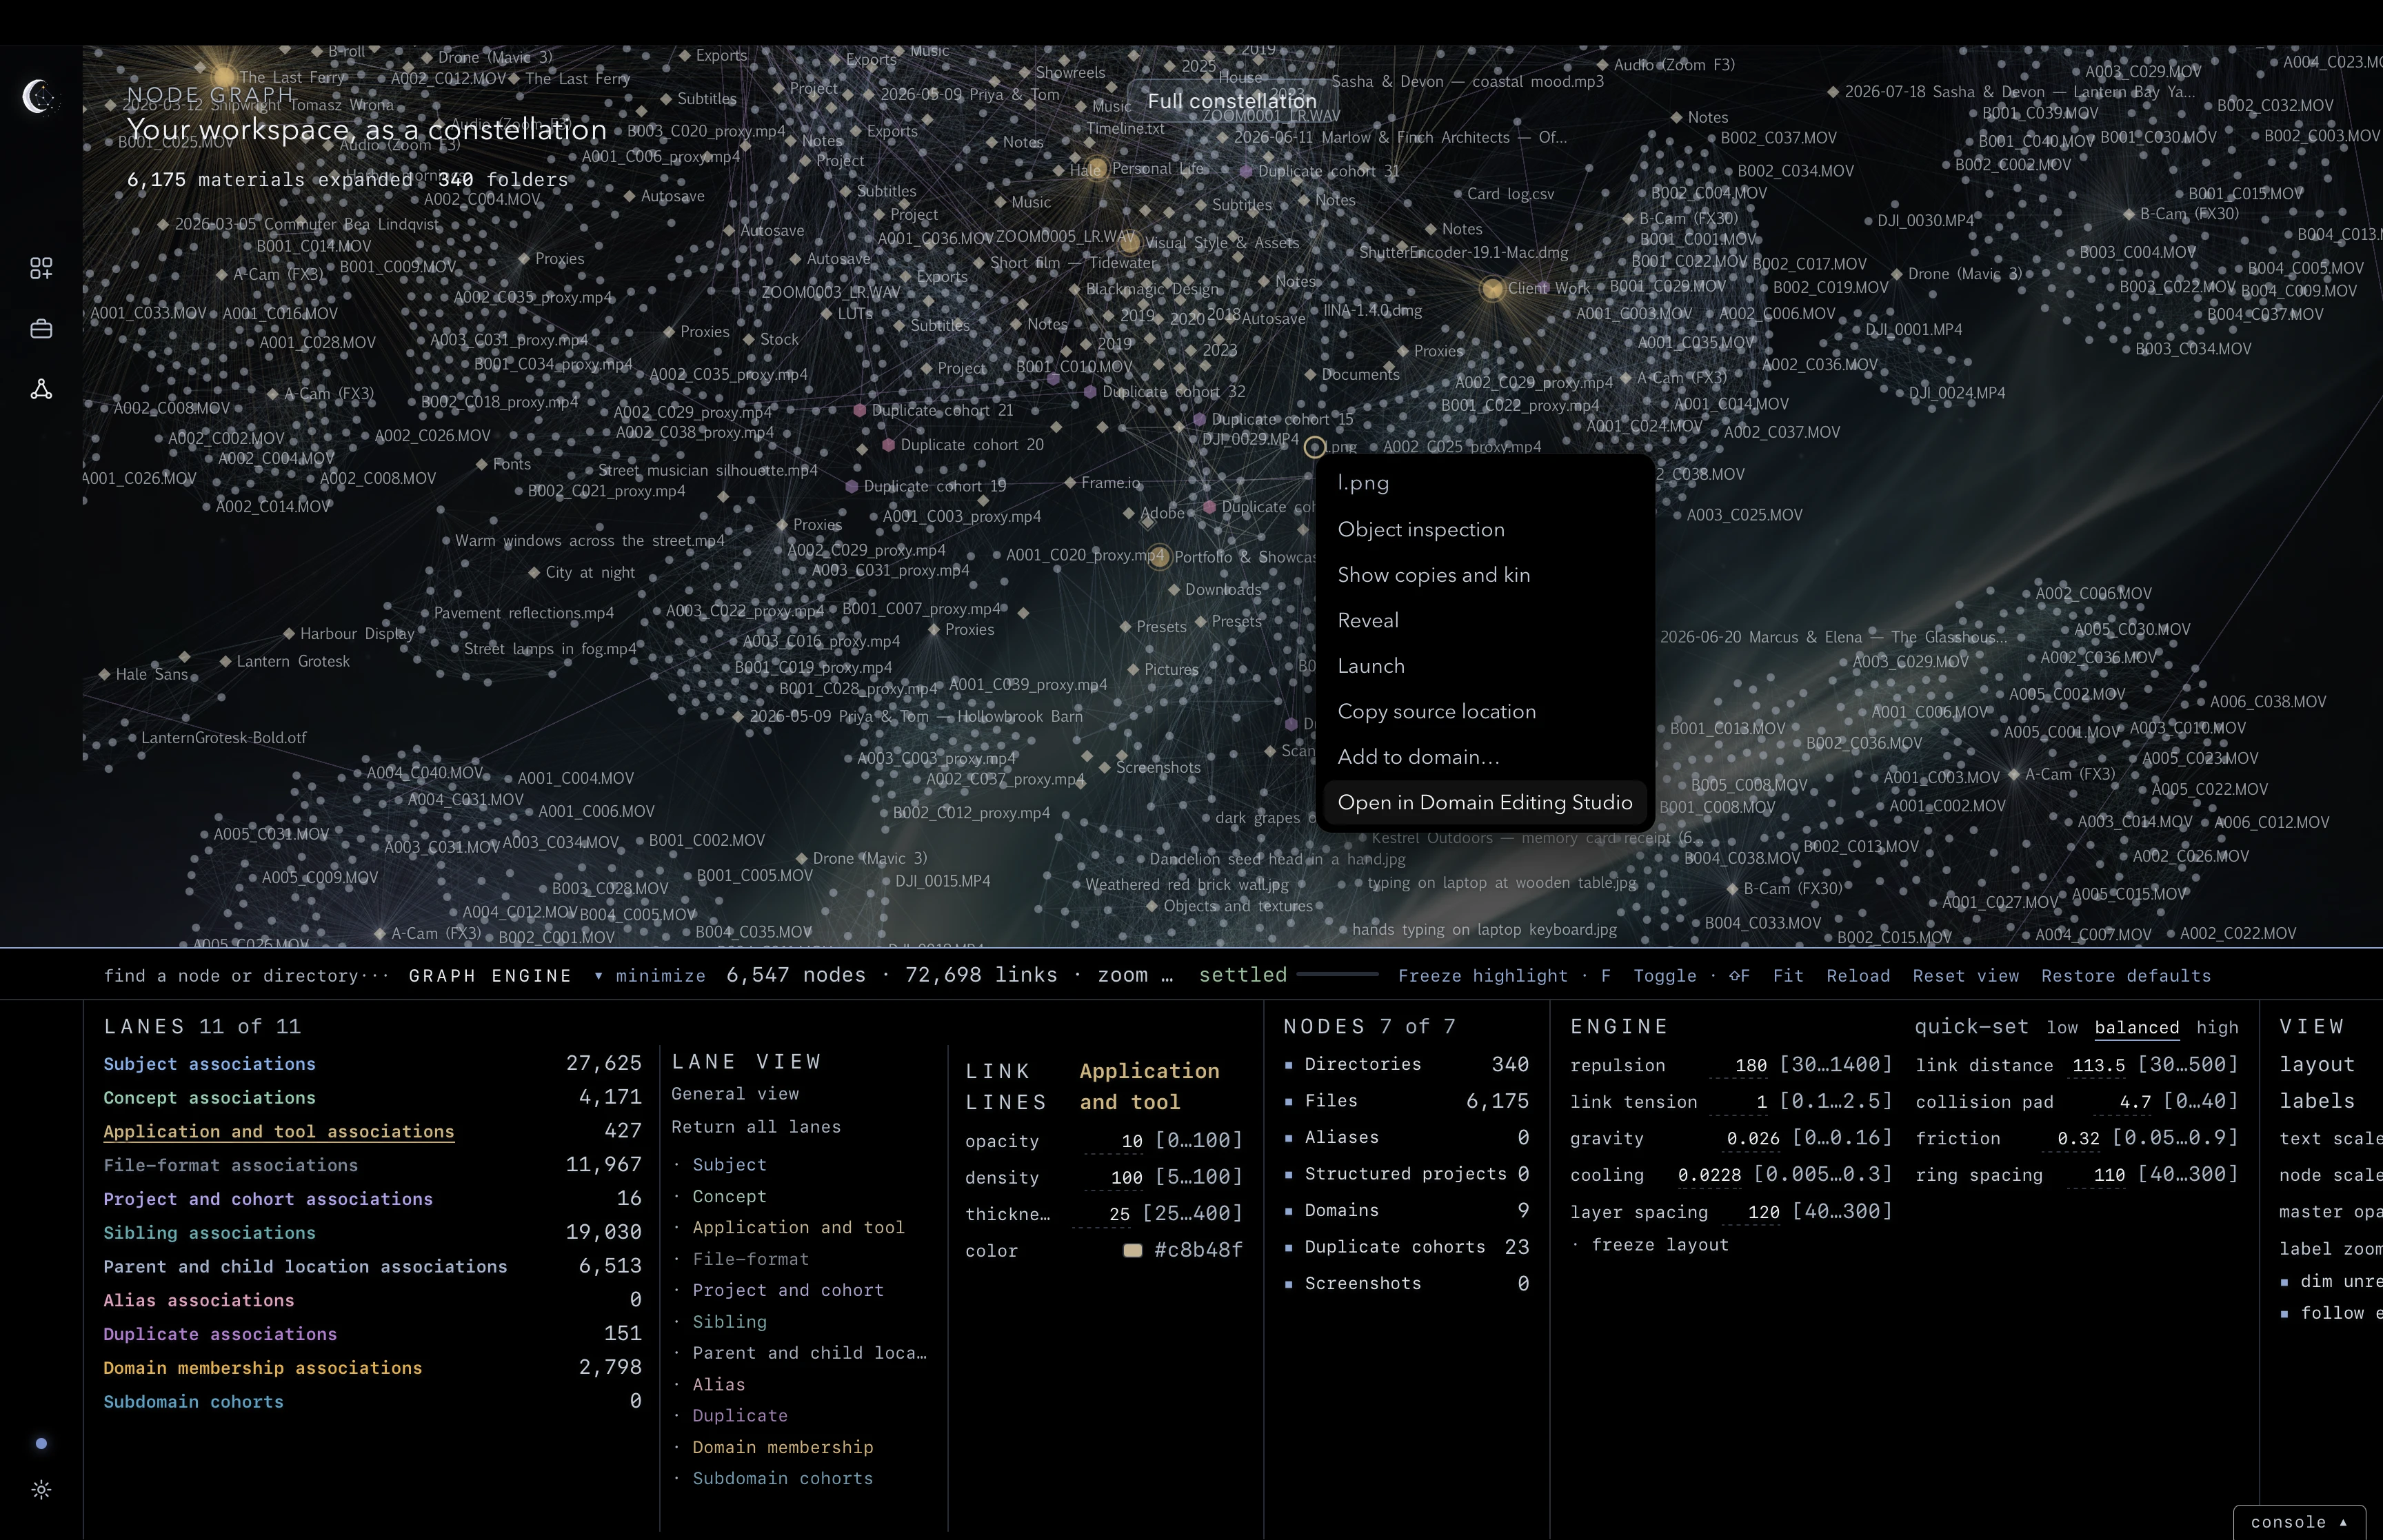
From Graph to Domain Editing Studio
Once you have found a material, right-click its node and choose Open in Domain Editing Studio. The Studio opens a search tab for that material so you can review it in the materials list and work with its placements.
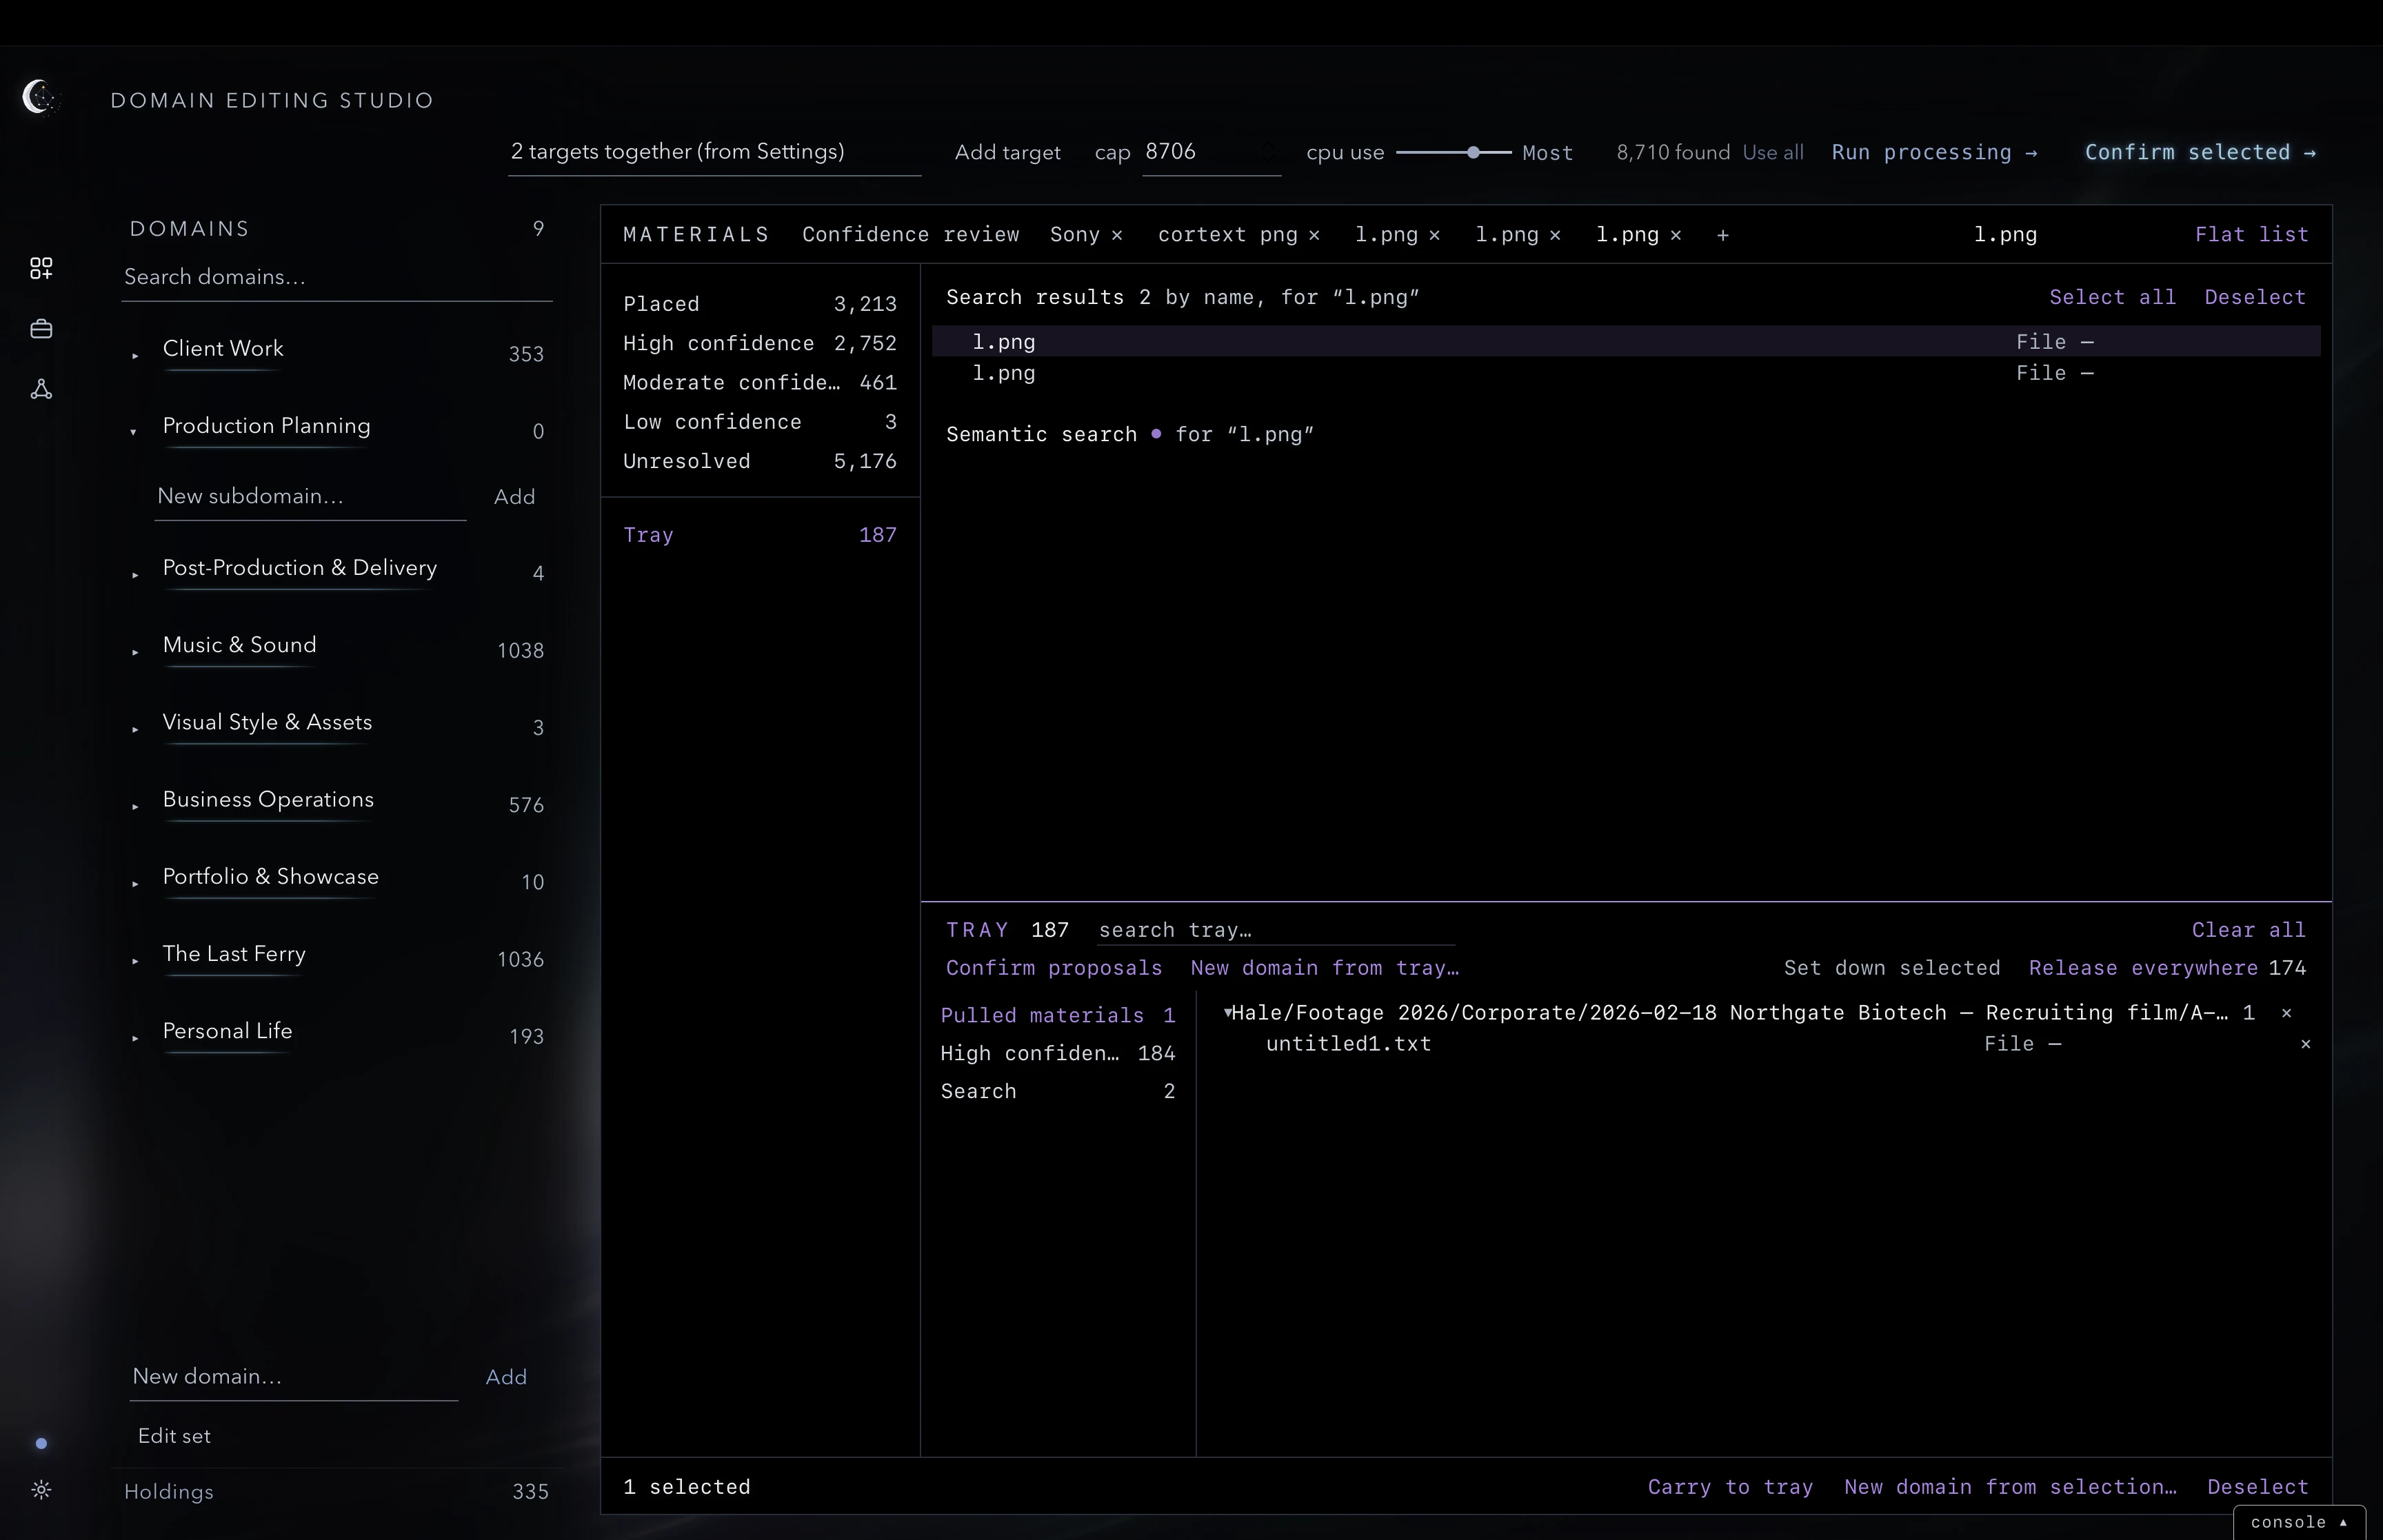
Use the Studio’s normal row actions to inspect or place the material. The Object inspection menu and its Overview, Signals, Candidates and File Info tabs are covered in Chapter 4, The Domain Editing Studio.
Return to the full constellation
In the Studio, right-click the material and choose Open in graph view. The graph opens Full constellation and marks the chosen material with a yellow focus ring, so you can pick it out among the surrounding nodes.
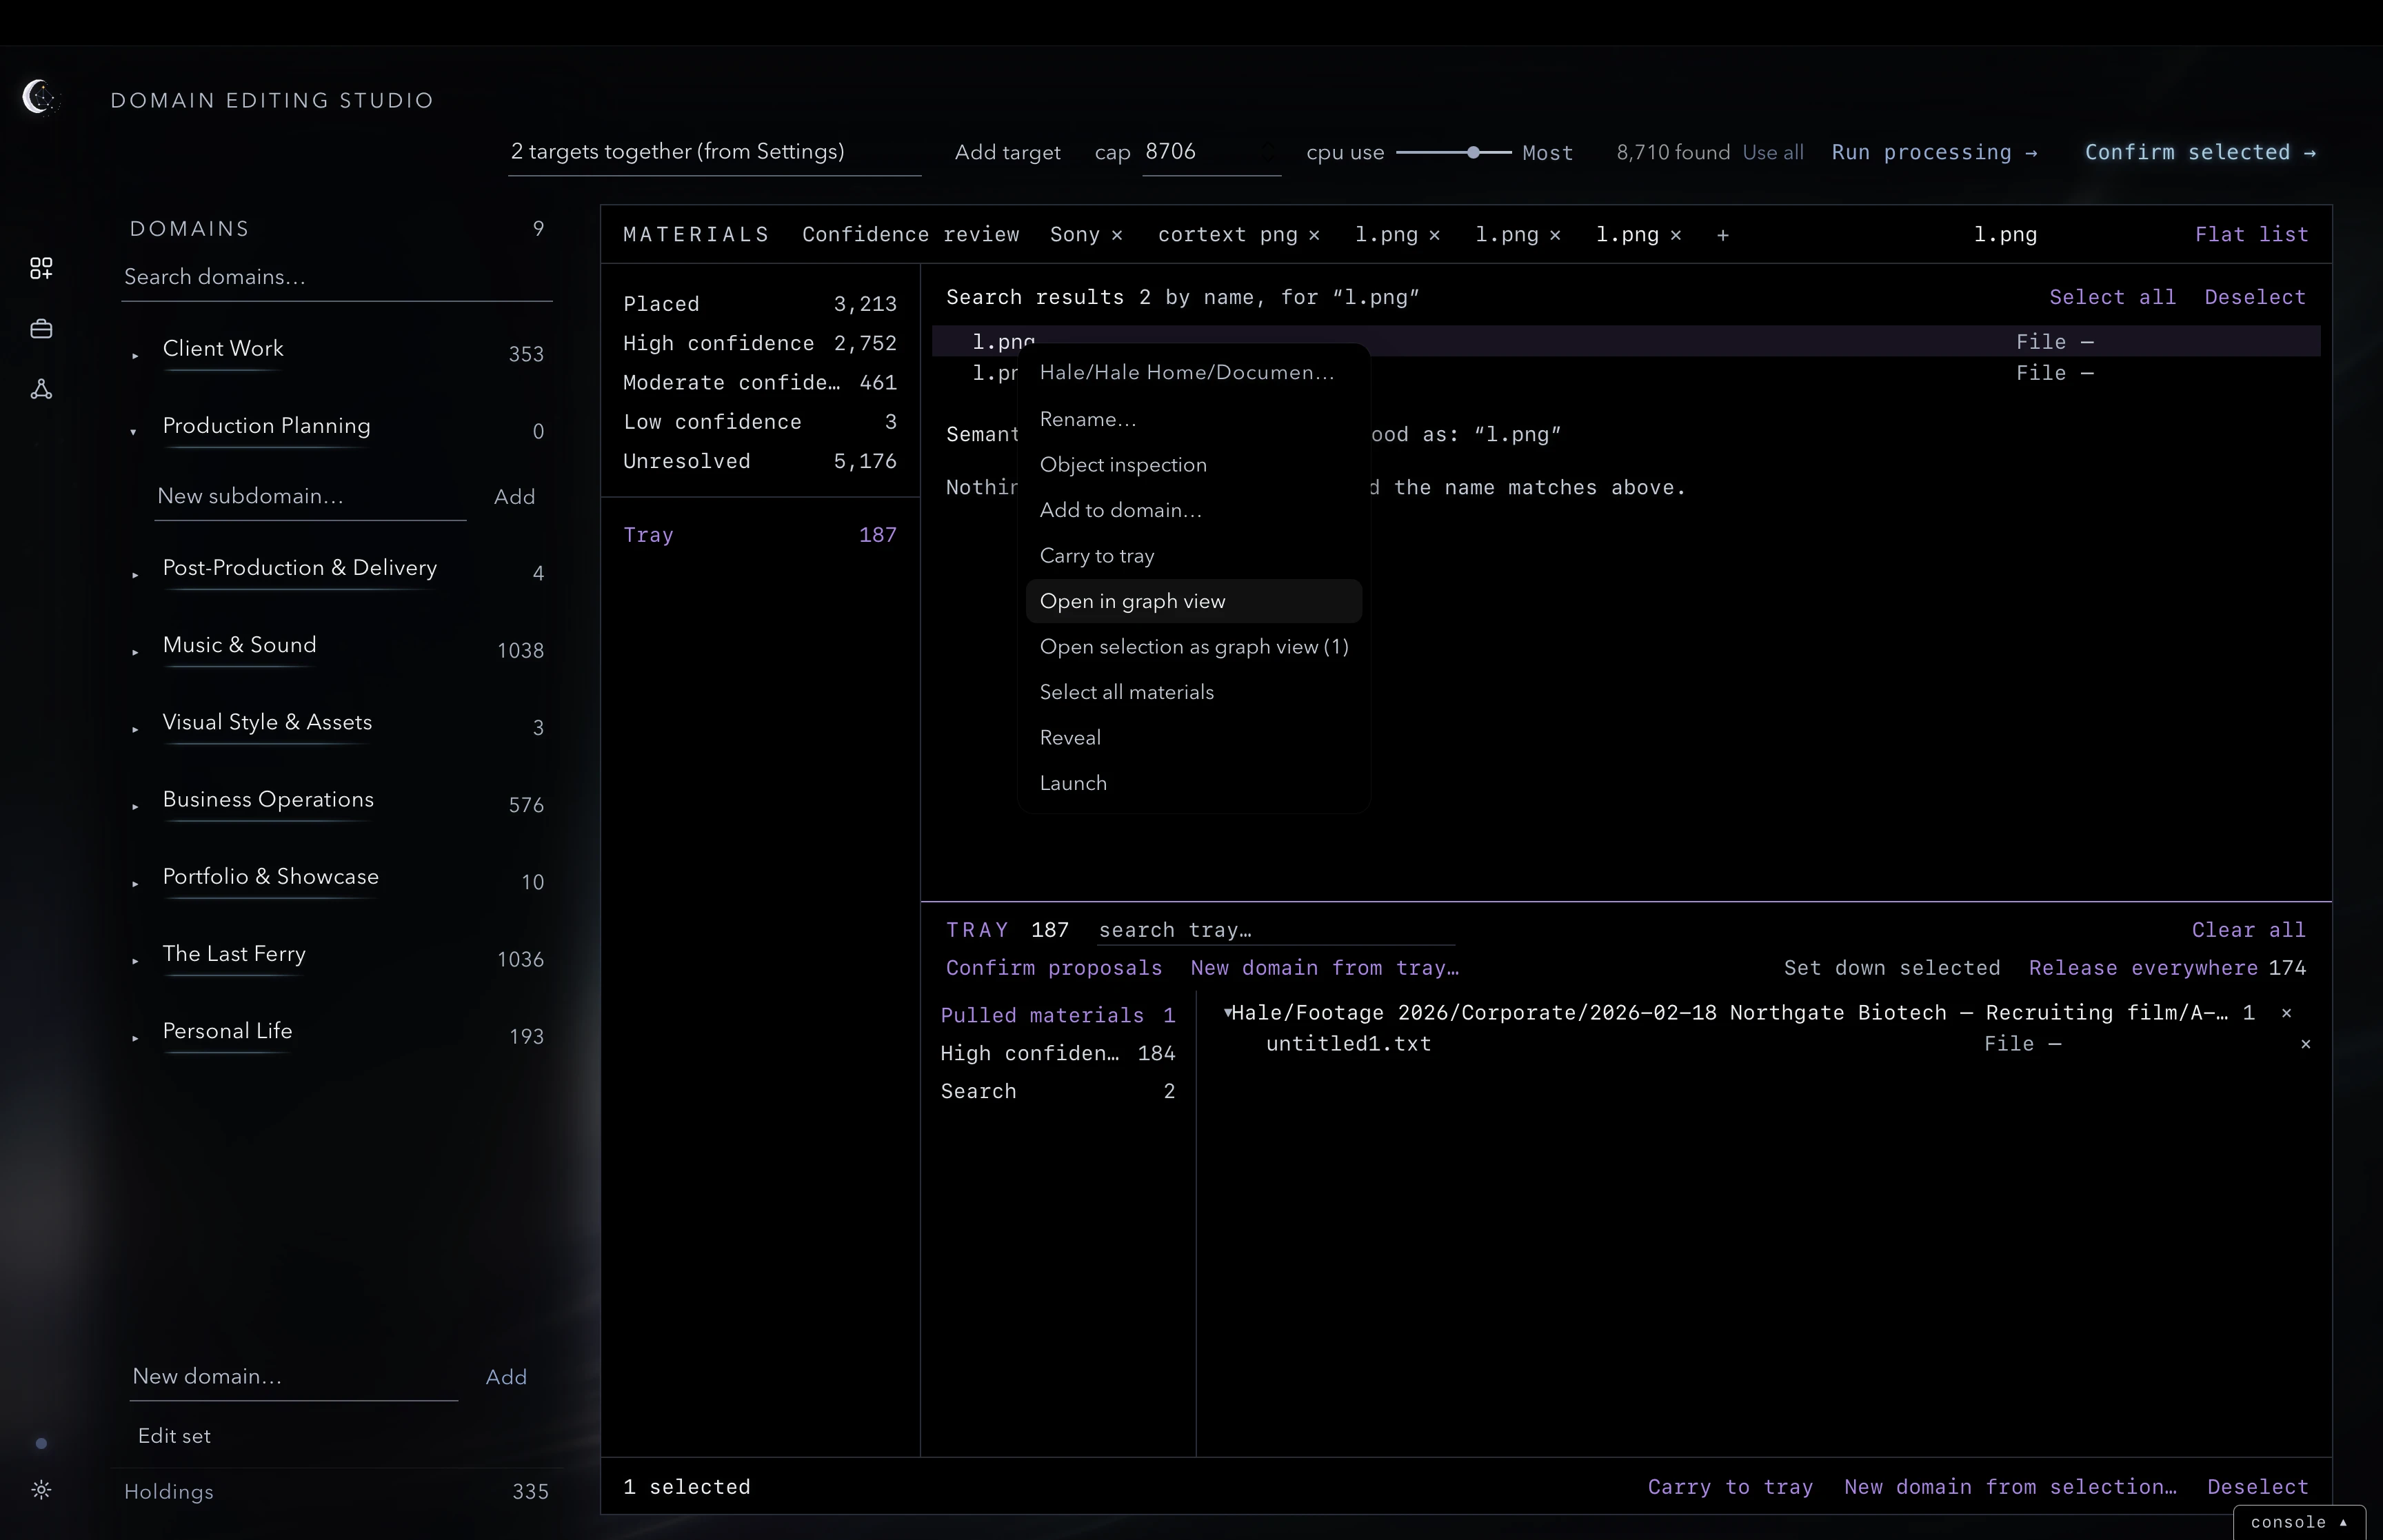
The Environment Workspace’s Show in graph action also reveals a material in the full constellation. To work with materials in a separate tab, use one of the focused-view actions described next.
Open a separate graph view
Right-click a directory in the graph and choose Open as its own view to give it a focused tab. You can open folders within that tab while keeping Full constellation available at the top.
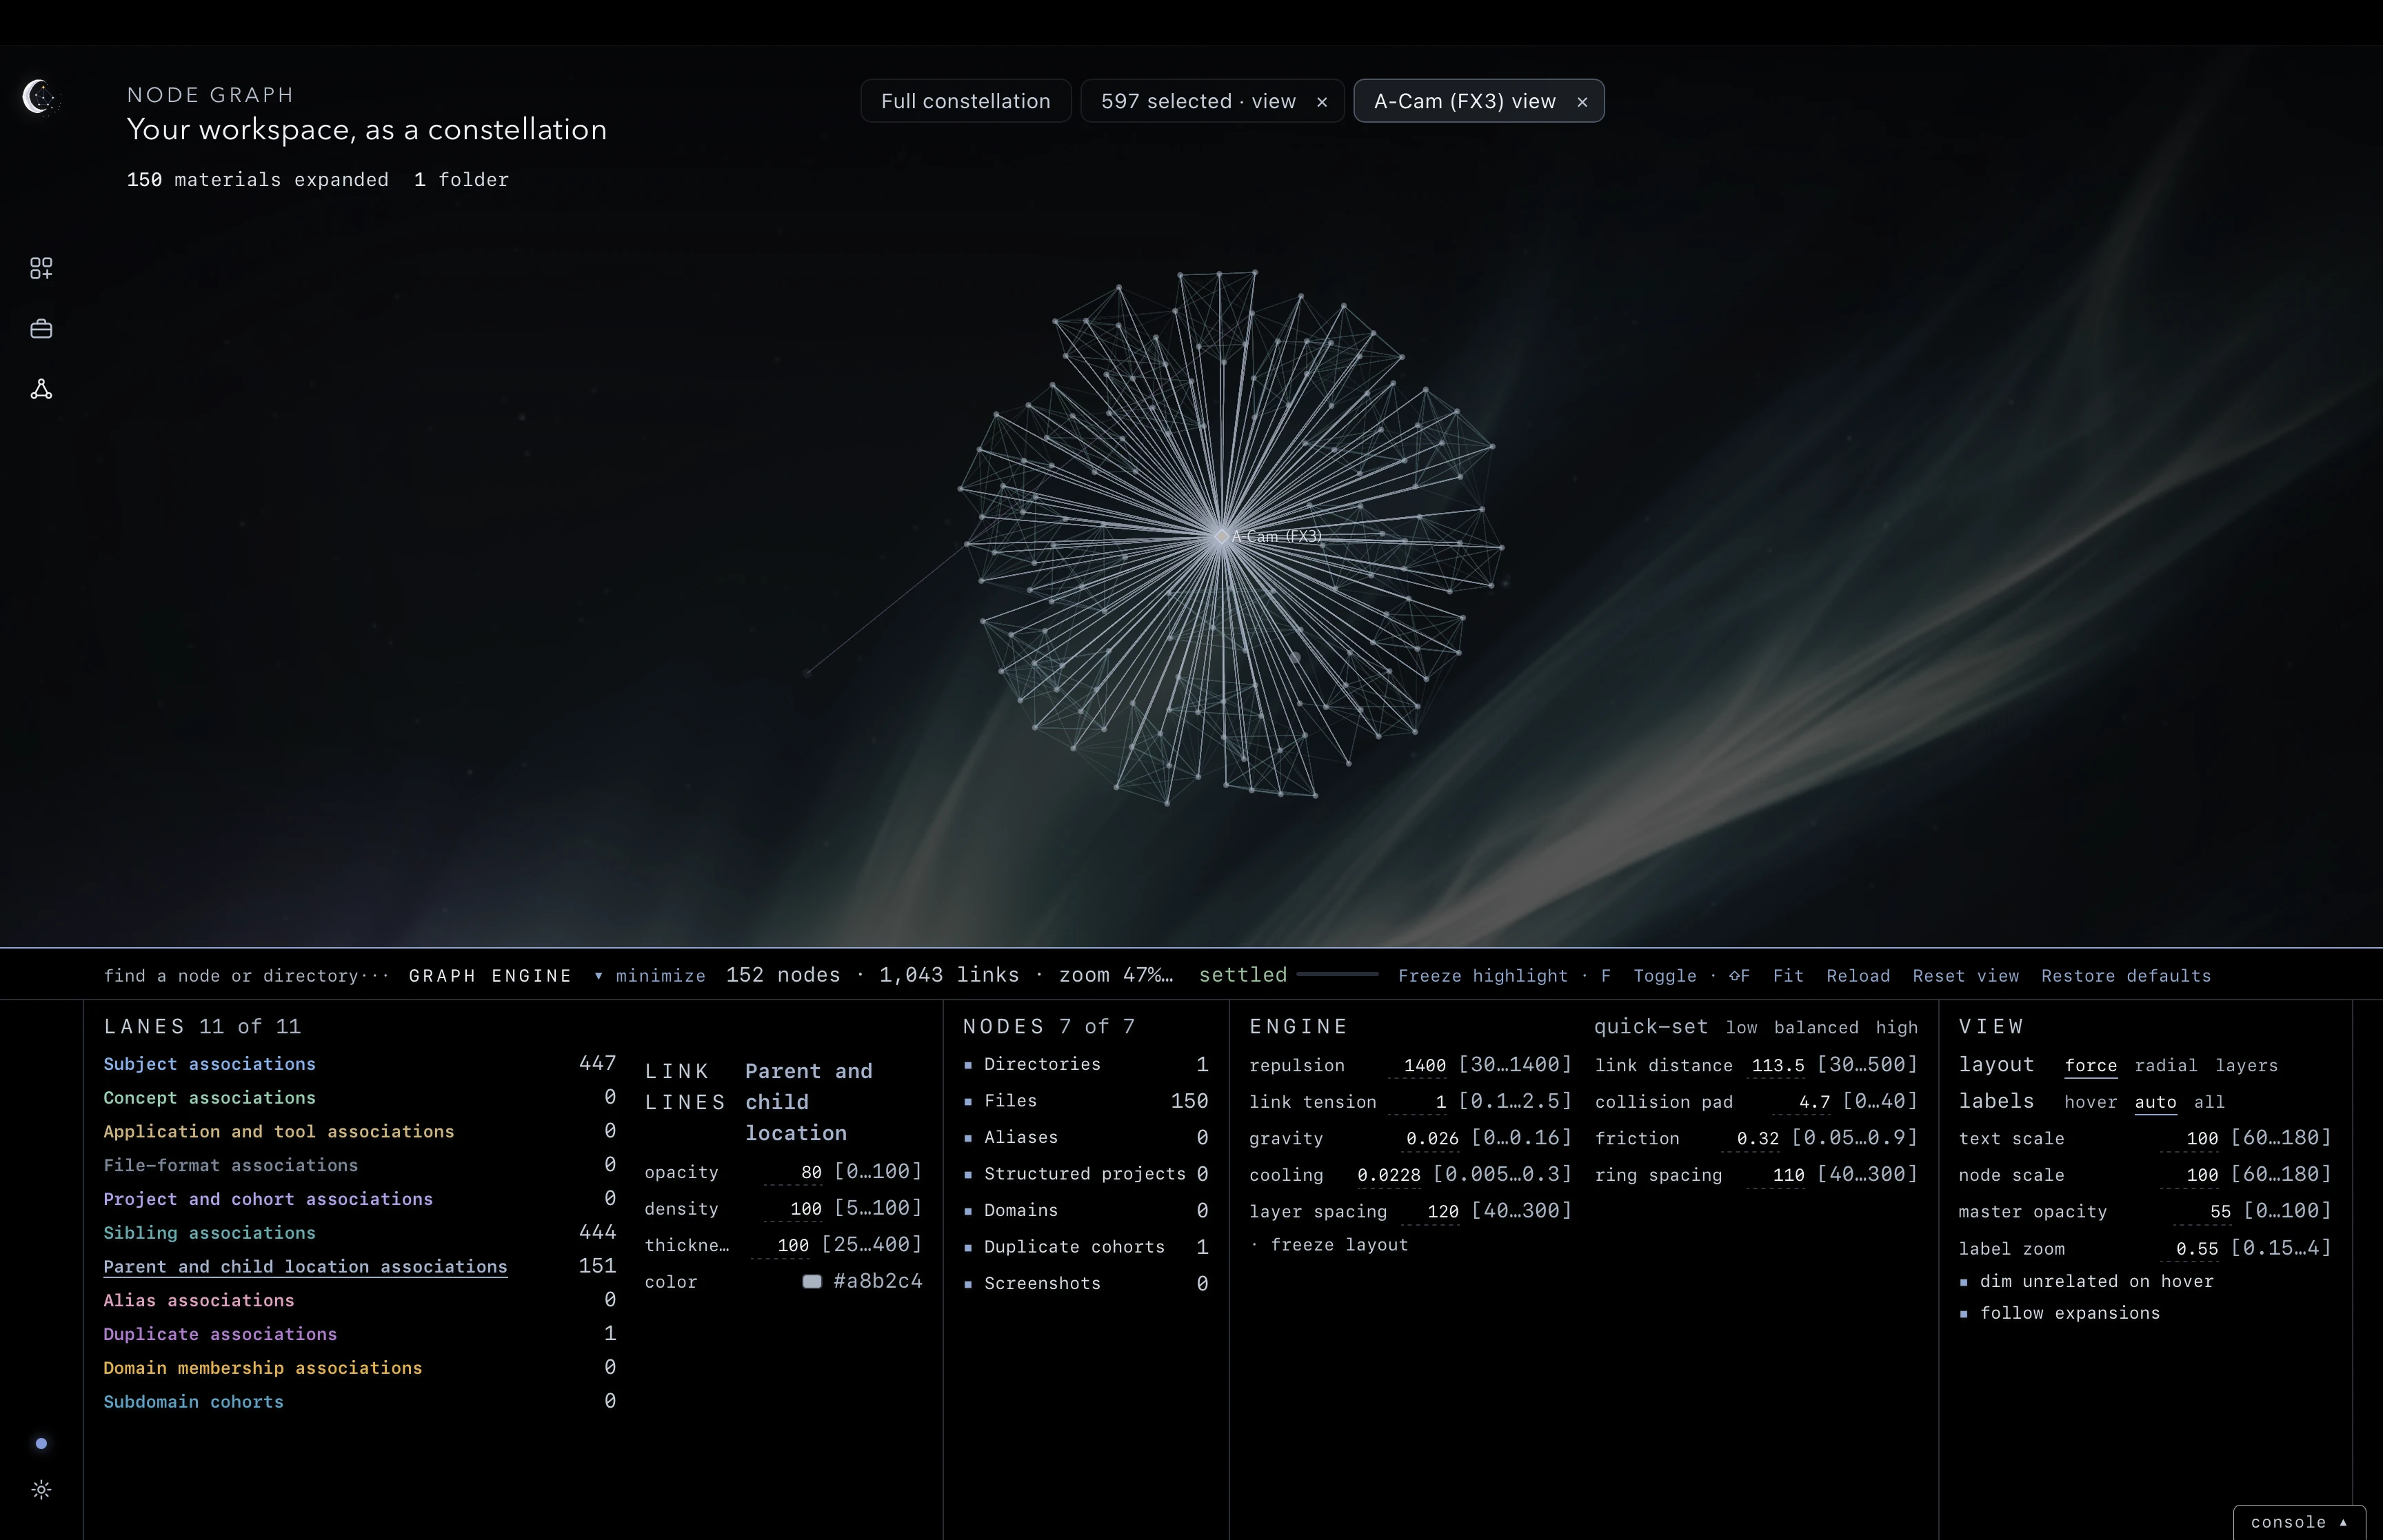
Separate graph tabs do not show LANE VIEW. Select Full constellation to use those toggles. Switch between views with the tabs across the top; use a tab’s × to close it.
Make a view from a selection
To start from several materials, select them in Domain Editing Studio, right-click within the selection, and choose Open selection as graph view. The number in the menu shows how many materials will open together.
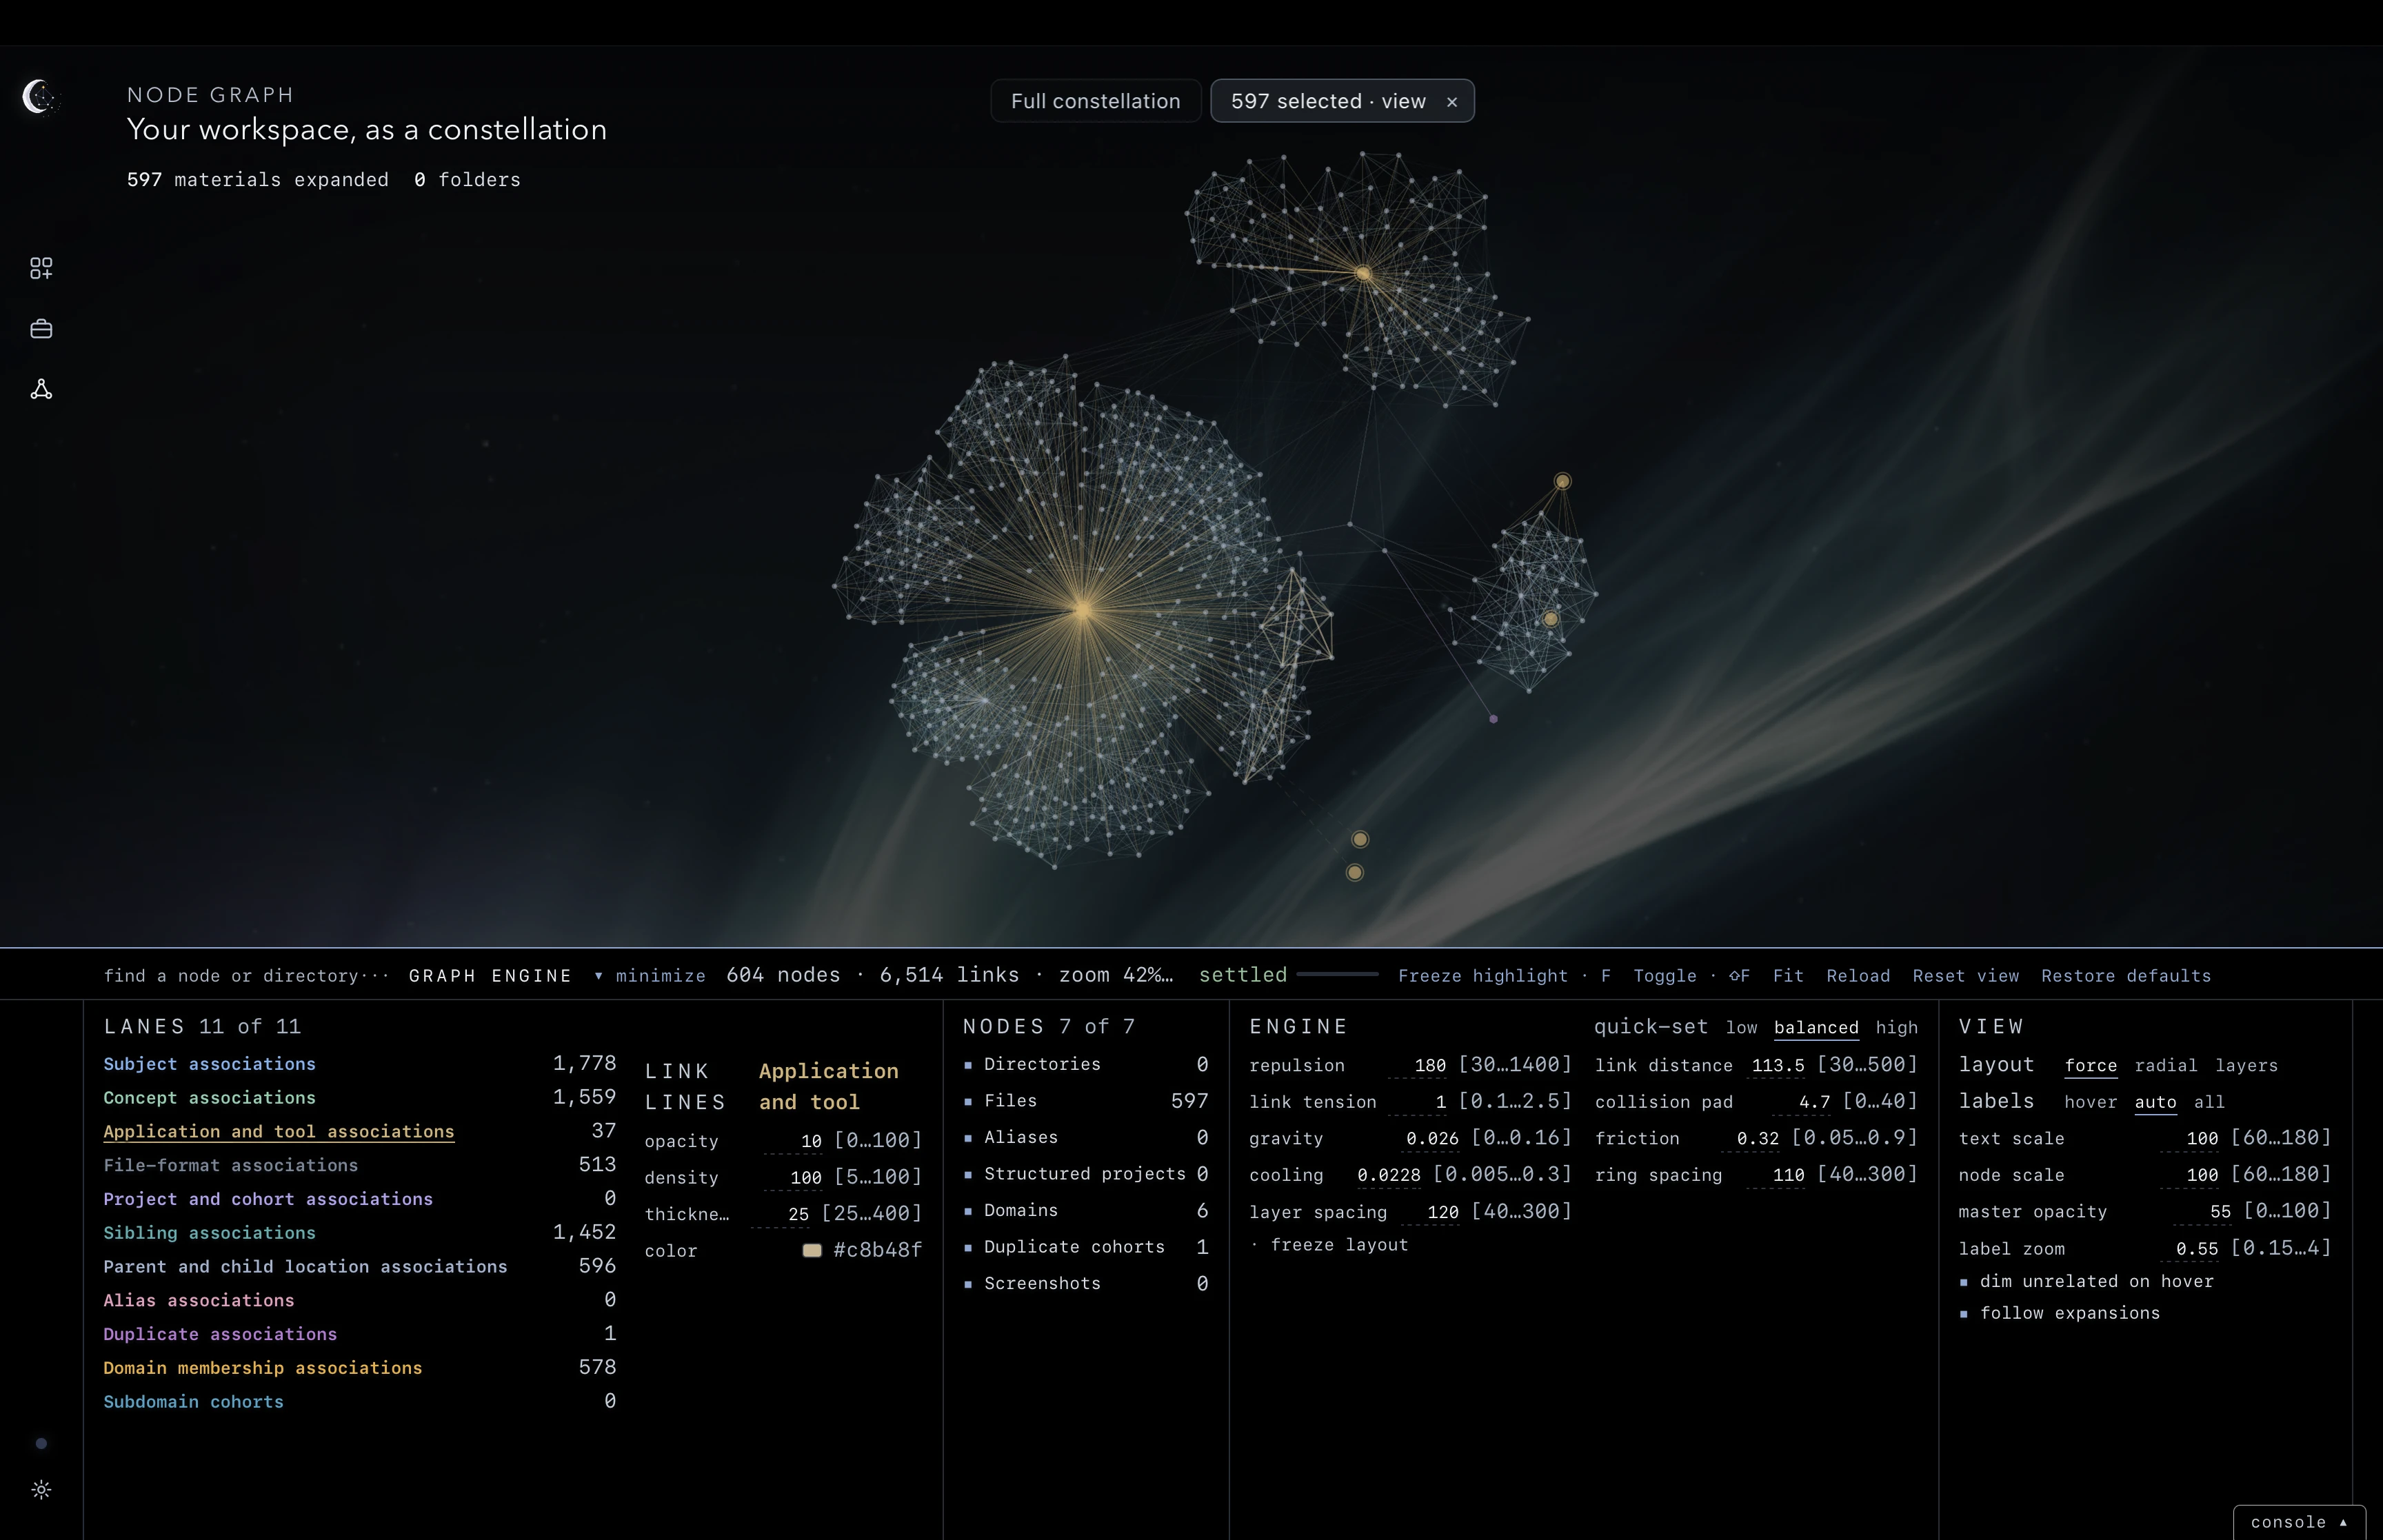
For a single material outside your current selection, right-click that material to target it. Open in graph view locates it within the full constellation; the separate-view action opens the targeted material or selection in its own tab.
From the Environment Workspace, View as constellation opens an environment’s materials as a graph view.
Open a lane in its own tab
Return to Full constellation and click Project and cohort associations in the LANES list. Its tooltip describes the two actions: click to open a separate view, or right-click to quiet or light that lane in the general view.
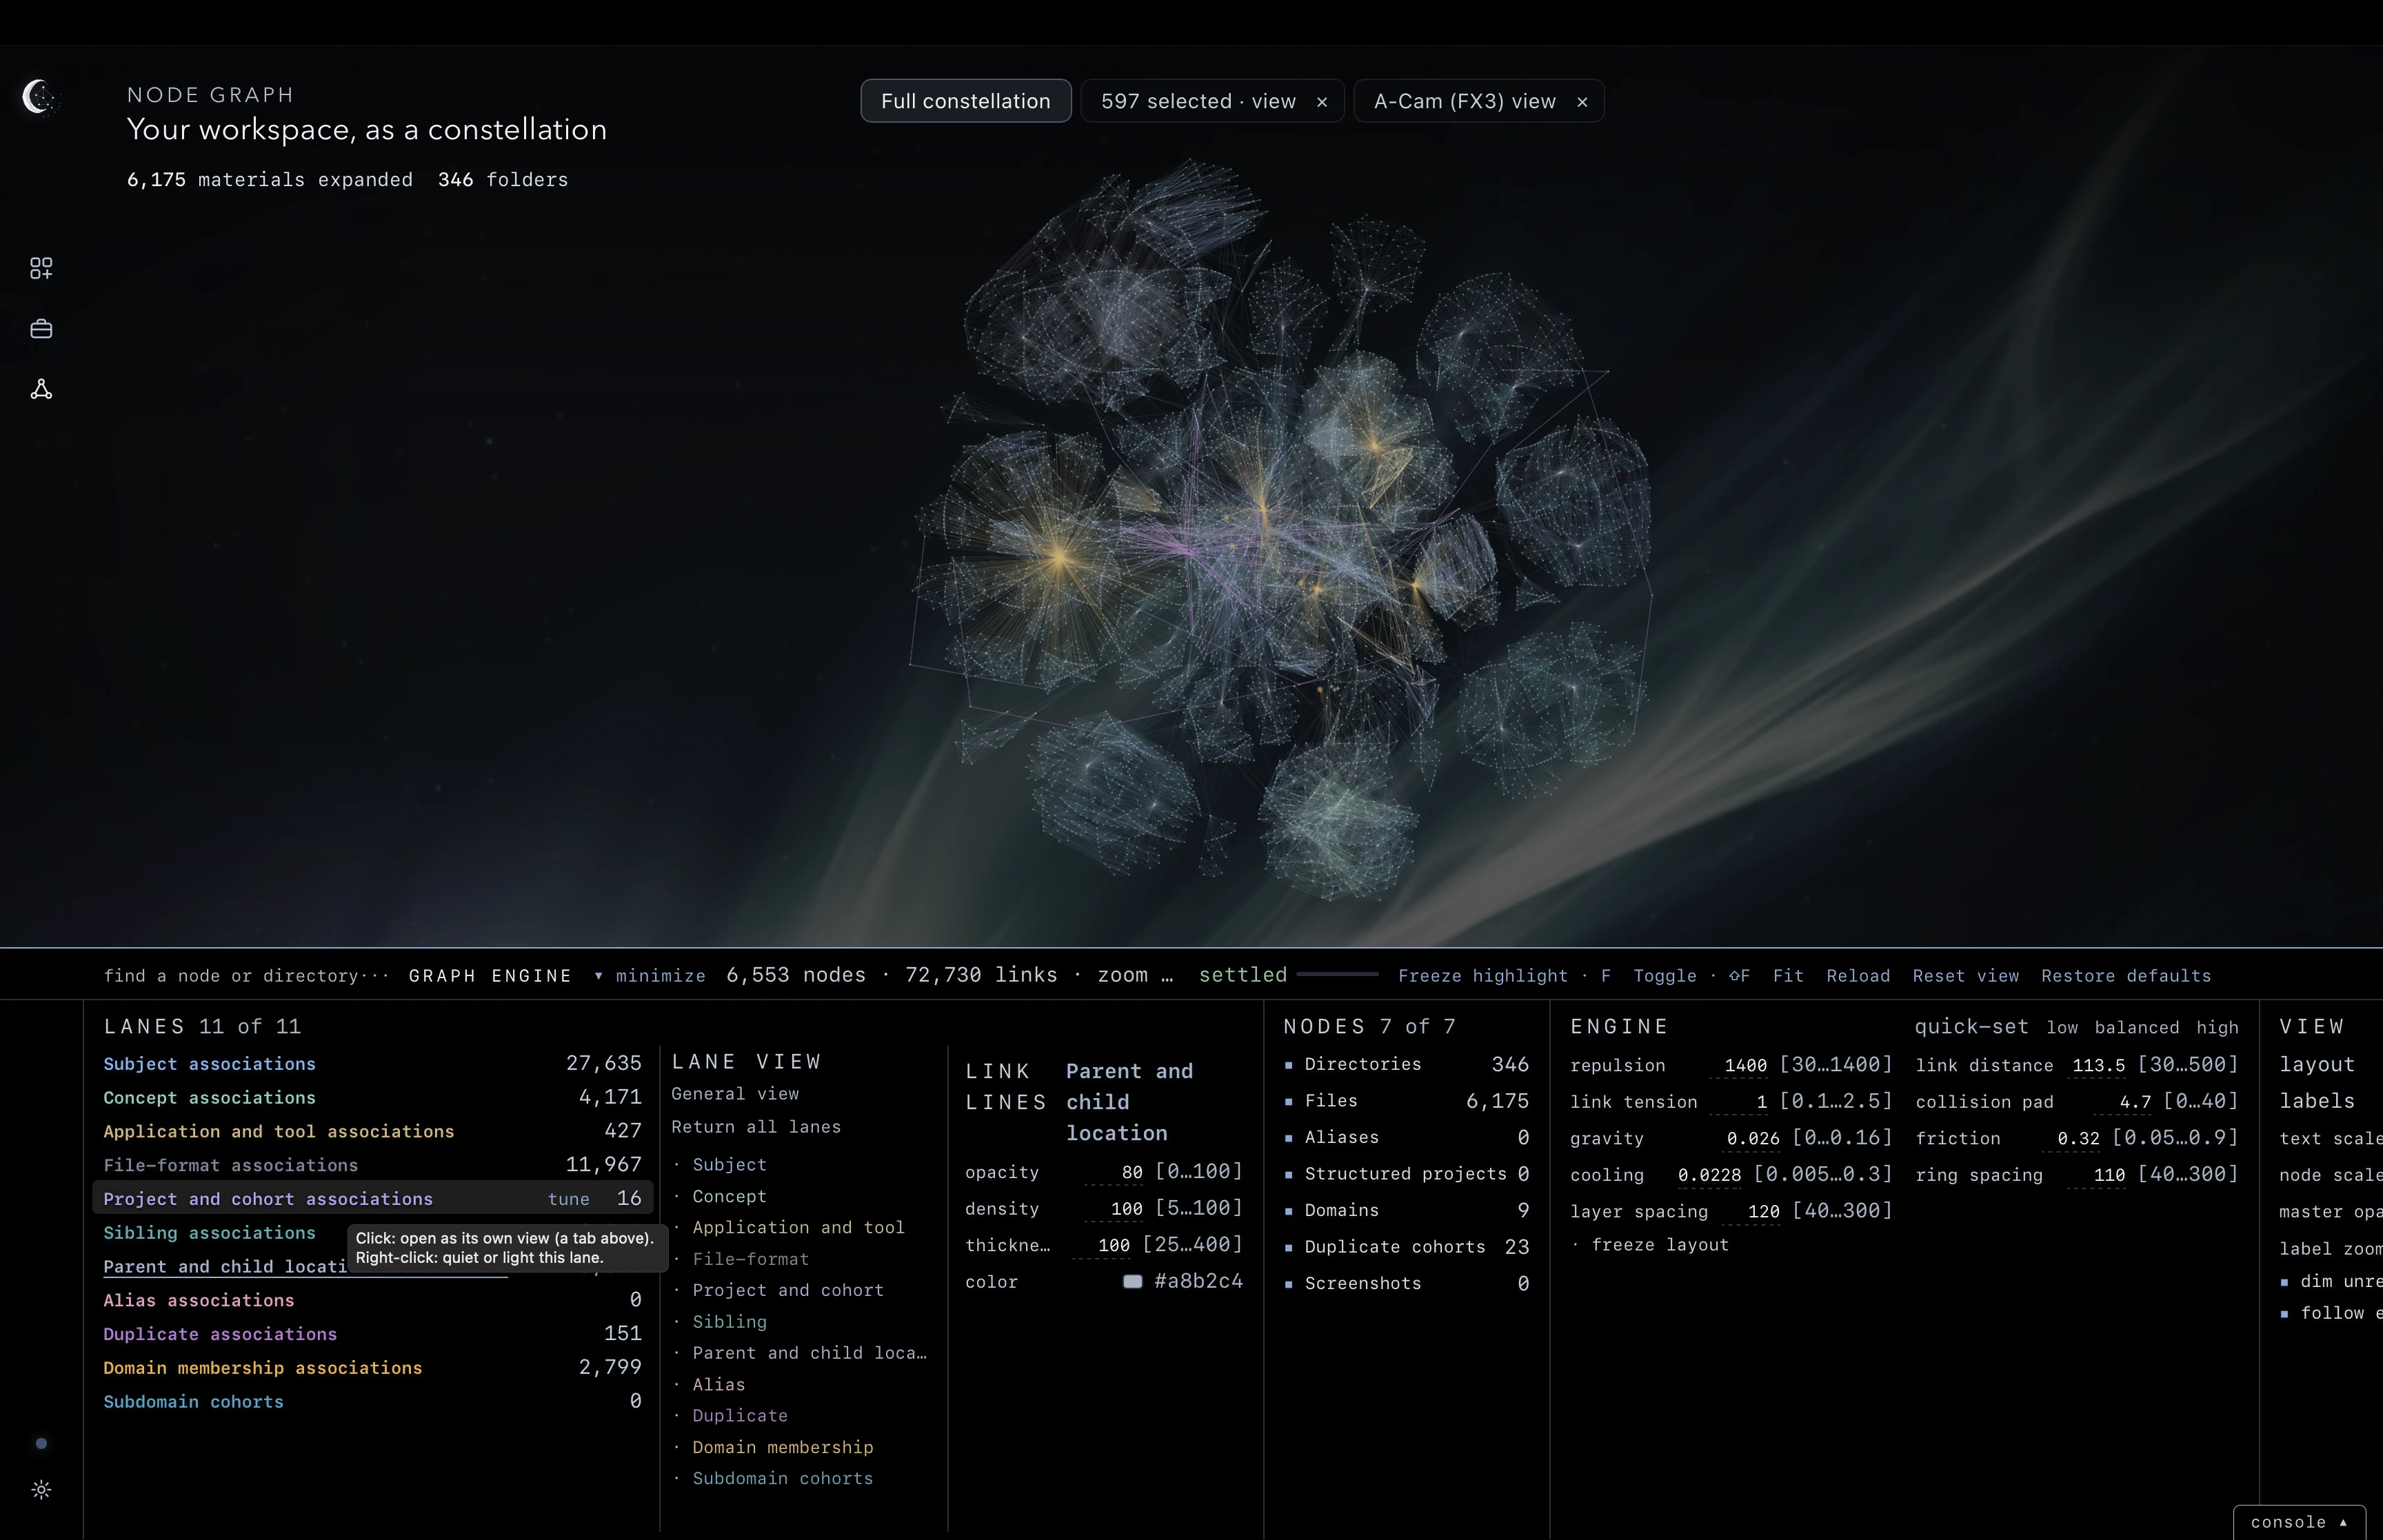
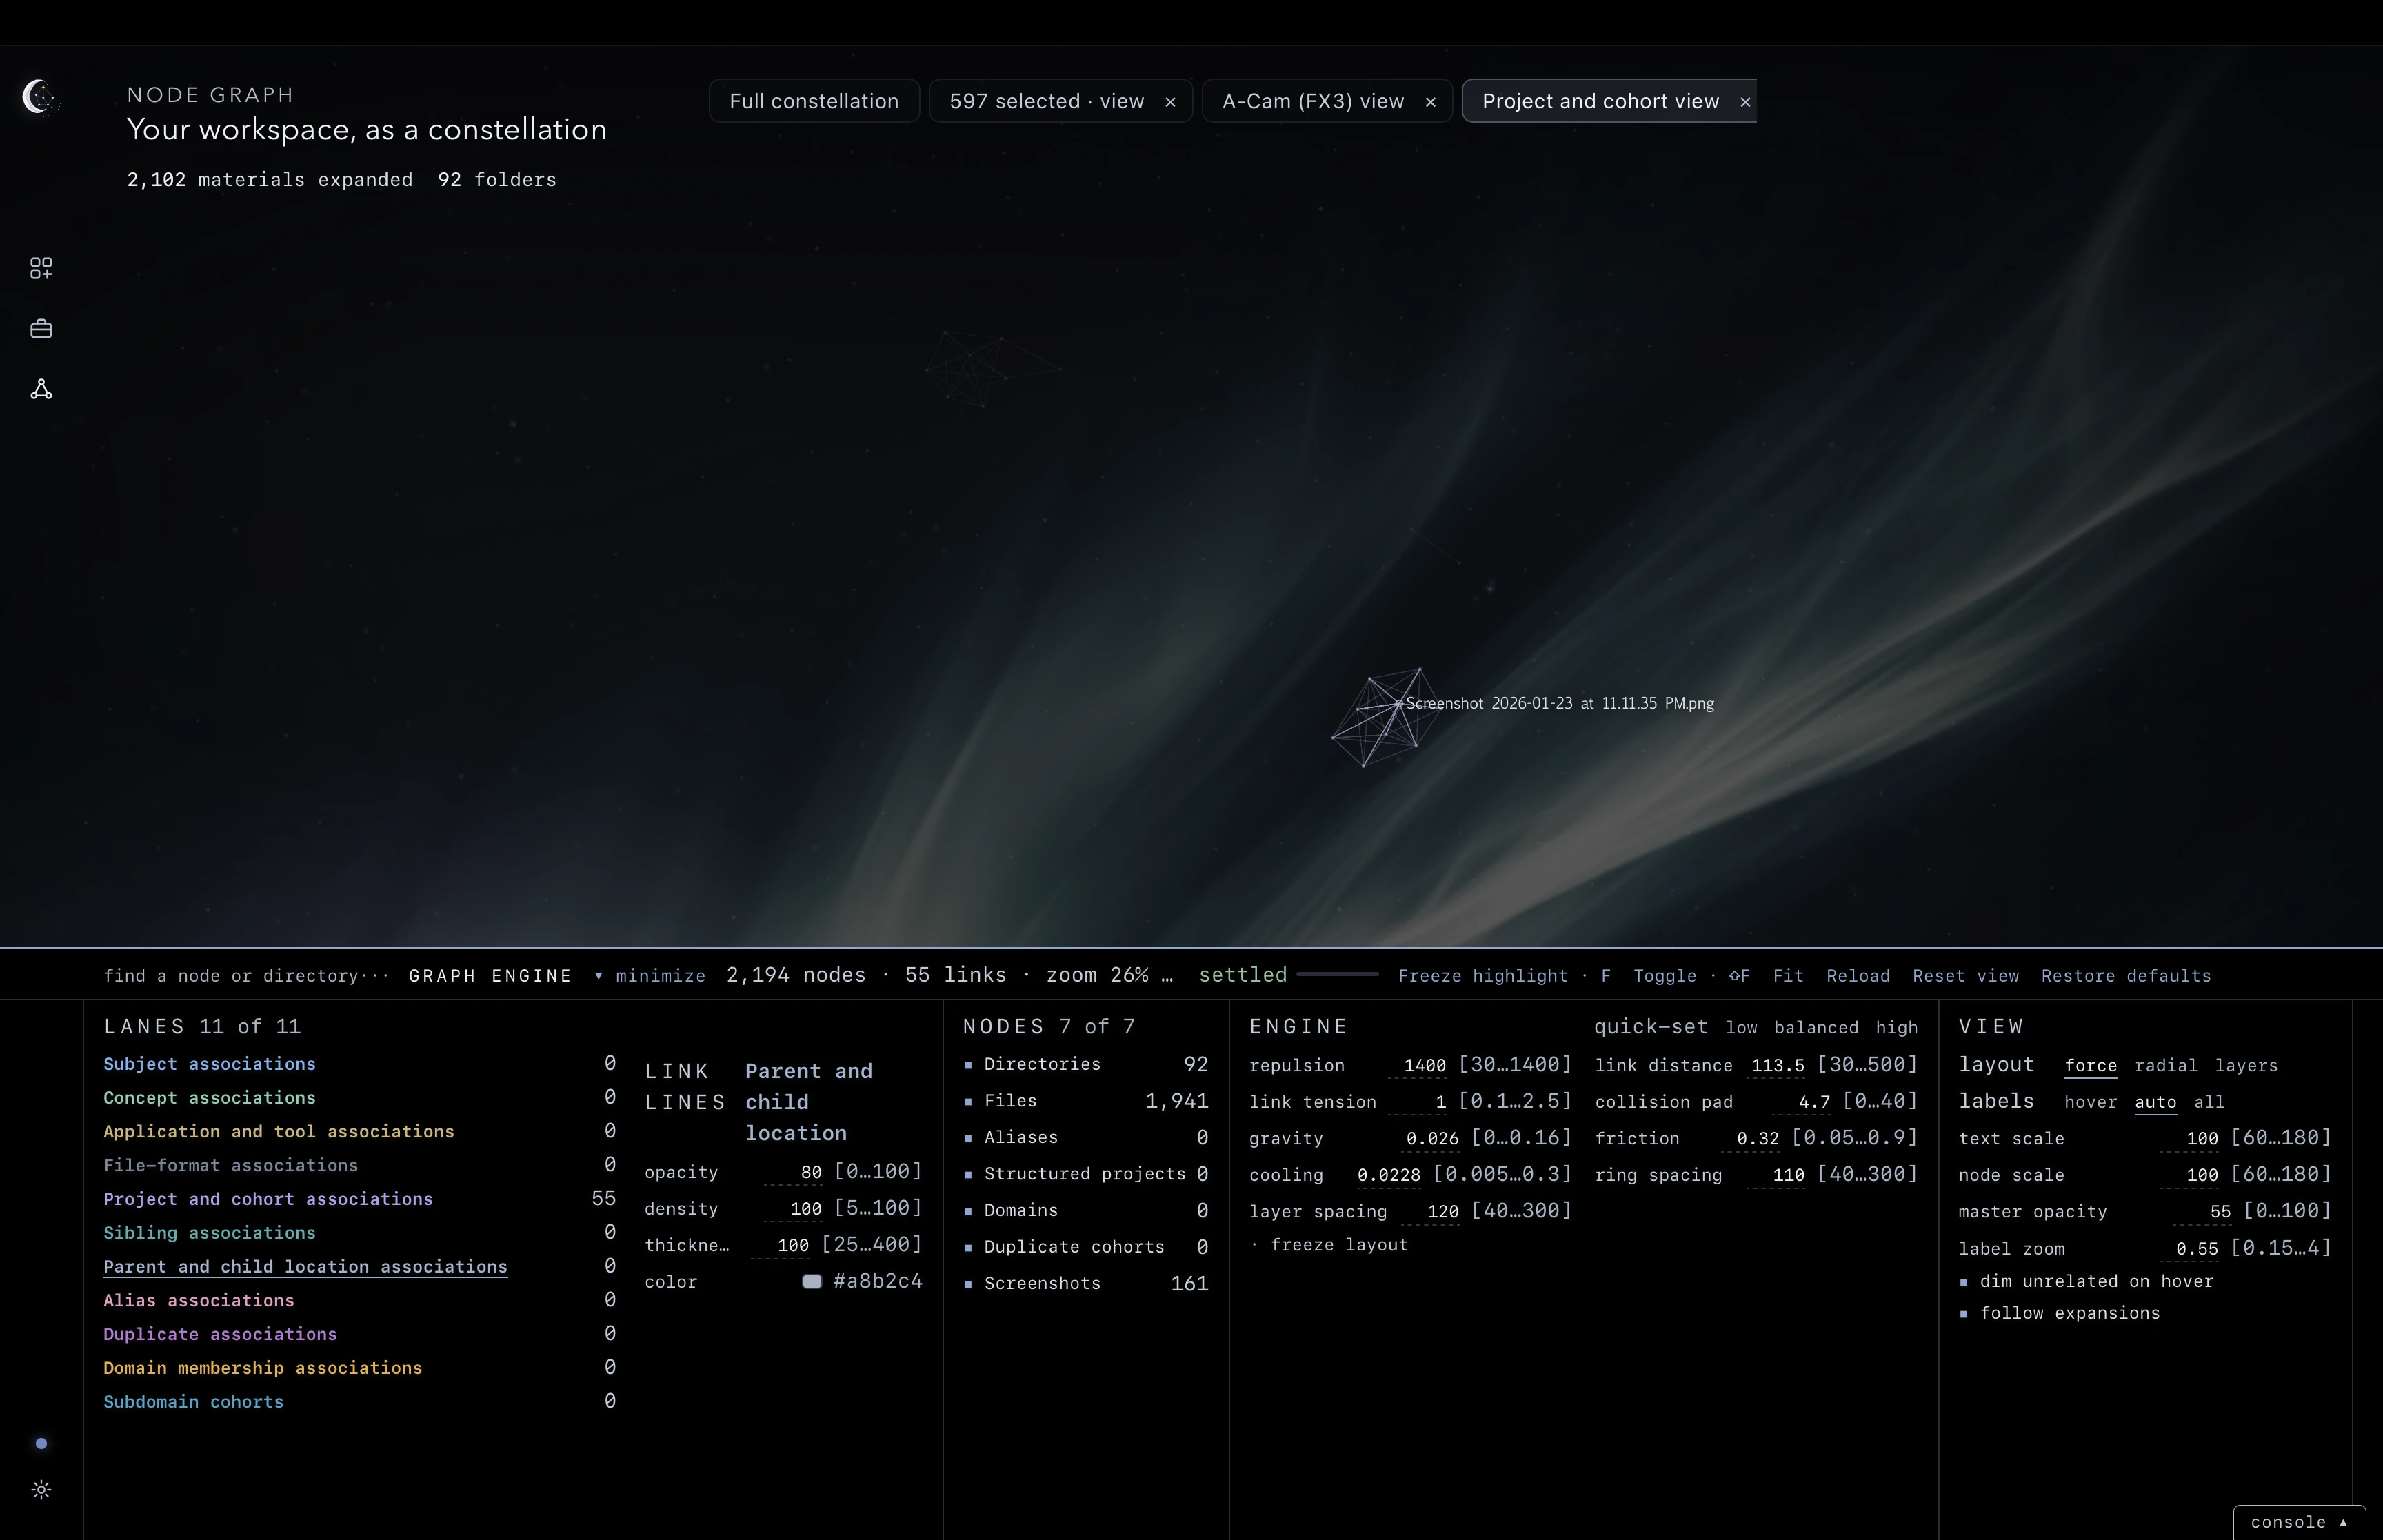
A lane tab has its own canvas. Open its folders to explore their materials. Use Full constellation to return to the workspace-wide canvas and its LANE VIEW toggles when you want to compare several relationship types.
The engine band
The bottom band brings the graph’s display and layout controls together. LANES controls relationship visibility and link appearance. NODES controls node classes: directories, files, aliases, structured projects, domains, duplicate cohorts and screenshots.
ENGINE adjusts repulsion, link tension, gravity, cooling, layer spacing, collision padding, friction, link distance and ring spacing. It also provides low, balanced and high presets and freeze layout to stop node movement.
VIEW contains force, radial and layers layouts, label mode, text and node scale, master opacity, label zoom, dim unrelated on hover and follow expansions.
Choose minimize to fold the controls down to the status bar and give the canvas more room. Choose engine in that bar to expand them again. Search, status, highlight controls and the main view actions remain available.
Reload or reset graph views
Fit frames the visible nodes without collapsing folders. Reload resets only the current tab: expanded folders collapse and pan, zoom, pinned positions and frozen highlights reset. A directory or selection tab keeps its original materials; Full constellation and your other tabs keep their state.
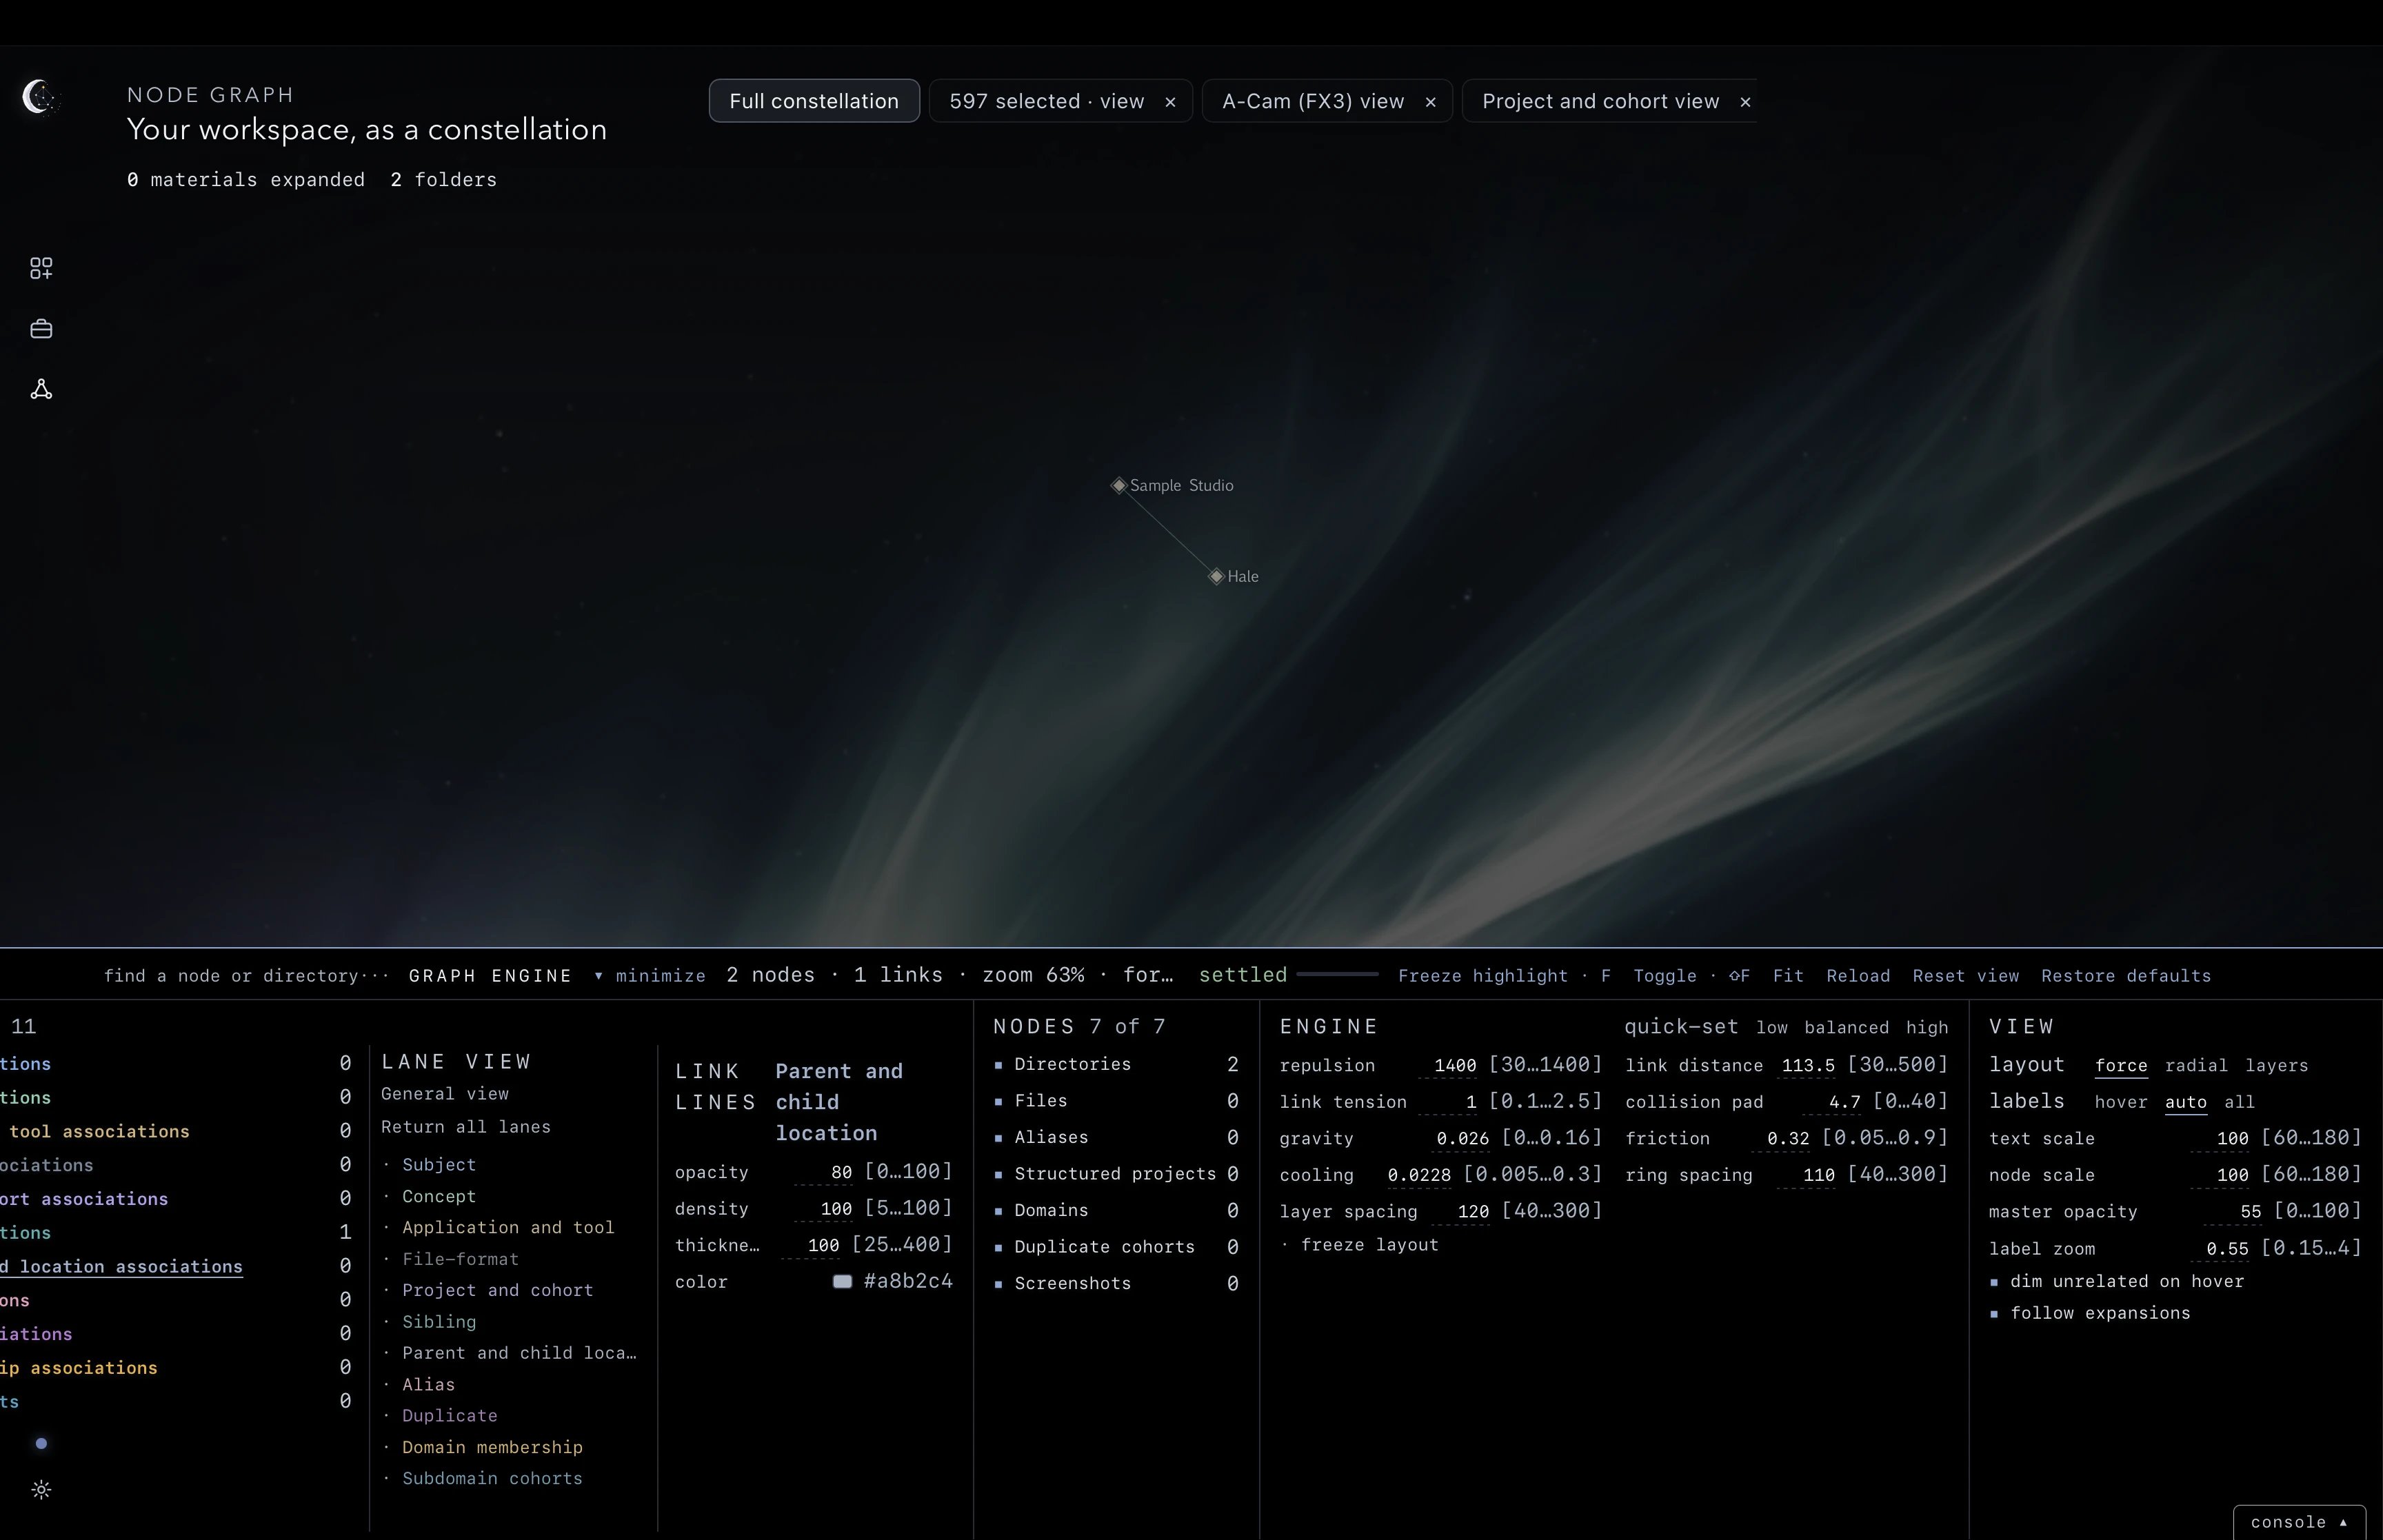
Reset view resets every graph tab, including Full constellation, and collapses all expanded folders while keeping the tabs available. Use it when you want to start exploring the whole graph environment again.
Neither Reload nor Reset view changes display or engine settings. Restore defaults resets those settings. Graph setting changes have their own Undo and Redo history: open Edit ▸ Undo / Redo History and choose Graph settings.
Saved workspaces
A saved workspace includes domains, placements, processing results, selections, tray contents, page state, notes and action history. Opening it restores that state without processing the sources again.
Save
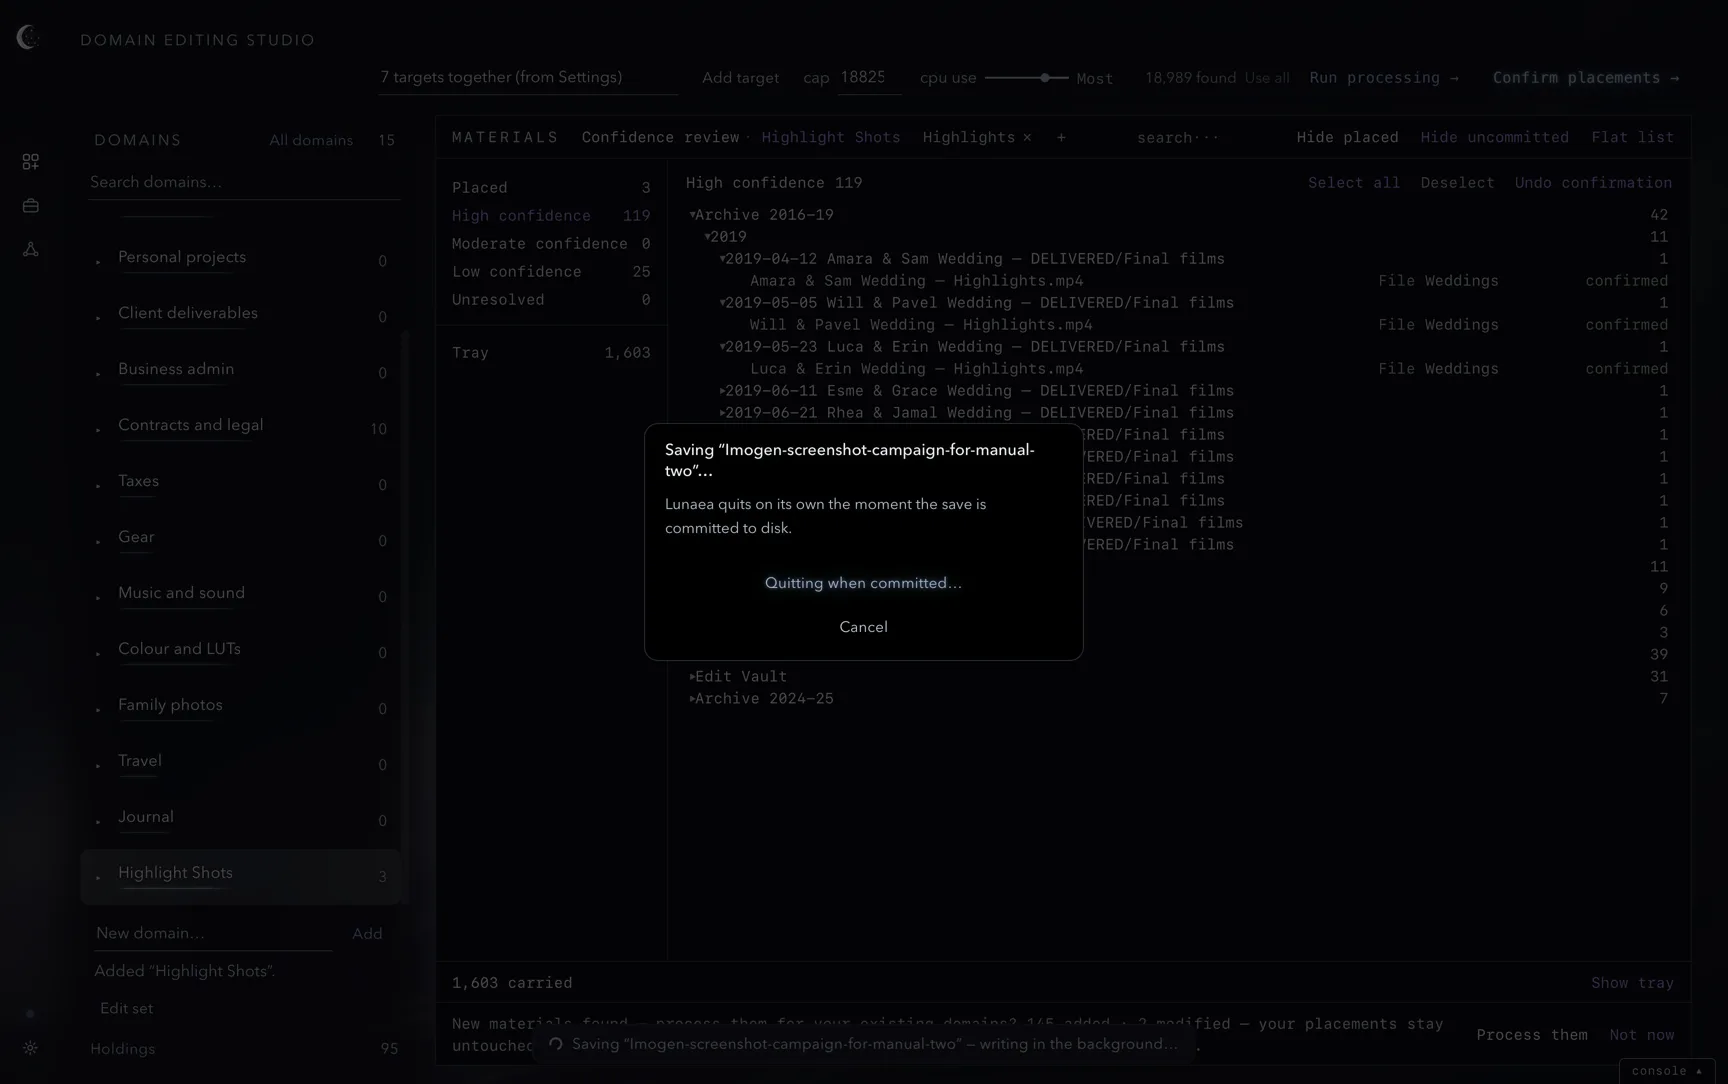
Choose File ▸ Save Workspace (⌘S). The first save asks for a name; later saves update that workspace. A line at the bottom of the window reads Saving “name”…, with a spinner, for as long as the write takes, including the part that finishes in the background, and Saved replaces it when the write is complete.
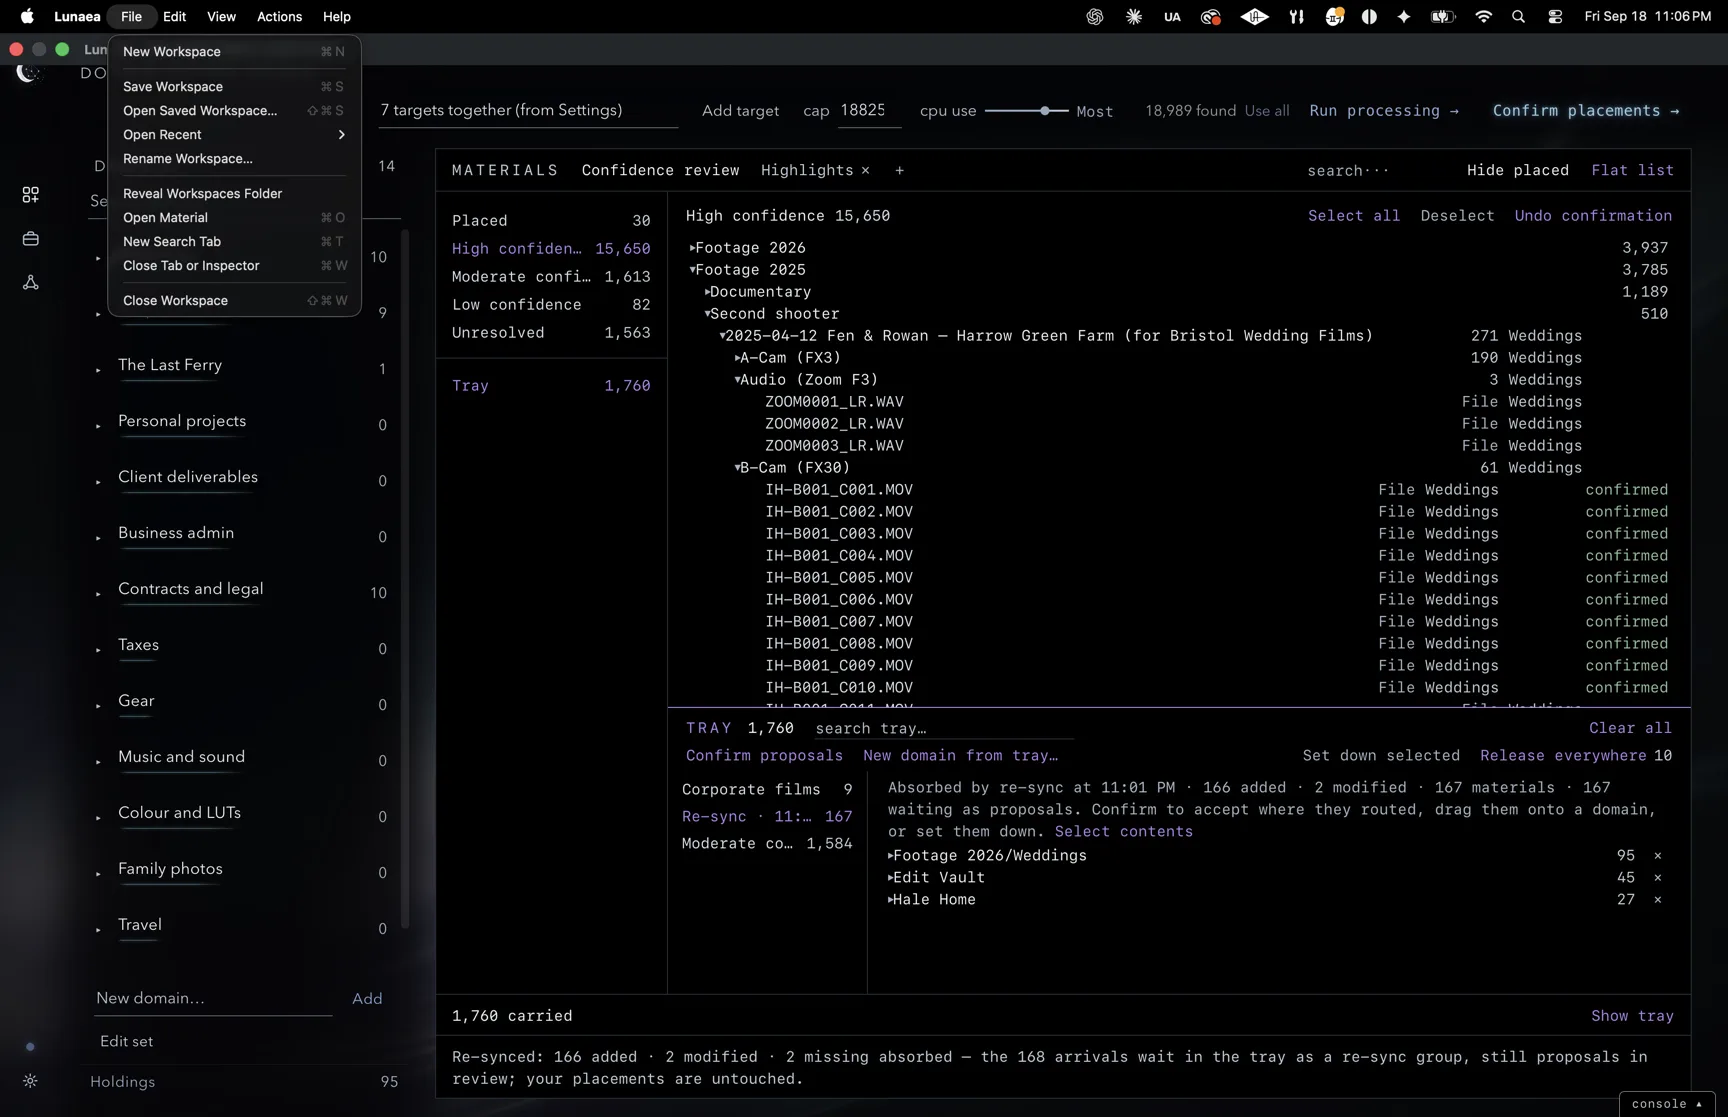
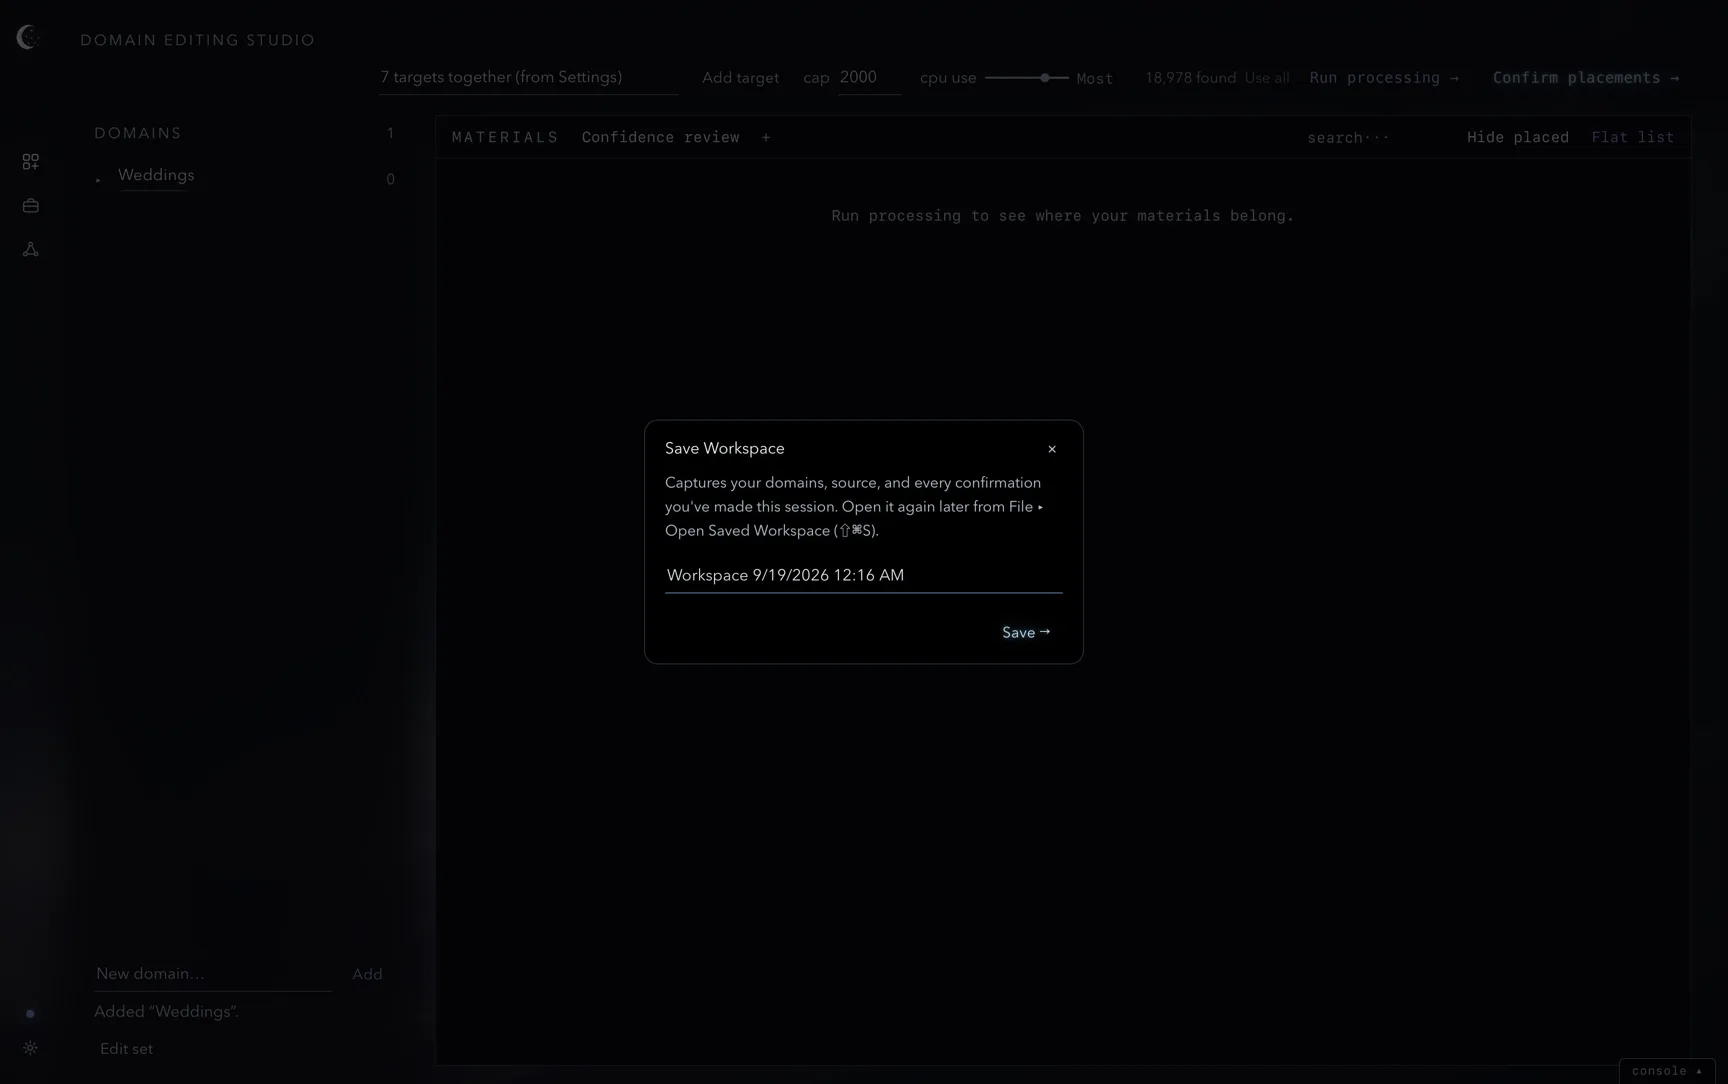
If the entered name belongs to another saved workspace, the dialog names it and explains that its contents will be overwritten. Replace → writes the replacement. Using the current workspace’s name updates it in place.
Open a saved workspace
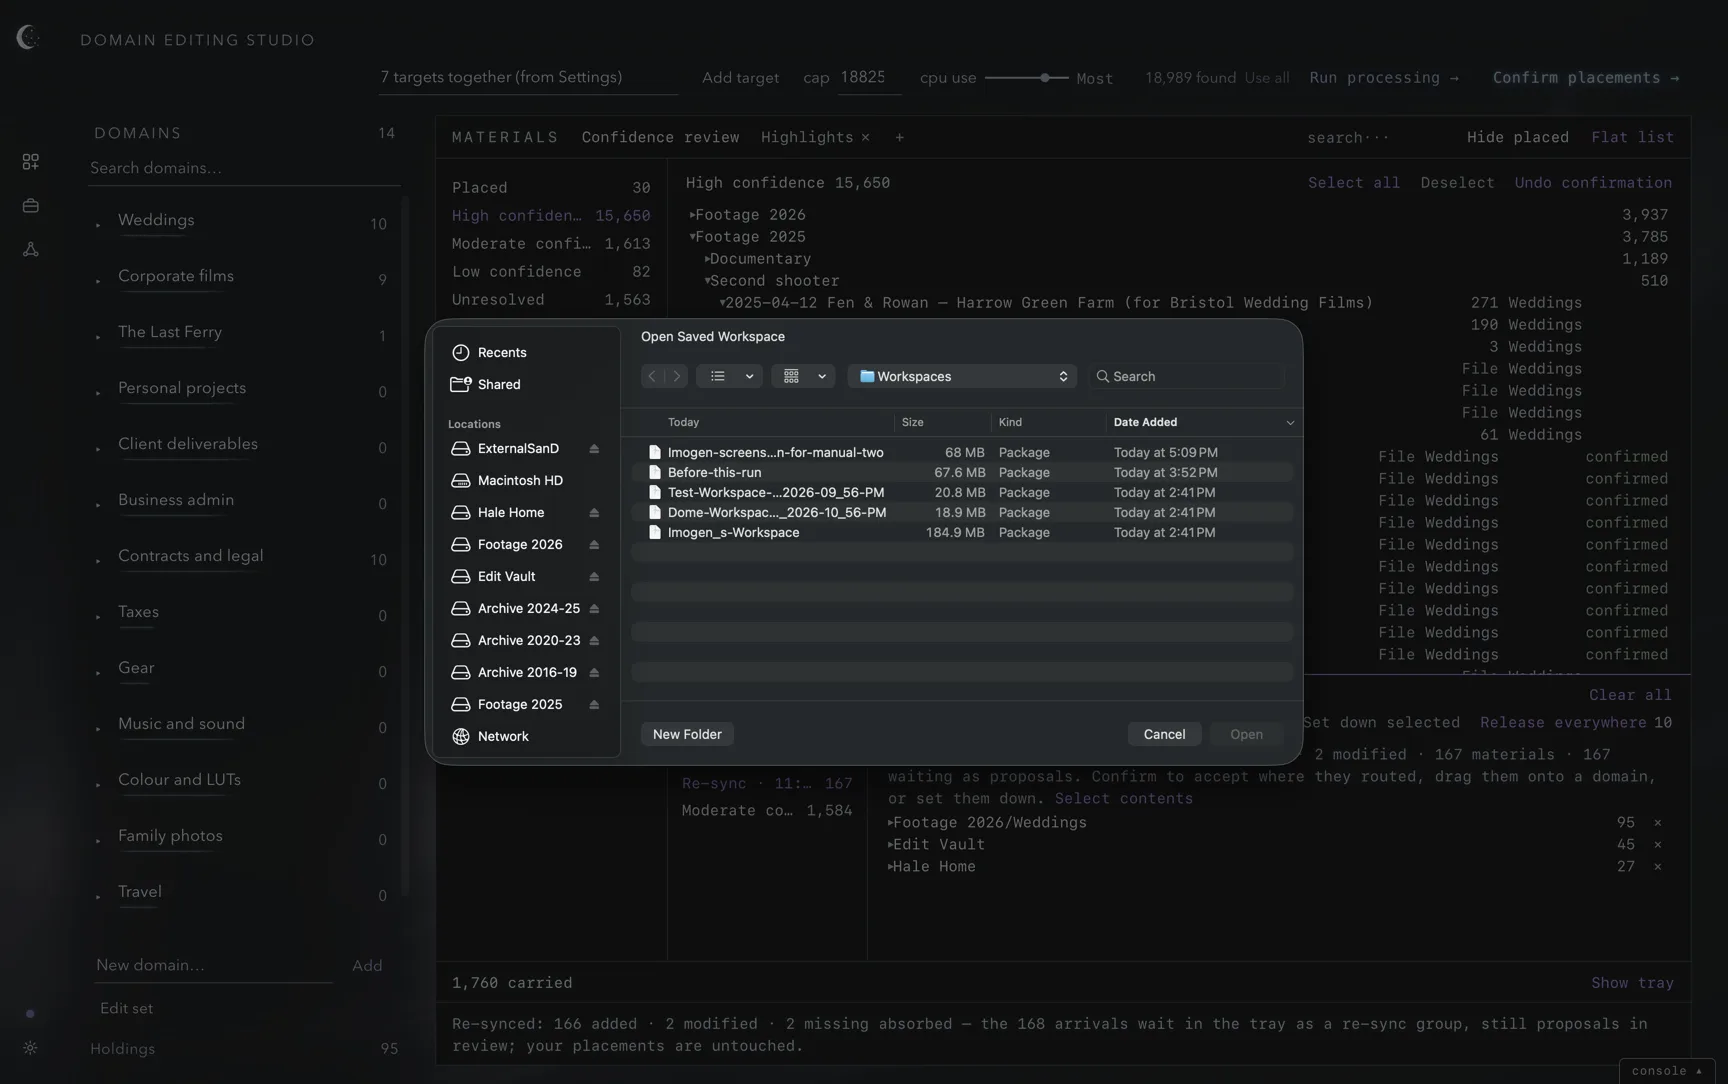
File ▸ Open Saved Workspace… (⇧⌘S) opens the standard macOS Open panel in Lunaea’s Workspaces folder, Lunaea ▸ Workspaces in your home folder. Each saved workspace appears there as a single item, like a document, so a large library can be sorted, searched and browsed the way Finder allows. Choose one and press Open.
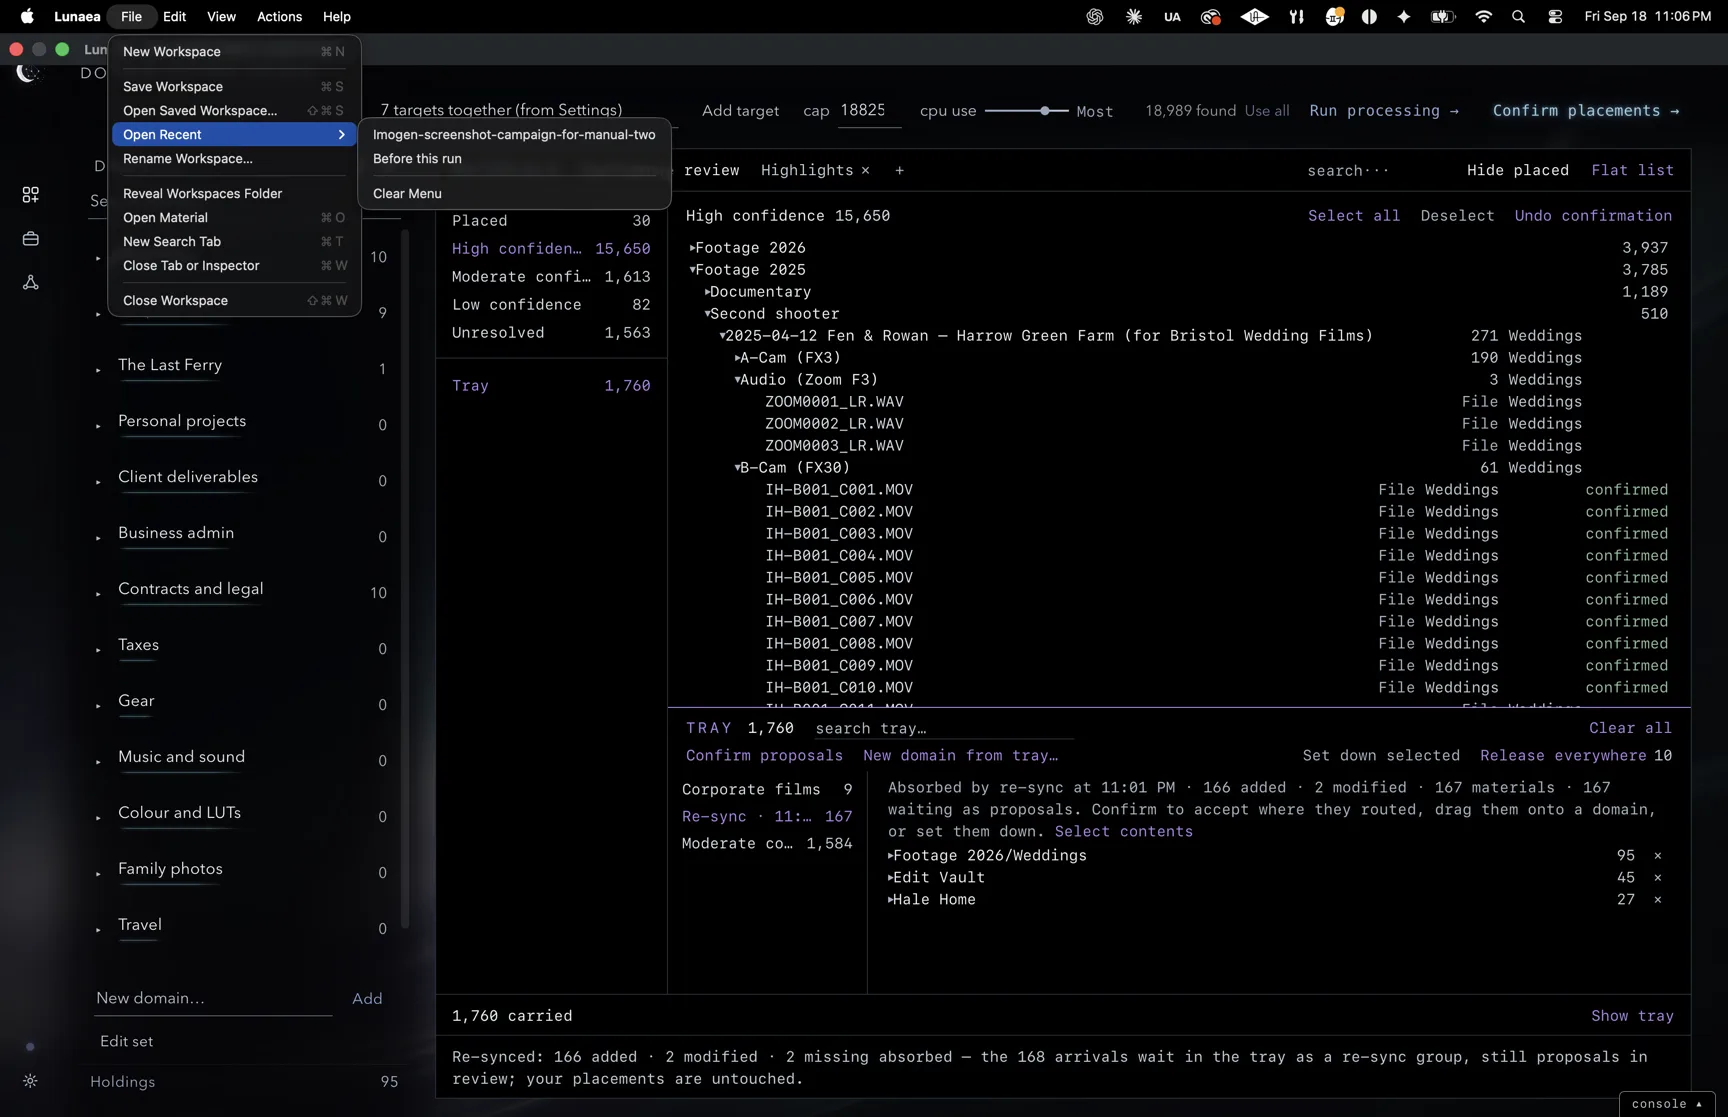
File ▸ Open Recent lists the ten workspaces you most recently opened or saved, newest first. Choose one to open it; Clear Menu empties the list.
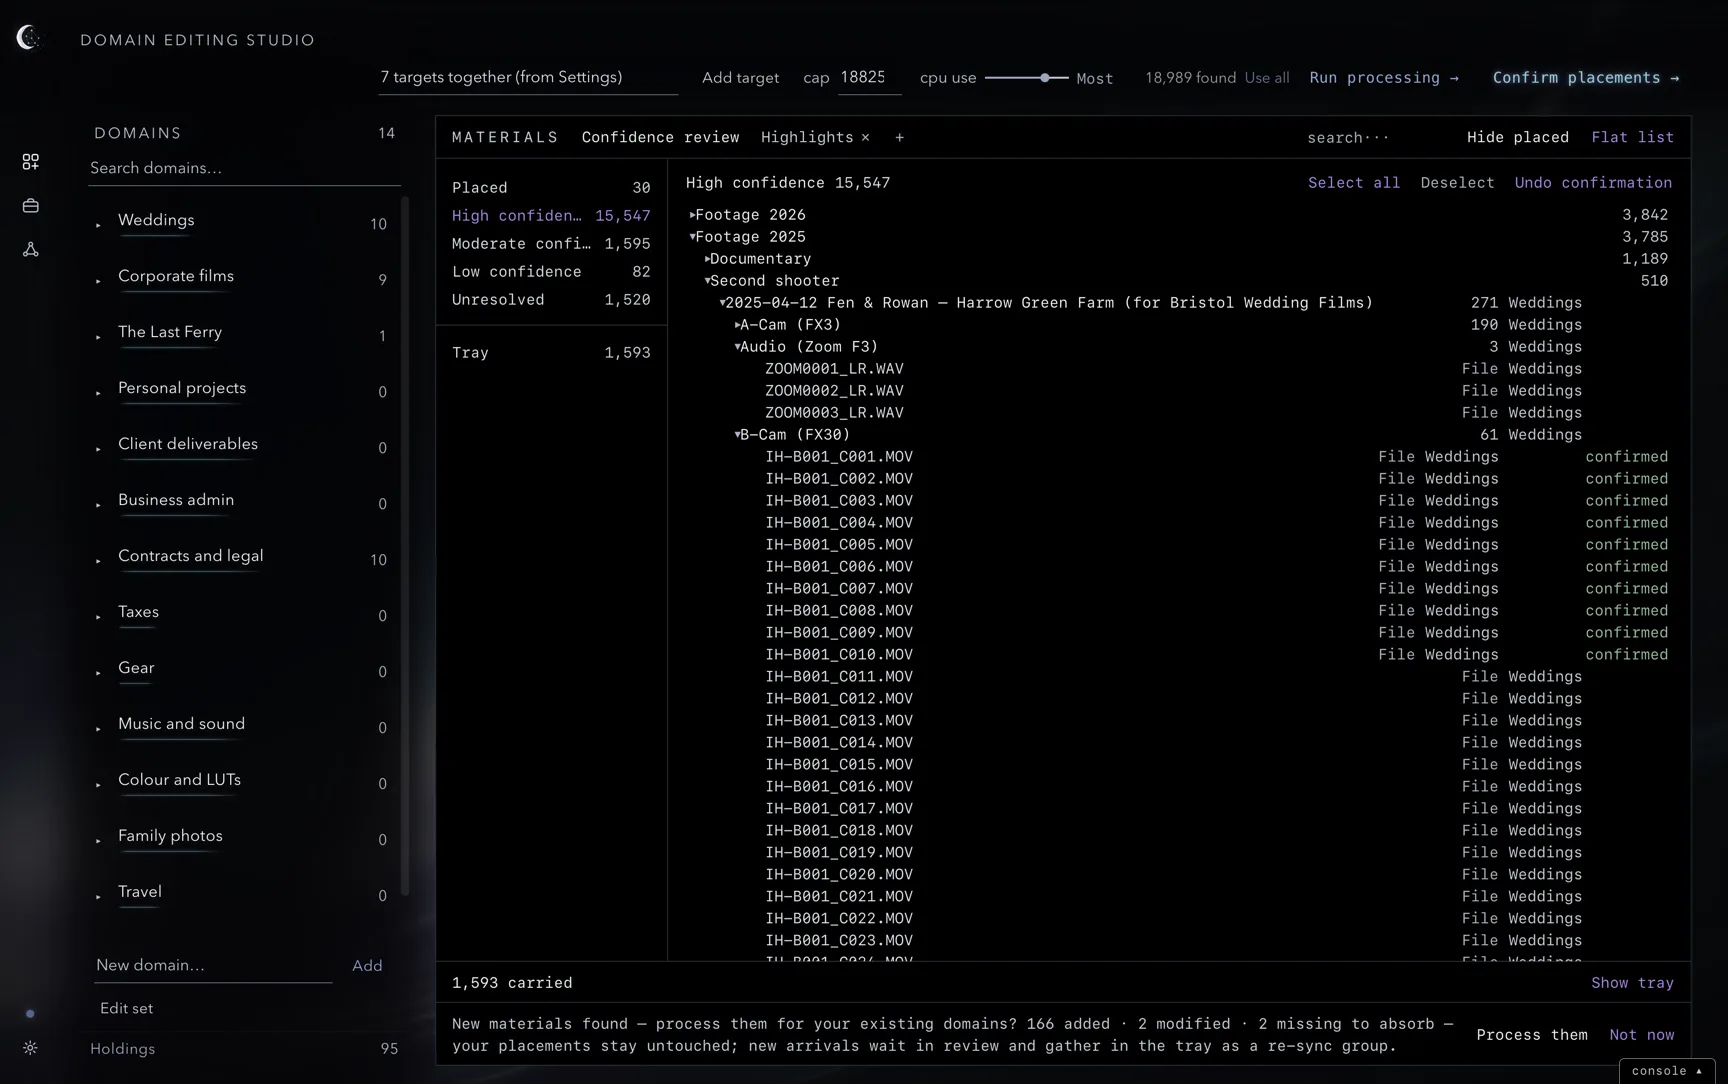
A large workspace can take a while to open: Opening “name”… stays at the bottom of the window until the workspace is on screen with its windows filled in. Search, the graph and object inspection finish preparing a little later; Preparing search, graph and inspection… stays up until they are ready, and you can work in the Studio meanwhile. Changes made after opening are written back when you save.
File ▸ Rename Workspace… renames the open workspace; its contents are untouched. A workspace can also be renamed in Finder: Lunaea takes the new name the next time it opens, and later saves update it under that name. File ▸ Reveal Workspaces Folder shows the folder in Finder. It sits outside iCloud’s Desktop and Documents sync, so large workspaces stay on this Mac.
New and Close
File ▸ New Workspace (⌘N) starts with an empty domain set and landscape, retaining your sources. If the current workspace has unsaved changes, choose Save, Don’t Save or Cancel.
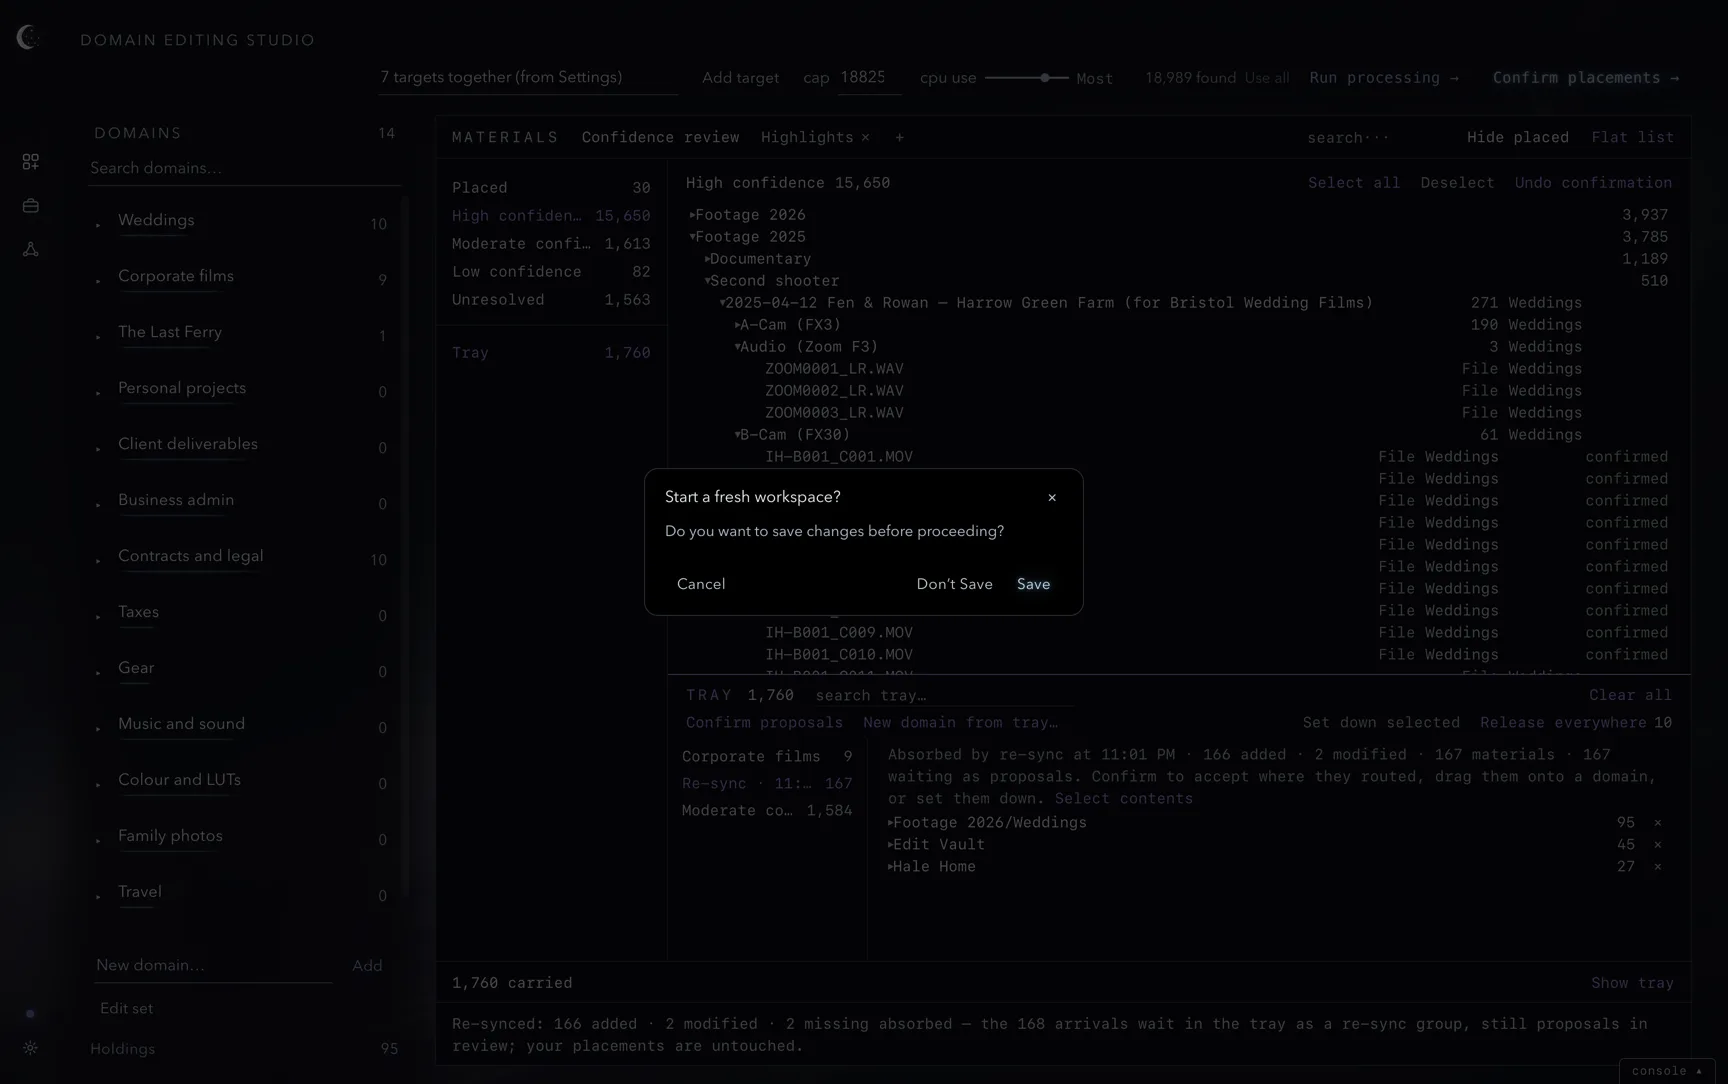
File ▸ Close Workspace (⇧⌘W) returns to Home and shows the Open panel, ready for the next workspace; cancel it to stay on Home. The same choices appear first if the workspace has unsaved changes.
The guard save
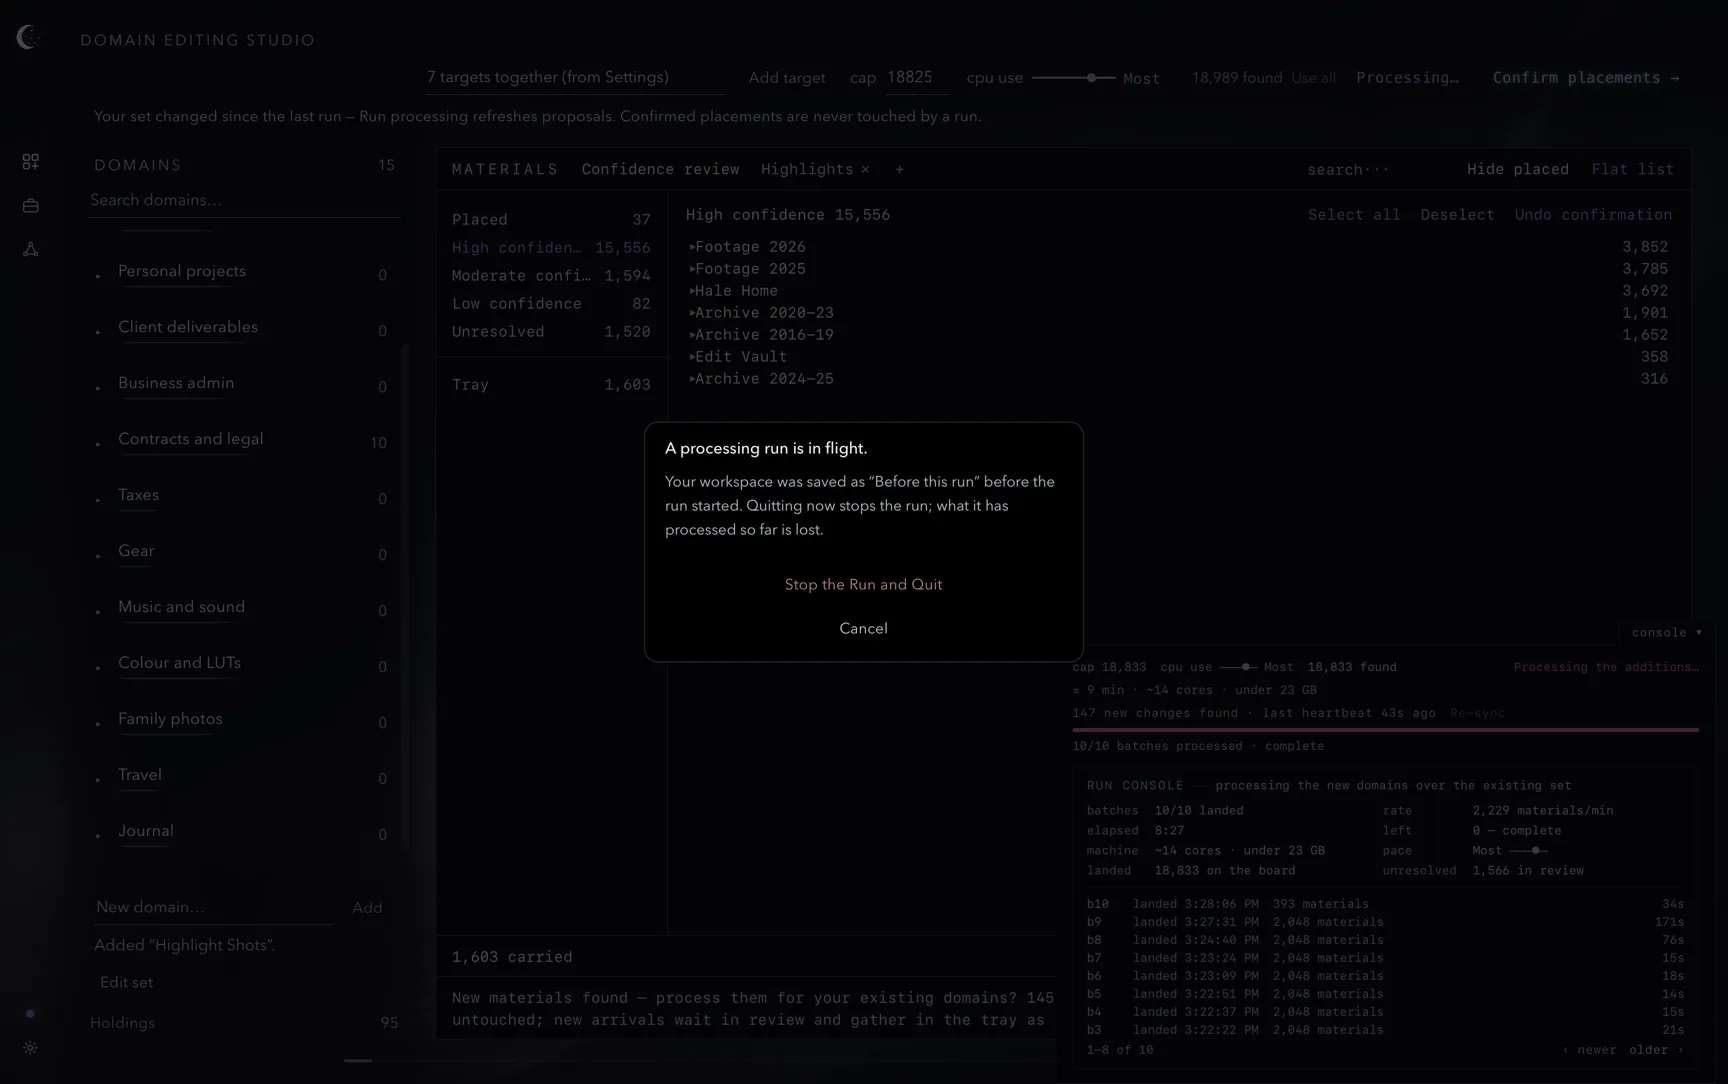
Before a full rerun of an existing landscape, Lunaea saves a restore point named Before this run. Stopping or failing that run restores this state. The workspace retains its own name, so the next ⌘S updates the workspace you opened. A later full rerun replaces the restore point. First runs and runs that process only added domains skip this save.
Quitting
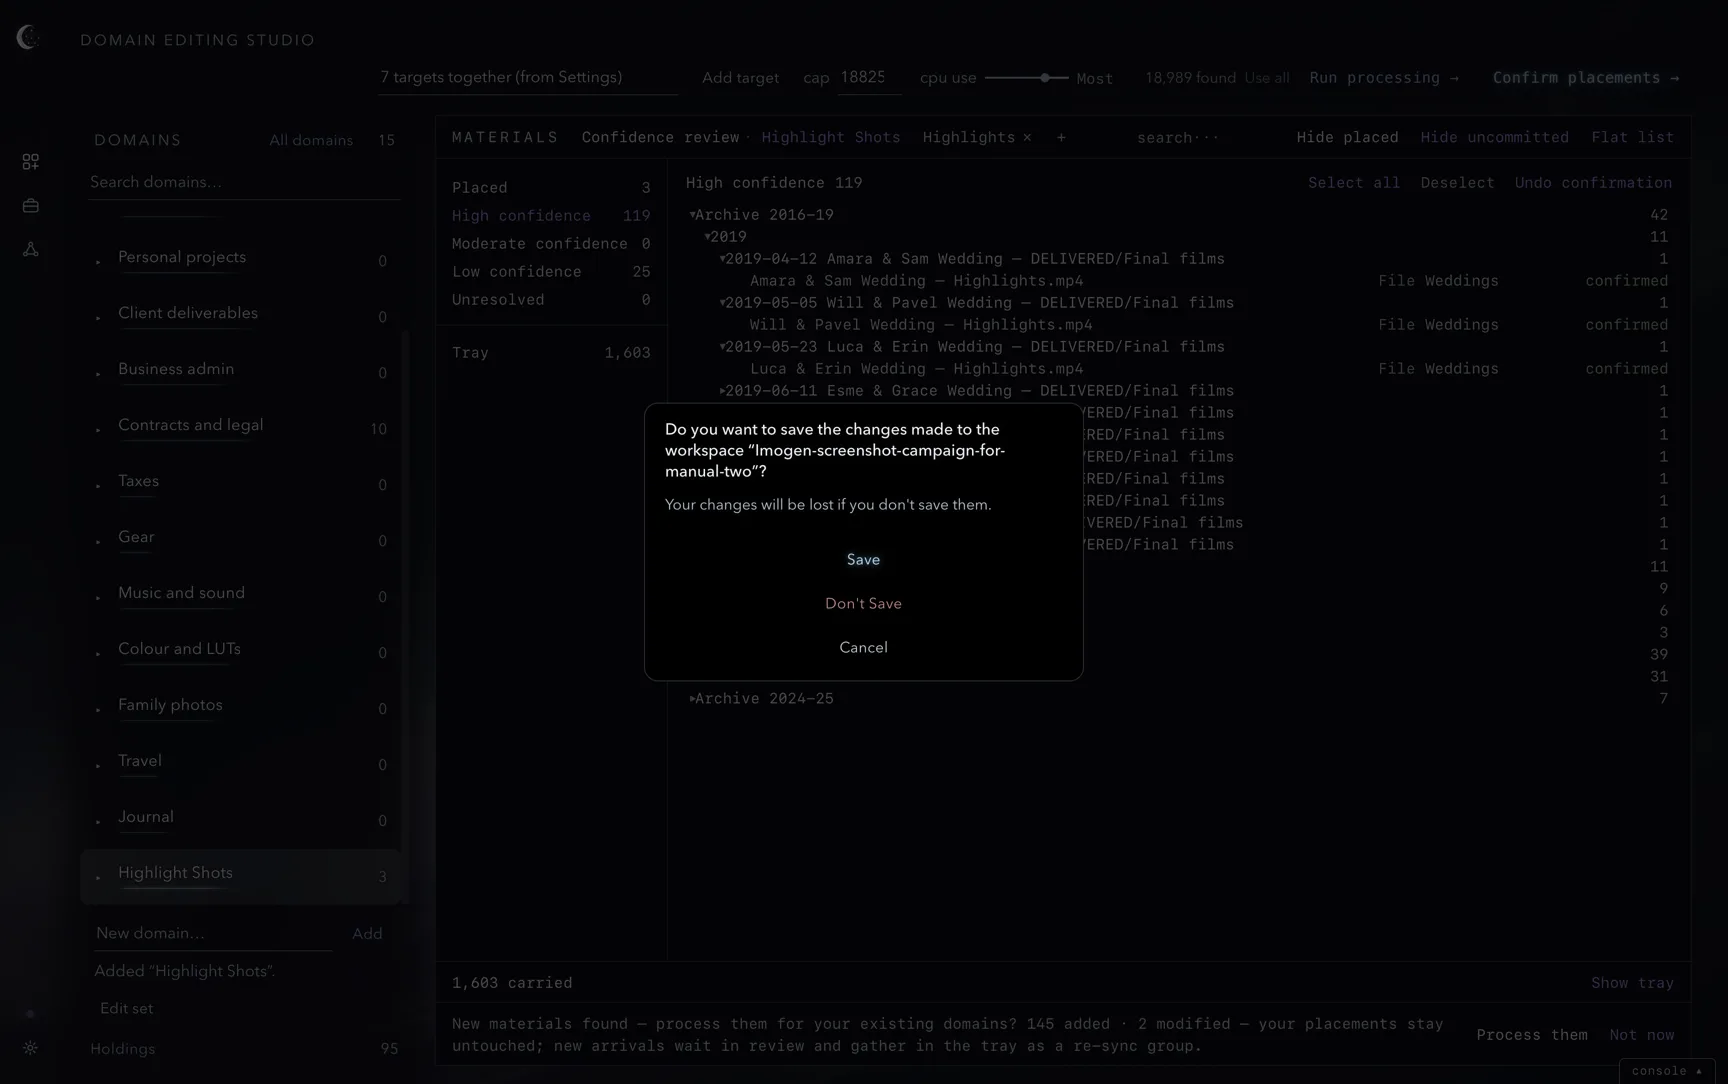
Quit with ⌘Q, the window’s red button or the Dock. If there are unsaved changes, choose Save, Don’t Save or Cancel. An unnamed workspace prompts for a name when you save. If Lunaea is behind another app when you quit and something needs an answer, its Dock icon bounces until you come back to it.
During a run, the quit sheet offers Stop the Run and Quit or Cancel and names the restore point. If a save is in progress, quitting waits for it to finish.
Settings
Open Settings with ⌘5 or ⌘, to manage Sources, Preferences, Agents and your license, and to review Last Run Details.
Sources
Sources lists each target’s availability and enabled state, Process all targets together, Add target, and excluded paths. Chapter 2 describes these controls.
Preferences
Preferences supply defaults for new sessions and workspaces. Saved workspaces retain their own settings. Corpus defaults set the source location, material cap and whether each holding starts enabled. In-app lessons controls hint visibility. Graph defaults set text and node scale, link opacity and label density for new workspaces. Reset preferences restores the shipped preferences.
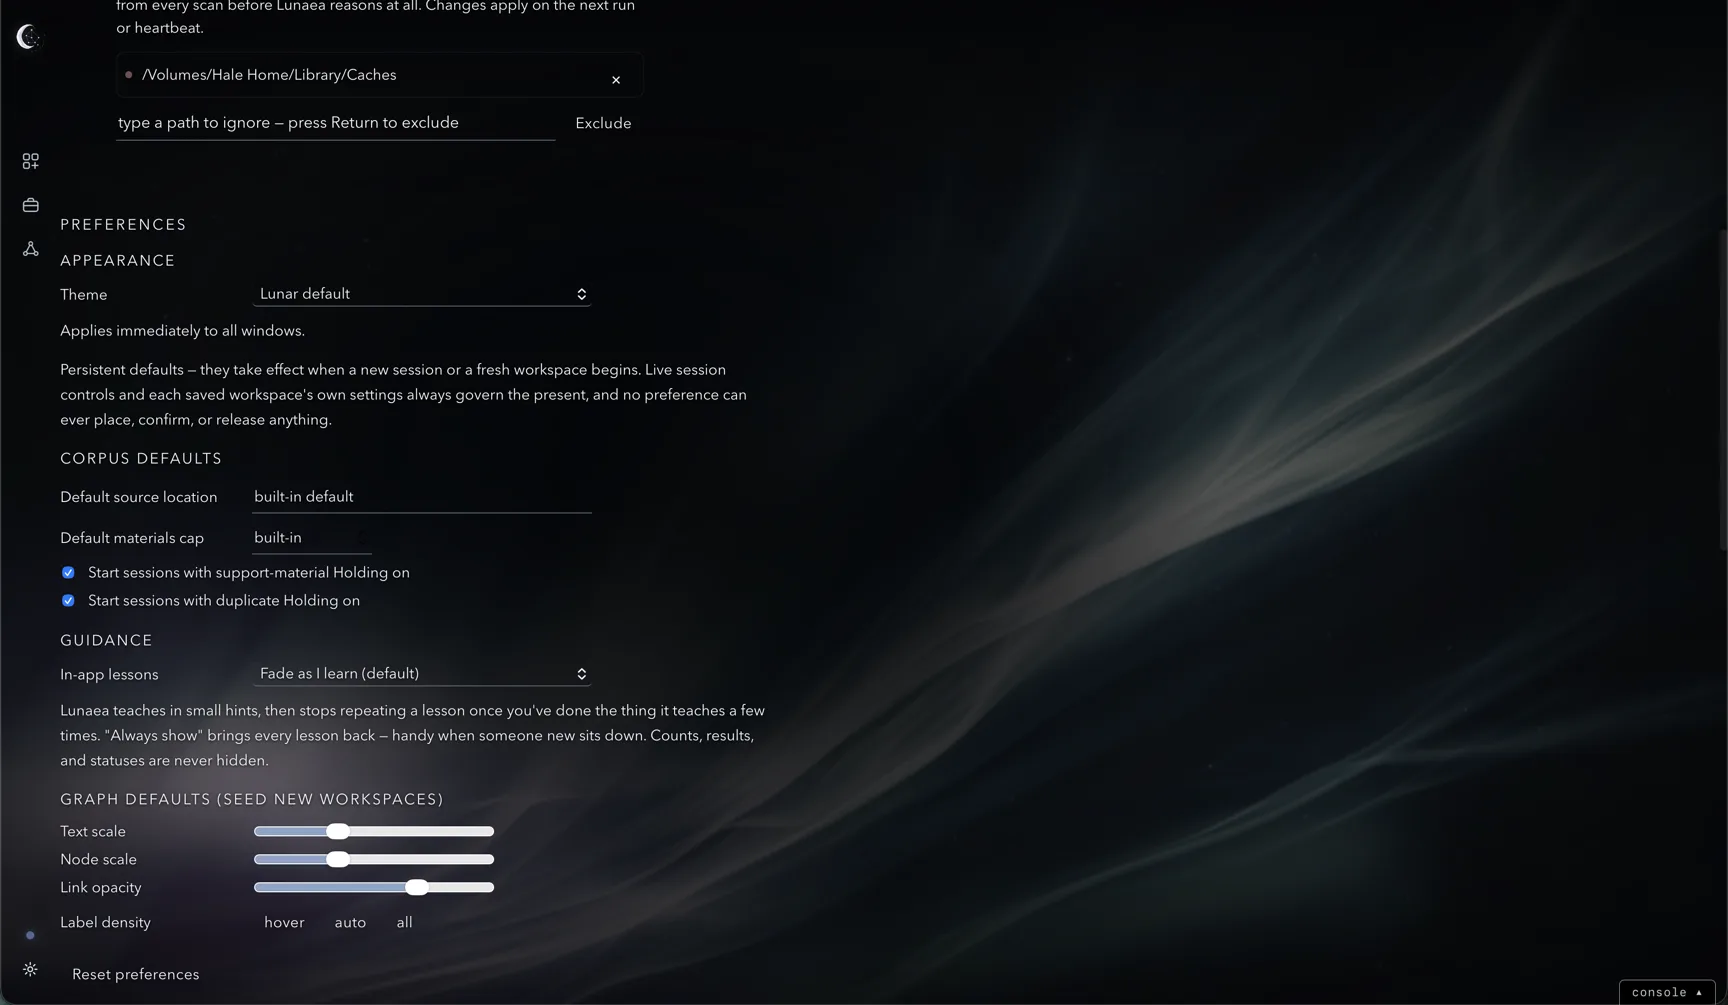
Appearance
Choose a theme under Preferences ▸ Appearance. Lunar default, Parchment and Dark apply immediately across all windows.
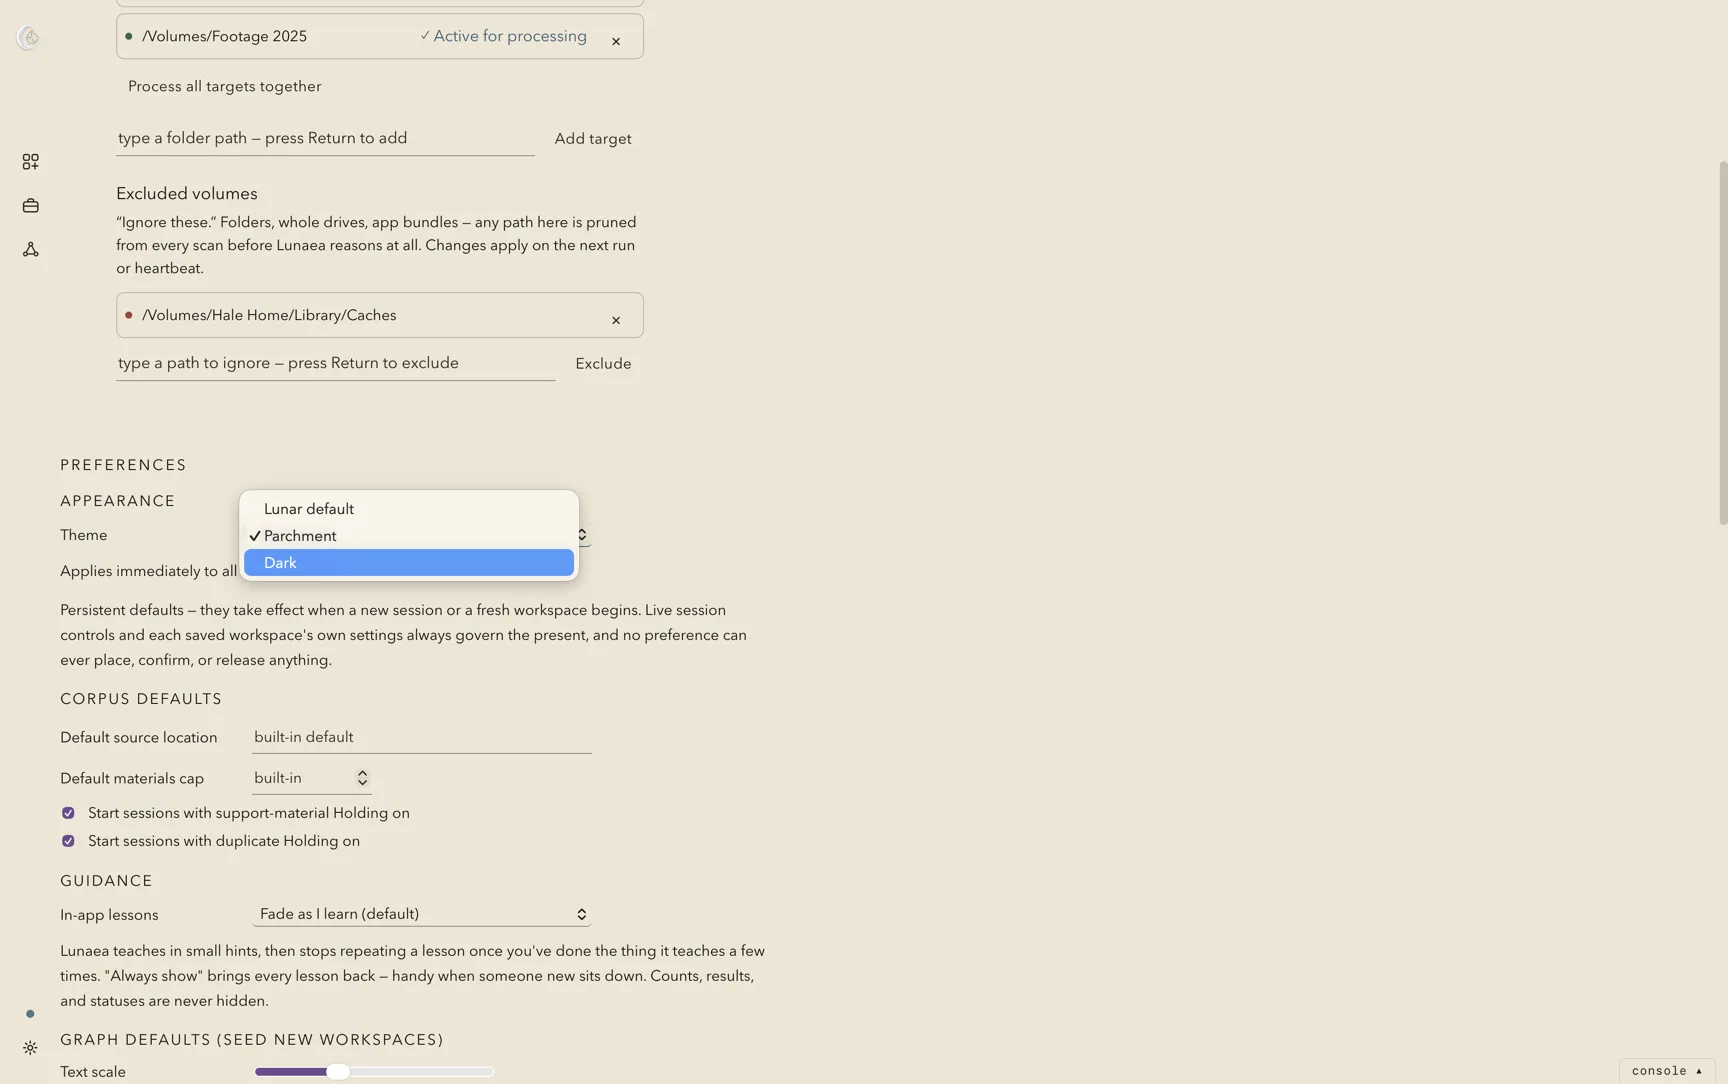
The three themes, page by page, follow in Themes.
Themes
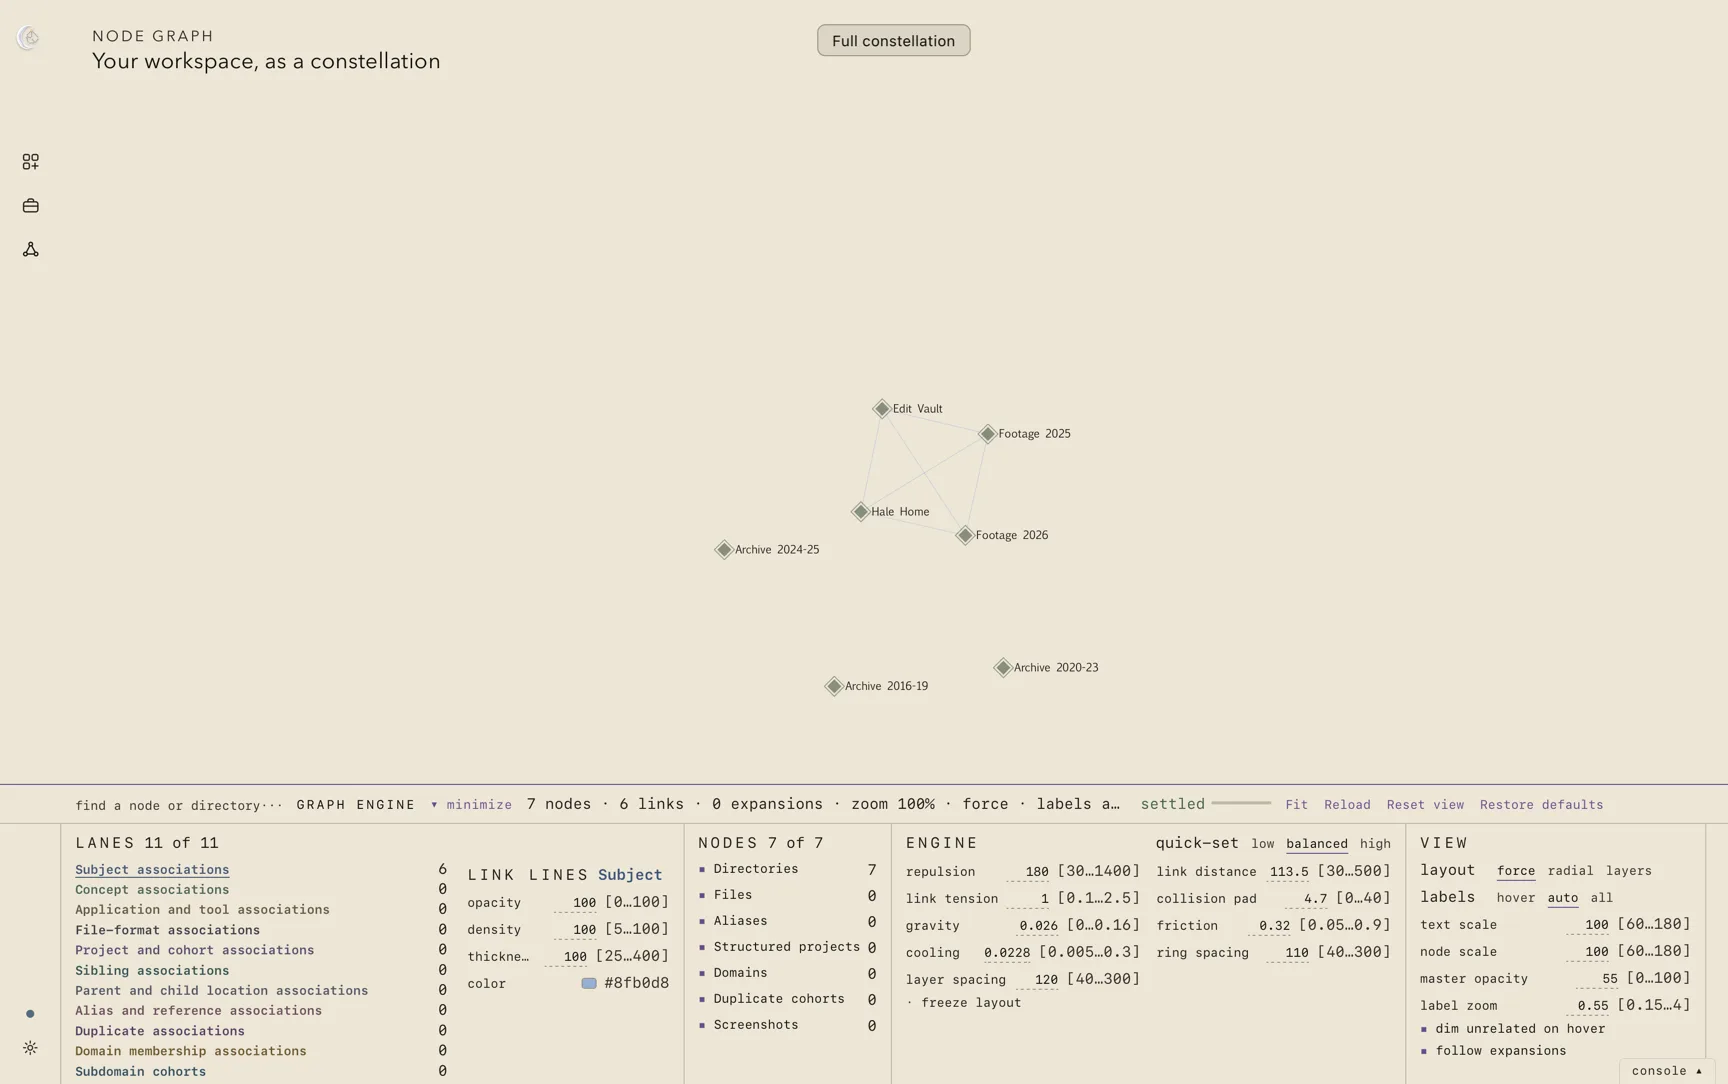
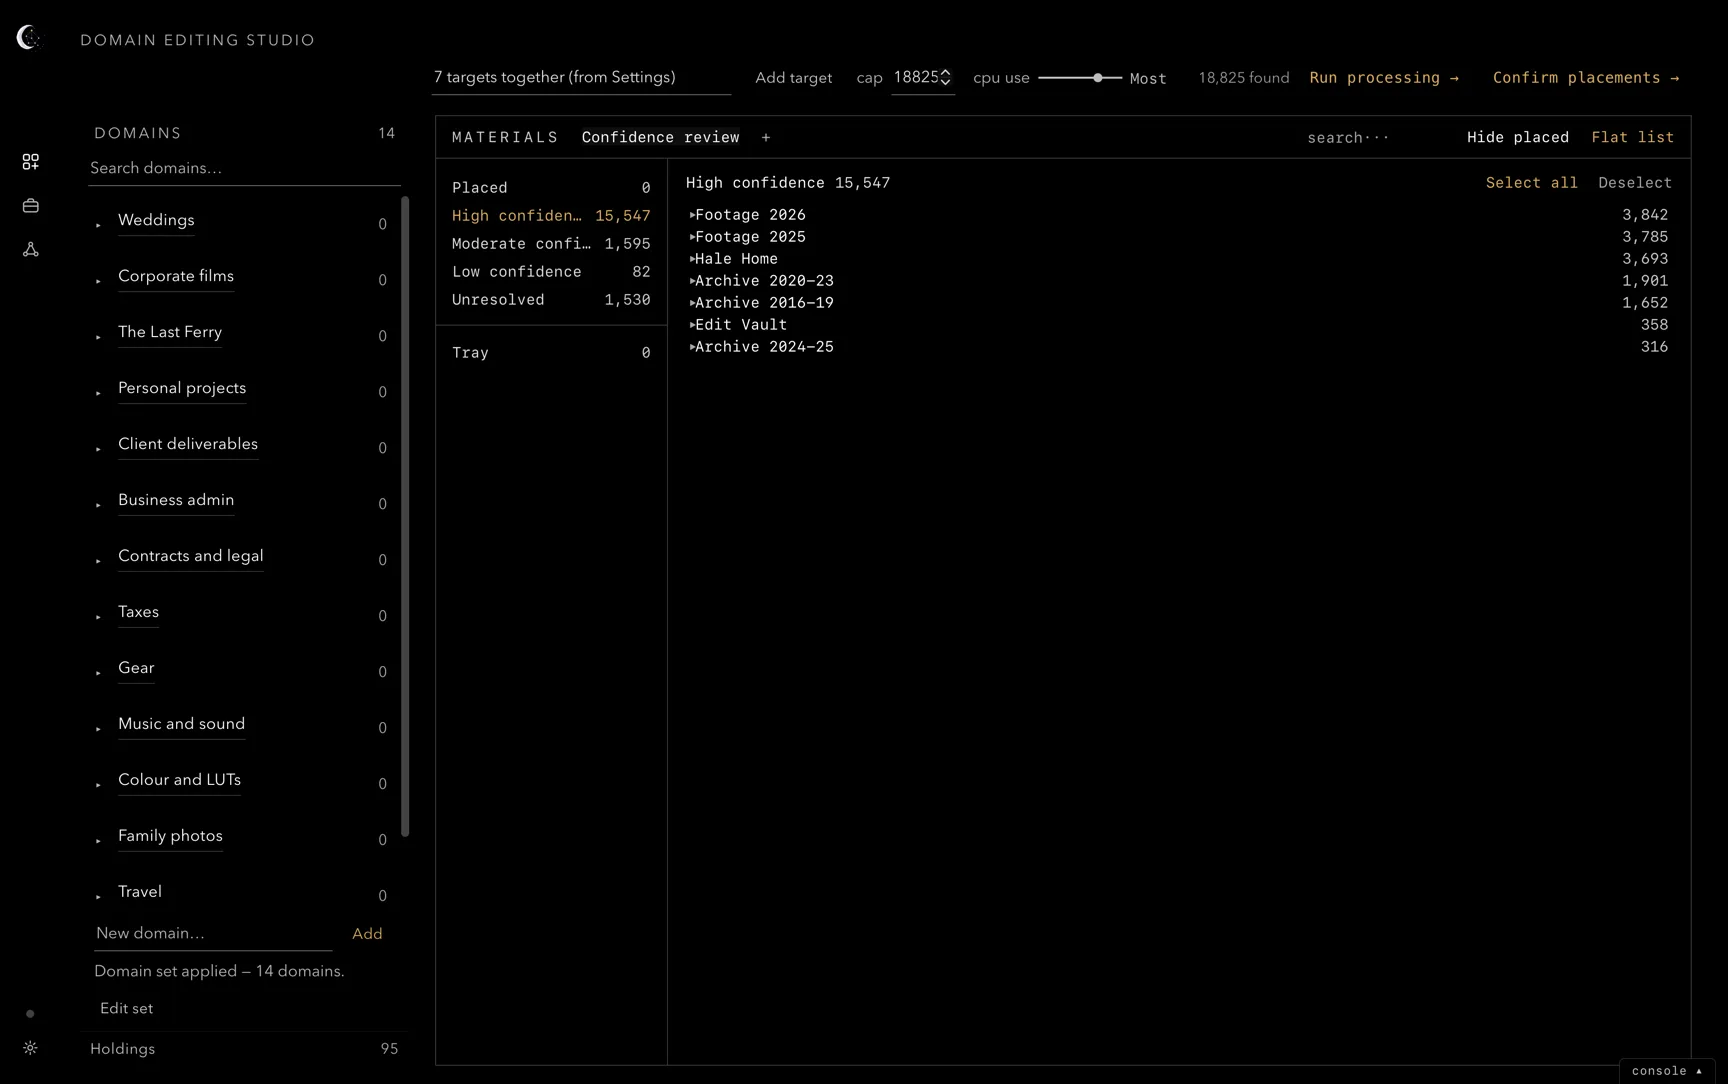
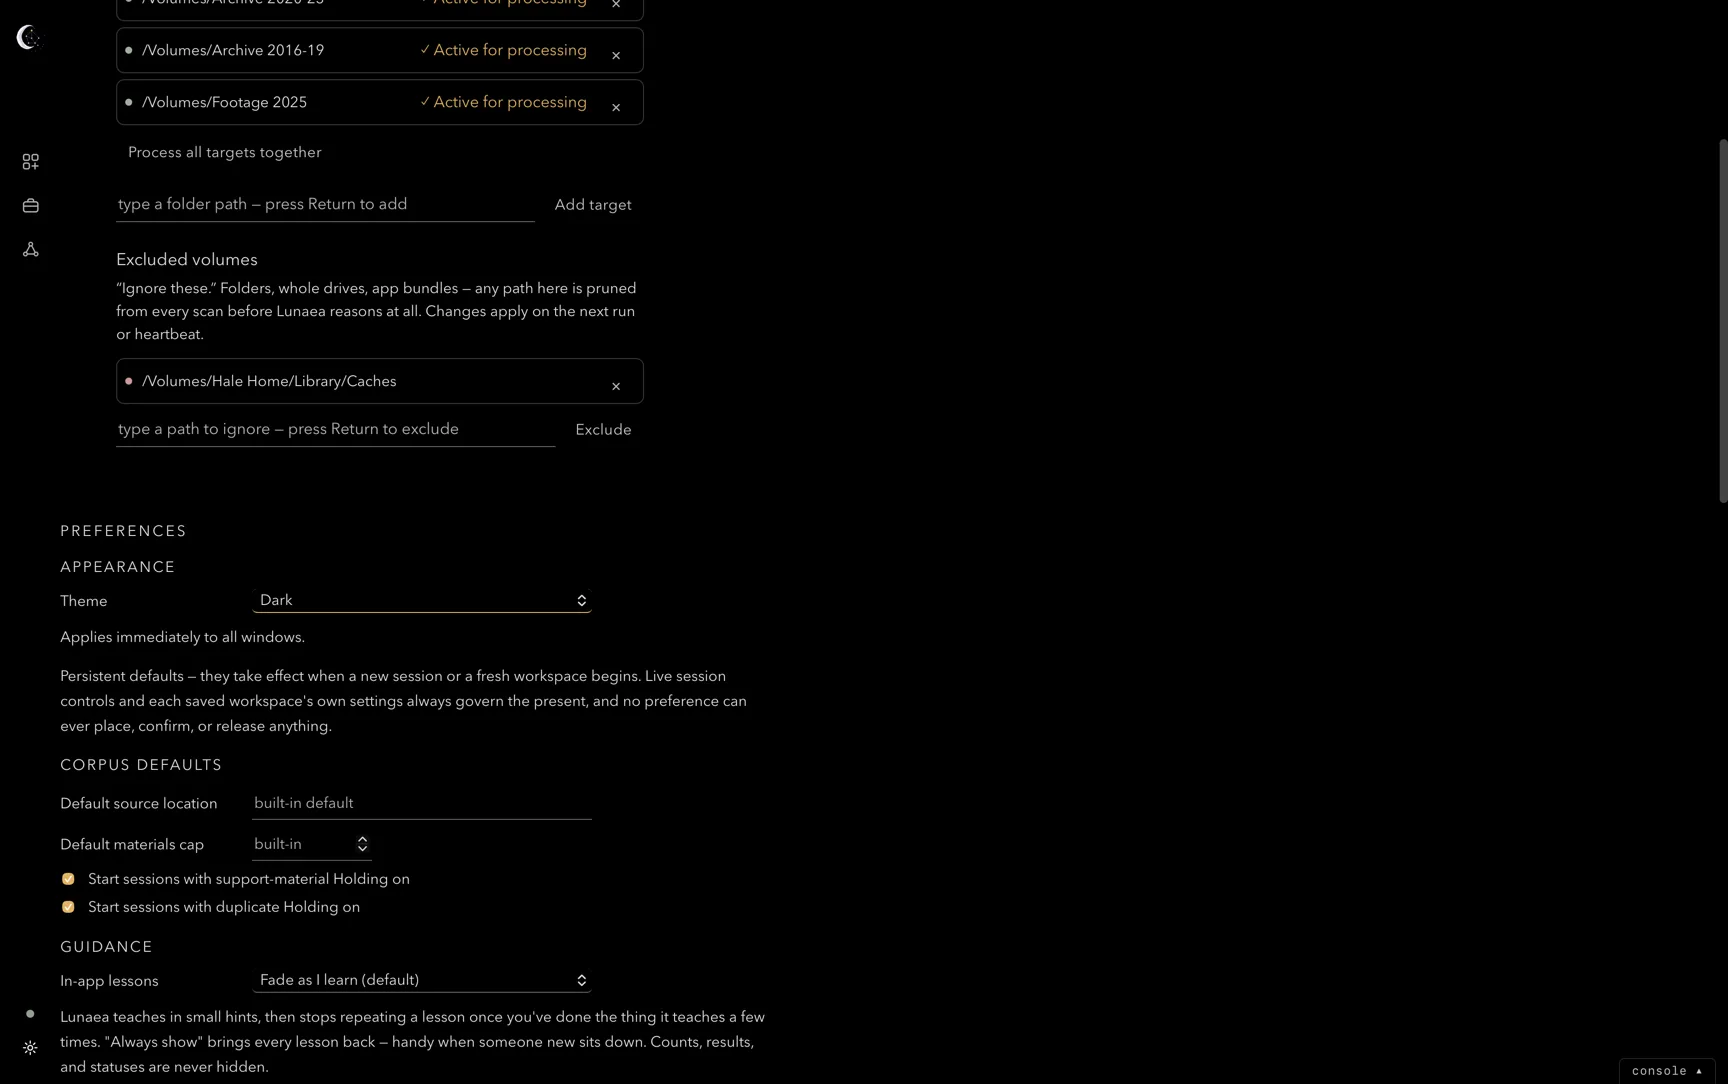
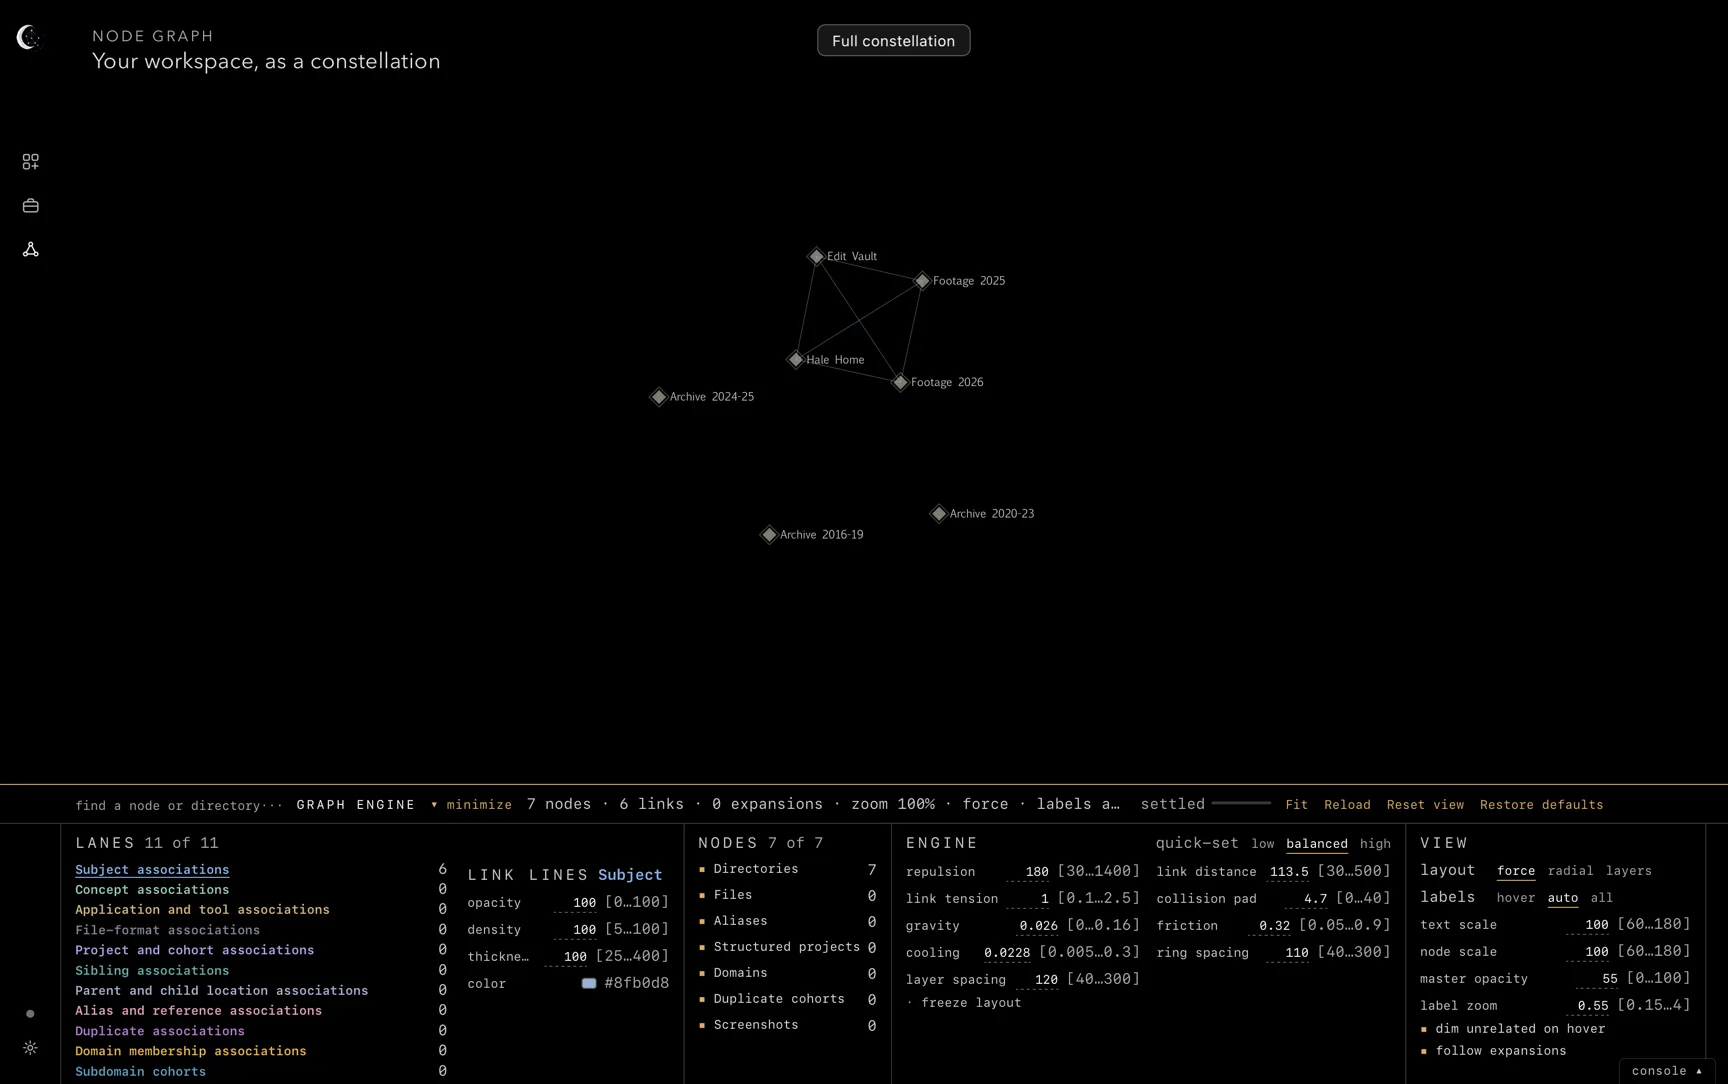
Every page carries the theme you choose. This manual is shown in Lunar default; Parchment is a light paper ground with dark ink; Dark is plain black with neutral greys and one warm action colour. Panels, menus, dialogs, the console and object inspection sit on the same ground as the page in every theme.
Your license
The Lunaea · License panel in Settings shows the license active on this computer. A time-limited license shows its expiration date and time, along with the time remaining. A Paid license provides lifetime access on this computer.
| License | Computers per key | Access |
|---|---|---|
| Trial | 1 | 7 days from the first successful activation |
| Paid | 3 | Lifetime |
To activate, connect to the internet, enter your key in License key, and choose Activate this PC on Windows or Activate this Mac on Mac. When a license is already active, the button reads Activate another license. Use it to enter a Paid key after a Trial. After activation, Lunaea works offline.
A Trial starts when you first activate it on a computer, not when you receive the key or download Lunaea. Reinstalling the app or entering a replacement Trial key does not restart that period.
Get a license opens scalaeon.com. Contact support opens a message to contact@scalaeon.com.
Activation and privacy
Lunaea generates a unique identifier for this computer and sends it with your license key to our licensing partner during activation. Your computer’s original hardware identifier and your files stay on this computer. After activation, Lunaea works offline.
Expand License details to see the Machine ID and, after activation, the Activation ID. Each has a copy button so you can provide the identifier to support when needed.
Recovery and expiration
If Lunaea reports that an activation needs recovery, contact support for its original activation ID. Select Recover an existing activation on this PC on Windows or Recover an existing activation on this Mac on Mac, enter your license key and the Original activation ID, then choose Recover activation while connected to the internet. Recovery keeps the original expiration date and does not take another computer slot.
When temporary access ends, Lunaea displays the license panel. If a workspace is open, Save workspace remains available so you can preserve your work. Enter a valid license to continue. Your source files remain in place.
Agents
Enable Allow agents to drive this app to open a local connection for an agent on this machine. Give your agent the displayed address and pairing secret directly in chat, or enter them in its connection settings if required. The agent can search, run processing and navigate views. Enable Agents may confirm and release placements to let it change placements as well. Agent actions are attributed on screen, and the rail indicator shows when the bridge is open. Disable the bridge or quit Lunaea to close the connection.
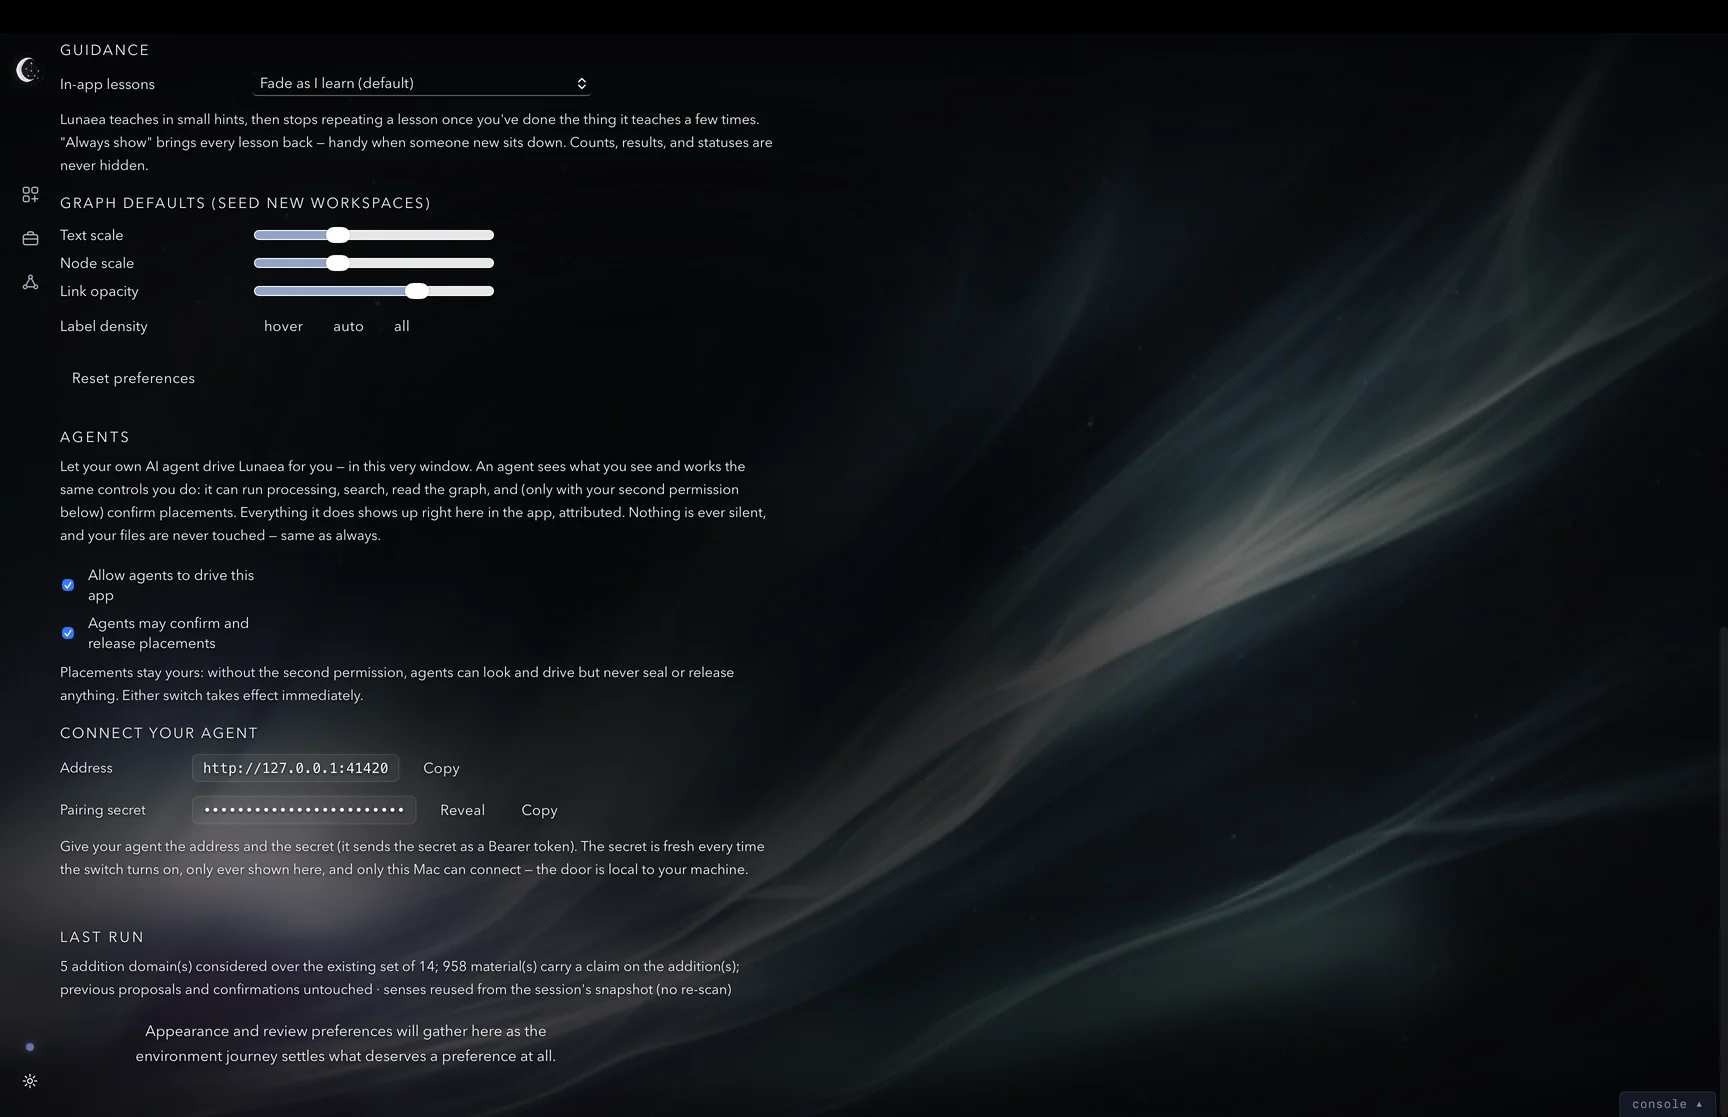
Last Run Details
The LAST RUN summary describes the latest processing operation. Its material count belongs to that operation: an additions run reports materials with proposals for the added domains. Help ▸ Last Run Details opens the detailed record, including the outcome, counts and record location.
Keyboard
Use Help ▸ Keyboard Shortcuts or ⌘/ to open the shortcut reference in Lunaea.
The Keyboard Shortcuts panel
Workspace and pages
| ⌘N | New Workspace |
| ⌘S | Save Workspace |
| ⇧⌘S | Open Saved Workspace… |
| ⇧⌘W | Close Workspace |
| ⌘Q | Quit Lunaea |
| ⌘1 | Home |
| ⌘2 | Domain Editing Studio |
| ⌘3 | Environment Workspace |
| ⌘4 | Node Graph |
| ⌘5 | Settings |
| ⌘, | Settings |
| ⌘/ | Keyboard Shortcuts |
Commands
| ⌘R | Run Processing |
| ⇧⌘R | Re-sync Now: refresh changes from the current source |
| ⌘Z | Undo in the text field, current workspace or graph settings |
| ⇧⌘Z | Redo |
| ⌥⌘Z | Open Undo / Redo History |
| ⌘A | Select all in the focused list or text field |
| ⌘F | Focus search on the current page |
| ⌘Return | Confirm the selected materials in the focused review or tray list |
| ⇧⌘N | New Domain: focus the new domain field |
| ⌘I | Inspect the focused material |
| ⌘O | Open the selected material in its associated application |
| ⌥Return | Carry the selected materials from the focused review list to the tray |
| ⌥Delete | Set down the selected materials from the tray; placements are unchanged |
| ⇧⌘T | Show or hide the tray without emptying it |
| ⌘T | New search tab in the Domain Editing Studio |
| ⌘W | Close the active closable tab or inspector |
| ⇧⌘[ | Previous tab on the current page |
| ⇧⌘] | Next tab on the current page |
In the Node Graph
| F | Freeze the hovered node’s relationship cluster; when any highlights are frozen, release them all |
| ⇧F | Add the hovered node’s relationship cluster, or remove that frozen cluster while leaving the others |
To freeze or toggle a cluster, keep the pointer over its node. Press F to release all frozen highlights. Freeze highlight preserves relationship emphasis; the separate freeze layout control stops node movement.
In a focused list
| ↑ ↓ | Move to the previous or next visible row |
| ⇧↑ ⇧↓ | Extend the selection through visible rows |
| ← | Collapse a folder or domain, or focus its parent |
| → | Expand a folder or domain, or focus its first child |
| Return | Rename the focused domain, folder or file (the name Lunaea shows; the disk is untouched) |
| ⌫ | Release the selected materials from the current environment; Undo restores them |
| Esc | Dismiss the topmost overlay or inspector; otherwise clear the focused selection |
⌥Return carries materials to the tray, ⌥Delete sets them down again; ⌘Return confirms their placements. ⌘W closes a tab or inspector; ⇧⌘W closes the workspace.
When something goes wrong
Messages in the app identify interrupted sources, unread materials, processing failures and memory limits. This chapter describes the available responses.
A volume disconnected during a run
If a source volume disconnects during processing, the run pauses and a sheet names it. Continue without it requests continuation with the remaining sources. Stop the run restores the workspace to its state before the run. Reconnect an absent volume before re-syncing its materials.
A volume absent at re-sync
When heartbeat or Re-sync finds a source unreachable, the status reads Volume absent. Existing materials and placements are retained. Reconnect the source and re-sync to check its changes.
The failure dialog
An application failure opens a dialog with an error code, details and Report. The report contains the code and application diagnostics, excluding your files, file names and paths.
Unreadable materials
A file read has a 75-second deadline. If it cannot finish, the material is counted as unread and processing continues. The run summary, Studio banner and Last Run Details show the unread count.
A corpus larger than the machine
Lunaea estimates memory requirements before processing. If a source set exceeds the available capacity, it displays a message before starting; a set near the limit may run with an advisory. Reduce the material cap or enable fewer targets to lower the requirement.
Files, decisions and privacy
How Lunaea handles original files, placements and processing information.
How your materials are handled
Lunaea stores domain placements separately from the original files. Placing, confirming and releasing materials leave their locations, names and contents unchanged. Reveal opens a location in Finder; Launch opens a file in its associated application.
Processing produces proposals for review. Confirm selected materials or place them by hand to add them to domains. Agents can make placements through the bridge when you grant that permission. Their actions are attributed on screen. Undo reverses placement actions.
Materials without enough available evidence for a confident proposal appear in Unresolved. The inspector explains proposed placements through the recorded signals and candidate assessments.
Material processing takes place on your machine. Reports you choose to send contain the failure code and application diagnostics, excluding your files, names and paths.
The run reports materials omitted by a cap, unread materials and disconnected volumes. Use these counts and messages to decide what to process or re-sync next.